What kind of Arduino
Arduino is a programmable microcontroller. That is, this is a board on which you can write your program, and this board can control other things: for example, light a light bulb, make a sound, turn on an electrical appliance, measure temperature, send SMS.
At its most basic level, the Arduino simply sends and reads electrical impulses. For example, you can connect a thermometer to it, and the Arduino can read the temperature in the room. And then, depending on the program, send a signal to the device, which will turn on the fan.
Or you can connect a carbon dioxide sensor to the Arduino. Arduino can be taught to read the sensor every five minutes and, when the level of carbon dioxide exceeds the norm, beep, flash a light, or use a series of motors to open a window.
How to program Arduino
There are many expansion boards and sensors for Arduino. The board's applications are almost limitless: automation, security systems, smart home, music, robotics and much more. Here's what you can do on this smart Italian board and on its Russian and foreign clones.
Amazing Arduino Uno Projects
Most professionals in the field of developing electronic projects on Arduino uno love to experiment. As a result, interesting and surprising devices appear, which are discussed below:
- Adding an IR remote control to the speaker system . In consumer electronics, a remote control is a component of an electronic device, such as a television, DVD player, or other home appliance, used to wirelessly control the device from a short distance. The remote control, first of all, is convenient for humans and allows you to work with devices that are not suitable for direct operation of the controls.
- Alarm . Real time clock is used to obtain accurate time. Here this system displays the date and time on the LCD display and we can set the alarm using the control buttons. As soon as the alarm time has arrived, the system sounds an audible signal.
- Stepper motor . Stepper motor means a precision motor that can be turned one step at a time. Such a device is made using robotics, 3D printers and CNC machines. - For this project, take the cheapest stepper motor you can find. Engines are available online. This project uses a 28byj-48 pedometer, which is suitable for most other similar projects. It is easy to connect to the Arduino board. - You will need 6 cables with female-to-male connectors. You just need to connect the motor to the board and that's it! You can also add a small piece of tape to the rotating head to see that it produces a rotating motion.
- Ultrasonic distance sensor . This project uses the popular HC-SR04 ultrasonic sensor to allow the device to avoid obstacles and move in different directions.
When you finish your work, the result of your actions will appear on the screen. To keep things simple and clear, it is recommended to use an LCD with an I2C converter, so you only need 4 cables to connect to the Arduino board.
Robot bartender with Bluetooth control
Complexity: 4/5.
Time: 5/5.
An indispensable device for any party: it runs on eight batteries, prepares a lot of cocktails and is controlled wirelessly. The mechanical bartender is based on an Arduino board, drives for positioning the shaker and serving drinks, and position sensors.
The main difficulty in manufacturing is engineering. You need to accurately screw all the parts and connect them together so that the container is exactly under the desired bottles.
Details: usamodelkina.ru.
The most special projects
There are developments that solve important social or educational problems.
3D scanner
One of the latest technological advances is a 3D scanner to create an exact copy of a model of an object. The best implementation option for Arduino enthusiasts is an Open Source project called FabScan. Using open information, any beginner can make a scanner at home, spending no more than $100. The project is not difficult, but knowledge of the basics of microelectronics and skills in working with a board are required.
Easy Robot Toy PipeBot
Easy Robot Toy PipeBot is an intelligent toy that you can make with your kids. The robot has the shape of a tube with 2 wheels and is controlled using a remote control or smartphone.
You can add various devices to it: camera, accelerometer, etc.
By creating a craft, the child will master the logic of electronic circuits and programming.
Accessibility for people with disabilities
The Arduino platform allows you to design devices that are useful to people with disabilities. For example, today there is a demand for a robotic arm that performs the gripping function.
To control the manipulator, a highly sensitive remote control is assembled, which allows you to control the mechanism with minimal movements.
Today, many different devices are offered that are made to compensate for physical disabilities: a communication assistant, a guide robot, an inertial tracker, etc.
Glowing cube with 512 LEDs
Complexity: 3/5.
Time: 3/5.
A beautiful thing that can glow in time with music like a 3D equalizer and show 3D animation. It can also work as an unusual night light.
To assemble, you will need a wooden chassis with holes in it so that each tier is the same size and shape as the others. The number of LEDs in each face was not chosen by chance: 8 lamps = 8-bit logic, the easiest to program and control via a controller.
Details: instructables.com.
Tips for working with Arduino projects
The development of “constructors” based on Arduino requires going through standard stages that are typical for any project:
- Search for an idea. It is important to clearly define the objectives of the system.
- Providing conditions for implementation. It is necessary to prepare the resource base in advance.
- Selection of element base.
- Circuit simulation. Before creating a robot, a virtual prototype is first developed, its design and possible errors are thought through.
- Creating a program for the controller.
- Final assembly. This stage involves testing and final configuration.
To master basic assembly and programming skills, the book “25 Cool Projects with Arduino” by Mark Geddes will be useful.
Thanks to this publication, the path to the world of Arduino will be pleasant and exciting.
Code lock burglar
Complexity: 5/5.
Time: 4/5.
This project was developed by hacker Samy Kamkar and is provided for demonstration purposes only. For hacking, in addition to the Arduino board, the author took servo and stepper motors to try combinations and connected everything on a homemade aluminum chassis. The algorithm is based on a simple search of all combinations, but the robot does it faster than a human.
Details: YouTube.
Arduino Projects for Beginners
If you look at all Arduino projects, information about which is available on the Internet, you can divide them into several main groups:
- Initial educational projects that do not claim to have any important practical use, but help to understand various aspects of the platform. Flashing LEDs - beacon, flasher, traffic light and others.
- Projects with sensors: from the simplest analog to digital, using a variety of protocols for data exchange.
- Devices for recording and displaying information.
- Machines and devices with servo drives and stepper motors.
- Devices using various wireless communications and GPS.
For each of these groups you can find a wide variety of materials in books and on websites. In this article we will begin our acquaintance with a description of the simplest projects that beginners are recommended to start with.
How to create a project on Arduino
An Arduino project is always a combination of an electronic circuit, some interconnected hardware and mechanical devices, a power supply system, and the software that controls all this chaos. Therefore, when starting work, you must firmly understand that when creating a device alone, you will have to become a programmer, an electronics engineer, and a designer.
If we are not talking about an educational project, then you will definitely encounter the following stages of implementation with the following tasks:
- Come up with something that will be useful and (or) interesting for others. Even the simplest project has some benefit - at least it helps to study new technologies.
- Assemble the circuit, connect the modules to each other and to the controller.
- Write a sketch (program) in a special environment and load it into the controller.
- Check how everything works together and correct errors.
- After testing, prepare to create a finished device. This means that you need to assemble the device in some kind of housing suitable for use, provide a power supply system, and connections with the environment.
- If you are going to distribute the devices you create, you will also have to take care of the design, the transportation system, think about the safety of use by untrained users and training these same users.
- If your device works, it has been tested and has some advantages over other solutions, then you can try to turn your engineering into a business project, try to attract investment.
Each of these stages of creating a project is worthy of a separate article. But we will focus on the stages of assembling electronic circuits (the basics of electronics) and programming the controller.
Electronic circuits
Electronic circuits are usually assembled using breadboards, which connect elements together without soldering or twisting. You can find out how the modules and connection diagrams work on our website. Typically, the project description indicates how the parts will be installed. But for most popular modules there are already dozens of ready-made diagrams and examples on the Internet.
Programming
The creation and firmware of sketches is carried out in a special program - a programming environment. The most popular version of such an environment is the Arduino IDE. On our website you can find information about.
Nod Bang - nod your head and make a beat
Complexity: 2/5.
Time: 3/5.
The idea is not just to nod to the beat of the music, but to generate the sound yourself with your nods. Andrew Lee made a special device that monitors the position of the head and plays the desired sound when tilted.
He built an accelerometer into the headphones, the buttons are responsible for selecting the sound, and the Arduino is responsible for playing the sound on the computer via a MIDI interface. To make everything look more impressive, the buttons are backlit, and they also make a beat.
Details: YouTube.
What is Arduino and what is it for?
Arduino is an electronic construction kit that allows anyone to create a variety of electro-mechanical devices. Arduino consists of software and hardware. The software part includes a development environment (a program for writing and debugging firmware), many ready-made and convenient libraries, and a simplified programming language. The hardware includes a large line of microcontrollers and ready-made modules for them. Thanks to this, working with Arduino is very easy!
With the help of Arduino you can learn programming, electrical engineering and mechanics. But this is not just an educational constructor. Based on it, you can make really useful devices. Starting from simple flashing lights, weather stations, automation systems and ending with smart home systems, CNC machines and unmanned aerial vehicles. The possibilities are not even limited by your imagination, because there are a huge number of instructions and ideas for implementation.
Arduino projects
Singing plant
Complexity: 2/5.
Time: 2/5.
Essentially this is a theremin made in the form of a plant. All other operating principles remain the same: sound occurs when the hands move, and different movements generate different melody.
The board registers changes in signal amplitude, for which the author uses a homemade touch detector to analyze touches to a flower. In addition, we needed a Gameduino expansion board and the flower itself.
Details: Vimeo.
Arduino firmware
In order to upload a sketch to Arduino, we first need to simply save it. Next, to avoid problems when loading, you need to check the programmer settings. To do this, select the “Tools” tab on the top panel. In the “Payment” section, select your payment. It could be Arduino Uno, Arduino Nano, Arduino Mega, Arduino Leonardo or others. Also in the “Port” section you need to select your connection port (the port to which you connected your platform). After these steps, you can upload the sketch. To do this, click on the arrow or select “Download” in the “Sketch” tab (you can also use the keyboard shortcut “Ctrl + U”). The board firmware has been completed successfully.
A lock that opens on a secret knock
Complexity: 3/5.
Time: 2/5.
An interesting thing for those who want to play spies or let only their friends into the room. The lock recognizes a knock on the door and compares it with the basic sound that the owner has set. If it matches, the drives move the lock and the door opens; if not, nothing happens, you can knock again.
To set a new knock on the opening, you need to hold the button on the handle and knock on the door in a new way. The piezo sensor recognizes vibrations and records them in the board's memory.
Details: grathio.com
Arduino analog inputs
As we already know, digital pins can be both input and output and receive/give only 2 values: HIGH and LOW. Analog pins can only receive a signal. And unlike digital inputs, analog inputs measure the voltage of the incoming signal. Most Arduino boards have a 10-bit analog-to-digital converter. This means that 0 is read as 0 and 5 V is read as 1023. That is, analog inputs measure the voltage applied to them with an accuracy of 0.005 volts. Thanks to this, we can connect a variety of sensors and resistors (thermoresistors, photoresistors) and read the analog signal from them.
For these purposes, Arduino has the analogRead() function. For example, let's connect a photoresistor to the Arduino and write a simple sketch in which we will read the readings and send them to the port monitor. This is what our device looks like:
Connecting a photoresistor to Arduino
The circuit contains a 10 kOhm pull-down resistor. It is needed to avoid interference and interference. Now let's look at the sketch:
int sensePin = 0; // The pin to which the photoresistor is connected void setup() { analogReferense(DEFAULT); // Set the reference voltage value. This line is optional. Serial.begin(9600); // Open the port at 9600 baud. } void loop() { Serial.println(analogRead(sensePin)); // Read the value and output it to the port delay(500); // delay so that there are not too many values }
This is how we made a light sensor from two simple elements and four lines of code. Based on this device, we can make a smart lamp or night light. A very simple and useful device.
So we looked at the basics of working with Arduino. Now you can make simple projects. To continue learning and master all the intricacies, I advise you to read books on Arduino and take a free training course. After this, you will be able to do the most complex projects you can think of.
Flower pot with automatic watering
Complexity: 4/5.
Time: 3/5.
A useful pot for those who forget to water their flowers before leaving or simply don’t know how often to water them. All electronics, pumps and water container are located inside the pot. For each plant, you can program its own watering regime in each pot.
Main characteristics of the miracle pot:
- built-in water tank;
- soil moisture level control sensor;
- water supply pump;
- water level sensor in the tank;
- LED indicating lack of water in the tank.
Details: usamodelkina.ru.
Yodo Sets
For those who do not have the time or opportunity to learn the C++ language, but have the desire to create interesting, useful and practical electronic gadgets, the Yodo set from Amperka will be the best choice. Thanks to the main component of the kit - the Iskra JS board, which is Arduino-like, you can use JavaScript to write code. The set contains a booklet, including theoretical and practical parts, to simplify the work with the contents. Using the Yodo kit you can assemble as many as 25 electronic devices.
How to install the environment
To work with the kit, you can use the convenient and widespread programming environment Espruino Web IDE - an application that runs on the Google Chrome platform and is compatible with Windows, Mac OS, Linux, Chrome OS.
The first step in the installation process is to add the Espruino Web IDE application to your browser. If the browser is Google Chrome, then you should apply additional IDE settings by clicking on the appropriate link. In any other browser, these parameters are entered manually.
When using the Windows operating system, you should install an additional driver for the USB interface of the STM32 microcontroller. Linux and Mac OS do not require such a driver.
Drum machine
Complexity: 1/5.
Time: 2/5.
A simple drum machine on Arduino. The project is interesting because this is not an ordinary search of recorded samples, but real sound generation using built-in hardware. There is also an audio spectrum analyzer: through the video output you can look at diagrams and frequency characteristics.
The mathematical basis of this device is the Fourier series expansion, which is solved by connecting the standard library.
Details: YouTube.
Arduino, Raspberry Pi
Arduino
— a hardware platform for device development, with an I/O board and a simple development environment on Processing/Wiring. Based on the Atmel AVR (ATmega) microcontroller, most boards are programmed via USB. Arduino boards allow you to create various devices with your own hands and are a good tool for beginners and learning MK. Most devices can be assembled without even using a soldering iron! In this section you will find various interesting circuits and projects for the Arduino platform, their clones Freeduino, Seeeduino, as well as Raspberry Pi, Python boards, etc. Don't forget to visit the Arduino forum
- Inexpensive DIY thermal imager
- Solar tracker
- Face recognition and tracking system
- Intervalometer with LCD for Sony NEX
- PTZ webcam controlled by Arduino
- Ethernet camera based on Arduino
- A simple timelapse camera using a Raspberry Pi
- 3D Photo Turntable Upgrade
- Battery capacity meter (Li-Ion/NiMH/NiCD/Pb)
- Simple Li-ion battery capacity tester
- Measuring Capacitance of Capacitors Using Arduino
- Arduino based inductance meter
- Winding machine on Arduino
- Winding machine on Arduino version 2.0
- Water flow meter
- Tachometer on Arduino
- Measuring the current consumption of devices using current sensors of the ZXCT series
- Real-time power consumption monitoring using Arduino and LabView
- Display to show the frequency of the power supply
- Digital voltmeter on Arduino with connection to PC via serial port
- 4-channel voltmeter with LCD indicator based on Arduino
- DIY parking sensors
- Bicycle speedometer on Arduino
- How to text a heater?
- Launch and assembly of the M590E GSM module
- GPS tracker for cars with sending data to the server using a GSM/GPRS shield
- Cat collar with GPS navigation based on TinyDuino microcontroller
- Portable compass TinyCompass
- Text display for remote communication with the office based on Arduino Uno
- Smart refrigerator magnet based on Arduino
- Seismic activity monitoring device
- Barometer with advanced features
- DIY barometer
- Contactless temperature control with RFID access for employees with data sent to the LORAWAN cloud
- DIY IR thermometer
- Infrared motion sensor (PIR sensor)
- Automatic lighting AtMega328 (PIR)
- Autonomous LED spotlight on Arduino
- Complex about simple things: digital thermometer
- Thermal relay with NTC resistor
- Arduino, motion sensor and relay module
- Homemade anti-theft device based on Arduino and fingerprint sensor
- GSM security system for home based on Arduino
- Radio Frequency (RFID) Access Control Using Arduino UNO and EM-18 Module
- Electronic visitor registration system
- Morse code decoder and transmitter on Arduino
- Receiving a signal from multiple 433MHz transmitters on Arduino
- Radio on Arduino
- Audio player on Arduino
- Smart home with Arduino
- Home weather station server on Arduino + Android widget for data output
- Home weather station server on Arduino + Widget on Android. Adding a BMP085 sensor
- Home weather station server on Arduino - widget for OS X
- Weather station on Arduino and MR3020 for public monitoring
- Reading the temperature sensor DS18B20
- Weather station on Arduino with wireless temperature sensor
- Arduino: Making your own temperature sensor
- Weather station + plotting + C#
- IoT barcode scanner with results sent to the cloud
- Sending data from an IoT device via the LORAWAN network to The Things Network service
- Covid-19 coronavirus data monitoring
- Fallout style Vault Keeper climate monitor on ESP8266
- Temperature and humidity sensor using ESP8266 Wi-Fi module
- WiFi ESP8266. Nodemcu Lua for ESP-01. Load management via web interface
- Setting RGB LED Strip Color Using Capacitive Touch Disk Pad
- NodeMCU - a quick start for Arduino lovers
- WeMos D1R2
- Connecting Arduino to the Internet: setting up client-server mode, processing GET and POST requests
- Sending data from Arduino to server (ENC28J60)
- Ambient air pollution detector
- MQ-2 Gas Sensor Module and Arduino Connections
- Resistive pressure sensor FSR402
- DDS sine wave generator
- Signal generator on Arduino
- LCD oscilloscope on Arduino
- Connecting the Bluetooth module to Arduino
- Transfer data via Bluetooth between Android and Arduino
- Controlling lamps via smartphone
- Control system for 220V appliances from a smartphone
- Internet of Things with RemoteXY
- Internet of Things with RemoteXY: Connection Configuration.
- Internet of Things with RemoteXY: working with the online editor and interface design elements
- Internet of Things with RemoteXY: Controls, Part 2
- Internet of Things with RemoteXY: display elements
- Internet of Things with RemoteXY: Controls
- Smart socket using a kettle as an example
- Arduino as an HID device
- Transferring MIDI data to a computer
- USB MIDI controller on Arduino
- Capacitive touch Midi keyboard
- Mini synthesizer on Arduino using a buzzer
- A simple clock based on gas-discharge indicators, optocouplers and Arduino
- Clock on Arduino using a standard indicator
- Setting up an RTC real-time clock module for Arduino
- Arduino clock from customer display (VFD)
- Clock on Arduino
- LED clock on Arduino
- O-Clock – a simple alarm clock based on Arduino and an 8x32 matrix indicator
- Countdown alarm clock on Arduino with Nokia 5110 display
- Universal 8-channel timer on Arduino
- OLED i2c display 128x64 pixels
- Color OLED display 96x64 pixels
- Arduino and dynamic indicators
- DIY Ambilight
- Dynamic backlight for TV
- RGB LED Piano Lighting
- JoyLED - non-standard RGB LED control
- Controlling an LED strip using a TV remote control and Arduino
- LED disco floor on Arduino
- Game TV console on Arduino. Part 1
- Game TV console on Arduino. Part 2
- Tetris based on Arduino and two-color LED matrices
- Button controller for the game What? Where? When?
- "Smart dumbbell"
- GTO in a modern way
- Logic game Crossing on Arduino
- Arduino toy: Simon said
- Dice game on Arduino
- Unusual control of LED (and other) matrices on Arduino and 74HC585
- New Year's magic or magic box on Arduino
- Sports counter on Arduino
- Passage sensor on arduino
- Digitizer for arduino uno
- Controlling the camera, devices and data from sensors on the TV screen
- TV output on Arduino
- VGA on Arduino
- Unusual combination lock on Arduino
- Arduino code lock
- A safe that recognizes colors
- Brute Force PC BIOS using Arduino
- Automatic watering for indoor plants using Arduino
- Automatic temperature and humidity controller for pets based on Arduino
- SMART-GARAGE
- Frozen pipe alarm on Arduino
- The simplest call with two melodies
- Singing plant based on Arduino
- Rotating platform with adjustable RGB lighting and Bluetooth control
- Playing WAV Files Using Arduino
- Audio spectrum analyzer on RGB tape WS2812
- Audio Spectrum Analyzer
- 3x3x3 LED cube
- LED cube 4x4x4
- LED cube 5x5x5
- LED Cube 8x8x8 on Arduino with RTC
- LED cube brightness control
- Holographic clock on Arduino
- Simple POV display based on Arduino
- LED matrix 24×6
- 3D input interface on Arduino
- Touch control panel
- Makey Makey New Year's RGB garland control
- Apple Remote Shield on Arduino
- Arduino laser tag
- Controlling iRobot Create with a Wireless Gamepad via Arduino
- Development of an Arduino extension for mobile robots
- Sending data from Arduino to WEB server with a GET request
- We control any remote control equipment at home via IR from a web page
- Sound activated socket
- Voice control of UNIEL radio sockets
- Hand controlled RGB night light
- LANp – RGB lamp from scanner parts controlled via network
- Light dimmer controlled by Arduino
- AC dimmer on Arduino
- Light measurement on Arduino and display on Nokia 5110
- Day-night controller based on Arduino
- Battery controller for arduino
- Power supply for Arduino from ATX
- ATX power supply controlled by Arduino
- Single-phase frequency converter on Arduino
- DIY Arduino with USB port
- Nanino - homemade Arduino
- Making your own Arduino Uno Mini
- EGYDuino – DIY Arduino clone
- Homemade Arduino-compatible debug board on a budget MK ATmega88/168/328
- Quick start with Arduino - Arduino UNO R3 development board
- Arduino Pro Mini and UniProf
- Development board with ATmega328 microcontroller
- Bitlash shell on Arduino
- Developing a brainfuck interpreter on Arduino
- Program Arduino using your Android device!
- DIY hive scales
- Automatic feeder for aquarium
- Connecting the coin acceptor to Arduino
- Vending change machine on Arduino
- Connecting a PS/2 keyboard
- Mini USB keyboard on microcontroller
- Wake up PC over network on Arduino and ENC28J60
- Write and read to SD card
- Connecting I2C EEPROM to Arduino
Arduino tutorials
- Arduino IDE - Introduction (video tutorial)
- Arduino UNO Lesson 1 - LED Control
- Arduino UNO Lesson 2 - Servo Control
- Arduino UNO lesson 3 - Timing
- Arduino UNO lesson 4 - Running fire
- Arduino UNO Lesson 5 - Fade
- Arduino UNO lesson 6 - Encoder
- Arduino UNO lesson 7 - Piezo emitter
- Arduino UNO Lesson 8 – Night Light
- Arduino UNO Lesson 9 - Managing a Powerful Load
- Arduino UNO Lesson 10 - LCD
- Arduino UNO Lesson 11 - Serial LCD
- Arduino UNO lesson 12 - Joystick
- Arduino UNO lesson 13 - Connecting the L298N motor driver
- Arduino UNO lesson 14 - Connecting the HMC5883L digital compass
- Controlling a bipolar stepper motor without using a driver
- Arduino Uno. Connecting the IR Receiver
- Connecting a seven-segment indicator (1 digit) to Arduino via SPI
- Shift register 74HC595
- Connecting an 8*8 LED matrix to Arduino via shift registers
- Arduino String object and serial commands
- Monitoring the position of the contacts of a 3-position switch using Arduino
- Text menu on Arduino for 20x4 display
- Arduino: thank you and goodbye
- Android and Arduino. Introduction to ADK
- Android and Arduino. Software
- Android and Arduino. Hello Arduino from Android
- Android and Arduino. Hello Android from Arduino
- Android and Arduino. Two-way data exchange
- Arduino World Young Fighter Course
- Arduino Course - Sensors
- Arduino Course - Logic
- Arduino Course - Serial Monitor
- Arduino Course - Displaying Data on LCD
- Arduino Course - Sound
- Arduino Course - Motors
- Arduino course - Microcircuits
- Arduino Course - Time and Random
- Arduino Course - Interrupts, Function Creation, Tips
- Arduino Course - Modules
- Arduino Course - Rangefinders
- Arduino - Processing course
- Control system for indoor plant parameters
- Temperature and relative humidity logger on chipKIT Uno32
Raspberry Pi and other boards
- Raspberry Pi 4 and Intel Neural Compute Stick 2
- Using Raspberry Pi GPIO Pins
- Z-wave smart home elements on Razberry and Z-Uno. Part 1
- Z-wave smart home elements on Razberry and Z-Uno. Part 2
- Raspberry Pi GPIO Web Control
- Raspberry Pi as an FM transmitter
- Raspberry Pi FAQ
- Raspberry Pi, Raspbian, XBMC and 7" eGalax touchscreen
- Hi-Fi player on Raspberry PI using RuneAudio software
- Double whammy: AirPlay-Pi and new life for an old radio
- FM radio broadcast station on Raspberry Pi
- Media center on Raspberry Pi 2
- Forex quotes board in real time on a 32×64 RGB matrix
- LED display controlled by a Raspberry Pi minicomputer and WiFi adapter
- LED display measuring 128x32 pixels, controlled by a Raspberry Pi microcomputer
- Portable laptop based on Raspberry Pi
- Plotter on Raspberry Pi using components from CD-ROM
- Connecting NES/Dendy console joysticks to Raspberry Pi
- A Raspberry Pi-powered chest that recognizes your face
- Music and light harpsichord on Intel Galileo
- Photo studio for Barbie dolls
- Using HMI TFT display STONE and ESP32 to control a massage chair
- Servo drive control using HMI LCD screen and STM32
- Mini-computer M5StickC on ESP32-PICO module
- MAIXDUINO Development Board for AI + IoT Applications
- Introducing the MicroPython Board
- 10 miniature development boards to solve any problem
- FEZ and .NET Micro Framework
- Particle Photon
- DFRobot Curie Nano
- Latte Panda
- FEZ Panda II Review
- Netduino: Interfacing with Character LCD Display
Walking robot
Complexity: 2/5.
Time: 1/5.
An easy-to-make four-legged robot that walks and independently overcomes obstacles a centimeter high.
To make it, you will need servos for the legs, some wire and any plastic from which the chassis is made. For power supply - a battery of any model, which is mounted on the back of the robot.
Details: xakep.ru.
Lesson 1. Flashing LED on Arduino
In the first lesson you will learn how to connect an LED to an Arduino and control it to blink. This is the simplest and most basic model.
An LED is a semiconductor device that produces optical radiation when electric current is passed through it in the forward direction.
Text and video of the lesson “Blinking LED”.
Robot vacuum cleaner
Complexity: 4/5.
Time: 5/5.
Dmitry Ivanov from Sochi has assembled a real robot vacuum cleaner that does everything the same as industrial devices, only with the ability to fine-tune it to suit you and your apartment.
The main parts are an Arduino board, 6 infrared sensors, a turbine with a motor and brushes, and a battery. The robot also has collision sensors that help it avoid obstacles, and a battery controller that monitors the battery level and warns that the vacuum cleaner needs to be charged.
Details: habr.com.
Features of projects
Most electronics engineers prefer to create their projects based on the Arduino Uno microcontroller, which we have already written about several times.
First, it’s worth getting acquainted with the functionality of the Arduino Uno microprocessor, on which most projects are built, and also consider the reasons for choosing this device. Below are the factors why a novice inventor should choose Arduino uno:
- Quite easy to use interface. It is clear where the contact is and where to attach the connecting wires.
- The chip on the board connects directly to the USB port. The advantage of this setup is that serial communication is a very simple protocol that has stood the test of time, and USB makes connecting to modern computers very convenient.
- It is easy to find the central part of the microcontroller, which is the ATmega328 chip. It has more hardware features such as timers, external and internal interrupts, PWM pins and multiple sleep modes.
- The device is open source, so a large number of radio amateurs can fix bugs and problems in the software. This makes it easier to debug projects.
- The clock speed is 16 MHz, which is fast enough for most applications and does not speed up the microcontroller.
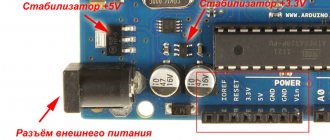
- It is very convenient to control the power inside it and it has built-in voltage regulation feature. The microcontroller can also be disconnected from the USB port without an external power source. You can connect an external power source up to 12 V. Moreover, the microprocessor itself will determine the required voltage.
- Availability of 13 digital contacts and 6 analog contacts. These pins allow you to connect equipment to the Arduino uno board from third-party media. The pins are used as a key to extend the computing power of the Arduino uno in the real world. Simply connect your electronic devices and sensors to the connectors that correspond to each of these pins.
- An ICSP header is available to bypass the USB port and interface directly with the Arduino as a serial device. This port is needed to reset the chip if it is damaged and can no longer be used on your computer.
- Availability of 32 KB of flash memory for storing developer code.
- The LED on the board connects to digital pin 13 to quickly debug the code and simplify the process.
- Finally, it has a button to reset the program on the chip.
Arduino was created in 2005 by two Italian engineers, David Cuartilles and Massimo Banzi, with the goal of allowing students to learn how to program the Arduino uno microcontroller and improve their electronics skills and use them in the real world.
The Arduino uno can sense its environment by receiving input from various sensors and is capable of influencing the environment by controlling lights, motors and other actuators. The microcontroller is programmed using the Arduino programming language (wiring-based) and the Arduino development environment (processing-based).
Now let's move directly to projects on Arduino uno.