01/16/201701/16/2017 master
Sometimes certain difficulties arise in a house or apartment that are associated with electrical wiring or electrical appliances. It will be inconvenient and expensive to call an electrician every time. At the same time, calling it will not always make sense, since very often existing problems can be fixed with your own hands, because they are associated with minor problems in the electrical circuit, switch or socket. But to find and fix the problem you will need a special tool - an indicator screwdriver.
Indicator screwdrivers
Such a screwdriver may seem unfamiliar to many and not a completely necessary purchase. But if you understand its capabilities, it will become an indispensable item in your home toolbox. Our article will help you understand the features of indicator screwdrivers.
What is it like?
In order to use any tool for its intended purpose, it is necessary to understand its structure and operating principle. The same applies to indicator (signal) screwdrivers. They look like regular models. But at the same time there is an indicator on it that reflects the presence of current in the circuit. It was he who gave the name to this device. An indicator screwdriver can replace a multimeter. Moreover, it will cost several times less than a measuring device. In simple words, this product is a voltage indicator made in the form of a regular screwdriver. Today, such products are produced in a wide variety. At the same time, they all share a common operating principle.
Note! Despite the same operating principle, such products may differ in design and design. Let's look at the structure of the standard and simplest indicator screwdriver.
Structure of an indicator screwdriver
There is a fairly simple structure here:
- a sting that acts as a conductor;
- thyristor. The sting is connected to it. This element is designed to reduce the current to a level that is safe;
- Light-emitting diode. It is located after the thyristor. The LED is connected to the contact fields that are located at the end of the screwdriver.
All elements of the indicator screwdriver are contained in a transparent plastic case. Thanks to its transparency, a person can easily see the glow of the LED, also hidden under the plastic housing. This structure is typical for the simplest and cheapest voltage indicator. Using it you can determine the working phase. In this case, zero in this situation is sought by elimination. Now let's look in more detail at how to work with such a screwdriver.
Battery-powered indicator screwdriver (with dialing function), contact type
This type of test screwdriver for checking voltage is almost impossible to distinguish externally from those described above. But they differ in functionality, and also schematically. This device is made on the basis of a field-effect or composite transistor; an LED is built into one of the circuits. The power source in this model is coin-shaped batteries. Usually there are two batteries, but there may be three. There is also a metal plate at the end of the handle, but you don’t always have to touch it. And this should be remembered.
Indicator screwdriver with LED, field transistor and batteries
You can distinguish this screwdriver by touching its two ends - the tip and the button on the handle. The LED lights up. By the way, this is how we check its functionality. This must be done every time before using the indicator screwdriver. After all, if the batteries are low, the LED simply won’t light up... As a result, you can touch the phase...
An indicator screwdriver with batteries allows you to not only determine the presence of a phase. In addition to the phase, you can also:
- Determine the presence of zero. You cannot determine zero with anything other than a multimeter. It is usually “determined” by elimination. Where a regular indicator screwdriver does not light up, it is considered zero. But he, too, may be in trouble. And then you have to ring the chain, which is not always convenient. And so, using a voltage indicator with batteries, you can immediately monitor the presence of a “zero” and the integrity of the wire.
- Ring the wire, check the integrity of the fuses, the integrity of the heating element, incandescent lamps, transformer windings, determine the presence of a break in any equipment.
- Check the diode for breakdown, find its anode and cathode.
- Determining the presence of voltage on an insulated conductor. This allows you to accurately find the location of the conductor break.
- Find the wiring in the wall. This is not a full-fledged wire detector, but it can be used to guess where the wire is running. True, there is a limitation: the distance from the wire to the wall surface should not exceed 1.5 cm.
Two circuits of an indicator screwdriver with batteries and an LED
Considering that such an indicator screwdriver costs very little - from 150 rubles to 300 rubles, the functionality is more than impressive. You just need to know how to work with it and monitor the condition of the batteries. This is their main drawback, because tablet batteries can quickly discharge. To maintain the functionality of the wiring tester longer, it is better to insulate the probe during non-working hours. For example, select a piece of cambric (PVC insulating tube) of a suitable diameter. Cover the probe with this piece of insulation, like a cap.
Algorithm for working with a simple voltage indicator
After we have examined the structure of the simplest signal screwdriver, we need to determine the correct operating algorithm for it. Finding a phase in the wires, in this situation, looks like this:
- with the tip of the product it is necessary to sequentially touch all the wires being examined;
Screwdriver in working mode
- When touching the wires, you must touch the contact field. It is specially displayed on a plastic case;
- the moment the tip touches the phase, the indicator on the screwdriver begins to glow.
Note! When you touch zero, the indicator LED will not light up.
As you can see, using such a tool, finding phase and zero will be quite simple, and most importantly, safe.
Screwdriver with neon lamp
Another type, in addition to a simple indicator screwdriver, is a voltage tester equipped with a neon lamp.
Voltage tester with neon lamp
This device functions as follows:
- the electric current that exists on the surface being measured is transferred to the tip of the meter;
- then the current through a resistor (limiting the current) having 0.5 mOhm (ultimate minimum) reaches the contact of a neon lamp mounted in the body of the product;
- the second contact of the circuit, necessary to turn on this type of light source, closes on the person, on the handle of the screwdriver.
Note! This type of voltage indicator is characterized by the inclusion of the capacitance and resistance parameters of the human body in the light bulb circuit.
As a result, when using such a tool, the glow will only occur if voltage is present. At the same time, in the absence of contact with the human body, its glow will not be observed. The disadvantage of such a voltage indicator is the fairly high threshold used to indicate voltage (from 60V). Models with a neon bulb have proven themselves well in the situation of searching for a phase or determining the presence of voltage. It cannot be used to determine an open circuit.
Types of indicator screwdrivers and their design
This not too complicated device has many names. Some are more common, others less. Here are the names you can find:
- screwdriver tester;
- voltage indicator;
- phase meter or phase meter;
How to operate an indicator screwdriver depends on its type
- electrician's screwdriver;
- probe screwdriver;
- screwdriver for checking electricity (phases);
- electric probe.
Perhaps there are other names - although this device is simple and costs little, it is useful for both professionals and amateurs. With its help, you can identify the most common damage, check the integrity of wires and the functionality of radio elements.
Voltage indicator with LED light
The more popular and in demand type of indicator screwdriver today are models equipped with an LED light.
Indicator screwdriver with LED
The principle of operation of this tool will be similar to how an indicator-type screwdriver with a neon light bulb works. The main difference between the models is that the LED varieties have a significantly lower threshold for voltage indication. Here, the LED glow will be observed in the presence of a voltage less than 60V.
Finding a Cliff
Using the Woodpecker device to find a broken wiring
There are many known electronic devices that can be used to find a break hidden from the user’s eyes under a layer of plaster or concrete. Some of them operate on the principle of a metal detector, capable of detecting metal objects by reflecting a signal generated by the device from them. It is possible to detect damage in the wiring due to the fact that reflection does not occur in the break area and the response signal weakens.
The cost of such devices is quite high. To find out where the break is located, it is better to use indicator devices that operate on other principles.
To search for broken conductors at home, devices that are considered the best in their class in terms of price and quality ratio are suitable. We are talking about a domestic product called “Woodpecker” and the E-121 signaling device. With their help, you can search for the exact route of electrical wiring in the wall, and also easily detect a break in its veins. The depth of penetration of the control signal into the thickness of the walls is no more than 7 cm. This is quite enough to detect a broken wire going to a room lamp, for example, even under a thick plasterboard board.
The operating principle of these devices is based on recording residual electromagnetic energies that retain their field structure even in a broken conductor. The only condition for the effectiveness of such devices is that an alternating voltage must operate at the ends of the controlled circuits.
If there is an indicator screwdriver with an LED in the home craftsman’s tool kit, the user will be able to solve many issues related to servicing the internal electrical network on his own. This approach is the only correct one, since it allows you to independently deal with existing problems, as well as save significant money by refusing to call an electrician.
Battery voltage indicator
In addition to the models described above, there are indicator-type screwdrivers that are equipped with an LED light source and operate on batteries (autonomous power sources).
Battery-powered indicator screwdriver
These types of products are multifunctional, which allows them to be used in a wide variety of situations. An additional element in the design of such instruments - a bipolar transistor - allows maintaining multifunctionality. The list of functions of indicator autonomous screwdrivers with an LED built into the housing includes:
- finding an open circuit;
- phase determination;
- locating the place where the conductor was damaged;
- determining the location of the wiring. This function is made possible due to the presence of voltage in this non-contact method;
Note! The ability to non-contactly search for a conductive electrical system is based on inducing the magnitude of the magnetic field.
- determination of the polarity of different current sources.
In addition, it should be noted that instruments of this kind are capable of detecting microwave radiation. Therefore they can also be used with microwave ovens.
Electronic type voltage indicator
Another type of indicator type screwdriver is the electronic model. This screwdriver can be presented in two types:
- with liquid crystal screen;
- without him.
Electronic screwdriver with LCD screen
This type of tool is equipped with an audible alarm, the activation of which indicates the presence of voltage. At its core, this device resembles a simplified and quite easy-to-use multimeter. Using the built-in LCD display, you can not only determine, but also find out the voltage value. Typically this parameter is in the range from 12V to 220V. The operating principle of electronic voltage indicators is similar to all other models.
Rules for using voltage indicators
When working with this kind of tool, there are a number of rules that you need to know in order to do everything correctly. Here you need to adhere to the following recommendations:
- compliance with the rules of safe work with electrical networks. This means that all manipulations with the indicator screwdriver should be carried out with the package switches turned off;
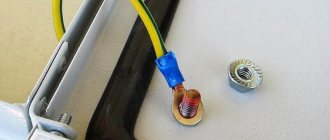
Switched off switches in electrical panel
- remember that electric current always flows through a conductor along the path of least resistance (from plus to minus);
Note! Any electrical appliance will function only if its phase/plus goes through the circuit to the neutral/negative wire of the network.
- Such an indicator meter of any type is not suitable for assessing complex electrical appliances. With its help, you can check the serviceability of electrical circuits of devices;
- in houses and apartments there is a standard network with a purity of 50Hz and a voltage of 220V;
- When working with such a screwdriver, you need to know that the (+) phase always receives voltage, the zero leads to the transformer (-), and the third wire is grounding (for example, in a socket).
When using a signal screwdriver in various works, be sure to adhere to the above rules. Otherwise, you may get the completely opposite result.
How to use an indicator screwdriver
When working with indicator screwdrivers, especially contact models, you must first of all follow the technology of their use and electrical safety rules. It is forbidden to touch the bare probe with your hand; the device must be held by the body covered with insulation.
When a regular and not a universal indicator screwdriver is used, its probe touches live parts, and at the same time the contact button is clamped on the handle. If there is current and the screwdriver comes into contact with the phase, the neon light bulb will begin to glow. The absence of a light signal indicates a neutral or ground conductor.
It's a little more difficult to work with a battery-powered LED indicator. Before using the indicator screwdriver, you need to check its functionality. To do this, you simultaneously touch the probe and the contact button with your hands. The LED lights up, which means the tool is ready for use.
A special feature of this device is that there is no need to touch the button while checking the phase. Simply insert the probe into the socket and touch the contacts. The light comes on - that means it's a phase. If the LED does not light up, you can press the contact button. The light signal indicates neutral, and its absence indicates the presence of grounding or a broken wire.
All other checks will also require pressing a button. This way you can check the conductor for integrity, the fuse or heating element for functionality, and identify other faults. When searching for hidden wiring with a tester, you need to take the screwdriver by the tip and move the button to the locations of the expected lines. In this case, the LED will light up, but the wire itself must be energized at this time.
How the tool is checked
Like any device with measuring qualities, our alarm screwdriver sometimes needs to be checked for its functionality.
Note! Working with voltage always requires constant monitoring of the serviceability of the measuring tool.
Working indicator screwdriver
To ensure that our signal instrument is always ready to measure voltage, pay attention to the following nuances:
- The body of the instrument must always remain intact and clean. There should be no cracks on it;
Note! If the case is damaged, the product must be replaced. Otherwise, your safety at work will not be guaranteed by the manufacturer.
- Before starting work, you should always make sure that the tool is working properly. You can check it simply by touching the conductor in which there is voltage;
- If the batteries are low, you need to replace them. To do this, carefully unscrew the fixing cap and replace the old batteries with new ones. The main thing here is not to confuse their polarity. Otherwise the screwdriver will not function.
Do-it-yourself repair of the alarm screw, if damage is detected, will be irrational - it is cheaper to buy a new tool.
Main types of checks
Checking the tester using a non-contact method
To determine the presence of a phase in the electrical circuit being tested, it is necessary to follow generally accepted rules for handling an indicator screwdriver and similar devices. The operating procedure is determined by the model of the tool used and the features of its design. Depending on this, the test can be contact or non-contact, and also designed to detect a break or search for a wire route. In the first case, you need to touch the tip of a screwdriver to the contact of a light bulb socket, for example, and make sure that there is no voltage on it.
In the second approach, to check the presence of a phase, it is enough to bring the test part of the screwdriver to the circuit being tested (without touching it). The same method applies if you want to determine the route for wiring hidden in the wall, using electronic voltage testers for these purposes. In addition to these simple operations, indicator devices are used to search for a broken wire, which, when laid hidden, is recessed into the thickness of the walls.