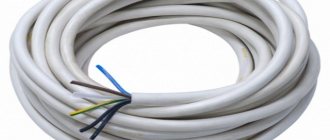
Anyone can independently install electrical wiring with copper cores. According to the rules, the wires are connected with terminals, soldered or welded. It is more convenient to use a device for welding copper wires in distribution boxes and panels. The copper twist melts in a matter of seconds under the action of an electric arc. After this she is isolated. Such a connection will last a long time and will not create additional resistance.
Having a small welding device at home, you can carry out third-party orders for the installation or repair of copper wires. Many craftsmen make welders themselves.
Design features and operating principles of wire welding machines
When choosing equipment for cold welding, it is necessary to take into account the characteristics of copper wire. When heated to 300°C, copper becomes brittle. It melts at 1100°C,
It is cooked with direct and alternating current, the operating voltage is given in the range from 12 to 36 volts, the current strength is 150 A. The power and operating current depend on the number of conductors in the twist and the thickness of the cores.
Welding machines for copper wires must have a smooth adjustment of the welding current to eliminate the risk of burnouts or lack of penetration of the conductors; at the optimal current, the electrode does not stick - it does not stick to the copper conductors. An inverter or a transformer-based device is suitable for working with copper.
Types of soldering irons based on the principle of heating the working part
Before you learn how to solder with a soldering iron, you should understand the types of tools available. Depending on the method of heating the rod, devices are of the following types:
- Soldering irons heated over an open fire - these are the very first types of tools through which parts were connected (mainly massive parts were connected with their help). The principle of their operation is based on the fact that before connecting parts, the tool must be placed in an open fire and wait for the red copper rod to heat up. Today, these tools are almost forgotten, and are only rarely used when the need arises.
- Nichrome - these are ordinary rod devices, which are also called electric. The rod is heated by passing an electric current through a spiral nichrome wire. The device gained its popularity due to a number of advantages - simplicity of design, maintainability, low cost, and resistance to damage. Their main drawback is that with daily (or frequent) use, the coil burns out. In addition to this minus, it should also be noted that the rod takes a long time to warm up, so after plugging the device into the outlet, you need to wait a while
- Ceramic - free from the disadvantage that is present in nichrome soldering irons. After switching on, they very quickly gain temperature, and at the same time maintain it at the set value. Due to the use of ceramics, the cost of devices increases. And this is not their only drawback, since ceramics are fragile, and if the instrument is dropped from a height, it may fail. Ceramic soldering irons are highly powerful and resistant to frequent use.
- Pulse — such devices are produced in the form of pistols. They got their name because when you press the button, the tip heats up almost instantly. After soldering the parts, which also takes a little time, the tool button is released and the rod cools. These instruments are based on high-frequency transformers and frequency converters. By means of such a converter, the voltage frequency is increased to 1800-4000 Hz, and the transformer is designed to reduce the voltage. The tip of the device (it is not removable) is connected to the secondary winding of the transformer, which helps to increase the current strength, which means that the parts heat up as quickly as possible. The presence of power and temperature regulators allows the device to be used for working with small and large parts and elements
- Induction - These are the most advanced types of soldering irons. The main feature of the devices is that the rod is heated through an inductor coil. The tip is covered with a ferromagnetic layer, inside of which a magnetic field is created using a coil. When a magnetic field is created, an electromotive force arises and currents are induced, through which the core heats up. The heating element is called an inductor. The main advantage of the tool is that the rod is heated with automatic temperature maintenance. When the temperature reaches its maximum value, the ferromagnetic layer loses its magnetization properties, which helps to stop heating. As soon as the temperature decreases, the ferromagnetic properties increase, so the heating process automatically continues. The tip on such devices is replaceable, so it can be used to work with parts of different sizes
- Wireless - they are also called mobile or battery-powered, and they are intended primarily for soldering where there is no electricity. The devices operate on replaceable batteries and are compact in size. The disadvantage is that the batteries need to be changed or charged regularly, which depends on the frequency of use.
- Portable — such devices operate from a special USB port. This is a popular port that is available on many devices, including cars. Characterized by low power, but it is sufficient for soldering small semiconductor elements
- Gas - another type of autonomous devices, the functioning of which is ensured by replaceable gas cartridges. Such a tool is also called multifunctional, since without a rod attachment, it turns into a regular gas burner
From the above list it is not difficult to choose the appropriate option. If you solder parts occasionally, then the best option is a nichrome soldering iron. Having understood the issue of types of devices, it’s time to figure out how to solder with a soldering iron.
Types of wire welding machines
There are specialized devices for cable installation of domestic and foreign production on the market. These are machines for welding strands of copper conductors:
- TC 700 produced with a power of 1 to 1.5 kW are designed for welding copper and aluminum;
- modification TS 700-1 is the most primitive, beginners can weld twists up to 16 mm, price 7.6 thousand rubles;
- model TS-700-2 is narrow-profile, it is used by electricians when installing thick cables, the maximum twist diameter is 24 mm, the price is within 9 thousand;
- TS 700-3 is the most powerful, sold complete with two power wires, an electrode holder, the cost of welding equipment is 9.3 thousand.
Making a soldering iron for soldering twists
Here is my soldering iron that I made myself.
A simple upgrade of a regular soldering iron and you will have the same one.
To do this, we take a regular 100-watt electric soldering iron. We also need a cylindrical copper blank with a length of 50 mm and a diameter of 20 mm. Next, we drill holes in our workpiece, as shown in this picture. We make a large diameter hole into which the tin will subsequently be loaded. The hole has a diameter of 16 mm and a depth of 3/4 of the length of our workpiece. The wall must remain at least 2 mm thick.
The tip of our soldering iron will be inserted into the second hole, so we make it such a diameter that the soldering iron tip fits in with force. This hole should not intersect with a large diameter hole and violate its integrity.
You can take a workpiece of greater length and diameter, but then you need a more powerful soldering iron so that the product is heated to the required temperature.
Well, our soldering iron for soldering twists is almost ready! It turned out something like a bath for tinning copper wire. And with this soldering iron we will solder twisted wires.
From time to time the soldering iron will need to be placed on the surface (during heating, to load tin, and in other cases). Therefore, it is imperative to make a stand for it so that it does not turn over and the tin does not flow out of the bath.
I made one like the one in this photo. Not very pretty, but simple. You can do something different that your imagination suggests.
You also need to extend the wire. Since the soldering of the twists will take place at a height, the wire must be long. I have it 4-5 meters.
Inverter device
The universal inverter is designed for many types of work; it is suitable for welding aluminum and copper strands.
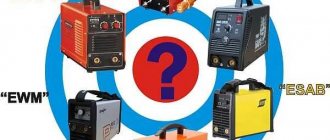
Domestic welders:
- "Resanta" SAI-160 produces current in a wide range from 10 to 160 A, device weight 4.5 kg, cost 6.3 thousand;
- “Svarog” ARC 160 Easy Z213 H produces current in the range from 10 to 160 A, weighs 4 kg, operates from a standard 220 V network, costs 9 thousand.
Imported inverters:
- The Italian “Quattro elementia 160 nato” 643-255, assembled in China, runs on a 220 V network. It costs about 6 thousand, weighs almost 5 kg.
- American "PFrionMax Welder DC-200 C", released by the Chinese branch. Weighs 4.5 kg. Equipped with a carrying strap and operates silently. Cost from 7.5 to 9.6 thousand depending on the configuration.
- The German “Fubag IQ 160” is small-sized but heavy, weighing almost 7 kg. Designed to operate from a network from 150 to 240 V, it is not afraid of voltage “sagging”. Produces operating current from 10 to 160 amperes. Equipped with two power wires, costs 7 thousand.
For welding with inverters, a copper-plated carbon rod is used, it is also called a copper-carbon electrode. Industrial inverters for copper wires are large and heavy. To work with electricians, choose small devices operating from a 220 V network, equipped with a carrying belt. Inverters differ from transformers in their stable arc and additional functions that simplify welding.
Requirements for a homemade welding device
An electrician constantly repairs electrical wiring. Purchasing special equipment is worth it. An amateur, he does renovations in his own house occasionally. It is more convenient for him to use a welding inverter with a current of up to 100A, or to make a device with his own hands.
A homemade welding machine must meet the following requirements:
- have a clamp;
- work from a 220V network;
- transformer power from 600W;
- withstand short-term overloads;
- the electrode is firmly fixed in the handle;
- adjust to the operating modes of welding copper wires;
- It is advisable to have a push-button switch on the holder.
The main requirement for a welding machine is safe operation. All contacts must be insulated. Before connecting to the network, the equipment must be connected to ground.
The twist is not easy to accurately bring to the electrode and press for the required time. For novice specialists, it will be easier to cook if you press the end of the connected wires and turn on the current by pressing a button.
Assembling the device yourself
Copper strand welding technology
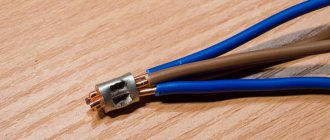
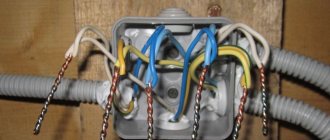
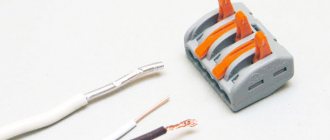
For welding, the wire is cleaned 5–7 cm from the end so as not to damage the insulation with welding equipment during operation. The cores are folded parallel, with ends in one direction. Twist, tightly clamp the twist with pliers. The electrode touches the tip of the twist. In 1–2 seconds a ball of homogeneous metal is formed. The welded twist is cooled and insulated with heat-shrink tubing or insulating tape.
Before work, you need to practice on cable scraps to select the operating current parameters. The carbon electrode is first heated for 5 seconds, only then sent for twisting. The holding time depends on the number of conductors and the diameter of the cores. Copper cannot be overheated until it darkens; the connection will be fragile and may crumble when laying the wire in a panel or junction box.
When choosing a welding machine designed for welding aluminum and copper wires, current parameters are taken into account. Select devices with minimal settings steps. Compact, lightweight inverters can be carried on the shoulder. The universal ones are good because they can be used for many types of welding work.
How to use a soldering iron
We place the soldering iron on a surface (floor, table, etc.), load it with tin, plug it into an outlet and wait until it heats up. When the soldering iron warms up, the tin in our bath will melt. The bath must be full
This is how I solder wires. The twists in distribution boxes should be with their tips down. In one hand there is a soldering iron, in the other a piece of rosin. I put the twist in the soldering iron for a couple of seconds, touch the heated twist with a piece of rosin and put the twist in the soldering iron again. 2-3 seconds and the twist is soldered.
Recently I soldered 16 junction boxes in 30 minutes. Each box contains 3-5 twists. This works out to be 2 minutes per box, along with rearranging the ladder and moving the soldering iron. Decide for yourself whether it’s quick or long.
How to solder microcircuits with a soldering iron
Separately, it is necessary to consider the process of soldering microcircuits, which are now found in modern televisions, computers, phones and other equipment. Before soldering microcircuits, you need to understand that it is important not just to solder or unsolder the element, but also to understand their purpose.
If conventional rod soldering irons are used for soldering wires and printed circuit boards with semiconductor elements, then when working with microcircuits, you should use hot-air devices or, as they are also called, hair dryers. Their main advantage is that soldering or desoldering of parts is carried out very quickly. To work with microcircuits, you will also need to prepare materials and tools. LTI flux is used as an antioxidant, and tweezers are used as an auxiliary tool.
The process of soldering microcircuits with a hot-air hair dryer is as follows:
- The soldered element can be a microprocessor, controller or microelements - resistors, diodes or capacitors. Before soldering or desoldering, it is necessary to flux the legs of the parts and places on the printed circuit board
- If it is necessary to desolder a microelement that is filled with special substances on top, then before desoldering, they must be removed. For this, acetone or special solvents are used.
- Once the part is cleaned, you can begin desoldering it. To do this, bring a soldering iron, which must be preheated. Places it at a distance of 2-3 cm from the part
- Using tweezers, pry up the part using little effort. As soon as the legs of the part melt, it will be disconnected from the board
- A similar method is used to attach the part to the board.
If necessary, solder is used when parts are soldered onto a new board. Solder should be applied first, and then begin soldering microelements. A detailed process of working with microcircuits with a soldering iron is presented in the video below.
How to assemble a machine for welding twists with your own hands
We recommend reading our other articles
- Is it worth buying moisture-resistant doors for a bathroom?
- Reliable water supply for your own home - it’s worth turning to professionals
- Watching a movie on the Internet is simple and convenient
- Quality and practicality of using luxury furniture when decorating your own home
So, how was the wire welding machine assembled?
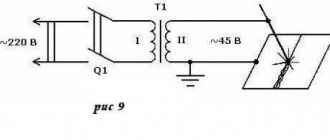
I disassembled the transformer from the microwave, sawing it with a grinder at the welding points. I will not describe this process in detail, because... this has been done many, many times, and you can at least find a video on YouTube.
BUT, please note that a microwave transformer is dangerous to life! Those. it should not be connected to the network for testing until the secondary winding is removed, because The voltage on it is about 2000V and it can kill a person from a distance!
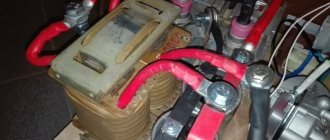
In general, the trans was cut, the secondary winding was thrown out, my own winding was wound with 6 mm square copper wire, I only got about 16 turns, either the trans was too small, or I’m not a very experienced winder, but oh well, after turning it on trans into the network, I received a voltage of 14 volts, which is normal for such welding (12-24v is needed). I then glued the trance core together with epoxy. At this point, work with the microwave transformer was completed.
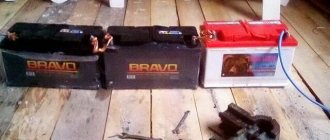
I installed it in the case, I also installed 2 16A circuit breakers there (after the first welding experience, in order to know the maximum current consumption, it turned out to be 11A).
Why didn’t you install a two-terminal device?
And I assembled the welding wires from what was at hand. My motto: Use whatever is lying around first, unless of course it ruins the design.