A hair dryer can be used for many different purposes, but one of its main purposes is to dry your hair. Hair dryers come in different designs and price ranges. It is clear that a good device cannot be cheap. And if it breaks, and even at the wrong time, this is a reason for disappointment. But don’t throw away your device and run to the store for a new device. Most problems can be fixed on your own. Any person can easily cope with this if he knows how to disassemble a hair dryer, its features, what breakdowns occur most often and how to fix them yourself.
Internal organization
Before you start disassembling the device, it would be a good idea to find out what’s inside and what it generally consists of. In principle, this is a fairly simple device and there are not so many basic elements in it. Any hair dryer consists of:
- Electrical cord;
- Switch/mode switch;
- Motor;
- Impellers;
- Heating element;
Now you can clearly see that the device is designed quite simply. Self-repair is quite possible. Below we'll take a closer look at the main reasons why a hair dryer isn't working and what you can do to fix them.
For this simple job you need to prepare in advance:
- Multimeter;
- Screwdriver with replaceable bits;
- Electric soldering iron.
Some tips
Repairing a professional device is quite complicated. Since the parts contained in it are equipped with special controls and various options, such as the Care button. In addition, the spiral is often made of a special alloy, which, when heated strongly, creates negative ions that have a beneficial effect on hair quality.
But such devices also have the same methodology:
- cable;
- switches and various buttons;
- cleaning from dust and dirt;
- inspection of the spiral and motor;
- capacitor and resistor control.
But before carrying out independent repair work, you need to familiarize yourself with the circuit diagram of the device. As you can see, repairing household hair dryers is not that difficult. But if there are any doubts, then you should not fix them yourself, but rather take them to a service center.
How to disassemble a hair dryer
Now the tools are prepared, the desire to repair the device has not disappeared, but how to disassemble this device without damaging the fragile plastic?
But disassembling the case can be a problem, since the manufacturer is confident in the reliable operation of its device and is not at all concerned about quickly and safely disassembling its device.
The case can simply be held on by latches. And if you know where they are located, you can simply squeeze them out to open the patient.
The outer parts of the housing can also be connected using screws. But not ordinary ones, but non-standard ones, which can have several types of contact edges on the head:
- Plus.
- Star.
- Fork.
- Triangle.
There may be just one self-tapping screw, covered with a decorative sticker, and then both parts of the body are connected with latches.
You must be very careful and careful not to accidentally break off the latches. And it's very easy to do. It is enough not to notice the self-tapping screw or screw hidden under a sticker or decorative plug.
There are also hair dryers in which the handle rotates to several positions. This is where you need to be extremely careful and remember the order in which all elements are disassembled. Otherwise, reassembly may not be possible.
If all the screws are unscrewed and the latches are released, both halves of the device will be in your hands. Now you can begin to “treat the patient.”
Inspection procedure
If the hair dryer is completely devoid of signs of life or functions poorly, then a visual inspection of the power supply circuit is required. It is best to carry out activities in the following order:
- Problems with the cable. It is necessary to begin the procedure for inspecting the power cable from the outlet. The problem may lie in the lack of an electrical network or some other malfunction. If there is voltage, then you need to inspect the cord of the electrical appliance; moreover, most often the breakdown occurs at the place where it enters the housing. Then they move to the fork. Before carrying out repair work, it is necessary to de-energize the device. If there are no kinks or burns, then you need to disassemble the hair dryer and check the connections of the wire with the internal parts. It often happens that the engine falls off. The situation can be corrected by regular sealing.
- Fan malfunction. In this case, the device simply stops spinning or does so very slowly. To identify the cause, you will also need to disassemble the unit, otherwise you will not be able to get to the part. At the very beginning, the impellers are inspected; they should not be dirty or dusty. Often the mechanism does not gain momentum precisely because of the hair that has wound around it during operation. Next, you need to disassemble the structure completely, thoroughly clean it and the filters on it. If the manipulations did not produce the desired effect and the device did not work, then you cannot fix the problem yourself; you will have to take the hair dryer to a service center.
- Engine breakdowns. The most unpleasant problems happen with the engine. You can understand that the reason lies therein by the characteristic smell of burnt wiring, as well as by the sparks that slip in the place where the motor is located. Fixing the problem will not be easy if you have no experience. First, you need to use a tester to identify the exact location of the malfunction, and only then, based on the problem, fix the breakdown or completely replace the element with a new one.
- Problems with the heating element. With such a malfunction, instead of a hot air flow, cold air flows from the household appliance. Most often this happens due to a burnt out or failed spiral. To repair a breakdown, you need to disassemble the device, the fan, in this way you can get to the required part and replace it. Repairs can be made, but, as a rule, after some time it will become unusable again.
Electrical circuit of a hair dryer
The simplest model can simply dry your hair with hot air.
More complex specimens have three airflow options:
- warm;
- hot;
- cold.
There is also a “more/less” fan speed control.
The heating element in a simple version is a nichrome spiral thread.
If you look at the diagram:
It is clearly seen that after the current passes through the spiral, which has its own resistance, it loses its strength. Now he needs to get to the electric motor. But first it is straightened through a diode bridge and only then goes to the electric motor.
The motor is connected to the impeller. It is she who supplies outside air to the hair dryer body. Passing through a hot spiral, the supplied air warms up and exits this hair dryer through a nozzle.
The entire device is controlled by an external switch, which allows you to:
- Turn on/off the device.
- Adjust the air flow speed.
- Select heating or fan mode.
Modern models are equipped with protection that will not supply voltage to the heating element if the motor is not turned on.
There may also be a thermostat - it prevents the coil from overheating too much and will turn off the power supply in time.
If there is an electrical circuit for the device, we will repair your home hair dryer together, but in order to understand what is wrong, we will turn to possible malfunctions.
Hair dryer design
Each hair dryer has a motor equipped with an impeller and a heating element. The functionality of the impeller is to suck in air from the back of the device. Air enters through the heater and is discharged hot from the front side. In addition, the hair dryer is equipped with a mode switch and elements that protect the heater from overheating.
1 - impeller; 2 - electric motor; 3 - heater; 4 — thermal protection; 5 — mode switch; 6 - power cable
The basis of the device fan is a commutator-type DC electric motor. For different models, its voltage can be 12, 18, 24 and 36 volts. Also for some models there is an electric motor operating with an alternating voltage of 220 volts. The engine is powered by the operation of a separate spiral. A constant voltage is provided by a diode bridge attached to the terminals of the electric motor.
The heater of the hair dryer, and specifically its frame, is made of plates made of non-flammable material that do not conduct current. There is a nichrome spiral on it. The number of its sections depends on how many operating modes the device is designed for.
The spiral is wound on a heat-resistant frame
A hot heater requires constant cooling due to the air flowing through the hair dryer. If overheated, the coil may burn out. Therefore, the design of the hair dryer takes into account independent shutdown when the critical temperature is reached, which is ensured by a thermostat. This is a pair of contacts closed to each other, placed on a bimetallic platform. The thermostat is located on the heater next to the outlet, so during operation it is constantly blown by escaping hot air. If the permissible heating is exceeded, the contacts on the bimetallic platform are disconnected and heating stops. After some time, the thermostat cools down and the circuit closes again.
Thermostat is highlighted in red circle
Some models are additionally equipped with a disposable thermal fuse for protection. It burns out if the optimal temperature is exceeded and then needs to be replaced.
If the thermal fuse blows when the optimum temperature is exceeded, it must be replaced
As a rule, almost all hair dryers have almost the same scheme:
- The heater consists of three spirals: H1, H2 and H3. The first spiral supplies power to the engine, the other two provide heating.
- In the “up” position, SW1 the circuit does not receive power. In position <<1>> the hair dryer operates at minimum power: power is supplied through the VD5 diode, which cuts off one half-wave of alternating voltage, only one heating coil H2 is turned on (not at full power), the motor rotates at low speeds.
- In the <<2>> position, the hair dryer operates at medium power: the VD5 diode is short-circuited, both half-waves of alternating voltage are supplied to the circuit, the H2 coil operates at full power, the motor rotates at rated speed.
- In position <<3>> the hair dryer operates at the maximum possible power, as the H3 coil is connected. When you press the <> button, heating coils H2, H3 are turned off, and the motor continues to operate.
- Diodes VD1-VD4 are a full-wave rectifier. Inductors L1, L2 and capacitors C2, C3 reduce the level of interference that inevitably arises during operation of a commutator motor. F1, F2 are thermal fuse and thermostat.
Standard diagram of a three-mode hair dryer
Possible faults
Despite its apparent simplicity, the hair dryer has some things to break:
- The power cord may have an internal break or short.
- The thermal fuse has failed.
- The resistor has burnt out.
- A breakdown of the diode bridge has occurred.
- The capacitor has burnt out.
- The mode switch itself is broken.
- The cold air switch is broken.
- The motor shaft is jammed due to hair being wrapped around it.
- The motor shaft bearing is jammed.
- The engine itself burned out.
- Broken nichrome spiral.
- Closing the heating coil.
- Carbon deposits on a spiral.
- The fan blade broke off.
This is the entire list of possible faults.
We will focus only on typical breakdowns that we can fix ourselves.
Characteristic signs of a faulty device:
- The device does not turn on;
- The device turns on, but the fan does not spin or gain speed;
- When running, the engine sparks and smells burnt;
- The hairdryer only blows cold air.
The air does not heat up.
If the air in the hair dryer stops heating, then the problem clearly lies in the spiral (Fig. 4) - the most vulnerable part.
hair dryer coil (Fig. 4)
It is easy to find out that the coil has failed - by the pungent smell of burning. Sometimes the ends of the coil diverge and the hair dryer begins to heat up. In order to eliminate this malfunction, it is enough:
- disassemble the device and connect the ends of the spiral with pliers;
- solder using a hand soldering iron;
- If you have an old non-working hair dryer, take a coil from it.
Details on how to solder using a soldering iron: https://howelektrik.ru/elektrooborudovanie/rukovodstvo-kak-pravilno-payat-payalnikom.html
Video: https://www.youtube.com/watch?v=q6hWmE3aytc
We begin inspection and repairs
As we have already said, it is quite possible to disassemble the device yourself if you are extremely careful and follow the procedure.
Device repair is also subject to its own logic, which we will discuss below.
Cord
If the hair dryer does not turn on, the most logical first step is to check if there is current in this outlet?
If everything is in order with the outlet, proceed to checking the power cord. Kinks and twists are common causes of power cord failure. When the hair dryer is disassembled, the contact points of the wire to the mode switches are also carefully inspected. To carry out this procedure you will need a tester.
If the wire is damaged, there is no point in repairing it. It is necessary to replace the entire wire and plug.
Attention! The most common place for a wire to break is at the entrance to the hair dryer body.
After such a technical inspection, we connect the device to the network and check the result of the work performed.
Switch and switch
We also check the power button itself. It should turn on smoothly and without jamming. There should be no traces of carbon deposits or melting on the switch contacts.
The three-position switch will be checked by turning on each mode separately. Before checking the switch, it is worth marking all the wires so as not to confuse the reverse connection locations.
Clean damaged areas with fine sandpaper and resolder with a soldering iron.
If the switch itself fails, the best option is to replace it with a new one. But if it is not possible to find a new switch, another option is to bypass it and connect the power wire bypassing the broken switch. Since there will no longer be a power button, the device will turn on immediately after connecting the device to the outlet.
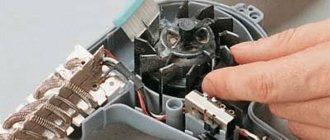
Fan
The fan is responsible for generating air flow. On the back side of the case there are special openings for air intake. The fan impeller is made of lightweight but durable plastic and rotates on a metal rod. This metal axis, on one side, is a continuation of the electric motor, and on the other hand, it rests on a special hole in the device body, which acts as a support sleeve. It is the impeller that takes in outside air through the holes in the hair dryer body and drives this flow towards the nozzle.
The most likely cause of reduced fan performance:
- clogged holes in the housing;
- hair is wrapped around the impeller shaft;
- One of the impeller blades broke off.
There are two options for solving the problem of a clogged air duct:
- If the device is equipped with a replaceable filter, you need to remove it and try to clean it thoroughly.
- If dust and debris have accumulated in the air intake cracks, everything can be successfully removed with a toothbrush.
If hair is wound around the fan shaft, it is better to remove the impeller and carefully remove the obstacle so that it rotates freely.
Attention! When cleaning the fan shaft, do not use excessive force to avoid damaging the shaft or impeller.
Spirals
Let us repeat once again, the material from which this heating element is made is nichrome. As soon as current is supplied to the nichrome spiral, it begins to heat up and makes the air passing through it hot. In normal mode, the hot air temperature is between 50–60 °C.
More advanced models have several such spirals that provide different air heating modes.
Typical manifestations of heating element failure:
- There may be a burning smell when the device is running;
- The air coming out of the nozzle is either too hot or completely cold.
These signs indicate that the heating element is faulty. All these breakdowns can be eliminated if the hair dryer is carefully disassembled, inspected and tried to detect the source of the malfunction.
If, after the device has been disassembled, you need to carefully inspect the heating element for integrity.
If burnt areas of the thread are found, it can either be soldered or two opposite ends twisted. Alternatively, crimp both ends of the spiral with a thin copper tube.
But we must warn you that, based on the experience of using nichrome spirals, such repairs can extend the life of the hair dryer, but not for long.
If possible, it is best to replace the burnt out spiral with a new one.
Important! You need to understand why the part failed in order to eliminate the cause of this problem in the future.
Engine
Electric motors on hair dryers can be in different versions - 12, 24, 36 volts.
A special additional electronic circuit reduces the voltage of 220 V. Thus, the level of danger of electric shock is reduced.
If the engine stops working, there are two main reasons for this malfunction:
- The supply wire is broken;
- The electric motor itself has failed.
We have already written above how to repair the supply cable with a plug, and the following symptoms indicate a malfunction of the electric motor:
- After turning on the engine, you can hear a slight crackling sound;
- The motor is unstable;
- There is a smell of burnt wiring;
- The fan does not rotate and a slight hum is heard.
If you suspect that the electric motor has burned out, the chances of repairing it yourself are zero. You can try to disassemble the motor, but where will you find the necessary part later?
Give it to a workshop? This is also not an option - repairing the device may turn out to be unprofitable. It’s easier and more profitable to buy a new hair dryer.
Chip
In professional hair dryers, operating modes are controlled using microcircuits. Everything is a little more complicated here. If you have skills in working with electrical circuits, you can try to find the cause of the problem yourself and fix it:
- The getinax substrate may crack and break the contact track. If a gap is found, it can be repaired using a soldering iron.
- A characteristic swelling can be seen on a faulty capacitor. When burned out, the resistor may darken. If a burnt part is detected, the fault is eliminated by replacing it with a new one.
Thermostat
This part protects the entire device from overheating.
If there is a thermal fuse, it can also cause poor operation of the coil. Its performance can also be checked with a multimeter. If it shows an open circuit, the fuse must be replaced - it cannot be repaired.
But there is an option to repair the device by excluding the temperature sensor from the general circuit, bypassing the wires past it. The device can be used for some time if it is not overloaded.
Causes of malfunction and ways to eliminate them
There are several types of faults that you can fix yourself at home. Let's take a closer look at them. Note! Any work must be carried out with the hairdryer unplugged.
Problem with the cable: no power is supplied and the hair dryer does not start
No voltage is supplied. Most likely the problem is with the power cable.
Before repairs, you need to carefully inspect the cable along its entire length, starting from the power plug and up to the housing, for visible damage. If they are present, you need to cut out the damaged area and solder the ends of the cable. Usually this turns out to be the only malfunction, and after fixing it, the hair dryer works again.
Carefully inspect the power cord and solder damaged areas.
The fan does not spin at all or does not pick up speed quickly enough
There may be a problem with the engine. Most often this occurs due to hair wrapped around the motor shaft. To remove them, you need to dismantle the impeller. The same must be done if you need to install a new motor shaft or lubricate it. Grab the base of the impeller with your fingers, pull it away from the hair dryer and remove it.
On my own behalf, I would like to add that the most convenient way to check an electric motor for your own safety is to dismantle it and then connect it to a power supply that is protected from a possible short circuit. If the motor does not rotate, check the windings and their integrity using a multimeter. If problems are found with the winding, it is better to simply install a new motor. Of course, you can try to rewind the old one yourself. But this is more likely to be suitable for your own entertainment, to improve fine motor skills.
A multimeter will help you identify problems with the winding
Video: removing the fan from the hair dryer motor
Engine malfunction: smell of burning wiring, sparks slipping
Sometimes when using a hair dryer it smells like something is burning. In such cases, even the blown air may be too hot. The simplest reason is that the motor shaft is wrapped in hair. They need to be removed urgently and carefully. They can melt and damage the spiral, which will lead to engine failure. The same hair, when burned, can cause sparks.
A burning smell or sparks from a hair dryer may indicate engine problems.
By the way, if the hair dryer sparks quite strongly, then it is better to replace the motor with a new one. You can disassemble the hair dryer and carefully wipe its parts with alcohol. After this, be sure to wait until the device is completely dry before turning it on again. This method helped me, but not for long. In the end, it turned out to be easier to install a new engine.
Heating element malfunction: hair dryer blows cold air rather than hot air
In this case, most likely, the coil in the hair dryer is burnt out. Usually its break can be seen with the naked eye, without using a multimeter. There are several ways to repair a spiral.
- Take a thin tube made of copper or brass, place the ends of the spiral into it on both sides, and crimp with pliers.
- The spiral is held on a heat-resistant frame consisting of plates that do not conduct current. In the plate you need to use a pointed object to make a hole with a diameter of 2–3 mm, and install a short bolt and washer of suitable size into it. Place the ends of the spiral under this washer and tighten well.
- The torn ends can also be thrown over each other or twisted together. This method is not as reliable as the previous ones. This is due to the fact that the place on the spiral, repaired by casting or twisting, often overheats greatly due to increased resistance and usually burns out quickly.
- If you have an old donor hair dryer whose coil is in working order, disassemble it and replace the part.
- The finished part can be purchased in specialized electronics stores or ordered in an online store. You can also wind the spiral yourself from nichrome thread. Order the material on a popular online platform.
Video: how to repair a burnt hair dryer coil
Little tricks
There are standard requirements for the safe operation of an electric hair dryer, which can push the boundaries of trouble-free operation of the device, without contacting service centers:
- There is no need to wrap the electrical wire around the handle of the device and generally try to avoid twists and loops on the wire;
- Use only those attachments that were supplied with the device;
- Do not use the device in rooms with high humidity to prevent water from entering the hair dryer body;
- If the distance to the outlet is too large, only factory extension cords can be used;
- It would be a good idea to protect the air intake area with a fine-mesh filter to prevent dust particles and hair from getting inside the device;
- Do not carry the hair dryer, holding it suspended by holding it with your hand by the cord;
- If even minor interruptions occur, further operation of the device is prohibited;
- Avoid excessive overheating of the product;
- After work, you need to let the device cool down and only then put it away for storage;
- The electric hair dryer must be stored in a dry and ventilated area;
- Follow basic safety rules when repairing electrical appliances;
- Repairing a hair dryer requires electrical skills. If they are not there, it is better to entrust the work to professionals in specialized workshops.
Let us repeat once again - independent repairs are possible if all work is carried out especially carefully. This is always true for electrical appliances.
How the device works
Modern curling irons on the market are distinguished by a variety of shapes and a range of functions. But, regardless of the brand or model, they are all similar in design.
The basis of the device is a round body with a heating element inside and a triangular flexible leg-stand. A power cord with a plug is connected to the handle. A metal clamp is hinged.
Unfortunately, the simple design of the styler does not guarantee its reliability and trouble-free operation. Even the cheapest models of the most popular brands fail.
If you repair your hair curling iron yourself, you can save money and time that you would spend on visiting a specialist. The main thing is to correctly disassemble the device and determine the cause of the malfunction.
Overheat protection system
The hair dryer circuit was created with the aim of organizing quick drying. To do this, some models can produce temperatures up to 60 degrees. The device is equipped with a switch. It helps regulate speed and heat. However, all internal parts must be reliably protected from overheating. If an emergency occurs, the power supply must be completely stopped. Thanks to this, it will be possible to avoid an emergency situation that could completely destroy the contents.
Important! The hair dryer was named after the warm mountain air, which with its gusts dried out all the adjacent lowland areas. However, among locals it is better known as föhn.
Additionally, you should find out what the device is made of and what is included in its composition to increase sensitivity:
- The thermostat allows you to organize contact between two plates that are made of metal. Each element must have a different degree of expansion. Thanks to this, it will be possible to fix the critical temperature and turn off the current supply. The engine stops working, and at this time the spare parts cool down and do not deteriorate further.
- The hair dryer also includes a special thermal fuse. With its help, it is possible to avoid overheating in all cases. It only takes a few seconds for the mechanism to operate. The element is fusible, so it quickly turns off the electricity supply. However, in some models, after a critical situation, further work becomes possible only after replacing the spare part.
The electric hair dryer has a simple system. There are only two main components that power the technology. If necessary, each person will be able to understand the operating features. Repairing a hair dryer with your own hands is carried out only if you have some experience in this field.
You should first read the instructions, which are guaranteed to be included in the kit. It contains complete information about the circuit used by the manufacturer. Each product has a number of features that should not be ignored.
Briefly about the design
Before you want to repair a hair dryer at home, you need to at least become familiar with its structure. So, a modern technology model may consist of the following elements:
- electrical cord for connecting to an outlet;
- switch or speed switch;
- fan;
- heating element (spiral);
- engine.
As you can see, the design of the device is not at all complicated, so if you want to repair the hair dryer yourself, there should not be any difficulties with the repair. Next, we will look at all the main breakdowns that can occur, and under each fault we will tell you how to fix it. From the tools you will need a multimeter, a screwdriver (or an asterisk) and, possibly, a soldering iron.
How to repair a tool: diagram
First, a diagnosis of a construction hair dryer is carried out. This is done visually and experimentally. For direct DIY repairs, use a screwdriver and a soldering iron. To replace the required part, you must purchase it in advance.
- The spiral is replaced taking into account the resistance value. The disconnected conductors are soldered back in place.
- To replace a capacitor, the part is selected taking into account the power characteristics and rated voltage.
- The external wire is changed by disassembling the hair dryer (its body). First, disconnect the damaged wire and check the serviceability of the others. When the new wire is connected, check the serviceability of all wires and the device itself. Only then is the instrument body assembled and connected to the electrical network.
Repair diagram for a hair dryer:
Design and operating features
Inverter welding is used at home and in various enterprises. It ensures stable burning of the welding arc at high-frequency current. The device is designed as a powerful switching power supply (UPS), the operation of which is based on the principles of:
- Converting alternating supply (mains) U into constant.
- Conversion of direct to alternating high-frequency current.
- Current rectification while maintaining frequency.
If you follow these design principles, then there is a significant reduction in the welder by several hundred or thousand times. In addition, such a device allows you to equip the device with additional cooling.
To carry out high-quality repairs of a welding inverter, you need to know the structure and principle of operation. Thanks to understanding the work, it is possible to correctly diagnose, find out the cause of the malfunction and eliminate it yourself. An inverter-type welding machine consists of main components (Figure 1):
- Rectifier.
- Inverter.
- Transformer.
- High frequency rectifier.
- Control circuit (electronic regulator).
Figure 1 - Block diagram of a welding inverter.
The rectifier consists of a semiconductor rectifier bridge and a filter made on a capacitor. The diode bridge rectifies the alternating current of the industrial supply network. When alternating current passes through a diode, current flows in one direction. As a result, the current becomes constant, but it is dominated by significant ripples. Current with such parameters is not suitable for powering the inverter, since it only operates on direct current. To smooth out ripples, a large capacitance capacitor (2200.5000 µF) is used.
After conversion U, the inverter is powered. The inverter is a set of radio elements for generating the necessary variable U for a high-frequency pulse transformer. The main elements are powerful key transistors and a microcircuit for receiving commands from the inverter control circuit, as well as for the correct operation of the latter. Transistors switch at a high frequency, which depends on the current model of the welder. It can range from 35 to 95 kHz. The transistors are connected to a step-down pulse transformer.
The pulse transformer converts the incoming U received at the inverter output to low. A high-frequency rectifier is connected to the secondary winding of the transformer, which converts high-frequency alternating current into direct current. With this conversion, the frequency characteristics are preserved. Welding efficiency increases when using high frequency current.
The electronic regulator is used to monitor the operation of the device, diagnose and issue commands to the inverter. In addition, it allows you to change the welding current.
Thanks to this design, relatively mobile inverter welders have excellent characteristics:
- Primary power supply (mains U and current): 157.275 V and 20.30 A.
- Parameters U idle: 70.85 V.
- U when arcing: 22.35 V.
- Welding current setting range: 20.300 A.
- Load time at maximum I welding: 5.10 min.
- Electrode types: “1”, “2”, “3”, “4”, “5”, “6”.
- Average weight value: 5.7 kg.