Every year, self-supporting insulated wire (SIP) is becoming increasingly used in the construction of power and lighting overhead electrical lines. With the advent of this material came a completely new technology for the construction, repair and operation of electrical networks. Overhead power lines made with SIP wire are usually denoted by the abbreviation “VLI”.
The actual installation process carried out during the construction of VLI is preceded by the design stage. The VLI project includes complete information about the location of the route of the future line, the brand of wire used, the number and type of supports, and the specifics of construction and installation work.
In order to install SIP wires on supports, building facades, perform branches, connections and other operations, the necessary set of special fittings and tools has been designed. The project specification must contain a comprehensive list of materials, which lists all the necessary fittings for the installation of SIP.
SIP cable fastenings for various surfaces
Power transmission line wires are the simplest and most inexpensive way to transmit electricity over any distance.
In electrical networks up to 1000 V, power lines are located along the streets of large and small settlements. Insulators with the cheapest aluminum wires are mounted on the supports. And from them branches are already being made into houses. For such branches from main wires, self-supporting wires are widely used.
What are SIPs for?
Self-supporting wires with insulated conductors are abbreviated as SIP, that is, Self-Supporting Insulated Wire. It is a twisted pair and is resistant to longitudinal loads.
Before the advent of this type of wire, compensation of the longitudinal load was assigned to the cable. It served as a support for an insulated wire attached along this cable.
Installation this way took more time and was technically more difficult compared to installing new wires.
Actually, this is the reason they were invented. Now they are used everywhere where, for one reason or another, it is impossible to use cheaper bare wires. Therefore, they are located near buildings and surrounded by trees.
If the wires were exposed, trees, especially in wet, windy weather, could touch them and cause a short circuit. To install SIP, specialized fittings are used.
Its elements are adapted for placement on the walls of houses and supports (pillars).
We make the optimal choice of elements for fastening
The models shown in the images are only a part of what is produced in the world for mounting self-supporting IP.
For this reason, sellers may have in stock products that are actually intended for fastening these wires, but are not optimal for a particular buyer.
When choosing mounting elements, you must take into account the purpose for which the SIP is used. For example, power wires can get hot because they allow conductor temperatures of up to 90 degrees Celsius.
For this reason, an appropriate selection of elements for installation is also necessary.
Facade mounting brackets for such wires should provide a greater distance to the wall for better cooling of the wire.
Experienced electricians who have completed a large number of self-supporting IP installations recommend the widespread brands of SIP with 16 and 25 sq.m. cores. mm secure with a clamp (further in the image).
Clamp for SIP Clamp for SIP This clamp is not recommended for use for SIP-2
There are two reasons for this. Chinese clamps of this model contain a weak bracket that breaks, and as a result the wire can come off.
Another drawback of this model, even if it is not made in China but from a well-known brand, is that the wire cores after the clamp are located too close to the bracket.
Therefore, it is inconvenient to carry out installation work. Especially with facade mounting.
Clamp bracket and where it breaks (fingers touch them) Anchor bracket model recommended for general use The image above shows an inexpensive and convenient anchor bracket. This is fair because you only need one tape to mount it on a pole. It can also be mounted on the wall of a house with just one hardware fastener.
The strength of such connections is sufficient for most situations involving the installation of self-supporting IPs both on poles and on walls.
Therefore, it makes no sense to use more massive, expensive and difficult to install bracket models.
Composition of reinforcement
Since supports for self-supporting IPs come in different designs, part of the reinforcement for mounting to these supports is also selected according to it. The reinforcement and the SIP itself together form a chain. It starts at the support and ends at the wall of the house. The first link is the brackets, which are located on wooden, steel and reinforced concrete pillars.
The bracket holds the next link - the anchor clamp. Then intermediate supporting clamps follow from the reinforcement elements. And this reinforcing chain ends with fastening on the facade of the building (wall). This is the so-called facade fastening.
Bracket Varieties of brackets for self-supporting IP Anchor clamp for SIP Another anchor clamp Another anchor clamp Another anchor clamp Another anchor clamp Another anchor clamp for SIP Anchor clamp Types of anchor clamps for SIP Intermediate clamps Varieties of intermediate clamps for self-supporting IP Varieties of façade fastenings for SIP
Important installation details
- You cannot use one anchor bracket for two self-supporting IP clamps. The force from the wire should be applied most coaxially to the bracket. The force component directed to the side will have a destructive effect on the bracket. One SIP wire – one bracket. This rule cannot be broken.
- If it is impossible to avoid the lateral force in the bracket, it is recommended to use a special model of it with attachment at three or four points located at the corners of the base of an imaginary pyramid, at the top of which is the point of contact between the bracket and the clamp.
An example of a bracket model recommended for self-supporting IP, attached at an angle to it
- For mounting tape on poles, it is recommended to use brackets that have large limiting projections to hold it.
Over time, play appears, which is caused by stretching of the tape. If the protrusions are small, the bracket may come off the mounting location. - On straight sections it is recommended to use support clamps. They are generally cheaper because their design is simpler than anchor ones. But on straight sections this is enough.
- To mount the anchor clamp on the wall of the house, select a place protected from falling snow and icicles.
- Installation of SIP is done taking into account the distances that must be observed.
If the wall of the house on which the anchor bracket is attached is more than 25 meters away from the pillar, self-supporting IP requires additional intermediate support. - The distance from the ground surface to the bracket is 2.5 meters or more, and on the street to the wire between the supports - 5–6 m.
Distances that must be observed when connecting self-supporting IP wires
- Distances to windows, balconies and roofs are also standardized. They are clearly shown in the image below.
Distances that must be observed for SIP if the wire is laid along the wall of a residential building.
There must be at least 6 cm from the wire to it
The images above do not show another distance that must be observed. If the wire is located at an angle to the wall, and the bracket is attached to it closer than 10 centimeters to the corner of the house, over time, especially if the wall is brick, it will crack and the bracket will fall out. It is recommended to mount the bracket to any wall using self-tapping screws with a hex head. The diameter of the screw is selected no less than for the mounting hole in the bracket.
- Gas and water pipelines must also remain at a distance from self-supporting IP pipes laid along the wall by 0.4 and 0.1 meters, respectively.
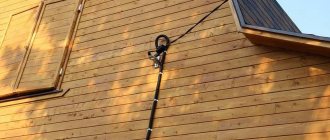
- If the wall of the house is wooden, the wire is laid along the wall in a metal corrugation. But at the same time, the temperature of the cores must be predicted and, if it is higher than normal, it is necessary to use SIP with an increased cross-section of the cores.
Self-supporting IP on a concrete rectangular pole SIP on a concrete round pole Self-supporting IP on a wooden support Mounting SIP (3 phases and zero) on a brick wall Mounting self-supporting IP on a wooden wall
Types of clamps for SIP
Most of the clamps allow you to simultaneously fasten two SIP wires. You just need to use an additional clamp. Saving materials and free space will make you very happy.
Just don't try to use regular cable ties for this. SIP clamps are thicker, wider and much stronger. They have a double reinforced clasp.
And most importantly, the plastic from which they are made is UV resistant. Such a clamp will hang on the street for many years without losing its qualities.
Ensto clamp IEK clamp Sicam clamp Niled
Clamp for SIP Ensto PER 15, PER 26, PER 14.1
Clamp for SIP IEK XC
Sicam CCD tension strap
Niled clamps
Some, in pursuit of savings, prefer to buy similar consumables for pipes instead of standard SIP facade fastenings.
This cannot be done, since these products, again, are not designed for outdoor installation. After a year of operation (winter-summer), the rubber seals will dry out and the edges of such fasteners will tear off the insulation. In addition, there can no longer be any question of any safe distance from the walls.
Material
Before installation, you must purchase all the material, namely:
- ⚡SIP 4*16 or SIP 2*16 (depending on the input 220V or 380V)
- ⚡Bandage tape SOT37 ~ 2.5-3m (for attaching the hook to the support)
- ⚡SOT36 clamp – 2 pcs (tape fixation)
- ⚡Bandage hook SOT39 or SOT29 – 1 piece
- ⚡Wall hook SOT28 or SOT76 – 1 piece and mounting
- anchor bolts to it
- ⚡Anchor clamp SO80 or SO158 – 2 pcs
- ⚡Puncture clamps SLIP12.1 – 8 pcs (for 380V input) and 4 pcs (for 220V input)
The brands of materials from the manufacturer ENSTO are indicated here; in your case, the specification (SLIP, SO, SOT, etc.) may not be the same, but the names themselves (piercing clamp, anchor clamp, clamp) should be the same.
Before starting work, it will be necessary to take certain measurements. The distance from the support to the facade of the house where the wall hook will be located should be no more than 25 m. Otherwise, you will have to install an additional support support.
Choose SIP depending on what input you will be installing into the house - 220V or 380V. When purchasing SIP, it is better to make some reserve in footage for all sorts of unforeseen situations. Basically, the 4*16 SIP brand is used for entering the house.
Tingle clamps will be required to connect to the main power line. Their choice is very large, there are even some that can be used without removing the voltage from the power lines. The shear head of the bolt is isolated from the contacts. First of all, pay attention to the cross-section of the wire and select the brand of clamp for it.
It is important to make one note.
If the main overhead line to your house is made of bare, uninsulated wires, then the clamps must be appropriate. One side for contacts has a smooth surface, the other has teeth. When there is also an SIP hanging on the main power line, in this case, choose clamps with piercing teeth on both sides of the contact substrate.
clamp for connecting to bare wires
Two hooks are installed on the support and facade of the house. It is between them that the SIP is stretched. Its fixation is carried out with anchor tension clamps.
Installation of SIP wire: fastening, connecting the house to the electrical network
Insulated wires have long replaced traditional ones. They are connected to the building and laid out on supports. This line is called VLI. Often a self-supporting insulated wire is called a cable, which in principle is also true.
The use of insulated wires is convenient because it reduces the risk of electric shock to a person if the line breaks, and also eliminates the possibility of electricity theft.
The SIP wire is installed in accordance with the instructions and technological maps.
Rules and procedure for the construction of VLI
The construction of overhead lines is carried out by a specially trained team of electricians. Installation begins with preparatory work, including clearing the route from vegetation and other obstacles.
Before rolling out the wires, all supports must be installed, passages through engineering structures must be protected, and, of course, drums with the wire itself must be delivered.
If VLI is supposed to supply electricity to the house, anchors must be installed on the building in advance for hanging SIP wires.
Installation of the drum and auxiliary mechanisms
Wire rolling begins by installing the drum. It is placed near the support where the final adjustment of the booms will be made. Moreover, the optimal distance between them is considered equal to the height of the support itself.
For manual rolling of wires, a special leader rope is used. This is a kind of synthetic cable with a length of 30 to 50 m and a diameter of 10 mm. The rolling out of the rope is carried out simultaneously with the fastening of the rollers and intermediate hangers on the supports. As the rope rises, the intermediate suspension is fixed to the pole with a special metal tape. If the support is equipped with a hole, the suspension can be secured using a bolted connection.
The intermediate suspension bracket is equipped with a hole. The rolling roller is attached here. The number of hangers and rollers depends on the number of complex pillars, intermediate, corner and anchor supports. It is important to maintain the correct position of the rollers so that the axis of the cable being laid is at the level of the recess of the support clamp.
The videos have some differences.
- The RT 5 mechanism is installed on complex and anchor poles. They are secured with a belt;
- The RT 2 mechanism is designed for intermediate supports. They are attached to the hole in the intermediate suspension bracket.
After completing the installation of all mechanisms, the leader cable is connected to the end of the SIP wire. To connect the cable and cable together, use metal stockings with a swivel. Moreover, stockings differ in purpose.
At the same time, a mechanism is used that is put on the cable itself and the neutral core, and the entire harness is crimped with a synthetic stocking. A double bandage made of electrical tape helps to increase the reliability of the connection. The main stocking is equipped with a weight ring.
The leader rope is attached to it.
Manually rolling out wire between supports
Manual rolling of SIP wires is carried out in sections limited to 100 m or between spans up to 50 m. The team performs the work in the following order:
- When everything is prepared for work, the team is divided into 3 units. The first and second links each include one electrician. Their duty is to monitor the operation of the unwinding mechanism motor, the uniform winding of the rope onto the reel and the smooth rotation of the wire drum. The third link monitors the passage of the connecting node of the rope with the cable along the unrolling rollers.
- The rolling continues until the connecting knot passes through all the posts and approaches the reel itself with a fully wound leader rope. At this time, a command to stop the engine is given. The cable is fixed to the anchor post with a nylon cable, after which the connecting unit is disconnected. A free piece of cable is left at the end supports for subsequent connections.
When rolling out the SIP wire, it is important to monitor its passage on the corner supports and prevent the sagging cable from rubbing against the ground.
Fixation and tension of SIP
SIP fastening is first carried out on the anchor supports of the span. Here the cable is fixed using anchor clamps. Next, the SIP is fixed to the intermediate posts. The tension of the neutral core is carried out according to the installation tables, but not more than 5% of the force of the design values. The sag of the arrows is determined visually, after which they are left to sag a little.
The next shift crew begins adjusting the booms:
- On the first anchor support, the clamp is installed on the zero core. A plastic clamp is placed near the clamp on the entire wire harness. It will not allow the tourniquet to unwind.
- The next clamp is placed on the final support bracket. A dynamometer is fixed to the load-bearing core away from the pole with a clamp. The cable of a hand winch, which is pre-attached to the first pillar of the span, is attached to it.
- While pulling the SIP wire towards you with a winch, look at the force on the dynamometer. When the desired value is reached, the zero core is fixed with a clamp on the bracket of the final support.
The wire tension is completed, all that remains is to tighten all the wires with a clamp and unhook the winch.
Independently connecting your home with SIP wires to the line
You can connect the SIP to the house yourself, but you will have to entrust its connection to the line to electricians. However, in order to correctly install the cable, you need to familiarize yourself with the technical standards, which can be obtained from the relevant organization. Making such demands is justified by the safety of the entire line, and not just your home.
Basic Installation Requirements
To install a SIP cable from the line to your home, you need to know the basic requirements:
- the minimum height of the supply cable above the ground is 2.75 m;
- a similar distance must be maintained from windows, doors and loggias.
Typically, the consumer connection is made using a SIP 4 cable without a supporting core. The cross-section of such a wire is 16 mm2, which meets the requirements of the PUE. Conductors of a smaller cross-section may not withstand the load, so such cables are prohibited from being used for entry into the house.
Before you start pulling the cable into the house with your own hands, you need to draw an exact diagram of its passage from the pole to the building. This will help you take measurements to purchase the wire.
Moreover, you need to buy SIP with a small margin, taking into account measurement errors. It is important to pay attention to the number of cable cores. If the connection is single-phase, it is enough to connect 2 wires to the house, that is, a phase and a zero.
For a three-phase connection you will need 4 wires.
The house input will have to be connected to the main line. To do this, you will need to install a special connector on each core. It is best to connect SIPs with piercing clamps. They will eliminate the need for stripping cable ends and ensure a tight connection.
When laying an overhead connection line from the pole to the house with your own hands, you must take into account the PUE standards. The rules clearly state that the maximum distance from the consumer input to the support is 25 m, otherwise an intermediate pole will have to be installed.
Which wire is better to introduce into the house?
A dispute often arises that SIP is not suitable for entry into a building. Why? After all, it is isolated and also resistant to many negative factors. In fact, this is true, and it can be introduced inside the house.
However, SIP is very rigid and does not bend well, which increases the complexity of installation. It is recommended to lay a cable with copper conductors inside the building, since this metal is the best conductor of electricity.
Many electricians recommend making internal input using a VVGng cable.
To make an entrance to the house, a distribution panel is installed on the facade. A self-supporting insulated wire is connected to it, inside it is connected to automatic circuit breakers and an electric meter, and from them a copper cable is brought out into the house.
Selection of section and grade
When choosing a brand of SIP, you should take into account the following factors:
- purpose of the overhead line;
- operating conditions, installation location, safety requirements;
- the required number of phases;
- total estimated power.
Design features of different brands of SIP:
- SIP-1: bare steel core on a zero load-bearing core;
- SIP-2: the zero of the load-bearing core is covered with insulating material;
- SIP-3: each core has a reinforced core enclosed in an insulating layer;
- SIP-4: the cores are insulated, but the cores are not used;
- SIP-5: there are no cores, and light-stabilized polyethylene is used as insulation. The cable is marked “NG”, which indicates its non-flammability. SIP-5 can be used even inside buildings, although to a greater extent this SIP, like any other, is intended for external lines.
The easiest way is to select the SIP section. The fact is that the minimum cross-section of such a cable cannot be less than 16 square millimeters. This is more than enough to provide electricity to an average-sized private home.
If you need to insert a cable into a large private house or apartment building, you will have to use special reference tables to calculate the required cross-section.
The most common SIP is two-wire (zero and phase) or four-wire (two additional phases). Cables with five cores and an additional PE protective conductor are very rarely used.
Installation of SIP cable from pole to house
Correct installation of a SIP cable begins with fixing and connecting it to a support, having previously measured the distance from the nearest support to the connected object. The fact is that the distance from the support to the point of attachment on the building should not exceed 25 meters, otherwise it is necessary to install an additional electric pole.
It is also important to choose the correct cross-section of the SIP electrical cable. The most common type of self-supporting wire used in residential construction is SIP 4×16.
Supply from pole to house
The next operation is to supply the cable to the house, tension it, fix it and connect it. To secure the SIP wire on the facade of the building, use a similar bracket, but fix it with anchor bolts. According to SNiP, the height of the wire fixation on the facade of a residential building should be 2.75 meters, therefore, if this parameter does not correspond to the design features of the house, then the entry must be made through its roof. Anchors are selected based on the material of the load-bearing walls to which the bracket and wire will be attached. To fix the wire on the bracket, use an anchor clamp for the SIP wire, the same as was used on the support.
It is important to know that the input cable from the power line to the connection point (electrical panel) should not have breaks or connections, but should be solid.
An important step is also the correct tension of the cable, since excessive sagging negatively affects the durability and reliability of the mounted wire.
SIP wire tension
The tension of the self-supporting insulated wire is carried out using a manual hoist (winch), which has a special gripping mechanism for the supporting core or the entire SIP cable. When carrying out this work, the main thing is not to overdo it and clearly calculate the applied force, best of all using a dynamometer. When working on a project, the cable tension will be indicated in it. But if there is no such documentation, then you can use a special installation table. Such a table will indicate the value of the tension force for various ambient temperature conditions and the sag length of the boom.
It is very important, however, to use tables and measure the tension of the wire, and not to carry out installation “by eye”. Since in winter, under unfavorable conditions (snowfall, ice), the cable will not break, and moisture will not flow down the cable into the building and will not get into the electrical panel.
Methods for connecting wires to a support
To connect the SIP wire to current-carrying power lines on a support, several options are used, depending on the power line cable.
For insulated cable lines, special piercing clamps are most often used, which are available in a wide range for various sections and types of insulation. Some clamps can be used without removing the voltage from the line: in their design, the stripping head is made in insulation, which allows you to safely connect the self-supporting insulated insulated insulated wire to the power line. At the same time, the design of the piercing clamps does not allow them to be reused, so everything must be calculated correctly, without any room for error.
But for bare conductors, special clamps are used that have contacts with a smooth surface and do not have piercing elements.
When connecting a house to a power line, it is better to coordinate all actions with the energy supply organization. Such organizations may have their own requirements for connections and materials used.
Some “masters” lower the SIP along the pole and lay it underground to the house. But it is important to understand that a self-supporting SIP cable is not intended for such installation, since it does not have special protection from harmful influences and armor from mechanical damage, as a result of which it is intended only for laying in the air.
Connection to the machine and meter
Entry into the house and laying of the cable to the electrical panel is carried out in special metal cable channels, corrugations or pipes. Typically, an ordinary steel water pipe is used for this. At the same time, it is important that unprotected electrical wiring conductors are inaccessible for touching (including accidental) in places where people are often present or pass by. Also, according to clause 2.1.79 of the PUE, it is recommended to install the cable in the pipe so that water does not accumulate in the passage and does not penetrate into the building, especially to electrical installations.
In the electrical panel, the cable is connected to the input switch, with preliminary crimping of the cores with pin lugs made of an aluminum and copper alloy, and from the switch, to the input circuit breaker and then to other protective devices (RCDs, differential circuit breakers and line circuit breakers).
Sometimes branches from the VVGng copper cable are connected to the SIP cable, using the same piercing clamps, and it is already connected to the switch in the electrical panel or directly to the input circuit breaker (depending on the cross-section of the cable).
An alternative to open cable routing along the façade
Reasons why you should not install SIP or other wires openly on the wall:
- The house is covered with fire-hazardous insulation, decorative upholstery: siding, wooden paneling.
- There is a danger of mechanical impact on the cable: opening shutters, tree branches, etc.
- Just for aesthetic reasons: I don’t want the cable to be laid along the facade at a distance of 6 cm from the wall.
- According to the characteristics, the cable used is not intended for open installation on external walls of buildings.
In this case, a closed cable duct or metal hose is used. It can be fixed directly to the wall. If the surface is covered with a flammable material, the hose should not support combustion.
There are no special requirements; the installation principle is similar to the SIP cable. The only mandatory condition is that when inserting the hose (box) into switching or distribution panels, protection is provided against moisture entering the internal cavity.
Advantages and disadvantages of using SIP
These wires allow:
- ensure the required electrical safety class;
- increase network reliability during operation;
- reduce the cost of maintaining the electrical network (up to 80%);
- reduce installation time and reduce labor costs;
- place electrical lines on the walls of buildings;
- reduce losses during electricity transmission (due to low resistance);
- connect objects without disconnecting the main supply line;
- lay and connect lines on your own.
Disadvantages of SIP:
- cost 20-25% more than conventional wires without insulation;
- many energy suppliers are not ready to use SIP (outdated equipment and no tools for installation);
- Only overhead power lines can be laid.
How to run a cable along the facade of a building and what requirements need to be taken into account
When connecting a cottage, country house or garage to the power supply network, as well as when installing satellite antennas, air conditioning units, light signs, CCTV cameras, you have to face the problem of how to run the cable along the facade and walls of the building, while fulfilling the requirements of the PUE and other standards.
This type of electrical wiring requires a serious approach to solving the issue, since violations of installation rules can cause unstable operation of the connected electrical equipment and create the preconditions for electric shock, as well as fire. According to the PUE, open and closed methods of laying wiring along the facade of a residential building are allowed. You need to choose an acceptable option depending on the environmental conditions, the brand of cable and the material of the wall on which the cable line will be attached.
The walls can be made of brick, sandstone, various types of concrete, wood, and also finished with siding. For all types of listed materials, there are corresponding standards for electrical installation work. Next, we will try to explain in as much detail as possible how the cable should be laid along the facade of the building.
Siding facade
This is the most difficult installation method, taking into account the fact that siding is a flammable material, and also that due to its strength properties it is not intended for attaching brackets for fixing cable lines.
Special hassles can be avoided if the necessary cable lines are laid along the facade and walls before finishing work begins, or if the siding slabs are partially dismantled.
However, often such options are considered impracticable, so the homeowner has to decide how to install electrical wiring through the siding without violating regulatory requirements.
First of all, the question arises of what and how to fasten the line. The façade fastening product type SF 10 is ideal for brick and concrete.
SF 10 provides reliable fixation of wire harnesses with a diameter of up to 25 mm, at a distance of 10 cm from the surface. If the siding is laid on wood, it is better to use a half-ring screw or a hook screw as fasteners.
When laying a SIP cable with a flammable sheath along the facade, it is prohibited to place it close to the siding; it must be located at a distance of at least 6 cm from the wall, even if it is inserted into a corrugated pipe or metal hose. This type of fastener meets these fastening conditions.
Brick, concrete or stone wall
You can lay a cable without a corrugation or tray only if its insulation is resistant to ultraviolet radiation. But in practice, in most cases, SIP is used, which is intended for installation outdoors and is resistant to ultraviolet radiation, or VVGng-LS, the insulation of which is not resistant to ultraviolet radiation.
In the first case, you can lay the cable along the facade of the building, provided that the distance from the cable to the wall is no more than 6 cm (PUE chapter 2.4, clause 2.4.60).
In the second case, the cable is laid in a metal electrical box. If there is no danger of mechanical damage, you can lay the cable in HDPE corrugation (black), but UV-resistant PVC corrugation is also available on sale (check this point, since regular PVC cracks in the sun). You can also use a metal hose. Cable cleats and corrugated fastening clips are attached to the wall with dowel nails or nail dowels using a construction gun.
The cable fastening pitch in horizontal sections should not exceed 350 mm, in vertical sections - 500, in bending areas - 100. The cable entry into the building must be placed in a pipe or a piece of metal electrical box (chapter 2.1. PUE clause 2.1.58). We talked about how to lay a cable through a wall in a separate article.
The ideal way to install cable lines along the facade would be to lay them in pre-punched grooves and then cover them with plaster, but due to the high labor intensity, this is rarely used in practice.
Wooden wall
Due to the high degree of flammability of wood, the standards for laying on a wooden wall are much stricter than for brick or concrete. In this case, the following conditions must be strictly met:
- The cable line must be laid in a non-flammable sheath.
- The entrance to the building through the wall must be equipped with a metal sleeve made from a thick-walled pipe.
As a rule, a branch from the power supply network is made with a self-supporting insulated SIP wire with aluminum conductors. The use of aluminum wiring with a flammable sheath for laying on a wooden facade is prohibited, therefore, before attaching the line to a wooden wall, you must connect to a cable with copper conductors using special sealed clamps. When laying a SIP cable, it is prohibited to place it close to the siding; it must be located at a distance of at least 6 cm from the wall, even if the wire is inserted into a corrugated pipe or metal hose.
The wiring can be laid in a metal or plastic cable channel. If there is no threat of mechanical damage, the use of corrugated PVC pipe or metal hose is allowed. When using corrugation, it is very important that the purchased product is equipped with a fire safety certificate. In accordance with the standards, the corrugated pipe fastening step must correspond to the table:
| Corrugated pipe diameter mm | Mounting pitch mm | Corrugated pipe diameter mm | Mounting pitch mm |
| 20 | 1000 | 50 | 1700 |
| 25 | 1100 | 63 | 2000 |
| 32 | 1400 | 75 | 2300 |
| 40 | 1600 | 90 | 2500 |
It is allowed to use a thick-walled pipe as an input bushing, the thickness of the walls of which must correspond to the cross-section of the conductors:
Securing the wire to the supports
Rolling continues until the beginning of the wire connected to the leader cable passes the rolling roller on the last support. At the next stage, the SIP is attached. The supporting core or the entire bundle, depending on the type of wire used, is secured in an anchor clamp, leaving the ends of sufficient length to make connections. Then the SIP is disconnected from the leader cable. The unrolling roller is removed. Next, you need to insert the cable into the eyes of the supporting clamps on all intermediate supports and remove the mounting rollers.
Installation of inlet inside the house
All the main questions and disputes about how to properly install a SIP cable from a pole to a house arise when it comes to the entry of power supply into the house. Some people believe that the input should be solid and there is no need to make an additional connection, and in some ways they are right. But here we can make one recommendation.
If you purchased a simple SIP not of the NG brand (non-flammable), then make the connection inside the house with a VVgNg copper cable.
How SIP supports combustion can be seen in this video:
The cable itself must be led through the wall into the house in a plastic or metal pipe.
What else is worth paying attention to when installing SIP:
- ⚡if the SIP will run along the façade of the wall for several meters, you will need to use remote clamps (SF50, SFW50), because the distance from the SIP to the walls must be maintained at least 6cm
- ⚡before entering the house, be sure to bend the cable downwards so that water does not get inside through the corrugation or protective pipe. Any sealants will still dry out over time, lose their properties and dry out.
Be sure to coordinate all work on installing the SIP input into the house in advance with energy sales organizations. Since in each city and even in different districts of the same city, they may have completely different requirements (solid SIP to the meter or connection via cable, installation location of the meter - the facade of a house or a support, etc.). If the installation is carried out correctly and in accordance with the rules, you can be sure that this input will reliably serve you for many years.
Laying on the wall
Next, facade fasteners are used. If you purchase factory fittings, the distance is already regulated: at least 6 cm from the cable to the wall.
Then the cable route is marked and holes for fasteners are prepared. The distance between the fastening points is usually at least 70 cm. In bending areas, the frequency of fastening increases to prevent free sagging.
Important! If SIP is used, it is necessary to take into account the requirements for the geometry of the gasket. The bending radius is at least 10 cable diameters.
Then, using standard bolts, all facade fastenings are secured. To prevent corrosion and destruction of fasteners, the metal caps are closed with special plugs.
If house communications are located along the laying route, it is necessary to ensure a safe distance. At least 10 cm to water pipes, at least 40 cm to gas pipes.
Important! It is prohibited to form loose cable loops near metal structures.
Under wind load, the cable can fray the insulation and the wires will short out.
The use of fasteners that are intended for other purposes is not permitted. For example, pipe clamps or cable clips for indoor installation.
Mounting the bracket on the facade
The procedure for installing the bracket on the wall is as follows:
- place the bracket on the surface and mark the mounting hole marks with a pencil
Strictly observe the minimum distance from the corner of the house. It must be at least 100mm.
Otherwise, the fasteners will tear out along with a piece of the wall under strong wind loads.
- drill holes to the required depth, according to the selected anchor bolts
Take care of the tool first. Obviously you will need a hammer drill. It must either be battery-powered, or you will have to use a generator and a carrier.
- then hammer the dowels into the holes
- install and secure the bracket
If you have a frame house, be sure to consider the location of the internal studs. The bracket must be secured to the post or corner beam through a bolted connection or turnkey anchor bolts.
Therefore, I recommend fixing the bracket yourself, and entrusting power engineers with the installation of SIP from the support.
Possible installation errors
When installing an input into a house using a SIP cable, difficulties may arise, and in order to avoid mistakes, the most common of them are listed below:
- Weak tension: a dynamometer was not used when tensioning, and installation was carried out “by eye.” This error can lead to increased load on the cable, especially in winter, and its breakage.
- Strong tension: also has a negative effect on the cable, especially its insulation.
- An attempt to reuse piercing clamps: they are disposable, since the head breaks off and re-installation is not possible.
- Damage to insulation during work: It is important to use a solid cable; damage to the insulation may result in a short circuit or electric shock.
- The clamps are not fully secured: the conductors must be correctly and securely fixed in the clamps and not dangle in them. A bad clamp will lead to poor contact, sparking and cable damage.
Types of SIP anchor clamps
The SIP is secured to the bracket itself on the wall using anchor clamps. Their brand depends on the cross-section of the wire and the manufacturer.
Ensto anchor IEK anchor KVT anchor Sicam anchor Niled anchor
Ensto anchor SO 243, SO 157.1, SO 158.1, SO 80
Anchor IEK ZAB and ZAB
Anchor KVT ZAB
Anchor Sicam GUKp
Anchor Niled DN 123
And the pivot table:
| Manufacturer | Anchor clamp brand |
| ENSTO | SO 243 - SO 157.1 - SO 158.1 - SO 80 |
| IEK | ZAB - ZAB |
| KVT | ZAB |
| SICAM | GUKp |
| NILED | DN 123 |
Important advice - for facade fastening it is better to use anchors with a lower destructive load.
For example, what is the difference between an SO243 and an SO80 clamp? Both seem to be suitable for a 16mm2 SIP section.
Imagine that your entrance to the house from the pillar passes across the road. And one fine day, a truck with an oversized cargo will catch the SIP, tightly secured to the bracket with a powerful anchor. The jerk will be so strong that it could easily tear out a piece of the facade.
And if there is an anchor clamp with less tensile strength, then it can simply tear the wire from the fastener, leaving the wall of the house untouched.
By the way, the same thing should happen on the sealing support.
Security measures
For any electrical installation work, the first and most important thing is to comply with electrical safety rules.
- Do not carry out work in high humidity, fog or during rain, as well as in the dark or at twilight;
- It is necessary to use only certified and reliable tools, cables and fasteners;
- Do not use a damaged cable;
- Do not use fasteners and clamps that are not intended for the type of cable used;
- Work must be carried out strictly using special clothing;
- Live wires are insulated with special overlays;
- Work at height must be carried out by professional installers using machines and mechanisms designed to work near power lines and having the appropriate permit.
Tools and accessories for working with SIP
The following allow you to install a self-supporting wire efficiently and safely:
- tools for tensioning steel mounting tape;
- cable cutting scissors;
- scissors for cutting steel tape;
- winches;
- mounting stockings;
- mounting clamp;
- mounting rollers;
- swivels;
- hydraulic presses for crimping insulated sleeves and tips with cord brush;
- dynamometers;
- cord brushes;
- tools for installing reinforced ties;
- insulated spanners;
- grounding kits;
- separating wedges;
- short-circuit devices;
- universal claws and manholes;
- safety belts;
- slings;
- device for twisting wires.
SIP supply to a house underground
When connecting an object to a source of electricity, sometimes difficulties arise, for example, it is necessary to install additional support or remove a tree that interferes with the laying of cables through the air. In this case, the owners of houses and dachas are interested: is it possible to lay SIP in the ground? The answer to this question can be found in GOST R 52373–2005. It states that the self-supporting insulated wire is intended exclusively for laying overhead power lines. Therefore, the use of this cable for laying an underground line will be a direct violation of current regulations.
According to the operating instructions for electrical installations, electrical products must be used in strict accordance with the manufacturer's instructions regarding the intended purpose of the product. If the technical specifications of the power supply project specify the use of a self-supporting cable, then the supply to the house must be carried out only by air. Otherwise, the connection will be incorrect.
If such a method is really necessary, then do this installation in a metal pipe, or at least in HDPE or PVC. This will protect the cable from moisture and, most importantly, rodents.
Connection methods
When organizing the entrance to the house, you may be faced with the fact that the minimum cross-section of the core is 16 mm2, as a result of which difficulties arise when bending when organizing the connection in the input panel. Therefore, when connecting SIP to a house, they organize a transition to another type of cable:
via terminal block;
using nut clamps;
installing a box under the circuit breakers on the descent of the overhead wire, using the terminals of the circuit breaker to clamp the wire.
insert the SIP into the electrical panel and into the input machine;
connect directly to the meter (also through machines).
A disconnected connection to the introductory metering device is very painful for inspectors during the acceptance of the meter and the introductory SIP. Utilities may see “bad intentions” in your actions in the future. Therefore, you first need to find out and agree on the method and location of connection.
Now let's look at each method separately. Remember that the wire through the wall, according to the PUE, must be routed through a piece of metal or other fireproof pipe in order to be able to replace it in the future.
The advantage of connecting SIP to the house through a sealed terminal box is ease and simplicity of installation. The disadvantage is that any connection requires periodic maintenance, and the box is sealed, which will make it impossible to service the terminal.
Nut terminals are a simple and affordable way to transition from a self-supporting insulated conductor to another type of cable. The disadvantages include access to the terminals and wires, as well as poor protection of the junction from the influence of the external environment.
Installation of an automatic transmission on the descent and transition. The terminals on the circuit breaker have the ability to clamp a large cross-section wire; in addition, the circuit breaker can perform a protective function. The disadvantages of connecting an SIP to a machine are described in the first paragraph: the impossibility of servicing the connection and in the event of automatic protection tripping, it is necessary to go up to the box to restore the voltage supply.
Inputting SIP into the switchboard is also one of the available connection options. The main advantage of this option is that the wire is connected in one piece to the input device. The disadvantage is that you need to choose a larger input box so that the loop fits inside and there is an opportunity to install an electric meter with automatic machines right there.
Rules and features of choosing the type of cable fastener
There are dozens of ways to install transmission wiring. But any cable fastening must meet the following requirements:
- Do not damage the insulating sheath.
- Hold the wiring securely.
- Do not collapse under the influence of environmental factors.
Fasteners are selected based on the listed requirements, but in addition, the choice is dictated by the type of cable insulation, material and properties of the base - the structure on which the wiring is located.
Massive, heavy power cables measuring centimeters in diameter require strong supports. The fastening material for them is metal and durable alloys. Usually this is steel, silumin, etc. To attach particularly thick wires to the wall, complex box-shaped structures can be constructed. For their installation, anchor bolts and embedded parts are used.
For light wires designed for a relatively small load, powerful fastenings are not required. Plastic, thin metal, even ordinary tin are used here.
The methods of fastening the wires, and therefore the type and material of the fasteners, are influenced by the location where the cables are located.
This is obvious if you pay attention to the forces and impacts experienced by the fastener under various conditions of use.
When installed on vertical planes (walls, supports), the fastenings must withstand bending and shearing forces. On ceilings and other types of “reverse” surfaces - pull-out loads.
A durable dowel, which provides reliable retention of hundreds of kilograms per cut, can sometimes be pulled out of the socket simply by hand, applying a slight force in the direction of its axis. The choice of method for fastening the wires should take these features into account.
Where the loads are small, attention is paid to the influence of external factors. Most plastics do not withstand ultraviolet radiation well
Cable fasteners made of polyethylene and PVC become brittle after some time and become covered with cracks.
In unheated rooms, as well as when installed externally, the fasteners experience temperature fluctuations. At the same time, many stabilized plastics (protected from UV radiation) become as fragile as glass at temperatures below –20°C. If the cable is pulled, the fastening will be destroyed.
Cable entry through a wooden house wall or foundation
If a self-supporting insulated wire or other conductor with aluminum conductors is laid from a pole to a wooden house, according to the PUE it cannot be introduced into the house: “laying cables with aluminum conductors over combustible structures is not allowed.” A switch to copper is needed. Most often, VVGng cable is used for this purpose - in non-flammable insulation.
It must be remembered that terminal boxes are used to connect these two conductors; ordinary twisting is unacceptable. Directly connected copper and aluminum enter into an active chemical reaction, quickly and strongly oxidize, which worsens the contact. As a result, even with minor loads, a spark appears at the connection point, and this is a direct path to a fire. Therefore, the use of terminal boxes is mandatory. They are available in a sealed case, and some are open. For outdoor use, of course, sealed ones are better; you can also install open ones in the house.
How to connect copper and aluminum wire
But that's not all. The power cable can only be routed through a wooden wall through a thick-walled steel pipe. The diameter of the pipe must be at least 4 times the outer diameter of the wire. The wall thickness is standardized (SP 31-110-2003) and must be no less than:
- 2.8 mm for a cable with a core cross-section of 4 sq. mm
- 3.2 mm for cables with conductors 6-10 sq. mm.
It is advisable to position the entrance with a reverse slope so that water does not flow inside. To seal entry and exit points, as well as to ensure electrical safety, you can use asbestos, rubber or plastic plugs. The edges of the pipe will need to be carefully processed and sanded until completely smooth so that the cable does not fray and its sheath is not damaged.
Entering an electrical cable through a wooden wall of a house
To calm down and increase reliability, the section that will be inside the pipe can be wrapped with asbestos thread or other insulating material. It can also fill the space inside the pipe to prevent insects from settling there. Another option is to fill the pipe with cement or alabaster mortar.
When entering through the foundation, the situation is slightly different: the structure is no longer considered combustible, so plastic embeds can be used. They are installed at the stage of manufacturing the strip foundation. In this case, the passage for the cable differs depending on whether the cable enters a wet or dry room.
Entering an electrical cable through the foundation of a house
The spare parts necessary for organizing the safe entry of electricians into the house do not cost very much, but significantly increase the reliability, electrical and fire safety of your home. The designs are quite simple; you can handle their construction with your own hands.
Bandage tape
It is best to choose a tape that is packaged in 50m rolls and packaged in convenient plastic cassettes with a handle. With this packaging, you will not have problems with it getting tangled or unwinding the required footage.
If you still purchased it in a paper package, then it is better not to tear the whole box, but to make a cut on top through which you can pass the end of the tape. The coil itself will remain securely twisted and will not get tangled either during transportation or when working with it.
Factory bandage tape has the following characteristics:
- tape width 20mm - for standard use; or 10mm - for small-section self-supporting insulated wires, or small-sized products on supports (for example, video cameras)
- tape thickness - from 0.4mm to 1mm (for SIP wires 0.7mm is most often used)
- maximum load - more than 9 kN for 0.7 mm tape; more than 5kN for 0.4mm tape
- material: stainless steel
Bandage tape is a universal fastening method for all types of supports:
- wooden round shape
- metal round, rectangular or hexagonal shape
- reinforced concrete round, rectangular, hexagonal
- sometimes you can even find such a miracle mount
Even on a d-40mm pipe you can fix anything you want with it. The main condition for this is that the surface of the fastening plane must be wider than the fastener itself. Otherwise, it may become deformed when tightened, and this will affect the quality of installation and its durability.
What can be secured with bandage tape in addition to fittings for SIP wires:
- distribution cabinets and metering cabinets
If the cabinet does not have a factory design for such fasteners, you can use special adapters.
- lamps
- road signs
- street cameras
- cable bundles
- insulation on heating pipes
- mesh grouse for fence posts
First of all, when choosing a tape, you need to look at the breaking load indicator. Moreover, it is not always necessary to choose a tape with its maximum value. Sometimes, depending on installation conditions, it is more advisable to use a lightweight version. This will be discussed in more detail below.
What does the Electrical Installation Rules say about this?
- The cable being laid should not experience tension or pressure loads.
- At transition points (couplings, piercing connections, etc.) insulation must be provided, the properties of which correspond to the characteristics of the main wire.
- All outlets and connections must be accessible for inspection and repair without mechanical intervention in the building structure.
- All connections of wire and cable cores are made in accordance with the PUE: crimping, welding, soldering or crimping.
- In the case when the cable is laid along the facade using pipes, flexible hoses, closed boxes, the possibility of quickly replacing the wiring is provided.
- Structural elements, insulation, transition points must be selected based on the environment of use: weather conditions, exposure to ultraviolet rays, temperature conditions.
- Metal parts of the structure must be protected against corrosion.
- The length of the cable laid along the wall of the building is calculated taking into account the temperature gaps for compression and tension. The movement of the wire under the influence of temperature should not create conditions for mechanical tensile forces.
- In places of connection, branching, transitions, slack is provided (cable reserve in case of reconnection or repair).
