Not long ago, I made myself an electrical extension cord from a thick cable of decent length for use outdoors. But, as I used it, I realized that constantly dragging a whole skein is not so convenient. Then I came to the conclusion that only a DIY extension cord reel would help in such a situation. Today I’ll tell you about a convenient option that I made.
Source youtube.com
DIY extension cord reel made from leftover plywood
We will send the material by email
Not long ago, I made myself an electrical extension cord from a thick cable of decent length for use outdoors. But, as I used it, I realized that constantly dragging a whole skein is not so convenient. Then I came to the conclusion that only a DIY extension cord reel would help in such a situation. Today I’ll tell you about a convenient option that I made.
Key stages in the manufacture and assembly of an extension cord coil
1. Making a bushing for the drum. A universal homemade extension cord reel will rotate
Therefore, it is important to make a reliable bushing with locking washers. To do this, you need to take a pipe with a cross section of 20 and 25 mm
The material is cut to the width of the drum, taking into account the installation of the fixing bolt. In this case, a tubular element with a cross-section of 20 mm must be cut with a margin of at least 5 mm in width. The smaller pipe diameter should fit freely inside. On the sides of the axle, bushings machined from steel 2-4 mm thick are installed. The moving element is fixed with an M8 or M10 bolt.
2. Stand for the reel made of profiled pipe. In the instructions in the photo, which shows how to make a reel for an extension cord, there is a structurally important element - a U-shaped stand. This part can be made from sections of profiled pipe 20x20 mm and 20x40 mm
Initially, it is important to determine the dimensions of the structure taking into account the dimensions of the rotating drum. A 20x20 mm pipe is cut to the required parameters and welded together in the shape of the letter P
The central part is marked in the center. After which a 20x40 mm pipe is welded vertically.
Important: The 20x40 mm pipe must be welded as evenly as possible so that in the future there will be no difficulties with rotating the drum. To do this, it is recommended to use a square or a building level.
3. Attaching the drum axle to the stand. The axle must be welded to a 20x40 mm pipe. It is first necessary to note the height position of the drum. A 20 mm round pipe is welded to the profiled electrode welding. You will also need a thrust washer, which will act as a retainer for the drum. If necessary, the washer can be welded to the profile.
4. Handles for the reel and supporting frame. Handles are necessary for ease of use of the reel. Handles from a grinder or drill are suitable as the main elements. The large handle must be secured to the upper part of the 20x40 mm profile using a nut. The small one should be located on the coil itself. The handle for rotating the drum can be made from a bolt or pin. A handle with a roller will also work. In this case, you can get a smoother operation of the rotating mechanism.
5. Installing sockets on the coil. Before reading how to make a reel for an extension cord with your own hands, you need to purchase all the components to assemble the product. For normal operation of the device, you must purchase panel sockets. This type of socket is quite convenient and most suitable for installation. Installation options are shown in the photo below. For reliability, the socket can be secured with self-tapping screws with a cap. The socket fasteners are selected individually, taking into account the width of the plastic drum.
6. Installing the drum on the axle. After installing the sockets and handle, the coil must be secured to the axis. To do this, a drum with a sleeve is placed on a 20 mm pipe. The outer part of the axle is fixed with a bolt or nut, depending on the type of design chosen. The locking mechanism should be tightened taking into account the free rotation of the drum. After tightening, the coil should not jam.
7. Winding the electrical cable onto a reel. For the intended use of the product, you will need to wind the cable. Almost any wire with a core cross-section of 1.5-2.5 mm2 will do. Winding must be carried out taking into account the cable fixing mechanism. There must be a plug at the end of the wire for inclusion, and the installed sockets must be connected in series. The number of sockets depends on the overall dimensions of the drum.
Important: For safety reasons, all contacts should be insulated. Not everyone has the opportunity to purchase a device for cable winding, or they are not satisfied with the parameters of the product, since a long extension cord will not fit on a purchased reel.
Therefore, it is necessary to make the device from scrap materials. You can make a reel for an extension cord with your own hands in a few hours.
Not everyone has the opportunity to purchase a device for cable winding, or they are not satisfied with the parameters of the product, since a long extension cord will not fit on a purchased reel. Therefore, it is necessary to make the device from scrap materials. You can make a reel for an extension cord with your own hands in a few hours.
Making a reel from lumber
After covering the frame with metal profiles, I was left with a large amount of plywood in excess, the thickness of which was 18 mm. For work I needed:
- one sheet of plywood measuring 100x100 cm;
- electric jigsaw;
- drill with annular bit;
- long studs with nuts;
- metal plates, drills;
- protractor;
- sandpaper;
- stainless steel bushing.
Before starting work, I prepared a place for myself. Next, the entire process of making a homemade extension cord consisted of the following steps:
- I measured the length of the cable and decided to make the base for the drum stackable, so that if something happened it could be reduced or increased.
- I took an electric jigsaw and made sure that its blades were in excellent (cutting) condition. Next, I drew circles with a diameter of 12 cm on the edge of the plywood.
- I also drew the inner diameter for each circle. It was made 2 cm smaller. Then, using a jigsaw, I cut out the parts along the outer line.
- Next, I connected the drill and put the crown attachment on it. I drilled a circle along the inner diameter.
- Next, I replaced the crown with a thin drill (preferably one that corresponded to the diameter of the stud or was slightly smaller), and using a protractor I measured three points at an angle of 120 degrees on each workpiece.
- Drilled holes. I drew lines with a simple pencil on the side of the base of the future cable reel with my own hands. I will use them as a guide when drilling.
- On the remaining parts (I got 5 of them) I did the same. Then he stacked them on top of each other and checked how accurately the holes were made. They must coincide with each other and form a single channel.
- If you have a drill of sufficient length to drill all the ring blanks at once, then it is easier to use it, having first fastened it with something.
- Next, I connected all the ring blanks with studs using threaded studs and secured them with special nuts.
- Then I used a grinding machine to clean the end part in a circle so that there would be no burrs after cutting. If you do not have such a device, you can use fine-grained sandpaper.
End round strips
The next step was to make the end parts of the wire coil with my own hands, using this algorithm:
- I took a thinner piece of plywood and drew two circles with a diameter of 24 cm. Then I carefully sanded all the edges.
- I used a drill to cut a hole in the center using a tubular bit. I got it with a diameter of 2 cm.
- Then I attached the base to the end parts and noted at which points the studs are located, since the coincidence of the holes is very important. Drilled the indicated marks.
- Then I removed the nuts from the studs on the base and fastened it to the large circles and then secured it with the same clamps.
- The next step was to make two washers from metal plates and drill three small holes at a 140 degree angle using a metal drill bit. The outer diameter is 7 cm, and the inner diameter is 1.6 cm.
- Then I took a metal sleeve and welded it to one washer to create a through hole. Next, he inserted it into it and screwed the same washer with a sleeve with three screws to the side circumferences of the coil.
- On the opposite side, I put a second washer on the bushing and also secured it with short screws.
Making the handle
Next I made a handle blank, it is important that it is comfortable and does not interfere with the operation of the reel. I followed the following instructions:
- I took a long furniture nail and made a mark on the spool where the handle should be installed approximately. I will attach it to the outer part.
- Then he built a solid cylinder 8 cm long from a wooden block, and drilled a hole inside with a drill similar in diameter to a furniture nail.
- Then I passed it through the workpiece and additionally sanded it with sandpaper to get a perfectly smooth surface.
- Then I drilled a hole on the outer panel of the product and screwed in the handle, securing it with a nut on the back side.
- Then, using a grinder, I cut off the excess part, which in the future could interfere with winding the cable.
Socket attachment
I advise you to take a tee from sockets; its length should fit on the front part of the outer circle of the coil. Next, to connect it to the wire, I did this:
- I took a drill and drilled an oblique hole in the base of the workpiece so that it led out. Then I threaded the end of the cable through it and inserted it into the socket body.
- I drilled several holes in the lower part of the case and screwed screws into them, then connected the wire to the socket contacts, and then closed the case completely.
- After checking whether the socket works by powering the wire from the inspection light, at this stage we can consider the manufacture of the coil complete.
Making a stand
A reel stand is a must. The ease of use of the device depends on this. I needed ducts with a diameter of 13 mm and a welding machine.
- First of all, I made a stand template from aluminum wire. This stage should not be neglected, since with its help it is easier to understand how to bend the structure.
- I took two rods and bent them using a special tool (I turned to a friend, he processed everything on a lathe).
- Next, I welded two parts together (one plays the role of a footrest, the other – a reel holder, respectively).
- I advise you to weld a small washer onto the axis on which the coil will be placed so that the edges of the bushing inlet hole do not bite. I did exactly the same thing myself.
- Next, I put the drum on and fixed the axle on the opposite side using a thin washer and a special clamp.
The result is a working structure that will reliably serve for quite a long period. Next, I carefully laid the extension cord on the reel I made with my own hands, and secured the plug to the side panel using ordinary office fasteners. To make the structure look more aesthetically pleasing, it can be painted with regular enamel, which will additionally protect the wood from moisture penetration.
This video describes in detail the process of making a coil, as in my publication. You may find answers to additional questions there:
Making a tube holder
At the second stage, a stand for the reel is made from polypropylene. You must have a device for soldering pipes, without which you cannot make a reel for an extension cord with your own hands from polypropylene. Progress:
- They make a rectangular bottom frame that is installed on the ground. It is assembled from plastic parts, corners and tees. On the elongated part, a tee is soldered in the center so that the free outlet is directed upward. A vertical stand is attached so that it is above the drum, to which a tee is also attached in the middle, only the outlet should be directed horizontally into the frame. A horizontal tube is soldered into this hole - this is the axis for rotating the coil.
- At the top of the vertical stand, a handle made of a tube is fixed horizontally. Furniture plugs are placed at the ends. Place the drum on a polypropylene sleeve and fix the clip on the edge.
- A hole is drilled in the disk, the plug is removed from the extension cord and the cable is pushed through a wooden circle so that the socket is outside. It is attached to the drum with self-tapping screws. The plug is reinstalled. A short wooden rod (handle) is screwed to the product with a screw. This part will make it easier to wind the wire.
Attention! It is better to make a coil for an extension cord with your own hands using photos and drawings.
Homemade extension cord on a reel.
I had a lot of free time, material (round pipe), 28 meters of two-core wire with a cross-section of 4 squares, at one end there was an electric plug, at the other end there were two sockets connected in series and it was all called an extension cord. And such an extension cord caused a lot of inconvenience, it constantly unwound during transportation, took a long time to wind up and unwind, got tangled, and in general took a lot of energy.
The idea came to mind to make a homemade extension cord on a reel, but before that I went to a hardware store to look at the prices for this product and realized that it was easier to buy an empty extension cord on a reel and wind a wire around the extension cord, it seemed like I could stop there. But the mechanism in the head is already running and a reasonable decision cannot stop stubbornness.
Guided by the principle, “You are not a guest at work, take away the nail!”, a plastic spool for welding wire was brought out; it contained 18 kg of wire with a diameter of 1.2 mm for a semi-automatic machine.
Subsequently, sockets were attached to a similar coil, many holes were drilled, and the wire was secured.
To attach a spool of wire to a semi-automatic welding machine, there is a hole with a diameter of 55 mm, this hole is too large and in order to easily center the spool on the extension frame, a sleeve was made from a 57-piece pipe and plugs were welded on both sides, after which this cylinder was sent to lathe for processing with given dimensions. To attach the bushing to the coil, I made holes and cut an M6 thread.
The base for the extension frame was welded from a round pipe, an M16 pin and two nuts of the same diameter were used to fix the coil on the frame, a plate made of a sheet of metal 1.5 mm thick was welded to the frame, a hole for the pin was burned in the plate with an electrode and a nut was welded on the back side , after which he screwed in the stud and welded it to the nut
In order to rotate the coil, I made a handle from an M12 pin and a round pipe, capped it with a nut and washers, and welded it with argon arc welding so that the nut would not unscrew.
All that remains is to assemble and fix the coil on the stud, for this I used an M16 nut with a flange, grabbed the nut to the stud, drilled a hole with a diameter of 4 mm in the nut and stud, cut off the tack, made a chamfer on the stud with a grinder, tightened the nut and fixed it using an MP 3 electrode with a diameter of 3 mm.
To fix the sleeve in the reel, I used an M6 screw.
All metal elements (except for the nuts and studs) were cleaned of rust with a brush for a “cup” grinder, wiped with white spirit, coated with gray metal primer from a spray can, and then applied black spray paint (only black was used).
I’ll say again that it would have been easier to buy it in a store, but... I had the material, time, the necessary tools and a lot of stubbornness, so I decided to do it myself.)
When winding the wire, the coil does not rub, it rotates easily, the wire fits completely.
In principle, it will pull,) only the base of the frame turned out to be large, I didn’t calculate it a little.)
No duplicates found
do the next one on an ESAB coil)))
I did about the same thing, only not from a metal pipe but from a PVC pipe. Since there were a lot of scraps left after the repair, I only bought corners and tees and welded it all together. It's been two years of constant use and nothing has broken. Yes, and very light.
Can you please send me a photo? I want to do something similar at work.
I can’t right now - the device is on site. I can only sketch it out
If it doesn't bother you.
A finished reel without cable costs 400 rubles
shit, sorry, but this is fragile, non-repairable shit. It will survive at a construction site for no more than a week.
4 squares. Is this really copper? why so much?
how much does she weigh? welded from the 15th pipe?
Reminds me of a scene from the movie Mad Max.
1. Sockets with grounding, two-wire wire.
2. Lack of thermal protection (current fuse)
3. Installation of sockets involves running the wires only in the braid with further crimping; you just started the wires.
My advice. Throw away this miracle and no longer experiment in areas where you know nothing.
And another question. Are argon arc welding, all these grinders and so on in your farmstead? Or did you do this at the factory?
Oh my goodness, so much fucking for nothing xD
I suggest making folding pins on the frame so that they can be stuck into the ground and the coil will stand quietly when the wire unwinds xD
If we continue to finish it, it will turn into a UAZ.
Darth Maul
Last week there was a festival for Star Wars fans in Moscow, and a friend invited me to take part in the accompanying fair. But then we need to do at least something thematic? I’ve been eyeing a geeky theme for a long time - not everyone can work with catchers and forest things, sometimes you want variety. I don’t really like repeating other people’s schemes (unless one particularly sticks in my heart), and I don’t always manage to draw my own schemes. This time I was lucky - the scheme came out literally in one go. Charismatic but underrated Sith Darth Maul
It took approximately two hours to create the diagram. It was important to repeat the pattern on the skin, so I looked for good references and tried to cram all the lines into the most modest sizes possible. By the way, the size of the finished badge is 5x4.5 cm.
Already in the process of weaving, I realized that I had gone too far with the bone growths. I tried to arrange them so that visually they seemed at different levels, but it turned out to be a crown =) But I’m absolutely delighted with the look. You got expressive eyes!
About the weaving process. Firstly, Japanese Delica 11/0 beads are used here. Secondly, work using the brick stitch technique. Thirdly, a fact from the history of creation =) When I wove half of the badge, I paid attention to the amount of red beads. By all estimates, there was enough for the second half. haha, of course, in the end there were about twenty beads missing. I went to various sites to buy - either there are no such beads, or the delivery is indecently long. At first I was upset that such a cool badge was going into a bottomless box of imperfections, and then I remembered that this very box contained training samples from one notorious beading course. This course was abandoned with the note “the most lousy waste of time and effort, because there is nothing useful.” Here you go. suddenly it turned out that there was at least some benefit from this course =) These samples contained the red beads I needed, so the story of the creation of the badge ends with a happy ending =)
Making a carrying reel
There's an electric cable
The main thing when working with electricity is safety. Therefore, to make the cable carrier we will use only dielectric materials.
- Plastic canister 5 liters
- PVC pipe with a diameter of 50 mm
- A piece of plexiglass
- Cable with a cross section of 1.5 mm, length 20 m
- Remote socket and plug
- M6 bolt and a pair of nuts
You will also need:
- hacksaw for metal
- jigsaw
- screwdriver with a set of bits
- glue
- dye
The carrier will consist of a body made of a canister and a spool for winding the wire.
Stage No. 1 - making a spool
We will use a PVC pipe as a spool.
We measure the width of the canister and mark this size on the pipe, departing from the outer edge.
We drill a hole in the middle of the pipe on one wall - a place for the wire to come out.
At this stage, we complete manipulations with the pipe , since it will be needed to apply markings to other elements of the homemade product.
Stage No. 2 – spool handle
The rotation of the spool will be carried out using a plexiglass handle.
To do this, on a sheet of dielectric with a previously prepared pipe (spool), we mark the place where the handle is attached. We also draw the shape of the future pen in any form. You need 2 pieces of such blanks.
We cut according to the markings; for this we use a jigsaw and a drill with a crown. We sand the blanks.
We glue the resulting parts together, sand them and paint them as shown in the photo above.
Stage No. 3 - preparing the canister
Mark and cut out
The spool will be exactly in the center, so we make markings on both sides of the canister.
The diameters of the holes for the pipe are different, so we mark them using a prepared PVC pipe.
We drill holes with a crown or cut out with a knife.
Stage No. 4 - gluing the spool and handle
The spool is completely ready
The paint on the plexiglass has dried, so you can glue the handle to the pipe.
But before that, you need to drill a hole on the handle for the bolt, which will be used for rotation. It should look like the one shown in the photo above.
Stage No. 5 – final assembly
We assemble the entire structure: we insert the wire through the spool, then through the canister and its lid. Everything should turn out as shown in the diagram below.
Instructions for assembling a good extension cord
So, first, let’s figure out what you can use to make a good electrical extension cord at home: A
collapsible electrical plug. You can cut it off from a broken electrical appliance, or you can buy a new one. The requirement for the plug is that it must be grounded. Three-core cable of required length
Here you need to pay attention to the purpose of the future homemade product. If powerful electrical appliances (for example, a welding machine) will be connected, the diameter of the cores must be suitable
It is better to calculate the cable cross-section in terms of current and power in advance, so that in the future you do not encounter problems such as melting of the socket and short circuit. Most often, when assembling an electrical extension cord at home, PVS 3*1.5 and PVS 3*2.5 wires are used. A block of sockets (or just one). There are also several main requirements here: the back wall of the outlet must be closed, the product must have grounding contacts, and the design must be made dust and moisture resistant. If all these requirements are met, the issue of safety of using such an electric carrier will not worry you in the future.
As for tools, you may need the following:
- multimeter (allows you to check the extension cord after assembly);
- curved and straight screwdriver;
- pliers or a special tool for removing insulation from wires;
- sharp knife;
- insulating tape.
Using an example, let's look at how to make an electrical extension cord yourself from a three-wire cable with sockets for 4 sockets. So, the assembly instructions look like this:
- Unscrew the plug and socket block to prepare places for fixing the cores.
- Remove 4-6 cm from the top sheath of the cable on both sides.
- We strip each wire by 10 mm, as shown in the photo below.
- We insert the wires into the corresponding terminals and tighten the screws thoroughly with a screwdriver.
- We twist the socket block and plug in the reverse order. If the cable dangles in the pass-through hole, wrap a little insulation to make the fit tighter.
- Using a multimeter, we connect a homemade electrical extension cord. If everything is correct, plug the plug directly into the power supply and use it.
That's all the instructions for creating. We hope that now you know how to make an electrical extension cord with your own hands at home. If you suddenly have any questions, ask them to our specialists in the “Questions to an Electrician” category!
I would like to additionally note that it is possible to make a more reliable version of the electrical extension cord with a switch in the form of a button. In this case, you can turn off or turn on the power to the sockets. If you decide to assemble a long carrier (for example, 50 meters), then it is better to wind it on a special reel so that the wires do not constantly get tangled. In addition, a coil is more convenient to store than a coil of wires.
We also recommend watching this visual video lesson:
Watch this video on YouTube
Watch this video on YouTube
Result of work
As a result, we received an extension cord that was convenient for transportation. It is quite sealed and, importantly, it is made of dielectric materials - electric shock through it is excluded.
VIDEO: DIY extension cord reel
Idea from plastic canister! It turned out a cool thing!
Tired of constantly getting tangled up in wires? ⚡ Just make an extension cord reel from a plastic canister?
Feedback from our readers is very important to us. Leave your rating in the comments with reasons for your choice. Your opinion will be useful to other users.
Homemade extension cord coils
At the dacha, you should always have an electrical extension cord on hand if you have to work away from an outlet. Buying it in a store is not a problem; the price starts from 1,200 rubles. But if you put your hands into it and make it yourself, as Alexander Stepanov did, the costs will be significantly less, and the device will be much more convenient.
To store the extension cord, I used to use a plastic plate with triangular cutouts made at the ends, onto which I wound the wire in order to compactly store the extension cord somewhere on a shelf. Everything is fine, but it’s inconvenient to wind the wire: it gets twisted all the time if you wind it on the plate. Or you have to hold the wire with one hand and twist the heavy plate with the other, which is also inconvenient.
When I finally got tired of it, I decided to make a simple reel with a rotating handle. You hold the handle with one hand, and with the other you twist the reel on which the wire is wound - evenly and without twisting.
The coil consists of two rounded plywood plates 8 mm thick with an insert between them - two planks measuring 60 * 50 * 20 mm. Dimensions of plywood plates - 220 * 100 mm.
The handle (a typical door handle) is fixed to a 200 * 50 mm strip with short screws. The bar can rotate relative to the drum. The axis is a 08 mm bolt with a length of 100 mm. A wire with a length of 12 to 15 m can be wound onto such a reel, depending on its thickness.
Extension cord with two sockets
I liked the idea with a homemade drum, and I decided to make another reel for the extension cord, but this time a “branded” one - with two sockets on the body. I assembled it from two plywood disks Ø 240 mm and 8 mm thick, connected by six bolts Ø 6 mm and 80 mm long. Between the discs, I put Ø 10 mm duralumin tubes and washers on the bolts.
On the side of the reel where the handle is located, in order to recess the bolt heads, I used a Ø 15 mm milling cutter to drill holes 3 mm deep. On the other side of the coil, on either side of the center, I made two Ø 68 mm holes for junction boxes for sockets. The boxes themselves were secured with a pair of small screws screwed into a plywood disk through a plastic bottom. By the way, on this side of the coil, the ends of the bolts with cap nuts, on the contrary, were made to protrude outward, thereby protecting the socket housings from impact if accidentally dropped.
— Extension cord without handle. — A reel with a handle installed—an ordinary door handle.
— After assembling the coil, the connection boxes for the sockets are inserted into the prepared holes. — The bolt heads are recessed so that the rotating bar with the handle does not touch them when the reel rotates.
To avoid accidentally pulling the wire out of the junction box when unwinding, I secured it to the duralumin tube with copper wire.
Such a reel can accommodate 11-12 m of PVS 3-1.5 wire or 15 m of PVS 3-0.75 wire. To prevent the extension from unwinding, I used a clamp from an old tape measure as a simple fixation.
I used the same handle as the previous reel. As a result, I spent about 650 rubles on an extension cord with sockets, and in the store factory analogues cost from 1200 to 1800 rubles.
— The reel handle is securely fixed in the holder. — A pipe with a slot is attached to a piece of plywood with two self-tapping screws. Beads with PVA glue are placed under it.
Using and storing reels
You should not work with extension cords by leaving them on the ground or floor, especially if plugs are inserted into sockets. Therefore, I made four identical holders: two portable for using the reels while working and two for storing them in the workshop. The holder is a piece of plastic pipe with a slot - a kind of cradle for the handle of our reel.
To make holders from a meter-long plastic pipe Ø 25 mm, I cut 4 pieces 245 mm long and in each of them in the same way, using a grinder with a metal disk, I cut a slot 10 mm wide and 170 mm long. Each such tube was attached through a slot with self-tapping screws to a plywood plate measuring 260 * 50 mm. To prevent the pipe section, held on by two short screws, from becoming loose under load, I glued sections of glazing beads under its sides with PVA glue.
To hang the reel, you just need to insert its handle into the holder tube. In this case, the handle posts are threaded into the slot and tightly fixed.
The holder can be mounted on the ceiling in the workshop (if you can reach it), from below on the bottom of the shelf, or simply on the wall. I made the remaining two holders portable; they can be hung on hinges, for example, on the leg of a workbench on the street or outside on the wall of the workshop.
For convenient and easy rotation of the drum, I attached a small handle consisting of two short tubes of different diameters to the edge of the reel disk. A tube of larger diameter rotates freely when put on top of a smaller one, rigidly secured with a screw with a flat head.
To store the reels, you need to find a place in the workshop - on the wall, ceiling, under the bottom of the shelf. For demonstration, both coils are inserted from above into holders mounted on a plywood panel. On the reel of sockets you can see a black tape measure clamp holding the wire.
Homemade yard extension cord from a spool of welding wire
dal_wost 21-02-2015, 14:27 22 658 Tools / Electrics
OK
When you get tired of winding a cable around your elbow every day and then unraveling it, you have to urgently make a device like this. My version of a homemade garden and yard extension cord from what was at hand at the time.
And this is what happened:
A piece of laminated chipboard, a piece of PVC pipe D-40 mm, a piece of laminate, a PVC panel, a threaded rod or a large screw, a small cylindrical handle from an old bedside table and the most important part - an empty spool of welding wire.
Tools:
Electric drill, drills, drill bit, saw, clamp, screwdriver, knife, wrench, el. cable ~30 m, plug, socket.
Manufacturing:
We saw off the laminated chipboard measuring 300*300 mm, drill a hole in the center for screwing in a pin (screw), depending on what you have. Take a PVC pipe and cut off a piece from it equal to the width of the coil + 10 mm, reserve for the washer, this will be a sleeve on which the reel of wire rotates. Now let's select core drills, we need three different sizes, one No. 1 equal to or slightly smaller than the inner diameter of the pipe, the second No. 2 equal to the outer diameter and the third No. 3 larger than the second by 10 mm or more. Using the first drill, we make several centering washers for the pipe from a piece of laminated chipboard or laminate, put them on the pin and then put on the pipe sleeve. Using drill No. 3, we drill a PVC panel (laminate), drill the resulting circle with drill No. 2, we get a ring, it should fit on the pipe, then we put on the coil. It is convenient to drill on a wooden lining with a clamp, then the probability of PVC breakage is reduced. Using drill number 3 we make the last finishing washer, put it on the stud and tighten the nut with a lock nut or glue, there is no need to tighten it, the coil should rotate easily but not dangle. We install a handle for winding the wire. For the wire, we make a hole in the coil, slightly larger than the diameter of our wire. We insert a wire from the inside and attach a plug, on the other side one or several sockets. You can check everything by winding the cable onto a reel; I have about 30 m of wire for a lawn mower. Everything unwinds itself quickly when stretched and is easily wound by hand by the handle. Don’t forget that using the extension cord in the wound state is prohibited and a little harmful! Become the author of the site, publish your own articles, descriptions of homemade products and pay for the text. Read more here.
OK
To write a comment you must log in to the site via social media. networks (or register): Regular registration
Information
Visitors in the Guests group cannot leave comments on this post.
usamodelkina.ru
DIY tutorial: how to make an extension cord. Easier than it seems!
Content
For most people, a country house is not only a vacation spot. Fixing a roof, putting up a fence, washing a car, mowing the grass on the property is a lot of work! And after work it would be nice to take a shower, have lunch, and watch a movie. It sounds good. But in reality, the power cords of equipment and tools are not enough to reach a fixed outlet. And besides, those few power sources are already occupied by basic household appliances.
An extension cord will help you! However, ready-made carriers are expensive and are not always ideal in length and power. You can make an extension cord yourself - there is nothing complicated about it. And most importantly, you will be confident in the quality of the chosen materials and the integrity of the assembly. We will tell you how to calculate the load and wire cross-section. In the steps we will describe the assembly process in detail. And you will find all the necessary parts and accessories on our website.
Restrictions on the use of electrical extension cords
Regulatory documents provide a narrow range of restrictions on the use of extension cords. Without special protective measures, the operation of motors with a power exceeding 1 kW (without specifying the type: asynchronous, commutator) is not allowed. We will circumvent the condition only in one case: we need to make sure that turning off/on the contact is possible only when the equipment is turned off. Apparently, an arc is supposed to occur here when the circuit suddenly breaks or switches.
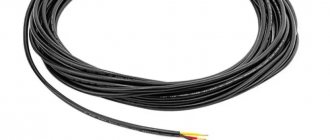
Partially stripped cable for measuring current with clamps
A typical extension cord is not suitable for current clamp measurements. An example is given in the photo. The insulation of the supply wire is broken; it is permissible to measure with a current clamp. The photo cannot serve as an example of how to make an extension cord of the ideal type yourself. In our case, a two-core wire was used, no more was required, the socket was taken of the old type, where the diameter of the sockets includes the plugs of devices manufactured according to the European standard. Helps avoid connection difficulties.
Socket and extension cord phases
I would like to add here a not so obvious fact, which is definitely not difficult to observe in practice: the extension cord plug is in place as it should be. By holding the wire, you can find that the phase is always on the side that is in the socket. Look at the photo, it is demonstrated: the plug is located in the most obvious way, with the wire facing down. Phase in the position shown on the left. Helps electricians and craftsmen stop guessing. Phase left.
A symmetrical fork lacks a clearly defined direction. The recess for the protective contact is located at the top. As for prefabricated forks, where there is none, you need to be guided by the inscriptions (see photo) so that they are readable and not placed upside down. We emphasize that in this case everything depends on how we connect the wiring inside the extension cord. It is necessary to ensure that with the specified location of the plug, the phase coincides with the socket in the extension cord (if taken in the manner shown in the photo). At first glance, it seems like unnecessary complications, but in a work situation it will be useful for various purposes.
Symmetrical fork inscription
Please note: for powerful appliances the plug is non-removable. In search of a cable of such length that meets the given condition, we will use a deceptive maneuver:
- Carefully seal the wire according to the instructions.
- We take the filler coupling compound and pour it inside. After hardening, the cooling conditions will deteriorate slightly, but a reliable frame will be formed to maintain its shape. In other words, the fork becomes non-separable after such manipulations.
We make a list of everything needed for an extension cord
Devices for installing an extension cord can be divided into two groups: mandatory and secondary. Without the first ones, you won’t be able to make an extension cord. The latter serve for ease of use.
Required purchase
- Wire with copper conductors, which are more durable compared to aluminum. Choose a standard and affordable PVS cable or a more reliable, durable and expensive KG cable.
- Straight or angular fork.
- Plug sockets for connecting one consumer or socket blocks for connecting several devices at the same time.
- Cable connectors for high power extension cords, primarily designed for 380 V mains voltage.
May be needed
- Reels for easy unwinding and winding during operation.
- Frames for easy storage of the extension cord.
What can you use to make an extension cord at home?
If you don’t have a purchased cable, then what can you use to make an extension cord at home? Some far-sighted people, when any electrical appliance breaks down and is only scrapped, for example: a vacuum cleaner, drill, refrigerator, electric oven, etc., cut off the cords and leave them, who knows how to use them.
And indeed, from several scraps of cords of different lengths you can assemble a good extension cord. The old wiring will also work after replacement.
When connecting, step-by-step assembly of extension cords and instructions for assembling extension cords will help. Of course, this option is a way out for urgent needs, but not for constant use, in order to avoid fire safety.
We carry out calculations
To correctly select components for an extension cord, you need to know two parameters - voltage and current. Voltage , as a rule, is 220 V in household networks, 380 V in industrial networks. The current is calculated using a formula based on the connected load, that is, the total power of consumers. In our calculations we neglect inrush currents.
For example, we plan to connect a water pump (800 W), a drill (400 W) and a trimmer (1000 W) to the extension cord. The total power is 2200 W.
To determine the current, divide the resulting amount by the voltage.
2200 (W) : 220 (V) = 10 (A)
Now we can select the socket and plug. Current values are always indicated in the technical specifications, as well as on the housings of the elements.
To determine the required cross-sectional area of the wire, refer to the table below. It is better to choose a wire with the closest value upward, so that there is a reserve when connecting more powerful consumers.
Table for determining cable cross-section
| Current, A | power, kWt | Cable cross-section, mm2 | |
| 220 V | 380 V | ||
| 11 | 2,4 | — | 0,5 |
| 15 | 3,3 | — | 0,75 |
| 17 | 3,7 | 6,4 | 1,0 |
| 23 | 5,0 | 8,7 | 1,5 |
| 26 | 5,7 | 9,8 | 2,0 |
| 30 | 6,6 | 11 | 2,5 |
| 41 | 9,0 | 15 | 4,0 |
| 50 | 11 | 19 | 6,0 |
| 80 | 17 | 30 | 10 |
We help you choose components for the extension cord
Extension cord without grounding, rated for power up to 1300 W
For assembly, a round flexible PVA cable with a cross-sectional area of 0.75 mm2 and a length of up to 20 m is optimal. The plug and socket can be the most common: made of plastic and without grounding, with a current value of up to 10 A.
Features of the extension cord
- Low technical characteristics and inexpensive components
- Affordable price
- Suitable for working with low-power consumers: drill, hammer drill, plane
Grounded extension cord rated up to 3500 W
Features of the extension cord
- Higher technical specifications
- Safety through grounding
- Affordable price
- Suitable for simultaneously connecting tools and equipment: circular saw, jigsaw, grinder
Reliable, grounded extension cord rated up to 3500 W
For installation, it is better to use a PVA cable with a cross-sectional area of 1.5 mm2 and a length of 50 m. Since one device will be connected, you can choose a plug socket instead of a socket block. The socket and plug must be rated for a current of at least 16 A.
Features of the extension cord
- Rubber as a material for sockets and plugs guarantees safety, as it protects contacts from dust, moisture and oils, has high strength characteristics, is resistant to chemical attack and wear
- Can be used outdoors due to more wear-resistant components and materials
- The cable length and power are ideal for garden equipment: trimmer, lawn mower, shredder, brush cutter, cultivator
Durable and flexible power strip rated up to 4600 Watts
When assembling, we recommend using a KG cable with a cross-sectional area of 2.5 mm2 and a length of 20 m. The wire of this brand better withstands low and high temperatures, voltage surges, frequent kinks, the effects of constant tensile force, and is also more resistant to abrasion. The cable connector is represented by a three-pin plug and a 32 A socket. The connector has a degree of protection IP44 and completely prevents the ingress of dust, fine dirt and splashing water. The socket is equipped with a protective cover.
Features of the extension cord
- Wide range of applications due to high power: work with diamond drills, trowels, painting equipment
- Safety and minimal risk of electric shock due to rubber insulation
- High flexibility ensures operation in harsh conditions, outdoors and at temperatures from -30 to +50 ° C
Extension cord for connoisseurs of European quality, designed for power up to 7200 W
When assembling, we recommend using a KG cable with a cross-sectional area of 4 mm2 and a length of 50 m. The insulating layer of rubber based on natural rubber ensures high flexibility even in cold weather. In addition, rubber is a good dielectric, so the wire is reliable and safe. The cable connector is represented by a three-pin plug and a 32 A socket. Thanks to the IP44 degree of protection and the cover, splashes of water, dust and dirt particles do not get inside the contacts.
Features of the extension cord
- High quality cable connector, made in Austria
- High flexibility ensures operation in harsh conditions, outdoors and at temperatures from -30 to +50 ° C
- For connecting devices and devices that consume current up to 32 A: heat guns and mosaic grinders
When you buy everything you need and read the next section of the article, you can start assembling. Soon you will see the results of your work!
Materials for homemade carrying
To make an extension cord with your own hands, you will need:
But this set seems banal only to the untrained eye. The fact is that depending on the cable parameters:
- Wire material;
- Type of insulation;
- Conductor cross-sectional area;
- Lengths.
It will depend on how much total power of electrical appliances can be powered through a homemade extension cord.
Ratio of maximum power and wire length
It is best to gradate extension cords according to the connected power and cable length. For example, when used inside an apartment, the maximum load can rarely exceed 3 kW:
- TV - 100 W;
- Iron - 1000 W;
- Microwave - 1.8 kW;
- Laptop + router + 3 LED lamps - 100 W.
IMPORTANT: devices must not only be connected, but simultaneously operate at maximum load.
For a cottage or garage, it is better to make a carrier designed for higher power, well, at least 6 kW. But here the cable length factor intervenes. The dependence can be seen in the table.
For an apartment, a 10 meter long carrier will cover the needs in 99.9% of cases. For a summer house, garage and other household needs, it is better to make an extension cord on a reel with your own hands, with a cable 40-50 meters long. This will a priori solve almost all possible needs.
Cable or wire
Unlike a wire, a cable has additional, general insulation of conductors, which allows it to be laid in the ground, or temporarily placed on the ground, in the open air. Therefore, for indoor use, you can use a wire, and for universal carrying, a cable.
IMPORTANT: for extension cords, always use only cable products with stranded copper cores.
The main requirement for an extension cable is flexibility. Therefore, when choosing materials, all types of cables with aluminum conductors, as well as single-core copper wires, are eliminated from the list of candidates.
FOR REFERENCE: according to GOST 15845-80, a stranded cable should be distinguished from a cable with a stranded copper core. In the first case, each core inside the cable has its own insulation. In the second case, several thin wires are twisted into one core and have a common insulation.
The electrical cable for the extension cord must be marked PVS or PBPPG. Their difference is that PBPPG is flat, and PVS is round.
There must be three wires in the cable! Grounding is a function of an extension cord that is better to have and not use than to complain about its absence after a tragic incident.
As practice shows, it is best to make an extension cord with a straight plug.
The wire fits to it along the axis, without bending. In some cases, this feature can be decisive when connecting in places with poor access. An eyelet on the plug makes it easier to disconnect and can be used for hanging.
Almost all plugs have a ground connection. Protection class not lower than IP44.
What does IP44 protection class provide?
If the connection at the plug and socket is correctly assembled, then the IP44 protection class allows you to leave them in wet rooms, they are not afraid of splashes. If the contact group is suspended above the ground, then the carrier can be left in the rain.
Socket block
There are two categories of products that are very similar in appearance
- Overhead sockets;
- Block (block) of sockets.
Such devices are easily distinguished when viewed from the back.
Please note that the socket block does not have special holes or slots for fastening on the back side. For the extension cord, you need to select exactly the socket block.
It may come with a switch
It doesn't make any fundamental difference. But do not forget that grounding must be required.
How to choose the protection class of a portable socket block is important if the extension cord will be used outside the apartment, such as in the country house, in the garage or even in nature. For universal carrying, the marking must indicate IP44.
We assemble the extension cord according to all the rules
1. Disassemble the socket or plug socket - unscrew all fasteners using a screwdriver. Inside you will see metal bars that are connected to the outlet connectors.
2. Strip the wire. Remove the sheath 4 - 5 cm, and the insulation 1 - 1.5 cm from the beginning of the wire. To do this, use a special tool - a stripper or knife.
3. Press the wires against the bars inside the socket - to do this, insert them into the grooves and secure with screws. The grounding wire is attached to the corresponding bus - there is a special symbol on it so as not to be confused. Secure the common wire with a clamp inside the socket and assemble the socket.
4. Strip the wires on the other side of the cable and disassemble the plug. Insert the contacts into the pins of the plug. Secure the ground wire with a terminal in the middle. Fix the common wire and assemble the plug.
5. Check the extension cord for short circuit. To do this, use a multimeter in dial mode. Check the plug first, then the socket. If the device does not give a signal, then everything is in order.
Congratulations! You have successfully assembled your own extension cord. Now you can calculate how much it cost you. The approximate total cost of a 50 m cable, socket and plug with a grounding current of 16 A is 1,500 rubles , as opposed to a ready-made extension cord for 2,500 rubles . With this difference you can buy more components and, for example, make another carrier for household use. Our simple solutions prove that assembling an extension cord is no more difficult than assembling an Ikea shelving unit. And how many advantages! It turns out to be of high quality, reliable, of the required length and power. Are you ready to repeat our DIY tutorial?
How to connect an extension cord to the network using a lamp
So, we will need pliers, insulating tape, a lamp, wire cutters and the extension cord itself. Take the lamp, carefully break the glass, and use pliers to remove the glass burrs from the threaded part of the lamp. We leave the central glass rod, then we bite off the central antennae with pliers, leaving the side electrodes.
We take an extension cord plug, one electrode and tightly wrap several turns onto the pin of the plug and insulate it with insulating tape. Moreover, the glass rod should be between the pins of the plug in the middle.
We do the same with the second electrode and part of the plug, then we wrap the entire connection with tape for elasticity and insulation. We screw our assembly into the socket, turn on the switch and the extension cord under voltage.
DIY extension cord
Often, when choosing an extension cord, the question arises: which one is better, and whether it can withstand a heavy load, well, it seems to be of good quality, but the cord is short. In order for the extension cord to be to your liking, in terms of quality, number of places in the socket block and length, it is preferable to make it yourself. It is not difficult.
Before you start making an extension cord yourself, you need to purchase a cable, an electrical plug and a block of sockets. As for the choice of cable: it is necessary to take into account the length and load for it.
Basically, those who make extension cords with their own hands use a cable for heavy loads from 3 to 5 kilowatts. The most optimal soft multi-wire copper two-core cable is P V C with a cross-section of 2-2.3 mm.
- Let's turn to the instructions on how to make an extension cord yourself.
- It is necessary to remove the top layer of cable insulation 5-7 centimeters, then strip the wires by 1-1.5 centimeters.
- Then we disassemble the plug by unscrewing the screw and loosen the fixing clamp in the plug with the screw.
- We connect the wires to the contacts of the plug and clamp them with screws, secure the cable with a clamp and assemble the plug.
- Let's disassemble the socket block and connect the wires to the contact plates, just like on the plug. Then we assemble the block.
- It’s not at all difficult to make an extension cord yourself; it will cost you several times cheaper than buying it in a store.
Extension cord on reel
- Let's look at another way to make an extension cord on a reel yourself.
- We will need a cable, the length is at your discretion, a socket block, a plug, two washers, an 8 mm bolt 16 cm long and a nut, an electric jigsaw, a screwdriver with an 8 mm drill and a spool.
First, let's make a coil.
Using a jigsaw, cut two perfectly even pancakes, the diameter of which is 25 - 30 centimeters. Suitable material: plywood, chipboard. Next, drill a hole in the pancakes exactly in the middle, cut off a polyethylene pipe 13 cm long with a diameter of 5 cm.
- Then, we put a washer on the bolt, the bolt itself with a washer, push it into the hole in the pancake, then we put on the pipe, then the second pancake, the washer, the nut and tighten them together.
The polyethylene pipe serves as a sleeve between the pancakes. As you tighten, the sleeve must be centered. Drill another hole on the pancake from the edge 3 cm to the center. On one side of the cable we connect the socket block.
We push the other end of the cable inward from the outside until the socket block rests against the coil, and secure the socket with self-tapping screws. We connect the plug to the cord. And we wind the cord around the sleeve.
The extension cord with the coil is ready.
Extension joint when broken or extended
When using an extension cord for a long time, sometimes the cable shorts due to kinks, blows once applied to the cord, etc. Maybe you wanted to increase the length of the extension cord. Let's look at how to connect an extension cord with your own hands.
To begin, unplug the power cord. If the cable is shorted, it will be immediately visible, cut off 10 cm on both sides from the epicenter of the short circuit, and wipe off the soot. We remove the top insulating sheath of the cable 5 cm, clean the wires 1.5 cm on both sides.
We twist the two bare wires together as tightly as possible, preferably without gaps for good contact, this will prevent the connection from heating up under load. We insulate the twist with insulating tape, and do the same with other wires; be sure to wrap both twists with insulating tape, for the elasticity of the twist and strength.
Some people prefer soldering wires; this method is better than twisting. Soldering of wires and insulation is carried out in the same way. When extending the cable, the same work is done
What can you use to make an extension cord at home?
If you don’t have a purchased cable, then what can you use to make an extension cord at home? Some far-sighted people, when any electrical appliance breaks down and is only scrapped, for example: a vacuum cleaner, drill, refrigerator, electric oven, etc., cut off the cords and leave them, who knows how to use them.
And indeed, from several scraps of cords of different lengths you can assemble a good extension cord. The old wiring will also work after replacement.
When connecting, step-by-step assembly of extension cords and instructions for assembling extension cords will help. Of course, this option is a way out for urgent needs, but not for constant use, in order to avoid fire safety.
DIY photo of extension cords
Source: https://electrikmaster.ru/udlinitel-svoimi-rukami/