How to make LED lighting for balconies with your own hands
When the renovation of the house has already been completed, you can turn your attention to improving the balcony or loggia.
Many people here prefer to do the finishing themselves. When that is completed, it’s time to think about how to organize decent lighting here. For many, the LED strip has become a real find. By correctly installing lighting on your balcony or loggia using an LED strip, you will add another room to your apartment in which you will enjoy spending time. And all this can be done with your own hands.
Pros of LED lighting
LED lighting on the balcony can be an economical and stylish solution. This option has been gaining popularity in recent years due to a number of advantages:
Meteorite72 is the best online store for LED lighting! Products of the highest quality, impeccable service, the widest range, excellent prices, guarantee. View products >>>
Installation of lighting on the loggia
Installing such lighting can be done by almost any homeowner who has changed a light bulb at least once in his life and has an idea of what wiring is. Moreover, LED lighting on the balcony can be installed regardless of what ceiling finish the owners preferred for this room - such light bulbs are suitable for both wooden and plasterboard ceilings.
Briefly, the LED lighting installation process is as follows:
For those who are alien to such manipulations, there is such an invention as an LED strip. This LED strip can be mounted both on the ceiling and along the perimeter of the glazing. The effect is guaranteed to be stunning.
Recommendations for choosing lamps
How to choose LED lamps for balcony lighting? You need to take this choice seriously, then this promising technology will not disappoint.
There are several main criteria:
Features of the room
Loggia and balcony are often used by people as warehouses for a variety of things. But if you gather your strength here, you can completely redo everything with your own hands so that you can spend warm summer evenings here with pleasure. And good lighting is not the last place in this matter. With this approach, it is necessary to take into account several requirements that apply to lighting fixtures on a balcony or loggia:
- protection from moisture. Very often there is no heating here, so when organizing lighting using an LED strip, you need to choose its moisture-proof versions;
Note! The tape must be protected from moisture, regardless of where it will be located: on the ceiling (plasterboard or tension type), under the railing or on the floor.
- protection from dirt and dust. The balcony and loggia always have wide windows, which are often open during the warm season. Therefore, it is necessary to protect the lamps from possible contamination.
This is where the main features of the premises end.
Types of lighting
There are several types of lighting fixtures that can be installed on the balcony.
Natural light
The simplest and most affordable option. It is better to use it if the glazing area is large enough (for example, with panoramic glazing) and there is a lot of sunlight, as well as on open balconies.
The advantages of this option include the absence of additional financial costs. The disadvantage is obvious: the loggia will not be illuminated in the evening and at night.
Ceiling lamps
One of the most common lighting options. Depending on the size of the balcony and the need for lighting, you can install from 2 to 6-8 lamps.
There are 2 types of ceiling lights:
- pendant: these are chandeliers that hang from the ceiling on a cord. When choosing, you should pay attention to the size of the lamps: a chandelier that is too large for the balcony will look ugly and take up a lot of space;
- spot: mounted in a suspended ceiling. The lamps can be static or rotating; the second option allows you to direct the light in the desired direction. The advantages of such lamps include their versatility and small size, the disadvantages are some difficulties in removal.
Let's talk about LED strips
Combined balcony lighting
Today, LED strip is a common lighting device that can be used to create a wide variety of types of lighting in any room of the house. Very often it is used to create hidden lighting for ceilings, especially suspended or plasterboard ones.
Note! Very often, LED strips are used in tandem with other types of lighting fixtures. This combination is often found on balconies and loggias.
LED lamp has many advantages:
- quick and easy installation. On the back of the tape there is a self-adhesive base, which makes it possible to install the lamp on any surface in a matter of minutes;
Note! To connect the LED strip, you need a power supply. And if you want to be able to estimate the color mode of the glow, then you will also need a controller with a remote control.
- a great way to decorate a room;
- significant product flexibility;
- high-quality luminous flux, thanks to which the lighting of walls or ceilings is complete;
- Can be installed on any type of ceiling. Often used for stretch and plasterboard ceilings;
- presence of a wide variety of colors. You can use both single and multi-color ribbons.
In addition, with the help of such a lighting product you can create lighting both around the perimeter of the room and local (in certain areas of it). On a balcony or loggia using LED you can make the following types of lighting with your own hands:
- are common. Here it is assumed that the light source will be placed around the entire perimeter. This option is great for the ceiling;
- local. For example, you can install the product under the railing. As a result, the light will beautifully flood the lower part of the room;
Local lighting of the balcony with tape
- decorative. This involves highlighting certain decorative elements. For example, such a tape can illuminate shelves, paintings or the bottom of furniture placed on a loggia or balcony;
- combined. This is the most common lighting option used on balconies. Here, LED lighting can be combined with spotlights from a suspended stretch or plasterboard ceiling.
At the same time, the LED strip is so easy to use that almost anyone can install it with their own hands, even if they have little knowledge of electronics. Which option for lighting a balcony using an LED strip you choose depends only on your preferences and the characteristics of the room itself.
Guide to choosing and installing balcony lighting
When arranging balconies, not only glazing and interior-exterior decoration, but also the installation of lighting are important. Thanks to a competent and correct lighting design, a balcony or loggia can look completely different than in daylight. Moreover, the view changes not only inside, but also from the outside. By correctly positioning various lighting fixtures, you can make your balcony stand out from others in the dark. Read an overview of the types and characteristics of window sills for the balcony on this page.
Peculiarities
Balconies and loggias are most often used in the daytime, and at night, due to the lack of lighting, they are in little demand. If you install lighting on the balcony, its functions will expand significantly and the usefulness of this room will increase. Read tips on setting up a bedroom on the balcony. The light on the balcony can be installed differently, depending on the type of lamp chosen and the main functions that the lamps perform.
Related article: Heating a balcony with an infrared heater
The lamps differ in location:
The light reflection and contrast on the balcony furniture and walls depends on where and how the lamp is located.
The lamps are also divided into types according to their purpose:
- are common;
- local;
- decorative;
- exposition;
- combined.
In addition, lamps can be divided into three types according to the direction of light:
- Lamps whose light is directed straight down.
- Lamps whose light is directed upward, causing reflection.
- Lamps of diffused light, in this case the direction of light is evenly distributed between the top and bottom.
In order to organize general lighting on the balcony, diffused lamps are perfect. Thanks to the dispersion and reflection of light from walls, ceilings and floors, the room is evenly illuminated. For balconies and loggias with a dark interior, it is better to use more powerful lamps in diffuse lamps. You can find a guide to interior finishing of a balcony here.
For more comfortable and soft lighting, reflective lamps are an ideal option; they do not create a blinding effect. If you plan to make a balcony or loggias more illuminated, it is advisable to use materials in the decoration that reflect light as much as possible, such as mirrors. In addition, mirrors will visually expand the space. And if you change the brightness of the lighting, you can create different effects of perception of volume and proportions inside the balcony. An overview of the types of cabinets for the balcony is described here: https://balkonus-pro.ru/dopolnitelnye-elementy/obzor-vidov-shkafov-na-balkon.html.
Lighting a loggia using designer lamps The picture shows an example of direct light lamps
Spot lighting for the balcony in the photo
You can create lighting on a loggia or balcony using simple lamps
How to install light on the balcony?
As a rule, most apartments in Russia do not have power supply on their balconies or loggias. In this regard, the owners of such housing have a question: how to install lighting on the balcony. To carry out such work, at least minimal electrical installation experience is required. Also, do not forget that the balcony is an area of particular difficulty, which means that maximum effort and scrupulousness should be applied to this type of work.
To install high-quality and competent lighting on the balcony, the following preparation is required:
- Project for the placement of lamps on the balcony.
- Exiting electrical wiring from the apartment to the balcony.
But before this, it is necessary to analyze the indicators of the electrical network already existing in the apartment in order to understand whether it is possible to additionally connect consumers to it. What is included in this analysis:
- determining the condition of the current electrical wiring so that there are no twists or destruction of the conductor insulation;
- check whether the electrical protection in the distribution panel is working;
- calculate the load on the entire line taking into account the added power. Based on the identified indicator, it will become clear whether such a load is possible and whether it does not exceed the permissible standards for the cross-section of already installed conductors.
Having received all the necessary values, it will be possible to determine the possibility of installing a future electrical network for the balcony from an existing electrical distribution or from a distribution panel.
To connect light to the balcony from an outlet, you must perform the following steps:
- Create a channel for laying the wire from the outlet.
- In the place where the wire goes out onto the balcony, you should drill through the wall.
- Next, a hole for the socket is hollowed out on the balcony using a hammer drill.
- Then a two- or three-wire wire is connected to the wires of the socket, which is located in the apartment, and led to the balcony. In a pre-prepared channel, the wire is secured with staples. It is recommended to use wire in black insulation, as it is of higher quality and more reliable. It is also worth paying attention to the wiring - whether it is copper or aluminum and take this into account.
- A special box is inserted into the hole from the apartment to the balcony, through which a wire is threaded and connected to the outlet. The socket, in turn, is fixed into a previously installed box.
- Using putty, the channel with the wire in the apartment is covered.
- After all the work has been done, all that remains is to install the lamp and connect it to the outlet.
LED strip lighting
LED strip is used as additional or decorative lighting on the balcony. It is installed quite easily, on an adhesive base in the required places. After fastening, the tape is connected to the controller, and it is connected to the power supply. Read tips on how to make an office on the balcony.
Related article: Decorating the inside of the balcony with your own hands
Balcony lighting with LED strip Balcony design option with LED strips
How to make lighting on a balcony without electricity?
It is impossible to light a balcony without electricity. Any lamp requires a connection to the network; if you pull the extension cord from the apartment, the door to the balcony will always be slightly open, which is not very comfortable.
Video
Watch the video for the secrets of balcony lighting:
By installing lighting on the balcony, you can completely change both the external appearance of the balcony and the internal one. In addition, the useful functions of the balcony will significantly expand. You can install electricity on a balcony or loggia with your own hands, the main thing is to understand electrical wiring diagrams and have minimal experience in this matter.
Color design
LED products, as noted above, have a wide variety of colors. For balcony lighting, it is recommended to use the following colors:
Colored loggia lighting
You can also use RGB strips, which will allow you to get a huge number of shades of any colors using the controller. In addition, such a system will work in several modes (color change, fading, and others). It is necessary to choose the color of the glow based on the finishing available in the room, as well as your preference. All the colors listed above will create a comfortable and cozy atmosphere. You can also organize a romantic or fairy-tale atmosphere, depending on the need and the created surroundings using special decorative elements of interior decoration.
Choosing lighting elements for the balcony
Balcony lamps such as sconces, table lamps or even floor lamps can act as lighting elements. Lighting of a large balcony and loggia can be organized using several lighting sources, say, a chandelier and sconces or spotlights.
Photo of lighting on the loggia
The choice of the type of lamp is also based on the functional purpose of the room.
Depending on the mounting method, there are wall, recessed, ceiling and floor lamps.
Floor lamp on the loggia
Lamps are divided according to purpose:
- to general
- decorative,
- local,
- combined,
- indicative,
- expositional.
Decorative lamps for a loggia photo
The direction of the light flow is of particular importance when choosing lamps for a balcony and loggia. According to this principle, they are divided into the following types:
Direct light
The lighting of these devices is directed downwards. This is the best option for balconies with low ceilings. Devices of this type are also used to create local illumination zones for certain interior items, when reading and working in a balcony office.
Lighting stylized to match the design of the balcony
Reflected light
Lighting from the lamp directed upward creates smooth and measured illumination. The absence of a glare effect ensures special comfort in the room. To increase efficiency and illumination, materials with a maximum reflective coefficient are used for finishing the ceiling in balconies and loggias.
How to install?
Places for cutting
Once you have decided which method of lighting a balcony or loggia is most suitable for you, you can begin installing the LED strip with your own hands. Here you will not need any special tools or additional materials, and the installation itself will take a minimum of time and effort. Installation will be carried out as follows:
- Determine the length of the LED strip and cut it off from the main skein. The incision site is marked with a picture of scissors;
Note! Today, LED products are sold in skeins of several meters. The skein should be cut only in special places. Otherwise you will damage the product.
- after all the pieces have been cut, you need to solder them together and with the wires with which they will be connected to the power supply. The wires should be soldered to special contact pads located at the edges of the cuts. All elements of the lighting system should be assembled according to the diagram shown below;
Diode strip connection diagram
- All wire soldering areas must be well cleaned and insulated.
When the entire system is assembled, you can begin installing the LED strip at a permanent location. To ensure that the backlight holds tightly and does not fall off over time, before gluing it, all dirt must be removed from the surface and degreased with alcohol. Next, we tear off the paper tape from the back side that protected the sticky part and carefully apply it to the surface. We even out any possible curvatures and run it with our palm so that the strip sticks to the surface as tightly as possible.
How to connect the light yourself
The work is not difficult, but requires accuracy and strict adherence to all recommendations. To simplify, the process is divided into small steps that must be completed in order.
Selecting a connection location and drawing up a project
Power for lighting and sockets (if any) on the balcony can be supplied from different places. You need to proceed from the situation and select what is most suitable:
- Connection from the apartment's distribution panel . The best solution, since you can install a separate machine and power the system separately. But the wiring will have to be done from afar. Therefore, it is best to immediately lay the cable during repairs, when all the wiring is done. If the finishing is already finished, it is better to choose another method.
- Connection to a distribution box , if it is located in a room adjacent to a balcony or loggia. Another good solution that will provide reliable power. Usually you need to make much fewer grooves. But if the box is located far away and you don’t want to spoil the wall, it’s better to choose the next method.
- Connecting wires from the nearest outlet . Most often, it is located closest, so it is more convenient to lay the cable than from the junction box. A groove is made from the outlet to the balcony; the twist inside should be soldered for reliability.
The easiest way to make a strobe is from the nearest point of passage of the electrical cable.
Once the connection location has been determined, a simple project can be made. It will allow you to clearly visualize the result and carry out the necessary calculations. There are several points to consider:
- Determine the types of lamps used and their location. You also need to consider the position of the switch and sockets, if any.
- Draw up a simple diagram indicating the connection point and installation locations of the main elements of the system. The main thing is to observe the basic proportions and provide for everything that is required.
- Calculate the amount of materials. These are lamps, distribution boxes, switches and sockets, cables, fasteners.
The simplest wiring diagram for a balcony with one lamp and a socket.
When purchasing materials and components, give preference to quality products; do not skimp on the reliability of lamps and switches.
Lighting on the loggia and balcony: do it yourself
Thanks to the use of various finishing options, the balcony can be turned into a cozy and stylish room. But in addition to the finishing solution, it is necessary to decide on many other issues, such as organizing good light on the balcony or loggia. Only with good light will a balcony become a full-fledged room in the house. But how to make balcony lighting with your own hands?
There are many design decisions that affect lighting. The main thing is that the lighting is in harmony with the texture and shades of the finish. For safety, the wiring must be done perfectly. What lighting options are there?
Using lamps on the balcony
Lamp is a broad concept. It includes not only ceiling lighting, but also other types. In addition to their immediate purpose, lamps are designed to emphasize functionality and style.
Lighting can be general, local, decorative, combined, exposure or indicative. As for the installation method, the following lamps are distinguished:
Using sconces on the balcony
They create an unusual diffused light coming from the side. In the relaxation area, sconces look great. They are attached above the chair. This job is so simple that you can do it yourself. The disadvantage of this option is the relatively small flow of light. In such lamps you can use no more than two light bulbs.
Sconces on the balcony as lamps
Using LED lamps on the balcony
Previously, they were practically not used on balconies and loggias. Today, this is one of the most versatile and inexpensive methods of lighting, allowing you to implement a variety of design ideas on the balcony. The disadvantages of this type of lighting include only the increased cost compared to most other lighting devices, even if the same level of illumination is provided.
This option is quite compact and highly elastic. If you decide to organize lighting on the loggia, the photo below shows how the LED strip is mounted. It can be installed in almost any interior item.
Installing LED lighting on the balcony with your own hands
Using Spot Lighting
Typically used as overhead light. It allows not only to organize general diffused light, but also harmonizes with local and exposure lighting. But this lighting option also has its drawbacks. So, if you push a powerful light bulb too deep into the ceiling, the lamp may overheat. This will not only damage the lighting fixture, but will also damage the finishing coating of the ceiling.
Primary requirements
Since at the stage of construction and commissioning in houses they do not even lay power supply lines on the balcony, the laying of wires and planning the location of lighting fixtures falls entirely on you. Since the climatic parameters on the balcony can differ significantly from those in the interior, the operating conditions for electrical equipment here will be relatively harsh.
Due to the danger of a combination of electricity, temperature changes and moisture, when designing and installing lighting on a balcony, a number of requirements and rules should be taken into account:
- The degree of dust and moisture protection of electrical devices must correspond to the conditions in which they will be used. They are indicated by the IP index on the case and the following two digits. The most protected are IP68, they can be called completely sealed; the smaller the digital marking, the lower the level of resistance.
- The type of lamp is selected in accordance with the temperature conditions and the purpose of the balcony. If you plan to use it for a short stay, incandescent bulbs will do just fine. At temperatures close to zero, it is not advisable to install fluorescent lamps, since they may not work correctly.
- For unheated balconies and loggias, it is advisable to reduce the number of electrical cable connections as much as possible. Therefore, it is better to install the distribution box in a heated room from which electrical wiring will be supplied.
- For small balconies, it is necessary to choose lighting elements of small dimensions so that they do not occupy the already scarce space.
- When choosing an installation location, you need to make sure that the lighting devices will not interfere with the free movement of each family member. Since if the integrity of an electrical appliance is violated, a person may receive electrical injury.
- If a balcony or loggia is divided into several functional zones, then for each of them it is advisable to provide its own lighting. For example, a relaxation area requires general dim lighting, while a directed flow with good color rendition is suitable for a work office.
Thanks to the development and implementation of modern technologies, a huge range of lighting devices allows you to use various types of lighting on your balcony, which you can use either individually or in combination.
Features of organizing lighting on the balcony
If you are interested in how to install light on a balcony with your own hands, the video accompanying the article will help you familiarize yourself with the process. First of all, it is necessary to lay reliable wiring. There are two main wiring options - open and hidden.
Lighting in the arch between the room and the balcony
Open wiring is laid along the wall in a specialized box. You can also use a protective corrugated sleeve. As for hidden wiring, it is laid in the ceiling or wall. Often it is laid behind the casing.
Features of open wiring
This wiring option is laid directly on the surface of the ceiling and walls. This wiring option has several important advantages:
- convenient installation, you will not need to punch grooves in the walls and seal them in the future;
- ease of repair work: all communication elements remain open, ensuring constant and easy access to them.
But open wiring has one significant drawback. It is difficult to use on the balcony, because it does not combine with almost any design solution.
Features of hidden electrical wiring
As a rule, hidden wiring is used in apartment conditions. This option has one significant advantage - invisibility. For this reason, on a balcony it is better to organize hidden electrical wiring. The choice of wiring method is determined by the chosen method of finishing the ceiling and walls.
Balcony lighting option
If you look at the interiors of loggias and balconies, it becomes clear that along with plaster on the walls, only hidden wiring is used. At the same time, it is laid in pre-created furrows called grooves. It is necessary to carry out the following sequence of actions:
- marking of the future placement of lamps and distribution boxes, switches and sockets is carried out;
- purchase cables of the required length with a suitable cross-section;
- using a hammer drill and a grinder, grooves are made in the surfaces of the walls and ceilings into which the cable is laid;
- the grooves are sealed with alabaster;
- carry out high-quality insulation of the connection in the distribution box;
- all newly laid wiring is connected to electricity; if you do not plan a high load of electrical appliances on the balcony, then you can connect it to the light wiring of the apartment;
- connect and install lamps, sockets and switches.
It is important to carry out work when the power is turned off. The phase wire is connected through the switch “for break”. Otherwise, when changing light bulbs, you may get an electric shock even with the switch off.
Wiring installation diagram
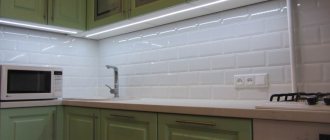
LED lights. LED strips for ceiling lighting
During renovations, special attention is paid to lighting, which, as you know, sets the basic atmosphere for each room. Along with the rapid development of energy-saving technologies, the use of diode lamps is increasing, which can significantly reduce energy consumption. LED strips are distinguished by a combination of practicality and attractive design. They are attached directly to the ceiling and create even, soft lighting.
LED strips for ceiling lighting
What are the devices
LED ceiling lighting
LED strip SMD 3528
In addition to the luminous elements, the tape contains resistors that protect the entire system from high voltage and limit the flow of current.
LED strip structure diagram
Table. Types of LED strips.
| Characteristic | Varieties |
| Diode type | 1. SMD 3028. 2. SMD 5050. Diameter affects coverage area. |
| Fixation method | 1. Self-adhesive with a reliable adhesive layer. 2. Attached with plastic brackets. |
| Tightness | 1. Without sealant, used in ordinary rooms. 2. Medium protection from water, can be used next to the sink or in the bathroom. 3. Sealed, able to function under water. |
| LED color | 1. White tape. 2. RGB. |
Types of LEDs on LED strips
Types of LED strips
RGB tape
Product benefits
The main advantages of LED strips include:
- saving electricity;
- uniform and directional lighting;
- service life reaching 10 years;
- the ability to choose different colors;
- in multi-color ribbons - stable color throughout the entire service life;
- flexibility, allowing you to give the tape any shape;
- environmental friendliness and fire safety due to the absence of mercury and low heating;
- possibility of adjusting the length of the tape;
- no influence on TV signals due to the absence of interference.
LED strip power
Due to these qualities, diode strip is often used not only for additional lighting, but also as the main light source. At the same time, the energy consumption of 10 meters of such a strip will be even less than that of an incandescent lamp that is familiar to many.
What does an LED strip look like in the interior?
Selection of tape by diode type
The most common diodes for such tapes are SMD 3028 and SMD 5050. They are mounted directly on the surface of the tape and vary in size, as indicated by the numbers in the name. In terms of brightness, small SMD 3028 diodes are not inferior to large ones, but due to their small sizes they can illuminate a smaller ceiling area. Therefore, to create a brighter backlight, you should choose SMD 5050.
As for the color parameter, it is worth paying attention to the crystals used in LEDs.
Prices for LED strip
LED Strip Light
Color samples
There are currently 4 options available:
- yellow;
- red;
- blue;
- green.
White crystals are not currently produced. Instead, the design uses a blue element that emits ultraviolet light. Since the diode is coated with a phosphor that glows when exposed to such rays, the output is white light.
LED Strip Light
But such a solution to the issue negatively affects the quality of the tape. It is the most short-lived due to the rapid burnout of the phosphor. The result is not only a decrease in the brightness of the tape, but also the appearance of a blue glow.
The classic RGB combination, in turn, allows you to get more than just one of the three colors offered. As is known from optics, white color is obtained by mixing all three colors. In combination with the stable operation of crystals that do not require additional coatings, this significantly increases the service life of the product. Typically, such tapes come complete with a remote control, which is used to adjust the lighting. This provides additional opportunities for experimentation.
Tips for choosing LED strip for different rooms
Depending on where the ceiling lighting is planned to be installed, the type of product and its placement are selected. The brightness changes due to variations in the number of diodes within one meter of tape. The more lighting elements, the brighter and more expensive it is.
One meter of tape may have a different number of diodes
Number of LEDs on strip
In the corridor
Since this area does not require stable bright lighting, purchasing a strip with SDM 5050 or higher diodes will be impractical. Mostly corridors and walk-through areas need additional light at night. Using incandescent lamps will lead to high energy costs, and darkness is not a good solution. The best option would be to install low power LED strips. Their light will not irritate the eyes at night, and using a dimmer you can change the brightness, which will also have a positive effect on the family budget.
How to lay wiring under the casing
This is a compromise method of wiring that can be implemented for lighting on a balcony. In this case, electricity is laid under the casing. This method of electrical wiring is applicable if you are using cladding with a frame. It has no significant disadvantages; rather, on the contrary, it combines the advantages of hidden and open wiring.
To install wiring in this way, you do not have to make grooves. The wires will not spoil the interior design. But you will have to lay the wiring in a protective corrugated sleeve made of plastic. This is necessary for additional insulation of wires and safety during operation.
Selecting a connection point
To connect the balcony to power supply, use one of three possible sources:
- Apartment electrical panel. This option is considered the most difficult to implement, since the electrical wiring will need to be connected over a considerable distance - stretching it through the entire apartment. This connection method is usually used only in case of simultaneous renovation of the home. The advantage of connecting from the panel is the ability to connect not only light, but also any powerful energy consumers, including heaters, TV, computer, etc.
- The junction box is in the next room. This connection method is used most often. You will need a distribution box in the wall, from which a new line is brought to the balcony. This method is fraught with certain difficulties. Not all cables are suitable for connecting another consumer: if the cable cores are of insufficient diameter, they will not support a new light source.
- Socket from the next room. This connection is called a daisy chain connection. The method is used when the installation box is located far from the balcony.
Lighting on balconies and loggias
In principle, you don’t need much to illuminate a balcony or loggia: its area is usually small, one or two light sources are enough. Today we will tell you how to choose them wisely.
Lighting for an enclosed balcony or loggia
Wall lights
In his project, Legko.com designer Andrey used a wall lamp to illuminate a cozy reading corner
Sconces and wall lamps are the most commonly used light sources for a balcony. A couple of small lamps will do a great job of illuminating a small space. In addition, attaching the sconce to the wall does not cause any particular difficulties, so you can do it yourself. An original solution for lighting an insulated balcony can be a garland of ordinary or LED lamps mounted on a load-bearing wall.
Ceiling lamps
Ceiling lamps, including spotlights, require more installation costs: for them it is necessary to prepare mounts on the ceiling, and for spotlights, you also need to organize a false ceiling behind which the wiring will be hidden. The balcony ceiling in this case is made of plasterboard or wood.
Large chandeliers or lamps hanging from the ceiling will visually hide the already small space of the balcony. But if you have a huge loggia, such lamps, on the contrary, can become an interesting accent in the interior. A good option is spot lamps that can be directed in different directions. Using one such ceiling or wall chandelier, you can organize lighting for all areas of the balcony at once.
3. Table lamps
Turning a balcony into a cozy office, reading corner or place for handicrafts is the dream of many. In this case, in addition to the main lighting, do not forget about local light sources. It is most convenient to use table lamps: they can be placed directly on the desktop, plus, they do not require additional communications. Work and read in comfort!
4. Fluorescent lamps
Bright fluorescent tube lamps (fluorescent lamps) will do a good job of lighting the balcony. They are mounted on the wall or ceiling. They are suitable for technological and minimalist design, for example, for high-tech interiors. In addition, if your balcony is a winter garden or greenhouse, fluorescent lamps will create the illumination necessary for plants.
LEDs
The recently fashionable LED strips are excellent for lighting indoor, warm balconies. You can place the tape around the perimeter of the balcony ceiling, or you can hide it under the railing, creating a kind of backdrop diffused light, as in the photo above.
Types of lighting
When planning the interior, the connection points for lighting fixtures are determined. To know how to make light on a balcony, you need to know: what type of lighting to use, how many lighting devices will be required, what power the electric lamps should be.
Knowing this, you can install the light on the loggias with optimal lighting and minimal energy costs.
Balcony lighting or loggia lighting is formed by a combination of light sources:
- Natural light.
- Upper light.
- Table lighting fixtures.
- Wall sconces.
- Daylight lamps.
- LED strip lighting.
To properly install lighting devices, you must first clearly understand how to make lighting on the balcony.
Natural light on the balcony
Modern glazing designs for balconies make it possible to achieve a high degree of illumination without electricity. Maximum natural light on the loggia can be obtained by installing panoramic windows. It should be taken into account that the installation of panoramic glazing is done in cold rooms.
The presence of a large number of framing elements of glazed openings can significantly affect the reduction of natural light in the room.
overhead light
Lamps for an upper loggia on the ceiling of a room can be of two types:
- spotlights;
- pendant lamps.
Spot lights
Spot lights are luminaires built into a suspended ceiling. In the store you will find a wide range of such devices. Balcony lamps are varied in their shape, color, and types of protective glass. Ceiling lights can be with fixed lamps or with rotating heads.
The method of installing a ceiling light is not complicated. The lamp is connected to an electrical wire. Then, a lantern is inserted into the cut hole in the suspended ceiling. Spring stops securely secure the lantern body in the suspended ceiling.
A group of rotating spotlights is convenient because the light of individual lamps can illuminate different places on the loggia.
As a rule, 4 or 5 lamps are installed in the suspended ceiling of a loggia. To obtain the required degree of illumination, the lanterns are connected to a double switch. This makes it possible to turn on your light alternately according to the scheme: 2 and 2 or 3 and 2 lamps.
Pendant lamps
You can hang chandeliers of various shapes and designs on the balcony ceiling. Naturally, you should not hang a bulky crystal chandelier on the loggia. Lamps with long pendants can significantly reduce the free space of a glazed room. Therefore, a short chandelier pendant is most preferable on the balcony.
Table lighting fixtures
Table lamps can be stationary and equipped with a special system of levers that allow you to move the lampshade with the lamp to the most convenient position.
A socket for connecting a table lamp is installed next to a computer desk or coffee table.
Wall sconces
A sconce with a beautiful shade will decorate the interior of any balcony or loggia. The lamp is suspended at a small height from the floor. The light from the sconce creates a warm, cozy atmosphere in a glassed room at night. A sconce switch element in the form of a chain or cord is very convenient.
Daylight lamps
Lamps are placed on the ceiling of the loggia to provide general illumination of the glazed room. Daytime lamps can be selected in terms of power and length to suit any internal volume of a glazed room.
Fluorescent lamps will also be useful for flowers
Artificial daylight is known to be especially beneficial for indoor plants. It is very convenient for lovers of floriculture to set up a small greenhouse on the loggia. Fluorescent lamps are placed where indoor plants are placed. In winter, when daylight hours are very short, artificial daylight has a very beneficial effect on the growth and development of indoor flowers and plants. To learn how to conduct electricity to a balcony, watch this useful video:
LED strip lighting
Recently, LED strips have become widespread. The backlight is a strip with LED elements attached to it. The tape has a bottom adhesive surface. Thanks to this, the lighting can be fixed in any convenient place on the balcony.
Light strips sell two types of power. The tapes can operate from 12 volt transformers or directly from the general electrical network. To learn how to make LED ceiling lighting on a balcony, watch this video:
For fire safety purposes, it is better to use light strips that operate directly from a 220 volt network.
In the retail chain you can purchase the above lighting devices for every taste, meeting the requirements of creating the interior of a glazed room.
Open balcony lighting
If the balcony is open or not insulated, the choice is narrowed down to street lighting fixtures that are not afraid of low temperatures, dust, rain, snow and wind. These include wall lanterns, dust- and waterproof designs, as well as luminaires with a high degree of climate protection.
Balcony lighting without wiring
If you don’t want to waste time, effort and money on wiring, organize lighting using battery-powered LED lamps. LED lamps consume a small amount of electricity while producing fairly strong light. Since you will not use balcony lighting as often as regular room lighting, the battery life will last for a long time.
Which balcony lamp to choose?
There are practically no restrictions on the choice of lighting fixtures for the balcony. These can be sconces, floor lamps, spots and entire systems of light bulbs. They can be placed on the ceiling, walls, on a table, along the railing, and even mounted into the floor. The main thing is that they should not be exposed to precipitation.
The only thing that can limit your imagination is the lack of heating on the balcony and severe frosts. In this case, you will have to select lamps that are resistant to changes in temperature and humidity. In all other situations, the balcony is considered a living space.
Wiring Tips
- The first and most important tip: if you have never conducted electricity, seek help from a professional
- All the work that you carry out on the balcony falls into the category of reconstruction or even redevelopment. This means that their implementation requires appropriate permission and subsequent approval by architectural and operational authorities
- Wiring on the balcony must be done with double insulated cables. When installing external wiring on open and “cold” glazed balconies, the cable must additionally be placed in special corrugated tubes. Electrical equipment protection class - at least IP 44
- In order not to complicate your life, balcony lighting needs to be thought out in advance - before insulation, cladding and arrangement
- Decide in advance on the function of the room. There is a big difference between lighting a study room and a winter garden
- Before starting work, be sure to draw a diagram of the future wiring: where the energy-consuming devices will be located, how much power will be needed for their operation, etc.
- Open wiring is easier to do than closed wiring, but it looks less aesthetically pleasing. This option is good if you plan to cover the balcony with panels behind which you can hide unattractive communications
As you can see, lighting a balcony is not such a simple matter. You need to have certain knowledge and skills to carry out all the necessary communications here. If you feel that you have the necessary competencies, all that remains is to choose the type of lighting and get down to business. If not, it’s better to seek help from a professional and just enjoy the result.
DIY lighting on the balcony
Lighting on the balcony and its installation is one of the stages of its arrangement. When choosing a suitable option, you need to consider the following points: what will the balcony be used for? For example, in the office, the lighting should be bright enough, especially if you are supposed to work at a computer or read printed materials and manuals.
For a guest or recreation area, dim lighting and soft lamps are suitable. If it is planned to equip a flower gallery there, then it is necessary to take into account the characteristics of the plants being grown and their lighting needs.
You also need to decide on the wiring diagram. In this regard, there are two main options:
- open wiring;
- hidden wiring.
The first option is simpler to implement and provide light on the balcony, but still a closed scheme is preferable for living space.
Lamps for lighting a balcony – which ones to choose?
A wide selection of lighting devices, on the one hand, makes the task of choice easier, on the other hand, on the contrary, it complicates it. It is difficult to settle on just one option - lighting on the balcony using a glow cord, installing sconces or rotating lamps, spotlights or a combined type?
Balcony lighting can be organized using any of the devices listed above; for maximum functionality, it is worth thinking through everything in advance and drawing up something like a project.
Combined lighting
The combined type shows itself best for a fully heated glass-enclosed room.
The main light may not be too bright, subdued; for this you can use a sconce or chandelier with a matte shade. And in places where it is required, you can install additional sources - spotlights or rotating directional light lamps. This option is good for equipment on additional usable office space.
Lighting for a small balcony
If the balcony width is minimal, you can use a neon cord for lighting. This is a great option for a small but cozy room where you can relax.
This type of balcony lighting, designed and implemented independently, will not cause problems:
- it is economical;
- easy to install;
- it is possible to choose the color of the backlight;
- durable;
- provides soft, uniform light along the entire length of the cord.
Also, a neon cord or, in other words, a light pipe can be used either as the only source of lighting or in combination with other options.
Combination of floor lamp and turning lamps
In this case, turning lamps play the main role; they can be installed in such a way as to illuminate all important areas. And the floor lamp will become a source of pleasant soft muted light during the evening rest.
The location and direction of rotating lamps should be thought out in advance for greater practicality.
This option will require not only the provision of electricity for the lamps, but also the installation of an outlet into which the floor lamp will be connected.
How to make the lighting on your balcony as energy efficient as possible
To begin with, you should think about combining different light sources, so you can use different lamps for your balcony without wasting electricity on lighting currently unused areas of the balcony.
When calculating the amount to buy lamps, remember that the stingy pays twice. Don't skimp on quality, make your choice in favor of economical products. These include:
- Fluorescent energy-saving lamps;
- LED light sources;
- Neon light pipes.
When organizing lighting on the balcony and installing lamps with your own hands, be careful. Do not connect wires made of different materials (aluminum with copper), carry out work only when the power supply is turned off and follow the instructions for installing the devices. To carry out the work, use special tools and devices.
Option 1 - open wiring
This option is suitable only for those cases when all the interior decoration is finished. To perform open wiring you will need:
- Cable. It is better if it is a three-core copper cable with a cross-section thickness of 1.5-2.5 mm.
- Cable channel. These are special fastening elements where wires are inserted.
- Fasteners - self-tapping screws or dowels.
- Distribution box. It is installed in the apartment, and from here the wiring goes to the balcony.
- Mounting boxes. Sockets and switches are mounted there (one in each box).
- Terminals. Electrical tape is a thing of the past; now the wires are connected with special terminals with clamps.
Self-installation
The choice of materials depends on the specific situation. Do-it-yourself installation of lighting on a balcony is divided into stages depending on its type.
Selection of materials and tools
To install the wiring you will need the following materials:
- cable: it is better to use a model with 3 copper cores and a cross-section of 1.5-2.5 mm. It is also worth choosing a cable with soft insulation, which bends easily and is practically not deformed;
- terminals: they connect the wires to each other;
- cable channel: this is a plastic part in which the cable will lie. It is an elongated rectangle with an opening top cover;
- fastening elements: these can be dowels and screws;
- distribution box: the cable comes from it. It is best to place it inside the apartment;
- mounting boxes: switches and sockets are “hidden” in them.
In addition to materials, you will need to prepare some tools in advance:
- a hammer drill for drilling holes in the walls and laying holes for the cable itself;
- multimeter to determine voltage;
- tape measure, screwdrivers, pliers.
How to make lighting with and without wiring
The light on the balcony can be powered either from the electrical network or from batteries. In the first case, you will need to lay out the wiring in advance, in the second, you just need to stock up on batteries.
Important! Before laying the wiring, it is necessary to calculate the voltage with a slight excess and turn off the electricity in the apartment
Wires can be laid in 2 ways - open and closed. In the first case, the wires are not hidden and can act as a decorative element; in the second, they are hidden in the wall. Exposed wiring is usually laid if it is impossible to remove it into the wall without additional repairs.
Open wiring is laid in several stages:
- It is necessary to measure the required amount of wire and mark the places where grooves, lamps, sockets, cable channels (if any) will be laid;
- Next, drill through (drill through) the wall, and through this hole pull the cable from the apartment to the balcony;
- Lay cable channels according to the chosen scheme between sockets and switches, stretch the wiring inside and combine all the elements into a single circuit;
- Check the voltage level in the network;
- Seal the grooves with mortar, close the cable channels;
- Connect the network to the switch at the input site.
The laying of hidden wiring is similar to the laying of open wiring, but has one feature - the wires run inside the wall in special channels and can only be carried out until finishing repair work is completed. When working, instead of cable ducts, corrugated pipes are used, which protect against wetting and fire; fastenings are made with special clamps.
Important! After completing the work, it is necessary to test the lighting and only then finish the finishing, otherwise, if problems arise, the repair will have to be redone. If desired, you can do without wiring
In this case, there is no need to drill walls or stretch and lay wires - the entire lighting system will be powered by batteries or accumulators. Three batteries usually last for 100 hours, but this is an average value: it depends on the power of the lamps, their number and the power source itself
If desired, you can do without wiring. In this case, there is no need to drill walls or stretch and lay wires - the entire lighting system will be powered by batteries or accumulators. Three batteries usually last for 100 hours, but this is an average value: it depends on the power of the lamps, their number and the power source itself.
You can install such a system in several steps:
- Choose a lamp and its location;
- Secure it to the selected location and connect to the power source;
- If necessary, install additional elements, for example, a motion sensor.
When choosing lighting for a balcony, it is necessary to take into account many nuances: whether the space is glazed or open, renovations have been completed there or are ongoing, how the room will be used
It is equally important to resolve the issue with power: lamps can be powered by batteries or mains power, wires can run on top of the wall or in it
Option 2 hidden wiring
Hidden wiring is fundamentally different from open wiring in terms of installation technology. But the list of materials and tools will remain the same. Only the cable channels will need to be replaced with special corrugated pipes, which will protect the cable from moisture and the risk of fire during a short circuit. As for the diameter, the thinnest ones will do.
Now about the intricacies of performing the work:
- The cable is located inside the corrugated pipe under the external finishing of the balcony. If the sheathing is made of profiles or timber, then holes are made in the racks. The cables are pulled through these holes, but in such a way that there are no kinks or sharp bends.
- If there is too little space for attaching the corrugated pipe, then fixation occurs using special clamps. It's very simple and quite reliable.
When the fastening process is completed, you need to check whether the system is working correctly. After this, the walls and ceiling are finished.
LED strip for the window. Options for lighting curtains with diodes
The LED window curtain garland has 2 types of glow: end and side. It is compact, thanks to this property it can be installed even in very narrow window openings. In addition, the tape is practically invisible when turned off.
Ideally, residents should not observe the glow provided by the operation of LEDs, but rather diffused (reflected) light that is pleasant to the eye.
Scattered (reflected) light
It is advisable to hide the cornice for such curtains in the ceiling niche or cover it on top with a polyurethane cornice so that the light source is hidden.
Decorative lighting of curtains with diodes is performed in 2 options:
- Below the curtains.
- On top of the curtains.
The most common way of illumination is from the top of the curtains, pointing down onto the fabric. To do this, a box is mounted near the edge of the curtain; a diode strip is placed in it, which supplies light tangentially.
Sometimes, to get a bright accent of light, it is enough to illuminate not the entire curtain, but only the lambrequin, which in the light of the diodes acquires a unique aura.
In some cases, LED curtain lighting is not hidden in a box, but is used to illuminate blinds. To do this, choose a tape with the most dense arrangement of diodes to create an interesting point-light decor.
Hypodynamic interior lighting is provided by full-color RGB diodes, which are controlled using a remote control and can change the shades of light. After pressing the control button, the tape takes on the selected static color, which can completely change the visualization of the curtains. If blue curtains are illuminated with yellow diodes, you will get diffused greenish illumination for the curtains, and if blue diodes are directed at red textiles, the curtain illumination will be purple.
Low-power diodes turn transparent fabrics into light and weightless ones. The lower the density of the diodes, the more airy the organza tulle, muslin or thin curtain will look.
For thick and heavy curtains, more powerful and closely spaced diodes are often used, because such textiles transmit little light and therefore require stronger lighting.
Option 3 – light without wiring
And now for a little bit of magic - balcony lighting without wiring. Seems incredible? However, it is possible. Then you won’t have to do any electrical work, drill walls and make noise, or cover everything with dust. Everything can be done much easier. Namely:
To begin with, let’s designate the required degree of illumination and where the lamp is needed for the balcony. After that, you can think about specifics.
The best option would be a battery-powered lamp. They differ in power, operating time, intensity, appearance, method of attachment, etc. To save money, you can purchase batteries that can be charged multiple times. You can also equip the lamps with a motion sensor. Then the lighting will turn on only as needed, which will significantly save energy. Moreover, you can buy a lamp quite inexpensively.
And, of course, one cannot fail to mention the ease of installation and dismantling of such structures.
General recommendations for carrying out work
In addition to the nuances of different methods of installing electrical wiring on a balcony, there are also a number of general recommendations that will be useful when installing lighting elements. Here they are:
On an open balcony it is better to install wall lamps, moreover, the switch is located in the apartment. You should also remember that the lamp itself must be designed for outdoor use. You cannot buy ordinary indoor sconces - they are not designed for exposure to moisture and other precipitation.
If the room is planned to be used as a relaxation area, then the best option would be bedside lamps, spotlights, and sconces. Diffused soft light in warm colors will help you relax and unwind.
If the balcony or loggia will be used as a workshop or office, then the work area should be well lit: add several additional lamps there - wall or spotlights.
To make it easier to navigate in the closet and find the right thing, you can also install a lamp there or install lighting on the loggia - for example, stick an LED strip. It's fast, easy and doesn't use up too much electricity. By the way, LED strip is also used in other parts of the balcony - it creates a pleasant-looking backlight on the balcony. Moreover, it is very easy to install and is not too expensive.
Selection of lighting fixtures
Lighting for any room can be divided into three categories: general, task and decorative. The group of general lighting includes chandeliers, sconces and other lamps that emit diffused light, evenly distributed over the balcony.
Working lighting devices can be lamps that provide directed point light on a work table, bar counter, chair or other surface. Decorative lighting creates the desired atmosphere or highlights certain interior items on the balcony.
Due to the small area of the room, the lighting design on the balcony rarely includes all three categories of lighting fixtures, usually limiting the lighting scenario to one or two groups
Chandeliers and sconces
A chandelier is a classic option for any living space. However, such a lamp imposes certain requirements on the ceiling height. If the chandelier is located below 2 m from the floor level, this will visually reduce the space, and for tall people it will create discomfort when moving on the balcony.
A general lighting chandelier should not cast glare or shadows, since in this case it is impossible to achieve a uniform light flux. The presence of shadows is more typical for decorative lighting.
Depending on the design and location, the chandeliers perform the function of general or task lighting on the balcony
If the ceiling is not high enough to install a chandelier, sconces are used as a source of diffused light. Typically, wall lights provide additional lighting. However, given the small area of the balcony, sconces can act as sources of main light.
The mounting height of sconces depends on their location. When placed on the wall separating the room and the balcony, it is better to mount the sconce at a height of 1.5 m. If mounted on side panels, the wall lamp can be placed a meter from the floor, focusing on the adjacent chair or armchair.
Sconce is great for lighting a balcony seating area
Spotlights
The most popular option for lighting the ceiling on a balcony is recessed spotlights. Their main advantage lies in the installation method. Such devices are located almost at the same level with the ceiling, so they do not take up free space.
Spotlights vary:
- design (shape, color scheme);
- type of lamps used (incandescent, halogen, LED, energy-saving);
- design (rotary, non-rotary).
The peculiarity of such devices is a strictly directed luminous flux. Therefore, they are installed directly above the desktop or soft corner. Rotating lamps can be directed to an area slightly distant from the mounting location, which makes balcony lighting more functional and practical.
To cover the entire space, spotlights are evenly distributed over the entire surface of the ceiling
LED strips
LED strips are the best option for organizing decorative lighting on the balcony. In addition to being economical and easy to install, such lamps are capable of emitting light of different shades: white, blue, green, yellow, red.
Standard RGB colors are produced by adding a special dopant during the production of LED crystals. In the case of white light, a different technology is used - the blue LED is coated with a phosphor, which, under the influence of blue radiation, produces white light.
Balcony lighting with LED strip is convenient to use to attract attention to a certain area or piece of furniture. For example, LED strips are often mounted under decorative shelves or as a picture border, creating an interesting effect. On a small balcony, LED strips can also be used as the main lighting, placing them around the perimeter of the ceiling.
LED lighting adds originality to the balcony ambiance
See even more options for the design and use of lamps on the balcony here.