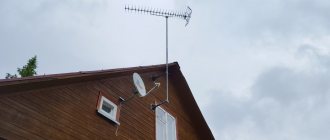
An antenna is a means of delivering an information signal to radio devices. With the advent of the era of cable Internet and television, the need for such structures in urban environments has decreased significantly. In rural areas, the issue of installing antennas is still relevant. Many owners of private housing construction are interested in which bracket for the antenna will hold it firmly and reliably.
Satellite antenna
Which antenna bracket to buy for your dacha
There are many different designs for each type of antenna on sale. There are several factors to consider when choosing a mount for an outdoor satellite dish:
Analyzing all these circumstances, you need to acquire drawings of fastening devices and evaluate the feasibility of using one or another support structure. After this, you can go to the store to purchase the necessary bracket for mounting the antenna. Antenna mounts can be represented in several types:
Wall bracket
The bracket for mounting an antenna on the wall of a house can be of two types: L-shaped and T-shaped structures.
L-shaped bracket
The wall support consists of a vertical support platform and a bent pipe welded into it at an angle of 900. When selecting the desired configuration of the device, you need to measure the size of the roof extension beyond the facade of the house.
Important! The distance of the fasteners must be such that when installing it, the pipe does not rest against the overhang of the roof above the building. In the technical documentation, the manufacturer must indicate the size of the offset of the vertical part of the support pipe relative to the wall.
Technical specifications:
The small reach of the bracket rod for an outdoor satellite antenna significantly helps reduce the wind load on the dish itself. Such antenna holders are used in dachas.
It should be noted! In addition to pipes, manufacturers use box profiles welded at an angle of 900. Such structures have high load-bearing capacity and can withstand the weight of heavy equipment.
T-shaped fastener
The support consists of 5 elements held together by electric welding:
Technical characteristics of T-shaped bracket:
Additional Information. The indicated dimensions are not dogma. Manufacturers of supporting structures use different rolled metal and different profile sizes. In general, all fastener variations are designed for the maximum load from a satellite dish.
Wall supports may have other forms, but their essence remains the same - the transfer of static and dynamic loads from antenna equipment to the wall structures of the house.
Telescopic bracket for TV antenna
Products of this type largely replicate standard wall construction. The only difference is that the extension consists of two elbows. Elbows can be made from box section or pipes. A profile of a smaller diameter is inserted into a profile of a larger size.
The profiles have mounting holes that allow you to adjust the size of the antenna offset relative to the building wall. Bolts are inserted into the holes. Clamping the hardware with nuts, fix the desired length of the stem.
Installing Wall Brackets
The bracket for the satellite dish is mounted on the facade of the house in two ways. Fasteners for an outdoor satellite antenna are mounted on concrete and brick walls using dowels. Markings are made on the façade. Holes are drilled using a hammer drill. Leaning against the support heel, dowels are driven through its holes.
For wooden walls, cap screws are used, which at the end have a wrench head. First, drill a hole in the wood ø 2 mm smaller than the screw. Then insert the hardware through the mounting hole of the bracket heel and screw it in with a wrench.
Mast-stand
Masts 2.8-3 m long are made of steel pipes. They are called telescopic. As a rule, they are installed on the roofs of houses. Masts are sold without a heel support and a prefabricated ring. The kit includes two elbows with a diameter of 30 and 35 mm.
Racks are used for installing both terrestrial and satellite antennas. Thanks to the large vertical extension of the structure, to which the height of the building’s roof is added, the possibility of receiving a high-quality radio signal is significantly increased. In order to lengthen the mast, just add the required number of elbows.
Manufacturers supply the radio equipment market with masts of various heights. For masts with a height of 6-8 m or more, the installation of guy wires will be required.
Mast installation
If a long rack is placed at ground level, then a foundation is made for it. The heel of the mast is secured to the base with dowels or by welding to embedded parts.
On a flat roof, the base of the mast-rack is secured with anchor bolts. If the height of the rack requires the installation of guy wires, then a prefabricated ring is secured to the mast, at three points on the roof around the rack with dowels or anchors with a ring-shaped end. The eyes of the assembly ring are connected to the anchors with cables. Three-way stretch ensures reliable mounting of antenna equipment on the rack.
A pitched roof will require an opening for the rack to exit outside. The heel of the mast is fixed to the attic floor. In a tiled roof, a hole is cut out in one of the sheets. A protective apron from precipitation is installed around the opening.
The same is done with a soft roof laid on the plank sheathing of the rafters. The tight passage of the post in the opening increases the load-bearing capacity of the mast.
Additional Information. Rack masts are used to mount antennas for radios and televisions on them. Satellite dishes have a large windage, and their location at high altitudes cannot withstand wind loads.
Ring, prefabricated for stretching masts
The device consists of three curved metal segments. The elements are fastened together with coupling bolts and nuts.
The ends of the planks have mounting holes into which the hooks of the cable extension ends are inserted. The prefabricated ring is usually fixed at a height of 2/3 of the mast length. The ring elements are made of galvanized steel and withstand the aggressive effects of a humid atmosphere.
Attention! Masts with a height of 14 m or more are equipped with factory-welded eyes. They are installed in sections through two elbows.
In the stores of the Electronic Paradise retail chain you can purchase a bracket for an external antenna of any design. Here, sales consultants will select not only an antenna mount, but also a satellite dish, cable products and other related products.
Bracket designs
According to the area of application, it is necessary to distinguish the following types of antenna brackets:
- Street;
- Indoor;
- Automotive.
Car brackets are specialized structures, and therefore it makes no sense to dwell on them in detail in this article.
For indoor installation, use special indoor antennas with appropriate mounting brackets. Their main feature: small dimensions, the ability to install anywhere, with the exception of some special models, as well as aesthetic appearance.
There are no difficulties in using such antennas and, accordingly, their brackets, especially since they are made as a single whole.
Outdoor ones are the most common and most complex devices. This type of bracket allows you to mount the antenna on masts, walls and other building structures, orient it in space and ensure reliable installation.
There are a lot of options for such brackets. Complexity and cost depend on many factors: the mass of the antenna itself; the need for adjustment in space; installation method; possibility of remote position adjustment.
Many people make their own antenna bracket. In this case, it is important to take into account your capabilities and provide sufficient strength and reliability of the structure.
Video
Source
Installing a satellite dish support
When purchasing a satellite dish , it is often included with a standard support (I had a wall support included). I would advise you to buy it separately and select it depending on the configuration of the place where you will install the satellite dish . As a result, you will prevent yourself from unnecessary financial expenses.
Below are several types of such satellite towers. The very first one, I displayed in more detail.
As you can see from the photos below, there is nothing particularly complicated in their assembly. This is what I would like to draw a little more attention to.
For example, of the listed types of satellite supports, if possible, I would prefer the support shown in Photo 3 or Photo 6, since they are more stable.
As for the support shown in Photo 4, it is advisable to install it if the diameter of the satellite dish does not exceed 0.5. 0.6 meters, since with a larger diameter there will be a rather large load on the mount in the wall.
In my version, I preferred the vertical support of the satellite dish (Photo 6), although I made this support myself (Photo 7).
For this type of satellite support, fixing it only at the bottom will not be enough (over time, it will gradually begin to loosen). In this case, here, a guy wire or an additional attachment point (Photo 8). Therefore, for greater stability of the support structure, I made an additional attachment point, securing it to the balcony railing.
Now that a suitable satellite dish support has been selected, you should especially think about how it will be secured.
Attaching the satellite tower
Important! When installing a satellite dish support on brick or concrete walls, do not use any wooden plugs, caps, “plastic” dowels, and especially nails.
The bracket is attached to all existing holes to ensure a tight fit to the wall without gaps. This is best done using anchor self-propagating bolts (do not use the anchor with a screwdriver, use a wrench).
Anchor bolts
| Anchor bolt for dense concrete and brick. The diameter of the hole to be drilled must correspond to the diameter of the anchor bolt. | Universal anchor. Used for soft foam concrete without drilling a hole. | special anchor for foam concrete |
The images below show the two main types of such anchor bolts, assembled and disassembled.
Such anchor bolts operate on the principle of expanding the body of the anchor itself inside a drilled hole made in concrete, or in a brick wall. And the more we tighten the bolt or nut, the larger the diameter of the anchor body will be. To understand in more detail what happens inside the hole with the anchor when we tighten it with a wrench, take a look at the pictures below.
Shown here is the anchor bolt pictured above in Photo 1.
This type of anchor consists of a long threaded bolt, a tube with a longitudinal cut and a cone-shaped expansion nut . When we start to twist the bolt, the cone-shaped nut begins to screw into the tube, thereby expanding it in the place where the tube itself is sawn. Thus, the expanded anchor bolt, by pressing on the walls of the hole in brick or concrete, is very firmly fixed inside this hole.
The second type of anchor operates on the same principle, but instead of an expander nut, it uses a cone-shaped screw head . And we turn it with a wrench, now not the screw (or bolt) itself, but its nut (Fig. 3 and Fig. 4).
Shown here is the anchor bolt pictured above in Photo 2.
When installing a satellite dish support, preparing holes for anchor bolts, make sure that the hole itself is of the required diameter and depth is 5.10 mm greater than the length of the entire anchor bolt . To find out the diameter, look at the anchor body; it should say there what diameter the hole should be, that is, the drill itself.
You can drill a hole in a brick wall with a simple electric drill, and if in concrete, then with a drill with a hammer drill, and of course with a special Pobedit drill. Such drills can be purchased at a hardware store, in the “Tools” section.
When you make markings for holes and then drill, try to carry out these works quite accurately , since if you make a mistake, then the fixed anchor bolt is unlikely to be pulled out back, and it will remain there “living” forever. And then, if you make a mistake with at least one hole, then all the holes must be drilled again, since in this case, the satellite dish support will have to be moved to the side.
After the “drilling” work is completed, it is advisable to blow out the holes made by taking a piece of vinyl or rubber tube (40.50 cm), smaller in diameter than the hole itself. Insert one end of the tube into the hole, blow into the other, and all the remaining crumbs from drilling will be blown out. At the same time, be very careful that large or small crumbs do not get into your eyes (when working with an electric drill, try to wear special safety glasses).
Once the anchor bolt is inserted, it should fit slightly tightly into the drilled hole , and of course, under no circumstances allow it to dangle.
Installation of anchor bolts
Below, in the images, you can see three options for anchor bolts, ready for fastening a satellite dish .
Source
The most convenient and popular way to install a TV is wall mounting. Wall-mounted installation allows you to get rid of the previously familiar cabinets that take up a lot of space on the floor. You can hang the TV in any room of your apartment or house - kitchen, bedroom, living room, hallway.
Hanging must be done on a mount pre-installed in the wall. Before this, a fastener is screwed to the TV and hung on the wall system.
The best way to mount your TV is with a factory-made bracket.
The wrong choice of bracket can result in structural failure.
By the way, if the TV is a picture tube, then a shelf bracket is required for installation. The structure is mounted only on the wall. And the TV itself is placed on a shelf and secured with a strap for safety.
The installation method does not depend on the brand of equipment. It will be possible to attach TVs from Samsung, LG, Sony Bravia, Philips, Sharp, Xiaomi, Dexp and other various brands.
DIY antenna mount on the wall of the house photo
But still, progress does not stand still. There are a huge number of people living in rural areas from whom you can make money. Therefore, companies working with cable networks began to appear, providing unlimited Internet through data transmission via an antenna. A transmitting device is placed on the nearest tower, to which an antenna installed on the roof of the building is directed, and unlimited Internet appears in a private home.
The only condition is that the transmitter must be in direct view of the antenna. Tall buildings and trees significantly reduce data transmission speeds, so the higher you install the antenna, the better the signal quality will be.
Each specific case has its own installation methods, for example, in our example we had to make a bracket and mast for the antenna with our own hands, since nothing like this is sold in stores.
We took the most accessible materials for the work, which are lying around in the corners of almost every yard. The antenna mast was electric welded from two pieces of old half-inch diameter water pipes. The main thing is that the two pieces of pipe need to be aligned evenly with each other so that the mast is as level as possible. Its length turned out to be 4 meters, in our case it is quite enough. The welding area was cleaned with an emery wheel and set aside.
Now we need to make a bracket that will hold the antenna mast. For these purposes, take a corner 5 by 5 cm and a square pipe measuring 2 by 2 cm. Cut them into pieces with a grinder so that you get 2 pieces of approximately 50 cm each. The length of the corners was taken arbitrary, and the length of the pipes is equal to the distance over which the roof sheathing hangs over the wall of the house. For us, this distance is exactly 50 cm. Using electric welding, we weld the square sections perpendicular to the corners.
Now you need to pick up another pipe into which the antenna mast will be inserted. We found a suitable piece with a diameter of an inch and a quarter, about 1 m long. We will weld two nails crosswise in its lower part so that the mast does not fall through. We drill two holes with a diameter of 9 mm in the pipe.
We will insert the mast into it and drill through it in the same places with a 9 mm drill. Let's check the alignment of the holes by inserting 8 mm bolts into them.
The next thing is to weld the pipe to the squares, departing 10 cm from its edges. First, we will weld one part, installing the parts perpendicular to each other.
Then we will do the same with the second part. Our bracket is almost ready.
To strengthen the structure, we will weld 2 reinforcement rods diagonally. Thus, the bracket received the necessary strength.
In each corner we drill 4 holes with a diameter of 11 mm.
The antenna mast and bracket are ready. You can send them for painting.
While the parts are drying, we will carry out preparatory work for installing the bracket. We will attach it to the gable of the house. Since the distance from the ground to the installation site is 5 m, we will build small scaffolding for convenient work. We will make them from logs and boards. The structure must be made with excess strength to ensure the safety of high-altitude work. We will install a plank flooring on top.
We will place a ladder on the scaffolding from which we will carry out the installation. First, we’ll lift the bracket, lean it against the pediment and mark the mounting locations with a pencil. Use a screwdriver to drill 8 holes. The gable boards, 25 mm thick, are not reliable enough to hold the bracket with the mast and antenna. Therefore, on the back side, in the attic, in the places where the holes were drilled, we will install two more boards 5 cm thick, placing them perpendicular to the gable plank. We will secure them firmly to the rafters.
Once again, using an extended drill of 11, we will drill the pediment. Install the bracket and insert bolts with a diameter of 10 mm into the holes.
On the reverse side we will secure them with nuts, place larger washers under them and tighten them with a wrench.
Our bracket is firmly fixed to the gable of the house.
Next, let's move on to installing the antenna. We attach it to the edge of the mast, positioning it in the desired direction, climb to the roof and insert it into the bracket pipe from above. Insert 8mm bolts into the holes drilled in the walls and tighten with nuts.
Since we kept the distance of the bracket from the wall to 50 cm, the antenna mast runs next to the sheathing. Let's take an aluminum hanger, crimp it around the mast and screw it to the boards with self-tapping screws.
This homemade design is reliable and durable, the cost of materials and production time are minimal. If the mast is even longer, it is advisable to secure it with guy wires made of steel wire. Now all that remains is to set up the antenna and use unlimited Internet.
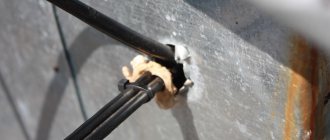
After the antenna has been purchased, before installation, you need to make sure that the fasteners are available and pre-treat its threaded part with lithol or machine oil, or, in extreme cases, silicone grease or WD-40. If you decide to install an active antenna, to prevent oxidation of the contact points, it is recommended that after completing the cable connection to the electronic board, seal it with waterproof silicone.
Depending on the power and direction of the television signal, a decision is made on the location and height of the antenna installation. In practice, the two most popular options are: on the facade of the house and on the roof. Let's consider both installation technologies.
The simplest and least labor-intensive option. You can install a television antenna on the facade yourself without anyone’s help, but this method has a significant drawback. To ensure reliable reception, the signal from the nearest repeater must be of such strength that the receiving device does not need to be raised high. The choice of this installation option is limited by the material and decoration of the walls of the house. Installation on siding cannot be carried out and is very problematic on aerated concrete masonry. The ideal option for installing an antenna on a facade wall is when it is made of brick or wood. When performing installation, maintain a distance between fasteners of no more than 1.5 meters. It is recommended to use anchor bolts or self-tapping screws as fastening materials.
- Receiving antenna device.
- Metal pipe or wooden beam.
- Bracket.
- Anchor bolt (self-tapping screw).
Photo examples of installing a signal receiver on the facade:
The video below clearly demonstrates how to install a receiving antenna device on the facade of a house:
By the way, we talked about how to make an antenna for a TV with your own hands in a separate article. Simple instructions will help you save money and at the same time assemble the simplest version of the signal receiver!
The most common way to install television antennas. In an area of reliable reception, when there is no need to raise the antenna to a great height, it can be mounted on a small wooden beam. Otherwise, you will need to install the receiving antenna device on the mast; for this case, the antenna kit includes special clamps. The height of the mast can reach several meters; it can be made of a solid metal pipe, round or profile section, or be a prefabricated or telescopic design option. The telescopic mast is considered the most acceptable and convenient. During operation, the antenna must be lowered to perform maintenance or replace the electronic board; the telescopic design allows this to be done without difficulty. You can do all the work yourself, without hiring additional people to help.
There are several ways to mount a television antenna mast on the roof of a house:
Method 1. Fastening with brackets to a brick chimney pipe and ventilation. Installation is carried out using brackets with clamps, which are attached to the wall with anchor bolts.
Where: 1 – mast; 2 – bracket with clamp; 3 – brick chimney and ventilation pipe; 4- anchor bolt; 5 - outdoor antenna.
Method 2. Installation of the mast on the ceiling with fastening to the roof structure elements.
1 — receiving antenna device; 2 – mast; 3 — clamp for fastening the mast to the roof structure; 4 - rafter beam.
In this case, the base of the mast must be installed on the ceiling slab in the attic of the house. The mast is attached with a clamp to the wooden roof structure; for this purpose it is best to use rafter beams.
Method 3. Installation of a mast with fastening using guy wires. If it is not possible to secure the mast to the roof structures, you can use its fastening using guy wires or steel cable. To do this, it is necessary to equip the mast with lugs located in the upper part of the mast structure.
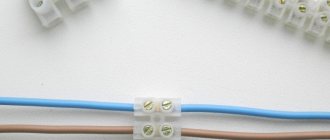
After installing the receiving antenna device, it is very important to secure the cable correctly and securely. It must be laid and secured in such a way as to minimize the impact of wind, snow sliding from the roof and streams of rainwater. The cable is fastened evenly along the entire length of the mast using clamps at intervals of 50 centimeters, then it is laid along the roof ridge and in the area of the window through which it will be inserted into the house, it is lowered down. At this point the cable must be secured with a bracket. It is first necessary to drill a hole in the window frame with a diameter slightly larger than the size of the conductor. In order to prevent precipitation from entering through the gap in the hole, it must be drilled with an appropriate angle; it would be better if it is possible to seal it with waterproof silicone. Be sure to allow a slight slack in the cable before entering the frame; this is necessary to compensate for temperature expansion.
The installation must be carried out carefully, observing the established technical requirements. The bending radius of the cable should not be less than five of its diameters; when applying fastening brackets, try to avoid squeezing the sheath.
Do I need to ground an outdoor antenna? Theoretically, if there is no lightning rod on a personal plot, this safety measure is necessary. In the event of a lightning strike, the grounded antenna device will operate in lightning rod mode, saving the TV from fire. At the same time, experts are of the opinion that there is no particular need for grounding antennas, given that most people do not watch TV during a thunderstorm while removing the cable plug from the antenna socket.
Grounding diagram for a television antenna and mast:
We talked about how to make a lightning rod with your own hands in a separate article. The instructions for installing a grounding loop in a house were also described in detail earlier.
Now you know how to install an antenna on the roof of a private house. We hope that our step-by-step instructions, with photos and video examples, were useful and interesting for you!
We also recommend reading:
About brackets
The latter is divided into three subtypes: regular, with one or two knees. They can be with an electric drive, which is controlled from a remote control.
Separately, it is worth highlighting the ceiling brackets. In some cases they will be an excellent alternative to wall-mounted ones.
What to consider when choosing
Conclusion: you must first focus on weight, then on VESA dimensions. The diagonal does not play a special role if the first two characteristics are met.
Don't forget about the type of bracket. In which cases which mount to use is discussed in more detail in the table.
| Mounting type | Description | |
| Fixed With a fixed bracket, it is important to maintain the correct installation height. In short, when viewing, your eye level should coincide with the center of the TV screen. The downside is poor access to the rear panel of the TV's connectors. If you are connecting an antenna cable, you will most likely need to use an angled adapter to make the connection. | ||
| Inclined | Allows you to tilt the TV up and down at an angle of up to 15° in each direction. Required if the TV cannot be installed at the correct level. For example, a television receiver is installed above the fireplace. Then, with a level position, watching TV shows will be uncomfortable. It is necessary to tilt the equipment slightly downwards. This is where the tilt bracket helps. Useful if the sofa or table (for example, in the kitchen) is not directly in front of the TV. Takes up less space than brackets with elbows. | |
| Tilt-and-swivel with one elbow | With such a bracket, you can move the TV forward and significantly change its horizontal position. The main movement is performed through the rotation of the knee. At the second end of the knee there is a rotating mechanism that makes it possible to tilt the television apparatus. | |
| Tilt-and-turn with two knees | An improved version of the single-arm bracket. The second one is attached to the end of the first bend. Therefore, rotation is available in several places. This makes it possible to move the device forward even more. It may even be possible to turn the TV in the opposite direction. The design is useful if you need to watch TV in different places within the same room. For example, the living room is combined with a kitchen. First you sit in the kitchen, and then on the sofa at the other end of the room. A radical change in viewing location requires a significant change in the location of the TV receiver. | Often used as a design solution. For example, if you need to place the TV in the center of a room where there is no wall. Useful if the wall is made of fragile material (porous brick, gypsum sheets), and there is no guarantee that the surface will not collapse under the weight of the device. |
Let's conclude which bracket is needed depending on the room:
Additionally, think about whether in the future you will buy equipment with an increased diagonal. Then select a bracket with the ability to accommodate different-sized TVs. A simple design is shown below. TV mounts can move horizontally. And vertically there are many holes on the fasteners.
Basic concepts of a potential master
Even if we are dealing with a traditional television antenna, and in such cases, installation requires at least minimal knowledge and skills. Satellite equipment is much more complex in comparison with conventional TV reception.
If for conventional equipment there are two main concepts - cable and plug, a system where satellite reception is carried out has a number of technical concepts:
- TV satellite.
- Satellite antenna.
- Converter.
- Multi-feed holder.
- Bracket.
- Receiver.
Let's take a closer look at each of the components of satellite equipment.
A television satellite is the source of the signal that the antenna needs to receive. Accordingly, in order to receive a constant signal, it is necessary to constantly point the antenna towards the satellite.
A device in geostationary orbit of the Earth is, in fact, a standard space satellite, but the main functionality of such a device is broadcasting a television signal
There are different satellites and different antenna designs, but the tuning principle is almost the same for all.
For this television reception technology, a satellite antenna is used, which is a disk “dish” of different diameters, equipped with a conversion device - converter .
Part of the equipment is an antenna that ensures reliable reception of a television receiver signal from a satellite. Considering the frequency of the transmitted signal, the antenna looks slightly different than traditional reception designs
This is a module of small geometric dimensions, usually cylindrical in shape, attached directly to the “front” part of the satellite antenna.
The disk antenna has a special design that allows you not only to receive a television signal, but to additionally concentrate it and direct it to one point - namely to the converter. It is, in fact, a primary signal amplifier, from which the signal is sent via cable to the receiver.
One of the components of a satellite dish that needs to be given special attention during installation, ensuring a high degree of tightness of the structure
A special rod holder is used to secure the module. A device called a “multifed holder” is the same rod holder, only slightly modified. Allows you to place several converters to work with different satellites.
The bracket is, in fact, a mechanical structure that is assembled from component parts and fixed in the intended installation location of the satellite dish. As a rule, such a place is the wall of the building, less often the roof truss system.
The so-called “multifed” is, in simple words, an extended rod. This is a holder for several converters at once, designed to receive signals from different satellites
The electronic module for processing the received television signal, followed by displaying information on the screen of the television receiver, is called a receiver .
There are various designs of receivers depending on the manufacturer. However, a specific manufacturer, as a rule, completes the equipment taking into account the matching of the antenna and the device.
The design of the bracket involves more than just a conventional stationary mount. The mechanical part has a simple but quite effective vertical and horizontal shift system
Therefore, it is quite problematic to coordinate any receiver (receiver) with any “non-native” antenna. This point should be taken into account before installing and configuring a satellite dish for a modern TV in your home.
The receiving module is also a “receiver” of the signal, which does not need to be installed like a satellite dish, but requires some settings on the part of the end user
At what height should I hang it?
There are many tips on the Internet for calculating and maintaining the height of mounting the TV receiver on the wall in different rooms. Most advice does not take into account the recommendations of equipment manufacturers and medical specialists.
Bad advice
The tips listed above do not take into account an important point. In the living room and bedroom, TV looks quite long. Therefore, it is necessary that when viewing for a long time, neither the eyes nor the body get tired from viewing. A very high setting will cause regular neck swelling.
To make the height as comfortable as possible for long-term viewing, there are clear rules and formulas.
Calculation formulas
Let's look at examples for each room. Slight deviations from the instructions below are not critical. The main thing is that the hanging height is not too high or low.
Living room (hall)
In the living room, the TV must be placed at one third level.
Let's give an example. In your case, the numbers may differ.
Bedroom
For the bedroom, the algorithm for calculating normal height is slightly different.
If the bed is already standing and repairs have been made:
Additionally, it is recommended to seek outside help. Have another person lean the TV at the calculated height, and have the TV viewer assume a fully reclining position. If the diagonal is large, then the legs may block the viewing area. Then you need to raise the TV higher.
If the room is under renovation, it will not be possible to experimentally calculate the dimensions. When calculating, standard values are taken:
This calculation is not as accurate as possible. But already during the repair it will be possible to install the sockets correctly so that they are behind the equipment. In the future, you can adjust the position of the TV, raise it higher if necessary.
It would be useful to take into account the size of the room. If the setting is low and the distance from the bed to the TV is too small, then you can accidentally hit the equipment while passing.
Kitchen
There is no clear formula. There is no need to spend a long time browsing channels, Youtube or Internet TV. The TV in the kitchen is needed for short-term viewing. Therefore, there is no need to get tired. But you still need to take into account some rules:
Satellite dishes
Before deciding which antenna to install in your dacha, it’s worth understanding the different types. The following antennas are currently available on the market: satellite antennas, amplified antennas, and digital antennas. In the first case we are talking about a well-known plate. It gives an excellent signal level, picks up a lot of channels, and works well even in bad weather. These antennas are quite expensive. Moreover, if you have chosen satellite television, you will not be able to install the dish yourself. This requires experience, knowledge of complex technology, as well as information on exactly where to point the device to receive a signal. But in the other two cases, you won’t have to worry for long about how to install the antenna yourself.
What distance should there be from the TV?
A large TV screen is not always an advantage. If the room is large and the sofa is far from the opposite wall, then a large diagonal will be better than a small one. You won't need to look closely at the image.
But if the distance from the screen is small, then a very large TV size will cause discomfort.
It can be compared to a movie theater when you sit in the front rows of the theater. You need to constantly turn your head, switch to the changes happening on the screen.
Therefore, before purchasing a plasma, consider the distance to the spectator seat.
Operate with average recommended values:
Outdoor antenna installation options
Antenna installation can be done in several ways.
1. Installation on a loggia, balcony . It should be remembered that balcony slabs do not have high fastening strength. And in the event of a strong gust of wind, the fasteners may break. Therefore, it is necessary to duplicate it from the outside with an additional metal plate. The size of the plate must be larger than the size of the mounting base. You can install the antenna in another way. Attach a pipe to the balcony and hang the antenna on it. To do this you need a piece of channel.
Mounting instructions
Hanging a plasma TV with your own hands is not difficult. There is no need to resort to the services of specialists. The main thing is to have an electric tool (drill or hammer drill) and a level in your home arsenal. The remaining components are almost always supplied with the bracket. Small fasteners (screws, washers, dowels) can be purchased at any hardware store. And these components are often included in the factory mounting kit.
Required materials and tools
Additionally, you can make a dust collector. You need a regular sheet of paper that is folded inward. To form a pocket, the edges of the folded side need to be slightly closer to the center of the sheet. Be sure to go over the edges well with tape so that spilled waste does not fall out of the dust collector through small cracks.
An alternative is to suck up the waste with a vacuum cleaner. Remove the brush tip from the vacuum cleaner tube. Place the end of the pipe as close as possible to the drilling site. Turn on the vacuum cleaner when working with a hammer drill and the waste will be sucked up by the vacuum cleaner. This method is only suitable if there is an assistant, since someone needs to hold the pipe.
Installing the bracket on the wall
First, check whether the bolts are screwed tightly into the television holes. The bolts that come with the bracket may be too long and will rest before they press the mounting plate to the body. In this case, prepare one or more washers for each bolt.
Making a bracket with your own hands
In the case where there is no specialized store nearby, and the antenna needs to be fixed, you can make a bracket at home.
Instructions on how to make a bracket for a satellite dish with your own hands:
- For high-quality work you will need a hacksaw or jigsaw, plane, grinder, drill, screwdriver, axe, hammer, nails, adjustable wrenches. Also, as a base you will need a wooden pole up to 1.6 meters long, one iron plate and a metal pipe.
- The wooden plank should be thoroughly cleaned of old bark, burrs, and irregularities. All work is done using a plane.
- The iron plate in which there are holes must be bent at an angle. The calculation of the angle of inclination should be such that the wooden plank is located on the roof at a right angle.
- The metal pipe is cut into two halves.
- Both ends of each half must be made flat, for example, using a hammer. The resulting flat planks also need to be bent at an angle, the size of which depends on the shape of the roof.
- On the flat ends it is necessary to drill two holes for fastenings.
- Further work consists of installing a homemade bracket. The iron plate is attached to a wooden plank using self-tapping screws.
- A hole is drilled on the bar itself for a bolt, which is pre-mounted on the ends of two metal pipes. Two pipes with flattened ends are inserted behind each other, and the junction is connected with a single bolt.
- Just above the fixing bolt, the metal ends are attached to the wooden plank using ordinary self-tapping screws. The bracket is ready, and then you can attach it to the roof.
It is necessary to make markings on the underlying wall, marking the installation points of the dowels. The material from which the building wall is made is of great importance in self-assembly.
For brick and concrete walls, use ordinary dowels, drilling holes with a hammer drill. For a wooden wall, you can choose wood grouse screws equipped with a wrench head.
Mounting on different surfaces
Drywall is intended for external wall cladding and surface leveling. The material is fragile and unable to withstand attached structures of large weights.
There is a lot of advice on choosing dowels that can be used for fastening. For example, it is often recommended to hang it on drywall using butterfly dowels, which, when twisted, open up and press against the back of the base.
The method is allowed, but only for light suspensions, without large masses. This is how paintings or small shelves are hung to place decorations on them.
You can replace butterfly fastenings with metal molly anchors.
Large, weighty TVs should only be mounted to the main wall, even if there is sheathing on top. Therefore, you need to drill holes of sufficient depth through the drywall directly into the wall. Further installation is no different from a regular wall, concrete or brick. A long anchor or screw is screwed into the hole in the wall.
The situation is different with false walls made of gypsum board.
The main purpose of the design is partitions for quick redevelopment of living quarters. Or the wall acts as a decorative element.
Hanging equipment, especially large ones, is not recommended at all.
On fragile, porous walls made of hollow bricks, it is better to hang the TV on a chemical anchor. During the reaction of the chemicals, compaction is done and the voids in the drilled hole are filled.
Installation without using a bracket is also possible. Methods for creating a homemade mount are limited only by your imagination. Be sure to take into account the weight of the device.
Furniture "ears"
You can avoid the disadvantages if you place a board between the screw heads and the wall. So, the distance will increase, ventilation will improve, and access to the connectors will appear.
It is also recommended to use the lower fasteners. It is better to screw bolts into them to make a stop against the wall. Otherwise, the TV may wobble at the slightest touch. And this can lead to severe damage to the plastic case.
Steel or aluminum corners
You will need four corners. The length of the elements must be greater than the vertical distance between the TV mounting brackets. The method requires precision execution. It is necessary to maintain the distances between the holes.
Furniture corners
It is a popular and very cheap way. You need to spend no more than 100-150 rubles on all the necessary parts.
You can use narrow or wide corners. The principle of hanging does not differ for different types of corners. You will also need two bolts and nuts. The diameter of the bolts must fit the holes in the corners.
Here's what the process looks like for single corners.
Installation process for multi-hole corners:
Screwing can be done on the TV or wall corners. In the first case, the ends of the bolts without a head should point down. Then the bolts are inserted into the holes on the wall corners.
In the second case, the bolts are attached to the corners of the wall so that the pin faces up (see image above). It is hung in the same way - the bolts must go into the holes in the mounting angles on the body of the television equipment.
If the lower fastenings are missing, then under the influence of its own weight the television receiver will tilt down. In order for the position to be strictly vertical, it is necessary to fix similar corners to the bottom of the device. Then the corners will rest against the wall and there will be complete verticality. Instead of corners, you can use regular bolts.
A good alternative for wall mounting on the wall is a sliding angle.
With a regular angle, you need clear markings, down to the millimeter.
With a sliding element, even a significant error will not affect the fastening, since there is a power reserve.
Sliding supports for rafters
It is a part of two elements:
The support must be secured to the base. It is better to fix it through a backing – a wooden block. This ensures normal ventilation and access to inputs for external connections.
The fastening corner is bent so that only the hook remains. Next, it is attached to the TV receiver.
Finally, the hook is placed on the wall element, after which the TV will hang securely.
From below, by analogy with furniture connecting and wall corners, to maintain verticality, you need to screw in the selections (bolts). The element will rest against the base of the wall and prevent it from tilting.
Swivel mount
To create an adjustable mount, you need to be able to weld metal, have a profile pipe and two metal plates. Of course, you will also need bolts with washers and nuts. The plates are taken slightly larger than the area of the TV mounting part.
This method can only be used by people with skills.
The final mount looks like this.
There are a lot of mounting options. Above are some easy ways that anyone can do.
Bracket yourself at home
In areas far from large cities, the necessary building material for making a bracket is always at hand.
For example, an antenna mast will require electric welding and two pieces of half-inch old plumbing pipe. It is very important to connect the two pipes evenly. Don’t forget to clean the welding area using an emery wheel. Then you can put it aside.
To make the bracket yourself you will need:
- Corner 5x5 centimeters.
- Square pipe - 2x2 centimeters.
Cut the pipe in half into pieces. You should get two even sections of 50 centimeters each. The length of the corner can be arbitrary. The length of the tube should be equal to the distance the roof sheathing overhangs the building.
Using electric welding, you can start welding square pieces (they must be welded directly perpendicular to the corner).
You will need another tube; you will definitely need to insert a mast for the antenna into it. To do this, take a piece of pipe (length -1 meter, diameter - a little more than an inch). Using electric welding, weld two nails (in a cross). This will allow the mast to stay at a certain level.
Next, you should drill 2 holes (the diameter of each should be about 9 mm). The alignment of the holes can be checked using 8 mm bolts.
You can start welding the pipe to the squares. Weld one by one - first one part, then the other. All parts must be perpendicular.
The second part should be assembled in the same way. To give greater strength to the structure itself, it is necessary to add two more reinforcement bars diagonally.
Installing the antenna: wall mounting
There are two ways to install a television antenna in the country: near a window on the wall or on a mast. For conventional on-air and digital models, both installation options are suitable. In the first case, you need to mount a bracket, which is made from a metal corner. Use anchors as fastening. The antenna should be secured to the bracket, with the cable leading out through the hole in the window. Make the wire slack a little in front of the window - then the water will roll onto this loop and not into the hole in the window.
Internet antennas: rules for working with cable
When answering the question of how to properly install an Internet antenna in a dacha, you need to pay attention to working with the wire. The cable is lowered along the rod, securing it every 50-80 centimeters with plastic clamps, then it is led along the roof ridge to the bracket - with its help, the wire is lowered from the roof. The cable is brought into the room through a window - then the same recommendations apply as for installation on the wall. If the antenna is inactive and the amplifier is installed in the attic, the cable can also be routed through the attic. But in any case, the wire should not be pinched or laid with strong bends. Do not lay it near sharp corners or where the cable may be damaged if strained.