Home » Lighting » Street lighting » How to install light in a barn and chicken coop with your own hands
There is no difficulty in lighting outbuildings; there are certain nuances and features that should be taken into account. In this article we will tell you how to install light in a barn or chicken coop, tell you the main features and show step-by-step instructions for connecting. Let us immediately note that the light must be safe and economical - these are the main points that we will pay attention to in this article.
We provide lighting in the barn - practical advice
Every year, LED lamps for garages and workshops are becoming increasingly popular among professional auto repair shops and private garages near the home.
High energy efficiency, bright light, strong flow and appropriate light temperature create excellent visibility even in very dark and difficult to reach places. Currently, the choice of LED lights for garages and workshops is simply huge. You can choose from corded lamps powered by 220V mains sockets, as well as 24V and 12V LED lamps for patios and sheds. In stores, you can also find lamps with a magnifying glass, lamps for hanging on magnets or hooks, lamps on stands and stands, or lamps for wall mounting.
How to choose the right simple and economical lighting for the garage, shed and workshop? Below we will look at the most popular models, you will understand their advantages and it will be easier for you to make the right choice.
Philips LED garage and workshop lights are bright, energy-efficient light sources that produce intense, uniform beams for excellent brightness and visibility where needed.
The Philips brand offers us 3 types of LED lamps: hybrid, wired and wireless. All lamps emit natural and, at the same time, very intense light with a color temperature in the range of 6000-6500 K (i.e., as close as possible to natural daylight).
Lamps from this brand are one of the most popular workshop lighting solutions in European countries. The company produces rechargeable and cordless LED lamps with various power and illumination levels.
The range of professional lighting systems from Yato is quite large: there are portable magnetic lamps powered by batteries, control lamps, rechargeable lamps, lamps for illuminating the engine compartment and LED lamps for workshops.
The cost of lamps and fixtures for garages and workshops is inexpensive; such products can be purchased for only 400-500 rubles. This will be a lamp consisting of 8 simple LED structures powered by AA batteries. Although, of course, there are more powerful and professional models with magnetic mounts, costing 1500-3000 rubles.
LED bulbs are durable, durable and energy efficient. And today, LED technology has advanced so much that it has almost completely replaced traditional incandescent, halogen and fluorescent lamps in almost all areas.
It is generally believed that the more diodes, the brighter the lamp will be. There is some truth to this, but remember that LED is not level and you may find that a lamp equipped with 150 regular LEDs will produce less light than a lamp with 100 LEDs. Typically, the most powerful workshop lamps on the market have over 100 LED diodes.
The main nuance when installing lighting in outbuildings is that it is necessary to take into account fire and electrical safety requirements. You yourself understand that the outbuildings or workshop at the dacha are not always heated.
In addition, such buildings may have high humidity, which further aggravates the situation. That is why you need to know how to install light into a barn from a private home, so that in the future the lighting system will be safe and durable.
Next, we will tell readers of the site Electrician Himself all the nuances of electrical installation work and provide some practical advice on this issue!
Barn Lighting Options
All types of artificial barn lighting can be divided into internal and external. The external one is most often located directly at the entrance or near the door. In order to save energy, you can use solar lamps, which will accumulate charge during the day and illuminate the building at night.
Solar lamp at the entrance
Interior lighting fixtures are installed on the ceiling or wall; additional lighting can be placed near shelves, near a workbench or table, if the barn is intended to be used as a workshop.
Several types of lighting equipment can be used to illuminate commercial buildings:
- LED lamps are the most economical in terms of light emitted per unit of power consumed. They have a long service life and an acceptable temperature range for barn lighting, but their cost is the highest;
- Fluorescent lamps are second on the list of economical lamps for interior lighting of a barn; they have slightly worse parameters than LED lamps. However, they are extremely capricious to low temperatures and at temperatures below –5ºC, an energy-saving lamp may not light up at all.
- Halogen lamps are low efficient for barn lighting, but have the lowest cost. These are relevant if the barn is rarely used and the lighting is turned on only when necessary.
Incandescent lamps are used extremely rarely in lamps, unless the owner wants to change to more advanced models. But, at the same time, Ilyich bulbs for lighting are justified for winter chicken coops, since they are a local heater and provide a good spectrum of light for the bird to gain weight and increase activity. In addition, artificial light in a chicken coop can be provided by specialized LED devices, but their price is quite high compared to a classic lamp.
For some sheds it is important to have autonomous lighting, especially if it is also used as a garage, basement, etc. The simplest version of an autonomous source is a rechargeable flashlight, which can be stored in any convenient place. But in the garage, autonomous lighting can be powered from a car battery.
Preparing materials
So, based on the above conditions, you must prepare materials in order to independently install light from a private house to the barn. We recommend that you use VVGng cable (for overhead wiring), moisture-proof distribution boxes with sealed inputs, as well as light switches with a high degree of dust and moisture protection (at least IP44). Also, with the aerial method of installing the lighting line, we advise you to additionally buy a special insulated cable, along which the corrugated cable will be laid in the future. For the cable, additionally purchase two hooks and special cable clamps, which will be necessary for further fastening.
If you nevertheless decide to draw a lighting line to the shed in a trench, we recommend that you watch the instructions with video examples on installing electrical wiring underground, which describes all the intricacies of electrical installation work. As for the cable, its length must be purchased with a margin of 3-4 meters so that there is no strong tension on the electrical line and at the same time there will certainly be enough material from the house to the barn. Don't forget to calculate the cable cross-section based on power and length. If you are going to connect several light bulbs and will not remove an additional socket from the distribution box, you can safely choose a cable cross-section of 1.5 mm2 (again, if there are no restrictions on the distance from the house).
Be sure to protect the lighting line in the barn with a circuit breaker, which will protect the electrical wiring from a short circuit and the outbuilding itself from fire. Read about how to choose a circuit breaker in the corresponding article.
Determining installation conditions
Before installing the light, you need to find out what the barn in the country is and what it is generally used for. Now we will look at the main options for utility units and briefly talk about what difficulties may arise when installing lighting yourself.
- The room is heated and dry. It is easiest to install light into such an outbuilding, because... You can choose any type of wiring: open or hidden.
- The humidity is high or the barn is simply not heated. Here you already need to draw the lighting line only in pipes, which additionally isolate the wiring from moisture.
- Particularly damp premises (usually greenhouses and hotbeds). The conductor must be double insulated, the light switch must be placed outside the dacha building. The lamps must be waterproof with a degree of protection IP 65, and operate from a safe voltage of 12 Volts.
There is no significant difference between a damp and a particularly damp room in terms of electrical installation work. In any case, you will have to install lighting in a corrugated or metal hose and install a 220/12 V step-down transformer if the barn is used as a cowshed or chicken coop. Well, the last of the most important installation conditions is the distance from a private house to an outbuilding. If the distance is small and there are no obstacles (we’ll talk about them a little below), we recommend bringing the light into the barn through the air. If the room is several tens of meters away and there are many trees or other obstacles along the way, it is better to lay the cable in the ground at a depth of at least 80 cm, as shown in the diagram.
Connecting to the home network
In our case, the barn is built of expanded clay concrete and brick. The thickness of the walls is 30 cm. Heating with electrical appliances is expected on particularly cold days. The wiring will be made from a two-core cable with a cross-section of 2.5 and 1.5 mm² in an open manner.
The connection is made using an overhead line. One end of the cable is connected to the house network, the second is passed through a metal tube attached to the shed structures, and brought into the room through a small hole in the brickwork. Know-how - a piece of plastic pipe is inserted into the channel so that the insulation frays less.
RCD installation
A 10 amp RCD circuit breaker will be connected to the shed's electrical system. The residual current device prevents electric shock to a person or animal when it comes into contact with a voltage source, as well as fire as a result of damage to the insulation.
External electrical connection
Although the connection from the power line to the building is the responsibility of the electricians in your village, you live in the house, and this work also needs to be monitored, as well as providing the electricians with everything necessary for installing the wiring. Moreover, there may be several connection options, and it is up to you to decide.
Here are a few notes on this stage of work.
Wiring can be carried out both by air - from the pole to the house, and underground. The wire from the power pole to the house should not sag more than 3.5 meters from the ground. It should not touch tree branches, wooden parts of the house, or any other protruding parts. If the distance is more than ... meters from the pole to the entrance node to the house, you need to install an additional support for the wires.
For the input cable, wires with a minimum cross-section of 16mm2 are used. It can be two-core (using a voltage of 220V) and four-core (using a voltage of 380V). NYM, VVGng, VVG and PUNP wires meet all operating requirements (safety, minimal losses and durability).
Wires are introduced into the house through a hole carefully insulated with non-flammable material. The wires must be threaded through a protective casing, such as a plastic or metal pipe.
Rules for external connection of a house
Inside the house, the wires go to the electric meter, which records the electricity consumed, and from the meter to the distribution panel.
Tests
After the socket and switch are installed, and the light bulbs are screwed into the lampshades, you need to carry out the first test run. If after switching on the lights are on, the socket is functioning, everything is in order, the work has been successfully completed.
If the lights do not light up or blink or the wiring sparks, you need to check the circuit for breaks and tighten the screws of the machine more tightly. Problems can be caused by a phase-zero mismatch, a violation of the integrity of the insulation in twists, or a connection of copper with aluminum.
We must not forget about safety precautions: do not work with a connected network, use insulated tools, avoid getting moisture on wires and devices.
Installation of distribution box
In the distribution box, incoming power is distributed into separate lines for all power consuming points. The barn is planned to have 1 socket and one switch for two light bulbs. According to the rules, power cables for lighting and sockets are laid separately.
The box is installed in such a way that it is convenient to route cables from it to the fittings. In our case, it is located above the socket. Wiring is usually laid along mutually perpendicular lines vertically and horizontally.
Box body mounted on the wall
When all the cables have been laid, their ends are inserted into the box, cut with a length margin of 5-7 cm. After connecting to the appropriate phases and twisting the wires with insulation, close the junction box with a lid.
Box with wiring
Twisting of wires with insulation
This is interesting: Pulsation of LED lamps - causes, standards, testing methods
Connecting the socket and switch
Electrical accessories in our case are of overhead type. The walls of the shed are quite solid, and cutting grooves for wires, sockets and switches would be impractical.
Installation of surface socket
According to the electrical rules, in a socket the phase is connected to the left terminal, zero to the right (blue and red wire).
The switch is a little different. You need to connect a phase to it, and a zero to the light bulb.
When you press the switch key, the circuit closes and the light comes on. There are 2 lighting fixtures in our barn that are connected in parallel. The wiring is fixed with plastic brackets to the floor beams.
The ends of the cables from the socket and switch are brought to the junction box, where the corresponding wires are connected and insulated.
Source
Owners of cottages and summer cottages build garages, bathhouses, small workshops, cellars and other utility rooms on their territory, to which electricity is supplied for lighting, heating and other purposes.
The article provides recommendations on how to reliably and safely perform such work, avoiding typical mistakes made by home craftsmen.
The content of the article
Principles for designing a building's power supply circuit
Before undertaking electrical installation work, you need to think it through carefully and draw up a plan on paper. This will save time on completing ideas, materials and money.
Electrical network structure
Official sources recommend using a radial wiring diagram in new premises to the main distribution panel of the building, when cable lines extend radially from it to all consumers.
This option allows you to place all protections and circuit breakers in one place, which is convenient to carry out according to the calculations of the laws of electrical engineering. But, in practice, it is necessary to lay a large number of highways, and this leads to increased cable consumption.
An alternative to the radial method of laying highways is a tree structure.
Here, electricity from the main distribution board of the building can be supplied not only individually to each consumer, but also to certain groups of them. For example, the electrical equipment of a bathhouse and a barn, which are located near the workshop (and they are used least often), can be connected to circuit breakers and protections located in the electrical panel of the workshop.
The tree-like method allows you to build a structure of the consumer power hierarchy that is more convenient for the owner and saves cable.
Electrical panels can only be installed in dry, enclosed areas that ensure safe operation. Using them in a bathhouse or damp basement is dangerous and prohibited.
Inside technical rooms, they usually create separate power supply with protection for power circuits and lighting installations, connecting them with a separate cable. This allows, in the event of an accident and its shutdown, for example due to a short circuit on the car battery charger, to separate the power circuit and leave the room lighting working: the owner does not have to look for a fault in the dark.
Selecting the wiring type
Wires and cables can be laid:
1. open method:
2. inside walls, ceilings or floors.
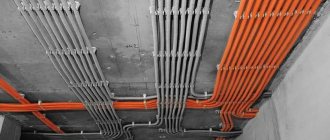
In technical buildings, they usually use an open method of laying wires along the walls, placing them at a safe distance. This simplifies installation and eliminates the need for gating of building structures.
The walls and ceiling of the premises are made of construction wood, allowing you to quickly install wires in a retro style using rollers. An alternative to this method is modern cable channels. They quickly and conveniently install and cover all electrical wiring elements.
Placing cables inside the walls creates their best protection from possible mechanical influences.
Choosing a method for supplying electricity mains
Voltage to the electrical equipment of outbuildings must be carried out reliably and as safely as possible. You can sum it up:
wires along overhead line poles:
cable laid inside the ground.
Placing the cable on poles or walls is also used, but as an exception. The supply of voltage by structures such as temporary extension cords that are constantly unwound and reassembled can cause electrical injury.
Drawing up a plan for placing electrical appliances in the utility room
Before visiting a store that sells electrical equipment, you should consider the distribution locations of electrical appliances, specify the number of illuminators, sockets for powering portable and stationary appliances, and junction boxes. Their locations must be marked on the building’s building elements and all distances must be accurately measured.
This will help determine the length of cable required to purchase. When performing the calculation, it is worth creating a reserve: at each connection point of the wires, for laying and connecting the ends, their length will need to be increased by 10÷15 cm. And the resulting total amount will need to be further increased by 10 percent - this will provide a reserve for any bends that may arise.
How to supply electricity to a building
Electricity input can be done:
Air input
For the first method, you will need to have a pole at a distance of up to 25 meters from the building. A pipe stand with insulators on which the wires are suspended is installed near the entry point. The place where they are inserted into the downward-curved pipe must be done in such a way as to prevent precipitation from getting inside.
Electric installation work
So, now let's talk about the most interesting thing - how to install light in a barn from a private house. In fact, lighting installation is much easier to complete than preparatory work. Let's look at an example of a simpler and at the same time popular installation method - by air into a dry utility unit.
- Attach the first hook to a suitable location on the house. You can use mounting on insulators, as shown in the photo below.
- Pass the cable through a corrugated pipe, which will additionally protect the lighting line from mechanical damage.
- Turn off the power at the home switchboard.
- Drill a hole in the wall of the house to insert the cable into it and connect it to the house distribution panel at the input.
- Extend the light to the shed and run the cable inside the building.
- Install a circuit breaker at the entrance.
- From the machine, take out the distribution box, from which you need to route the cable in a corrugation to the required places (where the light bulbs will be located).
- You can connect the lamp not only inside the barn, but also at the exit, as shown in the photo. In both cases, it is better to use lamps with moisture-proof shades for lighting.
- Install a light switch in a suitable location. To control street and interior lighting, it is better to use a dual model. We provided a wiring diagram for a two-button light switch in the corresponding article.
- After all the electrical work, turn on the power and check how correctly you managed to install the light in the barn.
That's all you have to do to install lighting in the barn with your own hands! As you can see, there is nothing complicated and besides, such work will not take much time. We draw your attention to the fact that if you install a step-down transformer (for example, nuclear power plant) in an unheated utility room, you will have an additional outlet to which you can connect a power tool during repairs. In this case, the cross-section of the copper cable that you will extend from the dacha must be at least 2.5 mm2.
This completes our simple instructions. We hope that now you know how to install light into a barn from a private house with your own hands! If your summer cottage is often left without electricity, it is recommended to place a flashlight at the entrance to the outbuilding, which can save the situation at any time.
PUE requirements
Rules for the installation of electrical equipment - PUE - were developed specifically to ensure the safe operation of electrical power lines and devices. For wiring in the barn the following conditions must be met:
The cable cross-section is selected based on the planned power of the connected devices. Under standard conditions, a VVGng cable with copper conductors with a cross-section of at least 2.5 mm² is used for power supply from the home network.
Important. If energy-intensive equipment is installed, you need to calculate the power cross-section and select wiring with appropriate characteristics.
Connecting to the home network
In our case, the barn is built of expanded clay concrete and brick. The thickness of the walls is 30 cm. Heating with electrical appliances is expected on particularly cold days. The wiring will be made from a two-core cable with a cross-section of 2.5 and 1.5 mm² in an open manner.
Dear readers, this is a continuation of the article about building a barn with your own hands; we recently added this article to the site and also recommend that you read it.
The connection is made using an overhead line. One end of the cable is connected to the house network, the second is passed through a metal tube attached to the shed structures, and brought into the room through a small hole in the brickwork. Know-how - a piece of plastic pipe is inserted into the channel so that the insulation frays less.
RCD installation
A 10 amp RCD circuit breaker will be connected to the shed's electrical system. The residual current device prevents electric shock to a person or animal when it comes into contact with a voltage source, as well as fire as a result of damage to the insulation.
The device responds to the potential difference between the incoming and outgoing current, which is normally zero. In the event of an insulation breakdown, the reverse current decreases and the RCD automatically turns off the electricity supply.
The device body is fixed to the wall below the level of the rafters or ceiling by 15-30 cm.
One core is inserted into the device, the other is connected directly. The neutral wire may not be insulated.
Ready RCD
Electrics in the bathhouse: rules, wiring diagram
Next, we will consider two main issues that arise when installing electrics in a bathhouse. First, as an example, let’s look at the simplest working diagram for installing wiring in a dressing room, with a detailed description of the entire process. Below are important practical tips on the topic: do-it-yourself wiring in a bathhouse.
What kind of lighting do you prefer?
Built-in Chandelier
Correct wiring diagram in the bathhouse and its step-by-step installation
If you are looking for information that will indicate where and how many sockets, switches, and lamps you should install, then this is not quite the right approach to solving the issue.
Start thinking about what devices you will use and where they will be located. Determine locations for switches, lamps and begin creating your own wiring diagram in the bathhouse .
Functional placement of electrics is when, upon entering the room, the switch is located by itself, turning on the TV is not associated with rearranging the furniture, and using the socket does not imply adopting a horizontal position. Below are the step-by-step steps:
Step one: Draw a wiring diagram
Let's start with a simple working electrical circuit for the waiting room. The minimum set of points consists of:
Step two: Install cable channels (canisters) or corrugation (tubes) for wiring
All wires, in the case of open electrical wiring, must be protected with plastic cases or corrugated hoses . And this is really important!
I want to give you a real life example. In a city apartment, children were playing ball in the hallway. The ball hit the wall along which the insulated wire from the lamp ran down and the wire turned into a fuse cord. A white, luminous point began to move, devouring the insulation.
I turned off the lamp, but it was too late, the process had already begun. It’s good that there was no cobweb or “dust bunny” in the way of the light and the light did not have time to hide in the wooden baseboard and the process itself was controlled by adults, otherwise a fire could not have been avoided.
If you choose corrugation, then all the wiring is passed through it in advance using an internal wire. When planning and calculating the volume of material, take it with a small (5-10%) reserve. If you opted for cable channels - pencil cases (and I prefer this option), then the laying of the wire can be carried out directly when connecting the wiring.
When choosing pencil cases, be guided by the wiring dimensions. You can’t take a small volume because the wire won’t fit, and there’s simply no point in taking more than you need.
Step three: Lay the wires in the cable channels
Having started installing the wiring in the bathhouse, you must, of course, be provided with the appropriate wires and cables. But how to choose a wire from the right material with the right cross-section? Having a professional project in hand, no questions will arise, but how to solve it if the circuit and wiring itself are made independently?
Installation of distribution box
In the distribution box, incoming power is distributed into separate lines for all power consuming points. The barn is planned to have 1 socket and one switch for two light bulbs. According to the rules, power cables for lighting and sockets are laid separately.
The box is installed in such a way that it is convenient to route cables from it to the fittings. In our case, it is located above the socket. Wiring is usually laid along mutually perpendicular lines vertically and horizontally.
Box body mounted on the wall
When all the cables have been laid, their ends are inserted into the box, cut with a length margin of 5-7 cm. After connecting to the appropriate phases and twisting the wires with insulation, close the junction box with a lid.
Box with wiring
Twisting of wires with insulation
Connecting the socket and switch
Electrical accessories in our case are of overhead type. The walls of the shed are quite solid, and cutting grooves for wires, sockets and switches would be impractical.
Installation of surface socket
According to the electrical rules, in a socket the phase is connected to the left terminal, zero to the right (blue and red wire).
The switch is a little different. You need to connect a phase to it, and a zero to the light bulb.
When you press the switch key, the circuit closes and the light comes on. There are 2 lighting fixtures in our barn that are connected in parallel. The wiring is fixed with plastic brackets to the floor beams.
The ends of the cables from the socket and switch are brought to the junction box, where the corresponding wires are connected and insulated.
How to install light in a barn: necessary materials
Now we move on to the second stage and prepare all the necessary materials.
Let's start with the wire, we recommend using VVGng, it has increased protection and will serve you for many years. The junction box must be moisture-proof - this is an important point.
Do not forget that all devices must have good protection. And of course, we make the correct calculation of the cable cross-section. We recommend installing energy-saving lamps, which can include: LED and regular house-saving lamps. The light in such buildings can burn for a long time, so it is important to save on this once again.
Is grounding necessary?
Grounding is a conductor that drains electric current into a voltage-neutralizing circuit. This can be a metal structure dug into the ground, or a reinforced foundation frame. Once in a large-volume conductive medium, the current instantly dissipates, and the likelihood of an electric shock is greatly reduced.
Important. If powerful electrical equipment is to be installed in the shed, grounding is mandatory.
In our case, such a measure would be unnecessary, since the barn was originally planned for keeping animals, and not as a workshop.
Tests
After the socket and switch are installed, and the light bulbs are screwed into the lampshades, you need to carry out the first test run. If after switching on the lights are on, the socket is functioning, everything is in order, the work has been successfully completed.
If the lights do not light up or blink or the wiring sparks, you need to check the circuit for breaks and tighten the screws of the machine more tightly. Problems can be caused by a phase-zero mismatch, a violation of the integrity of the insulation in twists, or a connection of copper with aluminum.
We must not forget about safety precautions: do not work with a connected network, use insulated tools, avoid getting moisture on wires and devices.
Source