The current consumption of an LED strip depends on its length.
In addition to lead-acid batteries, 12 V Li-ion batteries have high performance data. With equal capacities, Li-ion batteries have 4 times less weight and size. And to charge them, a compact charger is used.
Important! The battery will work out its life (up to 500 full recharge cycles) only if the discharge current does not exceed 1/10 of the capacity. In practice, this means that a 12V-7A*h battery can be connected for a long time to a load with a current consumption of up to 0.7 A or 2 meters of LED strip type SMD 3528-60 pcs./m, which will shine continuously for 10 hours.
To make calculations easier, below is the current consumption of 1 meter of LED strip, which depends on the type of LEDs installed:
- SMD 3528-60 pcs/m – 0.4 A;
SMD 2835-60 pcs/m – 1.6 A;
Battery powered
If buying a battery is expensive, but there is nowhere to charge it, then you can make the LED strip glow using batteries. Let's look at the 3 most common connection options.
Option No. 1 involves the use of 6 1.5 V AA batteries connected in series. Why exactly 6 pieces? Because the LED strip, even when powered by 9V, will operate at approximately half its power. Firstly, this level of light from the tape is quite enough to illuminate something. Secondly, half the current will flow through the LEDs (nonlinearity of the current-voltage characteristic), which will significantly extend the battery life. But if desired, you can increase the number of batteries to 8.
There are two ways to assemble a battery-powered LED backlight circuit:
- using short wires, all batteries are soldered together in series, secured with electrical tape, and two wires are soldered to the extreme “+” and “–” to connect the LED strip;
- 6 batteries are inserted into the cassette (container), observing the indicated polarity. The wires coming out of the cassette are clamped together with the LED strip in the connector.
The capacity of an AA battery is approximately 2 times greater than that of an AAA battery from the same manufacturer.
Option No. 2 involves the use of power in the circuit from one 9 V Krona battery. The capacity of the alkaline crown is approximately 0.5-0.6 Ah. This means that, for example, a 30 cm long SMD 3528 tape will shine continuously for 5 hours. The crown is often used for LED tuning of a bicycle.
Option number 3 involves the joint use of a battery from a phone (smartphone) and a step-up converter up to 12 volts. In this configuration, LED backlighting has several significant advantages:
- reliability and durability;
- compactness (the size of the converter is comparable to a flash drive);
- reasonable cost (3.7 V-12 V converter – $2, battery – $10);
- the battery can be easily charged from a smartphone or charger, and its capacity reaches 2000 mAh;
- Light emitting diodes shine at full brightness.
You can connect batteries and accumulators of any type to the converter. The main thing is that their voltage matches the input voltage of the converter.
Design and principle of operation
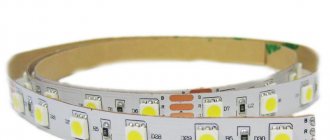
Conductive tracks are applied to the base of the LED strip, which connect SMD LEDs and resistors into a single electrical circuit. Then the flexible printed circuit board with the elements is coated with a silicone layer or a transparent PVC shell is created.
The main design feature of the 220-volt LED strip is the absence of a step-down converter used as a power source. Instead of an expensive switching voltage stabilizer, the power supply unit (PSU) consists only of a diode bridge located in a sealed housing.
On the one hand, it includes a network cable, and on the other, a wire with a connector for connecting to the LED strip. The voltage at the rectifier output is constant and is about 200V. In order for the LEDs to operate without overload, they are combined into groups, compensating for excess voltage with resistors.
As a rule, LEDs used in 220 V LED strips have a voltage drop of about 3.3 V, so each group includes 60 chips.
The voltage after the rectifier is pulsed in nature, which clearly affects the quality of the light. Rectified pulses with a frequency of 100 Hz, although invisible to the human eye, negatively affect the functioning of the brain and nervous system as a whole.
Light sources with such a high pulsation coefficient cannot be used as main lighting.
It would seem that the problem can be solved by installing a capacitive filter at the output of the diode bridge. However, this will lead to an increase in the average rectified voltage to 280 volts, which is unacceptably high. Logically, manufacturers could increase the number of LEDs connected in series in each chain, but so far there are no such products on sale.
Instructions for assembling and connecting LED strip from batteries
Let's figure out how a battery-powered LED strip is powered. At the same time, we’ll learn how to calculate the expected work life and decide whether this method is suitable, taking into account the task at hand and the materials available.
LED strips are designed for an operating voltage of 12 or 24 V, the standard voltage in the network is 220 V. By default, the problem is solved by purchasing a power supply, but if desired, everything can be solved with ordinary batteries.
Advantages and disadvantages
Firstly, the most obvious advantage of a 220-volt LED strip is the absence of a bulky and expensive power supply.
It is replaced by a miniature block with an input and output cable. When connecting to a 220 volt network yourself, it is enough to buy the required diode bridge and thin copper wires or special connectors. Due to the use of high voltage, the current in the load is small, which makes it possible to use a wire with a cross-section of 0.75–1 mm2. Secondly, thanks to the consumption of only 20–150 mA per meter of length, a single piece of tape can reach 100 meters, which is important when creating large-scale advertising projects. For comparison, the longest length of a low-voltage LED strip powered from one end is only 5 meters.
The main disadvantages of LED strips powered by 220 volts are their limited scope of application due to harmful flickering with a frequency of 100 Hz and dangerous voltage that runs along the entire length. In addition, you cannot ignore the following obvious disadvantages:
- non-repairable, since replacing the SMD chip will lead to damage to the sealed layer;
- minimum multiplicity 50 or 100 cm;
- poor quality of cheap Chinese-made products;
- lack of adhesive base in some models.
When will it come in handy
If compactness and mobility are important for business, we neglect the power and area of lighting. The connection is convenient to use when you don’t want to occupy an outlet or there isn’t one nearby at all.
We work with batteries in the following situations:
- interior lighting without fussing with wires and wondering where to put the bulky block;
- lighting of the utility room, garage - any place where there is no electricity;
- illumination for something moving - a bicycle, scenery, a costume for performances;
- I don’t want to buy a power supply and calculate its power for our task;
- lighting is used one-time or for a short time (at outdoor events, holidays);
- I need the light urgently, but something has happened to the power supply.
Connection principle
The most important condition for the launch and long-term operation of a battery-powered LED strip will be the power and charge level (capacity) of the power source.
In this case, you can use any types and types of batteries, including rechargeable ones. Moreover, this option is even more preferable.
- firstly, such a source will be reusable
When the charge runs out, disconnect the battery, recharge it and continue using the backlight. For the most part, battery-powered models are recommended for use in the kitchen and bathroom.
That is, where in addition to LED lighting, there is also traditional lighting.
- secondly, it is more economically profitable
There is no need to store spare batteries and buy new ones in a timely manner.
Any type can be used:
- finger-shaped
- pinky
- crowns
- and even pills
The main thing is to collect the required amount of them and get the required 10-12 volts.
When it's no use
If reliable lighting is important or a large area is covered, batteries will not be suitable. Power supplies are more convenient (or indispensable) when you want:
- carry out work on lighting a large room or many of them at the same time;
- design facades, cornices, outdoor advertising;
- leave the backlight on for a long time;
- use lighting effects (flickering, fading, overflow);
- highlight inaccessible or high-altitude areas of the room, where it is not possible to constantly solder and resolder batteries without the risk of going crazy.
Kinds
Separation according to the power supply scheme. On sale you can find two versions of 220 Volt LED strips:
- with a straightener, length multiples of 50 cm or 1 meter (0.5 m; 1 m, etc.),
- without a rectifier, in a coil, the required length is cut off (also in multiples of 50 cm or 1 meter), and the rectifier is connected separately.
Why is the tape cut into 50 cm pieces? Above, we already said that the LEDs on it are divided into 60 pieces. So, these 60 pieces are located on a segment of 50 cm or 1 meter, depending on the density of the LEDs. This is a production feature and is applicable to all 220V tapes. It is worth noting that it will not be possible to cut a piece of 40 or 90 cm!
Rarely, but still there are tapes with a cutting line of 200 cm (2 meters).
Division by protection class. In terms of protection from dust and moisture, they are no different from their low-voltage counterparts and have the same classification. The most common:
- IP 67 - such protection will protect a person from touching live parts.
- IP 68 – silicone tube, waterproof. Suitable for use in very damp rooms, including baths, saunas or outdoors.
We recommend watching an interesting video, the author of which talks about a sealed (IP 68) 220V tape running on SMD 5050 LEDs with a density of 60 pieces per meter.
Practice shows that the use of 220V LED strip is practical in aggressive environments: street, rain, wind, snow, temperature changes, cold, heat. The LED strip can withstand all these conditions and works for a long time.
It should be noted that self-adhesive tape does not adhere well in cold and wet conditions, so it is worth attaching it additionally to special brackets.
By types of LEDs. Things are the same here. The division can be carried out according to the type of SMD LEDs. On sale you can find SMD LED strips:
- 3528,
- 5050,
- 2835,
- 5630.
3528 and 5050 are the most common in Russia; they can be bought at any large store. Less frequently, but still appearing on sale on SMD 5630 LEDs. Chinese-made products are of low quality, so it is better to refrain from purchasing them.
Also, LED strip 220 comes on a rigid base or flexible adhesive. The first is often used by hobbyists with crazy hands to make lamps or modules.
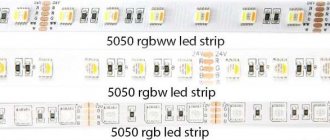
You can also differentiate by color; there are single-color ones: white, red, blue, green, yellow and multi-colored - on RGB LEDs.
LED strip RGB 220 Volt on SMD 5050 LEDs
What can be used in connection
An RGB controller will add brightness control and lighting effects. In designs with such devices, a power supply is required. Controllers differ in type of control:
- push-button controllers are switched by hand;
- infrared ones are controlled by a remote control at a distance of up to 10 m, which must see the sensor;
- radio controllers have a long range and do not need a visible sensor;
- Wi-Fi controllers are controlled by a mobile phone or tablet;
- Audio controllers are equipped with a microphone that receives audio commands.
The controller power standard is 20% more than the tape. An amplifier is used with low-power devices. Its price is comparable to the cost of a cheap controller.
Any batteries can be used for connection, but it is more profitable to use rechargeable ones. The total battery voltage should be between 8 and 12 volts.
Connection to a 12 V battery
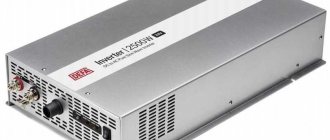
Compared to batteries, this method of autonomous power supply for LED strip operation is the best for several reasons. The 12-volt battery maintains the rated voltage in the load for a long time, allows you to obtain a fairly high level of illumination and can withstand several hundred recharge cycles.
The most common 12V batteries are lead-acid. Most often they are used in UPS, security and fire alarms. Among them, batteries with a capacity of 4.5 Ah (up to 0.8 kg) have the smallest dimensions and weight. The connection and operation process looks like this:
- 2 wires of the required length are soldered to the contact pads of a pre-prepared piece of tape with LEDs (red wire to “+”, and black wire to “–”);
- similarly, on the reverse side, terminals for connecting to the battery are soldered to the wires;
- for convenience, a small toggle switch is soldered into the gap of one of the wires. If it is not there, then to turn off the backlight it is enough to disconnect one terminal.
- SMD 3528-60 pcs/m – 0.4 A;
- SMD 2835-60 pcs/m – 1.6 A;
- SMD 5050-60 pcs/m – 1.2 A;
- SMD 5730-60 pcs/m – 3.0 A;
- SMD 3014-60 pcs/m – 0.6 A.
The current consumption of an LED strip depends on its length.
In addition to lead-acid batteries, 12 V Li-ion batteries have high performance data. With equal capacities, Li-ion batteries have 4 times less weight and size. And to charge them, a compact charger is used.
Important! The battery will work out its life (up to 500 full recharge cycles) only if the discharge current does not exceed 1/10 of the capacity. In practice, this means that a 12V-7A*h battery can be connected for a long time to a load with a current consumption of up to 0.7 A or 2 meters of LED strip type SMD 3528-60 pcs./m, which will shine continuously for 10 hours.
To make calculations easier, below is the current consumption of 1 meter of LED strip, which depends on the type of LEDs installed:
How long does it work
To calculate how many batteries we need and how long they will last, we look for the amount of current consumed by the LEDs. This value differs for different types of equipment and is indicated in the documentation. The quantity is indicated both per LED and per unit length.
Having calculated the total amount of current consumed, we select batteries of the required capacity. The 18650 lithium batteries have a capacity of 2600 mAh - with a consumption of 2600 mA (or 2.6 A), they can provide continuous light for an hour. Five meters of diode strip for 30 diodes, depending on the specification, can consume a current of 1-3 A; for an hour and a half of operation they will require two 18650 batteries.
The quality and operating time depend on the accuracy of soldering or the connectors used.
Types of power supplies for LED strips
The consumer is offered a wide selection of ready-to-use devices in various variations. They vary depending on the material used and the level of weather protection.
Leaky
Inexpensive, 12 V, but the most popular power supplies. They are, as a rule, intended for installation only in enclosed spaces and vehicles. They are considered most suitable for installation on suspended ceilings.
The power of such power supplies is low - within 75 W. In this regard, it is often necessary to install several power supplies in a room.
The downside of these devices is their poor protection from moisture and dust, and they are not very attractive in appearance.
Non-sealed power supply for LED strips with degree of protection IP20
Sealed
Well suited for outdoor work, they are not afraid of high humidity and other unfavorable conditions. These devices dissipate heat perfectly.
The case is well sealed, which is ensured by aluminum or plastic material. In rooms with high condensation, metal is most often used, which has greater strength and reliability and dissipates heat well. Such devices weigh more, which is their main disadvantage.
IP67 waterproof power supply for LED strips
When installing façade lighting, it is best to buy power supplies in a metal housing.
The plastic case is more compact, attractive in appearance, and weighs little. However, it also has significant disadvantages: it does not remove heat well, is limited in power - no more than 100 W, and is more expensive.
Semi-hermetic
More versatile and can be installed both indoors and outdoors. Characterized by degree of protection IP54. Often used for installing LED lighting under awnings and in kitchens.
Semi-hermetic power supply for LED strips with protection degree IP54
To solder or not to solder
The battery is attached using soldering. If there are several batteries, it is not necessary to solder each one separately - we use a battery box with 2-6 compartments.
When connecting using a power supply or box, as well as in designs with controllers and amplifiers, connectors can be used. Compared to soldering, this method is simpler, but:
- the connectors gradually begin to oxidize;
- plastic melts at high temperatures;
- diodes located at the connection points lose brightness.
Soldering is not necessary when using power supplies, and connecting with batteries will be safer and more reliable for long-term operation. But you will need certain tools and materials. Connectors are convenient to use in lighting of complex designs, especially high-rise ones.
Basic parameters of 220 volt tape
Ice at 220 V has the following parameters:
- Cut into 50, 100 and 200 cm.
- Power watts per meter.
- There is protection against moisture.
- Colorful temperature.
Like any other tapes, this one is available in different modifications depending on the degree of protection against moisture penetration. They use IP 67 and 68. This protection is a durable silicone tube. When using such a sealed tape, it is allowed to install diodes in damp rooms, for example, on the street and in a bathhouse.
If we study consumer reviews, we can conclude that the LED strip is suitable for use in low and high temperature conditions.
The base of the tape is quite rigid, but at the same time flexible. Due to the fact that the LED has a rigid base, a piece of tape is turned into an LED module and a ruler. A lamp is assembled from a similar line.
Installation can be self-adhesive or without an adhesive base.
Assembly and connection
Let's make sure that we have everything we need for work:
- the tape lies nearby, the required piece with the required number of diodes has been selected, the specifications are known;
- batteries have been purchased, capacity, voltage, operating time have been calculated; if there are a lot of batteries, the box has been prepared;
- soldering iron with a power of 25-40 W, flux, solder;
- flexible wires (preferably with multi-colored insulation), the cross-section can be small, 0.5-0.75 mm2;
- knife-nippers for stripping insulation;
- a piece of sandpaper or something similar for cleaning contacts;
- optional toggle switch and connectors.
Remember that with a series connection, the total voltage is the sum of the voltages of all batteries. When parallel, it is equal to the voltage of each individual element.
Let's start connecting:
- We clean the contacts on the batteries - we process the plus and minus with sandpaper.
- We tin the ends of the wires.
- We solder one wire to the stripped plus of the battery, the other to the minus.
- If you connect a toggle switch, a wire from the battery is soldered to its input, the output goes to the minus of the tape.
- We make neat cuts in strictly marked areas of the LED strip (usually the cut line is between pairs of solder contacts).
- Plus, minus, as well as operating voltage are written directly next to the contacts. RGB contacts are always a disadvantage.
- The plus soldered to the battery (or the positive wire coming out of the box) is soldered to the plus on the tape, the minus (or the output of the toggle switch) is to the minus. A soldered “green” pin will make the strip glow green, and a red pin will glow red. Sometimes the minus is marked as GND.
- Connectors can connect either individual sections to each other or the entire strip to a power source or controller. Each type (RGB, RGBW) requires its own connector.
- If necessary, repeat the steps above with the remaining batteries and sections of tape.
- There should be no solder residue left on the contacts.
The soldering iron tip should not be held in one place for more than 5 seconds, ideally 1-2 seconds. If the LED strip is coated with silicone, it will need to be carefully removed from the contacts before soldering. The soldering iron should not smoke, and the flux (it should be non-acidic) should not boil.
On colored tapes the 4 pins are very close to each other. We make sure that when soldering, a tin track does not form that covers several contacts at once. If this happens, reheat them and use a toothpick to remove excess tin between the contacts. We ignore it, and at best the colors will be mixed up; at worst, either the tape, or the power supply, or all at once will burn out.
When working with a soldering iron in weight, do not forget about safety glasses and gloves.
There are several ways to secure the LED strip:
- adhesive layer on the back of the tape;
- additional attachment with double-sided adhesive tape;
- gel superglue;
- aluminum profiles.
You need to choose a connection method with future installation in mind. The power supply and wires can be hidden inside cabinets and baseboards, but always close to an outlet. The connection with batteries is made taking into account the ability to quickly replace them.
Two methods of connecting a diode strip are fundamentally different in scale: battery - wireless, suitable for local tasks; with power supply - reliable, for large projects. The charge level relative to the electricity consumed will help you find out how often you will have to change the batteries and how many of them are needed for uninterrupted operation. Those who are not confident in using a soldering iron take a battery box or power supply and connect it using a connector.
The ability to connect an LED strip without a power supply will eliminate problems with laying wires. And this is the only way to make it work when there is no electricity.
Simply and easily
So, having figured out how to power the LED strip, we conclude that if you have the desire and additional sources of information, this can be done with your own hands. And if you remember that installing such lighting by a master will be about one and a half to two times more expensive than the materials themselves, then you should definitely try your hand at this, possibly new business. It is, of course, necessary to observe safety precautions when working with electrical devices.
LED strip, light white, length 2 m, voltage -5V.
- Price: 187 rub.
- Go to the store
Review of LED strip and its application options. Well, help me please)
In my city den, from time to time, there are episodes when the GOELRO plan fails and temporarily, while the electricity is turned off, a local Black out occurs. Either there are major repairs or accidents, or the neighbors are fixing something. In summer, when the evenings are light and the days are long, this is not a problem. In autumn-winter-spring it gets dark early, sitting for several minutes (hours) in the dark, even with a smartphone or laptop, is depressing. Especially on New Year's holidays. Beams, candles, flashlights are still local lighting, and the stage has already been passed; storing a car battery at home with an engine compartment illumination lamp is also not an option, due to its size. Although I tried it too. There are also the notorious flashlights from Xiaomi, but I want something lighter. There is, of course, an idea to use a UPS for these purposes, to which the PC and peripherals are connected, but I decided to leave this path as a last resort, as a backup option, and the protection against battery discharge of the UPS, kmk, will not allow them to be used. At my leisure, I decided to adapt this LED strip for lighting purposes in a force majeure situation, since its 12V counterpart, connected via a power supply to a 220V power supply, creates a completely comfortable level of lighting in the home. Why exactly 5V? I don’t know, more out of curiosity, there are tapes for 12V, but I haven’t tried them for 5V yet. And in this case the battery will be more capacious for the same price; in extreme cases, external batteries for smartphones will also be suitable. Although the 12V LED strip performed quite well on such a battery
What was purchased, except for the subject under review. Maintenance free Delta 6V battery.
Purchased from a local online store. A stabilized power supply with the necessary parameters for periodically recharging the battery has long been available.
As an offtopic,
I will also note that LED devices that receive electricity from the network do not last long for me. The LEDs for illuminating the Legrand Quteo series switches were especially disappointing. It seems like Hungary, but within a year all of them failed, about 15 of them.
Well, I repeat, the 14 W Gaussians also all burned out (the service life varied from 3 hours to 6 months).
Tapes powered by 12V feel quite comfortable even after 4-5 years of daily use.
Product packaging
I would also like to praise the seller, the delivery time was 18 days, upon delivery I received a message via email and on my smartphone.
Ribbon.
The length of the cord is 1 m, the length of the LED part is 2 m.
Test run
Questions for dear users of the resource: 1. What resistor should I buy to transform the voltage from the battery terminals (6V) to the voltage needed to power the LED strip 5V? In the same Chip and Dip, for example? 2. What is the maximum operating time (in theory) of the tape that can be calculated based on the battery parameters?
Maybe there are some programs for calculation? In electrical engineering, I’m an amateur, to put it mildly, although I remember Ohm’s law and can guess the purpose of a varistor.
How to properly connect an LED strip in a car
You can connect the LEDs in your car to the on-board network or directly to the battery (not advisable, more on that later).
The on-board electrical network of the car does not correspond to the nominal power parameters of the LEDs, since the voltage taken from the battery reaches 14.5 Volts. This is not fatal for LEDs, but it significantly reduces their service life.
The second risk factor for direct connection to the on-board network is significant current drops. Any car has units with significant power draw from the battery - starter, head lighting, air conditioning, electric power steering. They consume hundreds of watts, and currents reach tens of amperes.
You've probably noticed how, when starting the engine, the headlights go out, the radio and on-board computer turn off, and turning on the air conditioner "cuts down" the volume of the music. And this is when the wiring lines are separated through a distribution box and there are current stabilizers in the equipment.
Use stabilizer
Any LED can operate for a long time only in a narrow range of currents and voltages. For example, an SMD 3528 LED element requires 2.8-3.4V and 0.02A for power supply. Thanks to the limiting resistors on the tape itself, they only feel comfortable at a mains voltage of 12V.
To connect the LED strip to the 12V of the car, use a stabilizer; it is connected to the gap in the positive wire from the battery. You can assemble it yourself. Below is a diagram using the example of a voltage stabilizer LM 7812. It has an output voltage of 12V and produces a current of up to 1A. This is an outdated model and requires additional cooling.
More modern switching stabilizers will be a good replacement for outdated analogues. Here are the characteristics of a regular switching stabilizer from Aliexpress:
- Wide range of input voltage (4-36V) and adjustable output (1-36V);
- adjustable output current (0-5A);
- protection against overheating and short circuit;
- a wide range of operating temperatures is declared -40 +80 degrees;
- Conversion efficiency 96%;
- They cost around $3-4 on Ali (220-270 rubles).
Switching stabilizer 12V
Connecting RGB strip
Remember , there is a list of lighting colors that can be used on a car. Violation of the rule entails deprivation of rights, with confiscation of lighting devices. Read below about the legality of installing the backlight.
When connecting an RGB strip, an RGB controller is added to the circuit, which regulates the power of each color LED and allows you to obtain any color. It is connected after the stabilizer, before the RGB strip.
Connection diagram for RGB tape in a car
When connecting the diode strip to a car, you should avoid bending it. Any break will lead to a rupture of the conductive coating. If you need a sharp turn, make a break and connect the ends with connectors.
Use connectors
Soldering is the most reliable method of attaching wiring, but it is not always convenient.
In conditions of limited space, there is always a risk of damaging the car interior trim with a hot soldering iron tip, and soldering in an acrobat position is not comfortable. To connect the segments, you can safely use connectors with pre-soldered wires. They clamp the contacts tightly and are quite reliable even in conditions of constant vibration. But it is better to fill the places of such connections located outside the car with sealant or hot-melt adhesive. If you had to make additional holes in the machine body to route the LED strip wiring, carefully treat them with an anti-corrosion compound and, if possible, seal them. The connection points of the wires should be covered with heat-shrinkable tubing for reliable insulation.
What you need to know about soldering
The most important thing in working with LED strips is cutting them correctly into separate fragments and soldering them. In order for everything to go well, you should know the following nuances of carrying out this type of work:
- The product needs to be cut only in special places. Otherwise, the conductive contacts will be damaged and the device will be damaged;
Place for cutting tape
- you need to solder carefully, applying the soldering iron tip to the contacts and wires for just a few seconds;
- the wires must first be tinned;
- After soldering is completed, the contacts should be cleaned of solder residues.
By adhering to these recommendations, the process of soldering individual fragments of the product and connecting to a power source will be as easy and quick as possible.
Which power supply should you choose?
There are several power supply options available in lighting stores. Let's look at the pros and cons of each of them:
- Compact sealed in a plastic case . This option is ideal if small size, light weight and protection from moisture are a priority. Such properties are especially important in tasks related to interior lighting, where it is desirable to hide the power supply. The main and only negative is the maximum power of 75 W.
- Sealed in a metal case . Unlike the previous option, they provide a power of 100 W - a value that is enough to power two LED strips. The downside is the rather large size, which narrows the scope of application of such a power supply. Plus - high reliability and excellent protection from weather conditions.
- Typical unsealed (open) . Such devices are available in a wide range of power values; it can be 100 watts or more. Open power supplies are the largest in size, making them more difficult to hide in interior elements. The main advantages of open devices are the most affordable price and a wide selection of models.