How everything works
Anyone with basic skills can now connect an outlet from a switch.
We will try to talk in detail about all the problems that may arise in such situations. An electrical outlet should under no circumstances become a source of all sorts of dangerous situations. This is especially true for houses and apartments where there are many energy-intensive appliances. Here you will have to seriously understand the entire structure. You must become familiar with the entire switchgear.
The socket is equipped with decorative elements that are secured with screws. There is also a sub-socket and block on which the frame, grounding, front panel, protection curtains, phase, protective mechanism and housing are located. Don't forget about the fastening tabs, contacts and terminals.
Final verdict for daisy chain connections
The PUE clearly states standards that give categorical recommendations:
- Clause 7.144 - in order to connect the open conductive parts of the elements to the grounding and neutral conductors, separate branches are required. Protective conductors cannot be connected in series.
- Point 1.26 of the branch is carried out in a box, if it corresponds to such work, or in the housing of an electrical product, the socket is one of them.
To avoid a fire if daisy-chained sockets are connected, it is imperative to calculate the loads that consumers will experience.
To be taken into account:
- Additional contacts in conductors are the weak links.
- The socket is designed to consume rated current within 16 A. When connecting such a load, there will be no negative effects. If you turn on the devices at all points, the cable will not withstand due to the total current exceeding the rated value.
- When the owner plans to turn on audio equipment, a TV, a computer in one room - not very powerful devices, it makes no sense to connect separate points for them.
For a whole house, if it has a lot of appliances, household appliances, and plumbing equipment, it is better not to violate electrical rules. You need to make all the sockets autonomous, then when you turn on a new electric oven, multicooker or grill, you won’t have to think about how dangerous it is to operate powerful appliances at the same time, and what consequences can generally be expected from an overload of the electrical system. No matter how much money is spent on reliable wiring, it will be more profitable compared to repairing an apartment after a fire, if there is something left to restore.
We connect a three-phase 380 volt outlet ourselves
Often in manufacturing plants, during construction or in offices, powerful electrical appliances are used that require three-phase power supply at 380 V. And if connecting a regular outlet to a single-phase power supply is quite simple, then connecting a three-phase connector has its own nuances, since a four- or five-core cable (with grounding)
Therefore, in order for the connection to be safe and not lead to failure of electrical equipment, it is important to connect all conductors correctly and not confuse phase and neutral
What sockets are used when connecting 380 volt electrical appliances
In our country, two types of sockets are mainly used: PC32 and 115 (125) 3P+PE+N, as well as their foreign analogues:
- PC32 type connectors are used exclusively for non-movable electrical appliances, such as electric stoves, stationary water heaters, machine tools, etc.
- Sockets 115 (125) 3P+PE+N are suitable where mobile electrical equipment is used, for example in workshops or at construction sites. In this case, the devices are connected to the network using a flexible copper cable. This type of connector can also be used to power stationary devices.
It is advisable to install imported sockets if the design of the room requires it, or if the plug on the power cord of the electrical appliance has the appropriate configuration.
Note! When choosing an outlet, you need to take into account the amount of current for which it is designed. This value must be no less than the current consumed by the electrical equipment used
General connection provisions for all types of three-phase sockets
When installing a three-phase outlet, you must:
- Turn off the power supply and check the absence of voltage using an indicator screwdriver or tester.
- In random order, connect three phase conductors A, B and C to the contacts with markers L1, L2, L3. The location of the phases is unimportant, since only the direction of rotation of the connected electric motor depends on it. If the rotor rotates in the wrong direction, then it is enough to rearrange any two phase wires at the terminals of the electromagnetic starter of the device or in the machine.
- Connect the zero to the contact marked N.
- Connect the protective ground wire coming from the ground loop to the contact with the PE (ground) marker.
In the case when a four-pin socket is used to connect stationary electrical equipment, the device is grounded by a conductor not connected to the plug connector. The grounding stranded copper cable is connected directly to the metal body of the device under a bolt in a place marked accordingly. The wire cross-section should be the same or larger than that of the power cable.
Connecting a PC32 type socket
The process of connecting connectors of this type does not differ from the algorithm described above. Three phase conductors are connected to contacts L1, L2, L3. Zero is connected to terminal N, and the grounding conductor is connected to terminal PE.
Connecting a socket type 115 (125) 3P+PE+N
To avoid confusion, it is better to start connecting this outlet with grounding. The corresponding contact is located at the bottom, next to the guide groove, thanks to which the plug will always be oriented correctly when inserted into the connector.
The neutral terminal N is located to the right of the PE contact. The core of the working zero is connected to it. The remaining three terminals (L1, L2, L3) are connected to the phase conductors in random order.
As you can see, connecting a three-phase outlet is not so difficult and is accessible to anyone with technical skills.
How to connect the switch?
Installation is carried out in several cases when no other electrical appliances are provided or they need to be connected close to the switch. Then it is worth mounting them in the form of a distribution box. The installation algorithm is as follows:
- The voltage is removed from the distribution box, the neutral and phase wires are connected to the socket terminals.
- The socket will be used as a distribution box to connect lighting. Switching is carried out in the usual manner: wires are routed to the luminaire outputs.
- The protective and neutral wires are connected from the socket with a three-core cable: the protective and neutral wires are supplied to the socket terminals, and the phase wire is supplied to the switch terminal.
- To test the functionality of a triple socket switch, you need to connect the voltage and test with a load, such as a main light (switch test) and a table lamp (socket test).
Attention: When connecting a multi-track lamp, a three- and four-core cable is required. In this case, the three-wire connects the terminals of the socket and the output of the switch, and the four-wire is connected to the outputs of the socket with a protective and phase wire, and the other pair of conductors is connected to the outputs of the switch.
Connection type
How to properly connect the outlet(s), based on the number and characteristics of electrical appliances that will be connected to them? First you need to select the connection type. There are two of them:
- "loop", or serial connection;
- "star" or parallel connection.
“Loop” - connecting each subsequent outlet actually from the previous one. This applies to zero, phase and grounding. In this way it is convenient to assemble up to five or more sockets in one row, vertical or horizontal. The disadvantage is that it is not recommended to connect powerful equipment to such outlets.
“Star” - with this socket connection scheme, it is connected directly to the distribution box. It is done like this:
- Using special caps, regular electrical tape or other devices, the required number of wires leading to the sockets is connected to the power wire in the distribution box;
- Each outlet receives its own wires from the distribution box, which allows you to connect devices with high power consumption without risk to the outlet itself;
- To make such a connection, you should choose wires that are smaller in cross-section and capabilities than the wire connected to the junction box. For example, if a 25A cable with a cross section of 2.5 sq.m. is supplied to the box. mm, you can connect 16A wires with a cross section of 1.5 square meters to it. mm.
Connecting the cable
Connect to an existing outlet like this:
- the end of the new cable is cut to a convenient length;
- free the ends of the cores from insulation to a length of 1 cm. There is a special tool for this operation - a stripper (also known as a crimper), which eliminates the possibility of damage to the core. In its absence, the insulation is carefully cut off with an ordinary knife, trying not to damage the core;
- the bare ends of the strands are bent into loops and lightly squeezed with pliers;
- Having pressed the spacer antennae, remove the inner part of the socket and loosen the screws on the phase and zero terminals. The grounding conductor is completely unscrewed;
- the power cores of the new cable are inserted into the terminals and the screws are tightened. Now each terminal has two wires - from the power cable and from the jumper for the new socket. The colors of the insulation on the cores in each terminal are the same.
Grounding is connected differently. For it, connecting with a cable is unacceptable due to low reliability: if the contact in one of the sockets burns out, all subsequent ones will be left without grounding. According to the PUE, it is necessary to maintain the continuity of the conductor by making a branch for each socket.
Do this:
- a crimp sleeve is put on the unscrewed grounding conductor of the supply cable and two more conductors are inserted into it: from the jumper cable and a short section - a branch for the existing socket;
- press the sleeve with press pliers;
- put a heat-shrinkable tube on it and heat the latter with a hot air gun or lighter (insulation);
- Screw the branch to the grounding contact of the existing outlet.
Do the same when connecting each subsequent socket of the cable. The existing outlet is being assembled
It is important to make sure that the limiter on its inside (a rectangular metal plate) does not squeeze the jumper wire. If this is discovered, a cutout is made for the wire in the socket box, and if necessary, the hole in the wall is deepened
Connection diagrams
Even a novice master will not face any special difficulties, everything is very clear, but it is better to consider the features of each option.
Single-phase network without grounding
The diagram is indicated by numbers:
1 - general machine;
2 - the one that turns off the phase on a specific line;
3 - zero bus;
4 - distribution boxes, separate for each outlet;
5 - cables.
Any electrical specialist knows that the phase should be located on the left, but owners often break this rule. If there are problems in the electrical network, they create additional difficulties for themselves when diagnosing, as well as in the case of self-repair.
Single-phase network, but with grounding
In this case, only one element is added, number 6, this is the main grounding bus for the protective conductor (PE). It is indicated in green.
There is another option, used for outbuildings if they have open wiring. In this case, the grounding runs along the floor - along the perimeter of the walls, and a separate wire leads to the sockets below. There are no other differences in the eyeliner.
Installation of a block of several sockets
Single sockets and industrially manufactured multi-socket units are available with a rating of 10 or 16 A. Consequently, self-assembled blocks of several sockets are designed for the same currents.
Power wiring lines for a group of sockets are arranged from a conductor with a cross-section of 2.5 mm² and are connected on the panel through a circuit breaker with a rating of no more than 16 A.
A single 10 A socket can be used to connect equipment with a power of up to 2.2 kW, and a 16 A socket with a power of 3.5 kW. The total power of devices connected to the socket blocks should also not exceed these values.
The number of sockets in a self-installed unit is determined based on reasonable needs, with reference to restrictions on the duration of permissible currents. The minimum required number of consumers connected to the unit and their total power are calculated. If the obtained value is outside the acceptable range for the existing wiring, it is necessary to reduce the number of sockets in the block and compensate for this by laying additional socket lines.
Having calculated the required number of sockets in the assembly, choose the design of the block:
- invoice - located on the wall surface with preliminary installation of a flat socket box;
- built-in - installed in a module made of mounting boxes, for which a mounting socket is made in the wall.
Installing a surface-mounted socket block
Outdoor units are a collapsible box made of flame-retardant PVC plastic, in which 4-6 sockets are arranged in standard seats.
The front part of the box is attached to its base using latches and does not require special tools for removal. On the base of the box there are holes with a diameter of 20-32 mm, equipped with easily removable plugs for introducing cables into the box.
The cables are run into the box, after which it is applied to the wall and aligned horizontally, after which markings are made for drilling holes for fastening with self-tapping screws.
Once the box is attached, the front covers are removed from the sockets, in which holes for the wires to enter are cut out on the desired side with a knife, and the contacts are connected with jumpers.
The cross-section of the jumper wires must be no less than the cross-section of the incoming cable.
The installation of the grounding line must be carried out in strict accordance with the requirements of the PUE - the PE cable must be solid and reach the most distant outlet, having branches along the way separately for each point.
PUE-7 1.7.144
The connection of each open conductive part of the electrical installation to the neutral protective or protective grounding conductor must be made using a separate branch.
The series connection of exposed conductive parts into the protective conductor is not permitted.
Depending on the model, such multi-outlet blocks provide 1-2 seats designed to install sockets for a wired Internet connection or a landline telephone. Before installation, special landing supports are additionally inserted into these sockets. Partitions are provided in the cover of the box to separate the power wiring from the data cable.
After completing the electrical installation, the front cover of the unit snaps onto the base. If the connectors for the Internet or telephone cable were not installed, standard plugs are inserted into the holes - in the future, additional sockets can be mounted on these seats.
Installation of an internal socket block
The most common replacement for a single built-in socket is a multi-socket unit of no more than 6 devices connected in parallel - a cable. The connection of adjacent sockets in a cable is made with wires secured in socket terminals. That is, two wires are attached to the terminals of each socket, except the last one - incoming and outgoing. In this regard, parallel connection of sockets in this case also has the properties of serial:
- when a conductor burns out on one of the terminals of any device except the last one, all sockets following it become inoperable;
- Each connection of another consumer to any outlet significantly increases the current in the wiring section from the unit to the distribution box.
Don't miss: Ceramic tile apron: examples of layout in the kitchen. Variety of kitchen apron designs made of tiles: admiring the photos and interior
The PUE requirement for the continuity of the grounding cable is based precisely on the first property of the daisy chain connection.
Having decided on the number of sockets in the block, along with them you need to purchase socket boxes and an overhead front frame for the required number of places. It should be taken into account that incoming and outgoing wires will be connected to pass-through sockets (which is not only the last one), so the corresponding socket boxes to accommodate a larger volume of wiring must be chosen with a greater depth - 60 mm instead of the standard 45.
Installing a socket block in a concrete wall
Work begins with de-energizing the line by turning off the machine on the panel and checking with a tester that there is no voltage on it, after which the existing single socket is dismantled.
The mounting boxes assembled into a block are applied to the design location on the wall and the contour of the socket is marked - with a margin of a couple of centimeters in each direction. Depending on the base material, a landing socket is made in an appropriate way, which is partially filled with plastic cement mortar.
A cable is inserted into one of the socket boxes of the assembled section, after which it is recessed into a seat flush with the wall and fixed there until the solution hardens. Then the remaining gaps are rubbed and the base is finished.
When starting to install sockets, to connect them together, first cut the required number of jumper wires, clearing the ends of insulation and grouping them by color according to phasing.
The sockets are connected according to the above diagram, starting with the one closest to the incoming cable on the right. In the situation shown in the figure, after connecting the rightmost socket with short jumpers to the penultimate one, two long wires (phase and zero) will be drawn from it to the leftmost one - to connect another socket line.
If it is decided to replace several single sockets in a room with socket blocks, then one of the options for a daisy chain connection scheme may be as follows:
It should be remembered that each outlet must have a separate branch to the grounding cable.
To fulfill this requirement of the PUE for the integrity of the ground wire, you can use special clamps that make it easier to create branches for passing sockets.
The prepared jumpers are first laid out on the socket boxes, after which they begin to connect the sockets. Having secured the conductors in the terminals, the sockets are installed one by one in the mounting boxes, preventing the wires from getting under the spacer tabs.
Upon completion of the installation of the dielectric bases, a control tightening of the spacer screws is performed, installation of the front covers and switching on of the machine on the apartment panel. The installation of a socket assembly on drywall differs only in the type of sockets used - with external clamping feet and is simpler, since installing a socket in a gypsum plasterboard does not require professional skills or physical effort.
Replacing a single socket with a multi-socket block if there is no grounding cable in the wiring is performed identically. The work will take less time, but you should never neglect grounding, if any, and install two-pin sockets.
Option for connecting socket blocks to a network without grounding:
Mixed connection and grounding in series connection
If you decide to use a series connection of sockets, you can strengthen the overall design by using a mixed method. The essence of the method is as follows:
- A central cable is connected to the distribution box from the common panel board.
- In the preliminary wiring plan, the most distant point of access to power is selected.
- The selected outlet is connected from the distribution box cable.
- The rest are powered from this device.
This method increases the reliability of the network. If an outlet fails, the others continue to work. Disabling the entire system is possible only in the event of a malfunction of the main cable, twisted in the junction box.
Grounding is a must. With a serial connection, if a wire burns out at one point, the rest are left without protection. The optimal way to connect sockets to each other for grounding is mixed. The main cable is fixed under the ceiling, then branches are made for each access point.
This technique has disadvantages - the large length of the wires used, the need to install several junction boxes (for each branch). To know for sure whether high-power devices can be connected to the network, it is necessary to calculate the voltage before the cable wiring stage. An accurate calculation will help you choose how to connect the sockets in the end - in series, parallel or mixed.
Is it possible to connect sockets in series?
Connecting sockets in series mode has a number of disadvantages and limitations. In a large room and a significant number of powerful electrical appliances, this method cannot be used - the load is too high. It is better to parallel the sockets or use the ring type. The recommended quantity per chain is 5-6 pieces.
Another disadvantage is the uneven distribution of voltage at power points. Each outlet accounts for a portion of the total electrical flow. Therefore, serial connections are not used in residential and industrial premises. But you can use it in Christmas tree garlands and others.
Installation technology: how to do it?
Advice It is necessary to study the type of socket being installed and choose the most suitable method.
socket installation
How to install a surface-mounted device?
Actions should be performed according to the following algorithm:
- The power supply in the apartment or house is turned off.
- The decorative cover is removed from the device.
- The device is applied to the fixation site.
- The points at which the dowels will be screwed are marked with a pencil or marker.
- Using a drill, recesses are drilled to a depth equal to the dowel casing.
- The covers are inserted and the upper part of the hole is widened if necessary so that the caps do not interfere with the device's tight fit to the wall.
- The dowels are inserted into the holes of the mounting plate, screwed in with a screwdriver or driven in with a hammer.
- The zero and phase wires are inserted into the terminals.
- The socket is fixed and checked for fastening strength.
- Functionality is checked.
Hidden wiring products
- A marking of the mounting location is required, and if there are no wires laid from the junction box, then also the grooves for the wiring.
- A recess is drilled for the box using a core drill or with pobedit coating (in concrete, brick walls).
- Ditches are being dug for laying wiring.
Connection after such operations is performed as follows:
- The mains power in the apartment is turned off.
- The holes are prepared and cleaned of dust.
- With cement or gypsum mortar placed on the internal cavity, a socket box is inserted.
- It is necessary to wait until the material sets so as not to disturb the position of the box.
- To connect the wires from the junction box, the insulation is removed from 0.5-1 cm at the end.
- The wires are inserted into the holes of the terminals and secured by tightening the screws. It is necessary to tighten them well so that the dangling wire does not lead to heating or sparking of the contact.
- The device is installed on self-tapping screws and fixed on the socket box.
- Functionality is checked.
correct installation of the socket Attention The voltage between ground and phase, neutral and phase must be 220 V if measurements are carried out with a multimeter.
Device connection diagram
- First, at a distance of approximately 10 cm from the edge, it is necessary to strip the overall insulation of the wire to gain access to the three cores. Even remove about 0.5-1 cm of insulation from the ends of the wires with a knife or wire cutters. It is necessary to perform all operations very carefully so as not to damage the insulation, which will lead to a short circuit and burnout of the outlet. To connect the ground wire there is an additional hole, which is located further from the power outputs. The operation of the device is not affected by the order in which the wires are connected.
- It is necessary to ensure good insulation and reliable contacts. To do this, put on thermal attachments, push them closer to the terminals and melt them with a lighter. The main thing is not to overexpose the fire, so as not to melt the insulation completely, 1-2 seconds is enough.
- It is necessary to firmly tighten the screws that secure the wires so that heating or sparking does not occur due to poor contact.
Installation procedure
Drywall is a fragile material and must be handled with care.
Before you begin installing sockets yourself, you will need to read the installation instructions. The easiest way to consider an example is when they are installed in a plasterboard wall. The work order in this case looks like this:
- Take an electric drill with a “crown” type attachment, through which a hole for the socket is prepared in the selected location. Its diameter must match the size of the plastic case (glass) used as a mounting base and fixed directly at the installation site.
- The mounted socket is placed in the glass and secured in it using long spacer screws.
- It is necessary to connect the phase and neutral conductors brought out to the contacts, and then close the product with a decorative cover.
At the final stage of work, you should supply power to the line and check the socket for functionality - connect any household appliances to it.
To correctly connect several outlets in a row at once (with a cable), experts advise paying attention to the following points:
- The wire from the phase terminal of one socket unit is pulled to the same contact of the next product, and so on. To such a cable you can add the entire set of sockets installed in a given room.
- The same is done with the neutral conductor, laid from the corresponding contact to the second and subsequent products mounted on the wall.
- If there is a grounding conductor, the same operations are performed with it.
The advantages of this connection method include ease of implementation and economical use of consumables (wires). The disadvantages are the unreliability of the system, in which a break in one of the conductors will lead to de-energization of all subsequent sockets connected to this loop. In this sense, a star connection looks much preferable.
Design and installation locations of socket blocks
The design of the socket block differs from a conventional socket only in the number of “seats”. It consists of a plastic body and an internal part, represented by terminals with contacts and terminals, to which springs for the plugs are attached.
Most modern models are equipped with grounding contacts, which are designed to increase the safety of the system and reduce voltage from all electrical appliances connected through the unit.
The number of connection points of the installed socket block is determined based on the availability of household appliances placed in one group
There are two types of socket blocks:
- Designed for hidden wiring. Installed into the thickness of the wall using a module made of glass-shaped socket boxes;
- Designed for open wiring. They are installed on the wall surface using a plate-shaped socket box.
In addition to the two main types of socket blocks, there is also a very practical retractable type. They are easily mounted in a countertop or cabinet, from which they can be pulled out when needed. Their operating principle is similar to power supplies located on/in the wall.
Socket blocks are often installed in kitchens, placing them behind the work table at a height of 10 cm, inside kitchen cabinets and behind the walls of adjacent cabinets at a level of 30-60 cm from the finished floor. They are convenient to use when connecting a group of low-power household appliances: hoods, multicookers, refrigerators...
The recessed housing of the retractable socket group, consisting of three to five electrical outlets, remains hidden in the tabletop until you lightly press on its top panel
When arranging halls and living rooms, they are placed near computer desks or behind the TV screen. Socket groups of three electrical points can often be found in bathrooms. But in this case, devices with waterproof housings are used, placing them at a distance of at least 60 cm from the water source.
Advantages and disadvantages
To determine the optimal connection diagram for sockets and switches, it is necessary to prepare a wiring plan, calculate the number of devices and the possible maximum power. At the same time, in newly built buildings it is necessary to plan future possibilities without unnecessary modesty: an additional TV, the purchase of a separate freezer, and the like.
Based on the data received, the connection type is selected. The advantages of the sequential method include:
- simple connection system and circuit assembly;
- the ability to adjust the voltage level, make it less;
- You can use one fuse per circuit.
Safety precautions
- use high-quality tools with good insulation;
- wear protective clothing and shoes with rubber soles;
- perform actions only during the day in good lighting;
- turn off the power in the electrical panel to avoid electric shock;
- make sure that no one turns on the electricity: hang a warning sign on the panel, personally warn your neighbors;
- make sure that there is complete absence of wiring in places where it is planned to drill and groove walls for electrical wiring and socket boxes;
- It is good to tighten all screws in the terminals so that there is no sparking or heating in such connections;
- carry out work in a dry room.
To install a triple socket you will need to perform the following work:
- Preparation;
- marking walls;
- drilling a hole for the box;
- the installation itself.
How to choose the right method
It all depends on the amount you can afford to spend, the power of the device that will be connected to this outlet, as well as the presence or absence of decoration on the walls (the desire and ability to ruin it).
In any case, the most reliable way to connect any outlet is a separate (parallel) connection directly to the main panel or distribution box in the room (if the cable cross-section allows). If the outlet is planned only for connecting a TV or similar not very powerful devices, then a daisy chain connection is also quite suitable.
If you plan to install wiring in a new house or modernize (replace) an old one in an apartment, then first of all you need to, without undue modesty, imagine what electrical appliances you would like to have - what can be connected to the network in principle. Based on this, it is already possible to calculate the required cross-section of wires and the method of connecting them.
The method of installing the outlet depends on the type of wiring, of which there are only two:
Open
In the case of installing a socket for hidden wiring, a hole is punched in the wall, a socket box is installed, into which the socket itself is then installed.
When installing a receptacle for open wiring, the process becomes much simpler since the receptacle is installed directly on the wall. Older models of sockets may require a wooden cover to increase the safety of their operation, but modern sockets do not need this either.
How to properly install and connect the socket?
The first thing you need to do before installation is to choose the right location for the future electrical point.
Depending on the rooms in which the sockets are installed, certain distances must be maintained:
In living rooms - at a distance of 20-30 cm from the floor
In apartments where there are children - above their height or special pads should be used
In kitchens - at a distance of 1.3 meters from the floor
From gas pipes and electrical appliances - at a distance of at least 50 cm
In bathrooms and showers - 1 m from the floor
You will find some more rules in the picture below.
Having figured out the installation location, you can begin to prepare a place in the wall for installing the outlet.
Preparing the hole for the socket
In order to install a socket in a concrete wall you will need:
Hammer
Diamond crown
Installation box
Plaster mortar
If the socket will be installed in a plasterboard partition, then instead of a hammer drill, you can use a conventional drill and a crown designed specifically for plasterboard.
In this case, we will consider installing a socket in a concrete wall. In order to make a hole in such a wall, you must first make markings. To do this, take a socket box, trace its contours with a pencil, and then apply a crown to it.
After this, the hole is cut to the required depth, equal to the size of the socket box, and using a chisel and hammer, the stone is knocked out and removed from the recess.
Then a groove is drilled from the finished hole for the wiring. The socket box may have a hole for cable entry, or it may not, and then you will have to break it out yourself.
After preparing the groove, you can lay a cable into it and install a socket box; to do this, the hole must be cleared of debris, small pebbles and dust. Then a primer is applied and a plaster solution is laid, which will securely secure the installation box.
When the box is installed in the hole, it will also need to be coated with plaster along the edge.
Connecting the socket
After the plaster solution has dried and been sanded, you can connect the wires to the outlet. In order to do this correctly, you need to understand its structure.
On the socket block you can see 3 contacts: 2 of them are for connecting phase and neutral, and the third is for grounding.
They are connected according to this scheme:
Important! Before you start connecting the wires, you must turn off the power to the apartment. You can check the absence of voltage in the outlet using a special device - a multimeter.
Having figured out where each wire will be connected, you need to strip the ends of the wires and connect them to the contacts of the socket. The connection is made using a spring or screw clamp. After this, you can twist the excess wires and carefully place them in the box.
Final stage
Once connected, all that remains is to attach the block to the wall and complete the process. The block is attached either with screws or with screws. And after attaching the socket, you need to install the plastic cover, that’s it - the installation of the socket is completed.
Connection diagrams
Several cables can come into the junction box.
Firstly, this is a three-wire power cable from the lighting circuit breaker installed in the electrical panel. Secondly, a 4-wire cable goes down to the three-key switch, which you have already connected from below.
Well, then there may be options. If you have one chandelier with 3, 6, 9 bulbs, then you can connect it with one single five or 4-core VVGnG-Ls cable with a cross-section of 1.5 mm2.
If you have three independent lamps, in different parts of the room or house, then you will have to run a separate 3-core cable to each of them. Let's consider the last option in more detail.
Installation of sockets
Before looking for how to wire a 4-socket outlet, it is better to become familiar with the requirements and installation process of a simple single device. The fact is that there is no difference in installing double, triple sockets, or devices with a large number of sockets.
Complete blackout is the first condition for any electrical work. When installing, be sure to pay attention to the color coding of the wires. Phase wires (L) can be:
- white;
- turquoise;
- brown;
- red;
- orange;
- pink;
- gray;
- purple;
- black.
But still, 3 colors are more often used - white, black or brown. Neutral (N) - zero working contact - blue or blue. Grounding (PE), which is often called “zero protection,” has a shell of yellow and green stripes (longitudinal, transverse), sometimes a yellow-green tint, and can also be purely yellow or only green.
The process of installing sockets looks like this:
- First, a hole of the required diameter is drilled in the wall for the socket box, and grooves are made for electrical wiring. These operations are not necessary if the task is simple - replacing a failed socket. In this case, pull the end of the power cable out and remove all accumulated debris using a vacuum cleaner or brush.
- To install the socket box, prepare a cement/gypsum mortar. After applying it, insert the installation box into the hole, pull the cable into it, and fix it flush with the wall. Leave the work until the solution has completely set.
- Then the insulation is removed from the ends of the wires, they are inserted into the contact mounts (phase - on the left, zero - on the right, protective cable - in the center) and tightened with a screwdriver. Check the connection for strength.
- The body is installed inside the box, aligned horizontally, and temporarily fixed on both sides with self-tapping screws. The position is corrected using a level, then the fasteners and spacer tabs are tightened, finally fixing the socket body
- Attach the cover to the body and tighten the central screw. Turn on the electricity and use the indicator to check the functionality of the outlet.
Installation and connection of sockets by professionals. Price
Installation and connection of sockets by professionals in Moscow and the Moscow region are carried out approximately at the following prices:
| Connecting and installing sockets | ||
| Installing an outdoor outlet | PC. | 300 rub. |
| Installing an indoor outlet | PC. | 250 rub. |
| Installing a RJ45 computer socket (Internet) | PC. | 250 rub. |
| Installation of a television outlet (TV) | PC. | 250 rub. |
| Installation of telephone socket RJ11, RJ12, RJ45 | PC. | 250 rub. |
| Installing a dimmer (dimmer) | PC. | 300 rub. |
| Installing a rheostat for a heated floor (thermostat) | PC. | 600 rub. |
| Installing a socket for an electric stove | PC. | 600 rub. |
| Drilling holes for socket boxes | ||
| In plasterboard ⌀ 75mm | PC. | 150 rub. |
| In brick, wood ⌀ 75 mm | PC. | 200 rub. |
| In concrete ⌀ 75mm | PC. | 300 rub. |
| In plasterboard, recessed ⌀ 75mm | PC. | 150 rub. |
| In brick, recessed ⌀75mm | PC. | 220 rub. |
| In concrete, recessed up to ⌀ 75mm | PC. | 350 rub. |
| Installation of socket boxes, junction boxes | ||
| Installation in drywall | PC. | 100 rub. |
| Installation in concrete, brick, foam block, gas block | PC. | 150 rub. |
| Installation of external junction box 80x80x60 mm | PC. | 250 rub. |
| Installation of an internal junction box 100x100x60 mm | PC. | 300 rub. |
| Installation of an internal junction box ⌀ 80 mm | PC. | 150 rub. |
vote
Article rating
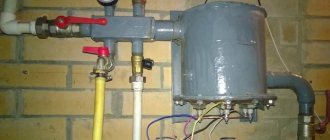
Is it possible to connect an outlet to the switch?
Imagine the situation: you have renovated your premises, all the electrical wiring is walled up in the walls, and there are no backup boxes or socket boxes. An outlet needs to be installed in one of the rooms. Placing it next to the distribution box is irrational, the location is too high. But I don’t want to lay open wiring (especially, ditch the wall).
There is a switch in a convenient location that clearly has voltage. How to make a socket from a switch if it is possible to aesthetically place them next to each other?
To answer this question, let’s remember: what types of lighting schemes with switches are there?
Classic connection: tap from the distribution box.
The neutral conductor is inserted into the lamp from the box. In the box itself, a break in the phase cable is organized (it is opened using a switch), then the phase enters the lamp along the same path as the zero.
With this scheme, only the phase conductor is present in the body (installation box) of the switch. It will not be possible to organize a closed electrical circuit to connect an additional electrical appliance (via an outlet). You can use the phase from the switch, but you still have to lead the zero from the distribution box, which makes the idea pointless.
Conclusion: With this type of lighting arrangement, it is impossible to connect the socket to the switch.
The switch is located between the power source and the lighting fixture.
This scheme is less common, but in some rooms it is used. If at the design stage it was decided not to use distribution boxes in the lighting network, you are in luck. The switch wiring box contains both neutral and phase wires.
The sequence of work is as follows:
- We dismantle the existing switch without touching the installation box.
- We determine the routes for laying the input and output cables. If you have a diagram and plan for the electrical supply of the room, this is not difficult to do.
- Carefully drill a hole for the socket box.
- We install terminal blocks in the switch box and connect the socket according to the following diagram:
Since the current wiring is intended for lighting, most likely the cable cross-section is no more than 1.5 mm². The maximum possible load for such a cable (provided that it is copper): 3.3 kW. That is, not very powerful electrical appliances can be plugged into this outlet. The maximum is a vacuum cleaner. Well, phone chargers, a power supply for a router or an antenna amplifier - no problem.
Expansion of the power network in a separate room, due to disconnection in existing switching devices, is possible. As a rule, the switch is connected to the outlet. The opposite situation is possible only with a certain wiring diagram.
How are sockets and switches connected?
We hope that the general part of the circuit structure is clear to everyone. Now let's see how the electrical points are connected to it.
Connection diagram for luminaires via a two-key switch
So, we have a group power wire that comes into the junction box. This wire can have two or three cores. According to modern standards, three-core wires are used for these purposes. It is worth saying that the connection diagram will not change much depending on the number of available wires.
- All three wires will have different color markings. White or pink is phase, blue is zero, and yellow-green is ground. Be careful and careful when making connections, as there is always a chance that the electrician connected the wires to the machine incorrectly. Pre-check the wires for voltage with a tester.
- Let's start the analysis by connecting the outlet. The phase and neutral are connected to its power contacts, while the “ground” is connected to the grounding contact. That is, to connect it to the network, all three wires are used.
Grounding is required to transfer charge from the device body to the ground loop, which avoids electric shock.
- With the switch, everything is a little more complicated, since this part of the circuit also includes a lighting device.
- So, we have three wires in the box - they are separated from each other and we can clearly see the color coding, which corresponds to the actual parameters of the circuit. A two-wire or three-wire wire is laid from the distribution box to the switch box - the first is taken for a single-key switch, and the second for a two-key switch. If there are even more keys, then the number of conductors increases proportionally.
- We screw the stripped ends of the wire to the switch terminals. Let us say right away that only phase wires will be suitable for this device, regardless of their number. The fact is that the task of the switch is to break the circuit and stop the supply of electricity to the lighting fixture. That is, the ends of the wire are input and output.
- Already in the distribution box, one core connects to the phase conductor of the group wire. The second core is connected to another wire, which is extended to the lamp as a phase. This wire also has two or three cores - the second is connected to zero according to the color marking, and the third is connected to ground. We do the same if the switch is two-key, but according to a slightly more complicated scheme. Here the task is to divide the lighting fixtures into groups and turn them on separately.
Connecting wires in a junction box
Video - Connecting a socket and switch
If you have read the above carefully, then you already understand that the connection diagrams for the points are completely different and there is simply no zero or grounding in the switch box so that you can connect the outlet. So how can this be done? Let's name all acceptable methods.
Installing an indoor outlet
It must be said right away that all sockets are divided into internal and external. Their operating principle is the same. The difference between them is that external sockets are installed directly on the wall, and internal ones are installed in boxes (socket boxes), which are “hidden” in the wall.
First of all, for safety reasons, it is necessary to disconnect all electrical wiring in the apartment from the power supply. We are talking about automatic switches in the electrical panel, which is usually located in the hallway of the apartment or on the landing.
If you are left completely without electricity in your home, you may need lighting in your workplace. It’s good if there is enough daylight, but in the dark you need to think about alternative lighting sources, for example, a flashlight may come in handy.
Necessarily! Additionally, use a multimeter or an indicator screwdriver to make sure that there is no voltage in the outlet.
Prepare your tools:
- Wire cutters
- Level
- Pliers
- Screwdriver
- Pencil
- Knife.
Features of installing a group of sockets with a cable:
- According to the requirements of the PUE, the PE conductor must not have breaks. To connect it to the terminals of the electrical installation, it is necessary to use separate branches. Incorrect connection of the grounding conductor can lead to the fact that if it breaks on one of the outlets, all other devices will also be ungrounded. Since it is impossible to determine the quality of grounding without special measurements or visual monitoring of the integrity of the PE conductor, in this case it is not possible to achieve the required level of electrical safety.
- To protect consumers powered by a group of outlets, a 16 A circuit breaker must be used. If the total power of the electrical installations supplied exceeds 3 kW, then a separate line must be laid for each device.
Open and closed wiring
The difference between the methods is noticeable to the naked eye. The closed wiring is located inside the wall, for which grooves (grooves) are punched or cut into it, in which the connecting wire is hidden under a layer of putty. Open wiring is laid along the surface of the wall, on which it is held in special fasteners or laid in plastic guides - cable channels.
Accordingly, if you can see the wires that fit into the outlet, then the wiring is of an open type. Otherwise, closed wiring is used, for the installation of which the walls were cut.
These two methods of connecting an outlet can be combined with each other - if the old points are connected in a closed way, then nothing prevents you from connecting a new one in an open way. There is only one choice - in wooden houses the socket can be connected exclusively in an open way, just like all other electrical wiring.
Open wiring - advantages and disadvantages
An analogy with the most common extension cord (surge protector), which is essentially an additional branch of the electrical network, but is connected not to a junction box, but to an outlet, will help you understand why open wiring is good.
Advantages:
- You don't have to cut the wall to install a new outlet. This is especially true for those premises that have already been renovated.
- Installation does not require tools such as a wall chaser or a hammer drill.
- In the event of a breakdown, you don’t have to open the wall - all the wiring is in front of your eyes.
- Installation speed. Even after all the work has been completed, adding another point to the existing wiring is a matter of several minutes.
- If desired, you can quickly completely change the wiring - ideal for temporary connection schemes.
Flaws:
- There is a high probability of external influence on the wiring - children, pets, you can simply accidentally hook it. This disadvantage is mitigated by laying wires in cable channels.
- Exposed wires spoil the entire interior of the room. True, it all depends on the design abilities of the owner of the room - cable channels will fit perfectly into modern design solutions, and if the room is made in a retro style, then special wires and other accessories are produced for this.
- The need to purchase special fasteners, even if cable ducts are not used - in wooden houses, open wiring should be laid at a distance of 0.5-1 cm from the wall surface. Wires are often laid inside iron pipes - all these requirements are aimed at increasing the safety of using open electrical wiring.
As a result, this connection method justifies itself if for some reason there is no point in laying the wires to the outlet inside the wall. Besides the fact that the wiring will be visible, there will be no differences in the operation of the outlet.
Hidden wiring - pros and cons
Despite some significant disadvantages, it is used almost everywhere - the advantages of its use still outweigh.
Advantages:
- The wires to the socket fit into the wall, so wallpaper or other finishing can be done freely on the outside.
- Meets all fire safety requirements (in concrete buildings) - even if a short circuit occurs, there is no fear of a fire from the wires in the wall.
- There is a very low probability of damage to the wiring - it can only be damaged when drilling walls.
Flaws:
- For installation you need to cut the walls.
- It is difficult to carry out repair work.
- If the walls are finished, then after installing an additional outlet you will have to redo it.
The disadvantages are leveled out by preliminary calculations - if you plan in advance where and which block of sockets should be installed, then problems usually do not arise in the future.
Types of devices and their features
There are quite a lot of varieties of plug sockets and blocks. Each type has its own design features and purpose.
- Hidden devices are mounted directly into the wall - in special socket boxes.
- Open devices are produced for those apartments where the electrical wiring is not hidden in the wall.
- Retractable socket blocks are mounted in a table or other furniture. Their convenience lies in the fact that after use, the devices can be easily hidden from prying eyes and playful children’s hands.
The devices differ in the method of clamping the contacts. It comes in screw and spring types. In the first case, the conductor is fixed with a screw, in the second - with a spring. The latter are more reliable, but they are not so easy to find on sale. The devices are fixed to the walls in three ways - claws with jagged edges, self-tapping screws or a special plate - a support that facilitates both installation and dismantling of the socket.
In addition to conventional, inexpensive devices, there are models equipped with grounding contacts. These petals are located in the upper and lower parts, and a grounding wire is attached to them. To ensure safety, sockets are equipped with curtains or protective covers.
Main popular types
These include:
- type “C”, it has 2 contacts - phase and zero, usually purchased if intended for low or medium power equipment;
- type “F”, in addition to the traditional pair, is equipped with one more contact - a grounding one; these sockets are becoming more popular, since a grounding loop has become the norm for apartments in new buildings;
- Type “E”, which differs from the previous one only in the shape of the grounding contact, is a pin, the same as the elements of the socket plug.
The last type is less common than the others, since it is less convenient to use: turning the plug 180° with such a socket is impossible.
The security of the case is the next difference between the models. The degree of security is indicated by the IP index and a two-digit number following these letters. The first number indicates the class of protection against dust and solids, the second - against moisture.
- For ordinary living rooms, IP22 or IP33 class models are sufficient.
- It is recommended to buy IP43 for children, as these sockets are equipped with covers/curtains that block the sockets when the equipment is not in use.
- IP44 is the minimum required for bathrooms, kitchens, and baths. Not only strong humidity, but also splashes of water can pose a threat. They are suitable for installation in basements without heating.
Installing an outlet on an open balcony is a sufficient reason to purchase a product with a higher degree of protection, this is at least IP55.
Drilling out socket boxes
Next begins the noisiest and dustiest part of electrical installation work - drilling and chipping.
In order to minimize the amount of dust, construction vacuum cleaners are used.
In addition, each tool in this case must have an outlet with a pipe or a dust removal device.
Small hammer drill, medium hammer, large hammer, wall chaser, all of these tools must have dust removal, otherwise your vacuum cleaner will be of no use.
First, the centers of the socket boxes are drilled out using a d-6mm drill. Then, based on the material of the walls, a tool is selected for arranging niches for socket boxes.
It could be:
medium hammer drill with diamond bit
large hammer drill with impact bit
wall chaser with a cut 60mm deep
How to properly connect a socket from an outlet
General diagram for connecting a group of sockets with a cable
The most popular way to connect sockets is to install jumpers between their terminals.
The advantages of this solution are the following:
- ease of implementation;
- there is no need to groove walls for a new line;
- speed of implementation;
- minimum consumption of materials.
There are also disadvantages:
- a large number of connections contributes to heating the circuit;
- there is a risk of wires coming loose and short circuiting;
- You will still have to drill and cut - you need to make channels and a hole for the glass.
If you carefully perform each stage of the work, the structure will be strong and safe.
Electrician's recommendations
You should adhere to the basic rules when working:
- horizontal transitions from the junction box to the sockets or switch are laid at a height of 2.5 m;
- the insertion of veins is carried out only vertically or horizontally;
- connection points should only be located in mounting boxes;
- for underground cable laying, you need to use only a single piece with a strong armor tape;
- The biggest mistake is installing the switch in the zero gap;
- It is forbidden to install electrical wires near a wooden surface, but if this is unavoidable, then an insulating hose or gasket made of asbestos and steel with a thickness of 0.2 - 0.5 mm is used.
General rules
When you have chosen one of the methods for connecting an additional outlet. And having also determined its location in the apartment, preparatory work can begin. It must be remembered that wiring and installation of a new socket are carried out only after the network has been completely de-energized. This is done by turning off the machine or traffic jams. To make sure that the network is completely de-energized, you need to use a special indicator. Ideally, you can use two indicators at once. This will help you get error-free results and avoid unwanted consequences.
What to do if a person is electrocuted. First necessary aid to an injured person
It must be remembered that laying electrical wiring and installing a new socket is carried out only after the network is completely de-energized by turning off the machine
If you decide to use a hidden method of laying electrical wiring and installing a socket in a hidden way, then you need to prepare the groove and space for the mounting box for an additional socket. In the case of using the open cable laying method, cable ducts for the new cable are installed, and fasteners are installed to secure the overhead socket.
We remember safety, convenience and aesthetics
It must be remembered that before starting work on installing a new section of cable and an additional socket, you must make sure that the existing cable of another electrical wiring line does not pass through the selected location for laying the wiring and installing the socket. It is also worth considering the convenience of the location of the additional socket and the new cable, so that in the future, if necessary, installing any interior elements on the wall will not interfere with the new socket or so as not to damage the mounted cable.
It is most convenient to place sockets at a height of 0.5-1 m from the floor, but not lower than 30 cm from the baseboard. It is most important to place one outlet for every 6 - 8 square meters of housing.
Several rules when connecting 380 volts in a private home
Outdated power lines are gradually being modernized and transferred to the new TN-CS model. With this method, the fourth PEN wire is laid from the supply substation not with one wire, but with two disconnected wires: PE and N.
Input of three-phase voltage into the building
To connect 380 volts to a private house, you must follow some rules:
- voltage is transmitted from the transformer substation via power lines (four wires), which include three phase conductors (L1, L2, L3) and one common neutral wire PEN;
- Most often such a line is overhead and less often cable.
A three-phase connection is based on the connection of all conductors to the input apparatus of the object. Next, the current enters the metering device and passes into the distribution panel, for the purpose of subsequent distribution to electrical receivers.
In the middle of the input device, the working zero N and the protective zero PE are separated. Then they are connected to the main ground bus (GZSh). Then it is connected to the repeated grounding circuit of the room.
The last section of the line from the support to the entrance to the house is carried out by air or underground. It is also called a branch. It is listed on the balance sheet of the power supply organization, so the connection of the house is made with the permission of the owner of the power line.
If the cable line runs underground, then the branch is mounted in a metal cabinet, which will be located near the route, and for overhead power lines - directly on the support. In both cases, the owner is obliged to ensure their safe operation and prevent unauthorized people from invading the electrical panel.
Outgoing lines
With three-phase power supply, an input distribution board (IDB) is installed on the facade of the house. It is in it that the PEN conductor is separated and the input circuit breaker is installed, as well as circuit breakers for the group circuits of the house.
All three phases L1, L2, L3 are connected to a three-pole input circuit breaker (3). An electricity meter is also installed there in order to keep track of the resource consumed. Three conductors from the input machine and conductor N from the main generator are connected to the input terminals of the metering meter. The electricity meter output is connected to a common circuit breaker (four-pole) for protecting the entire house. If it goes off, the entire house will be cut off from power.
The operating voltage between phases is 380 V, and between phases and zero 220 V. After all, this voltage represents three phases in three different wires, only with different instantaneous potentials and a frequency of 50 Hz.
Electrical wiring in the house should be divided into groups, each lighting line is protected by a single-pole circuit breaker (5). Each group is powered from different phases.
In rooms with high humidity levels, you need to use a difavtomat (6), which is triggered when the current reaches no more than 30 milliamps.
For a kitchen group, it is advisable to install a three-pole circuit breaker (9) and a four-pole circuit breaker (10). This is due to the fact that the kitchen power supply is three-phase, so if a phase is short-circuited to zero, it will be necessary to cut off the zero worker and all phase conductors at the same time.
Power connection procedure
To properly assemble the socket and connect, follow the following instructions:
- All work must begin with de-energizing the power line. To do this, turn off the circuit breaker in the distribution panel to the desired line if the installation is carried out on an existing wire.
- Using a test lamp or multimeter, we make sure that there is no voltage on the wire that will be connected.
- Stripping the wire. The cable laid to connect the socket, and which has already been routed through the socket box, needs to be prepared for connection. To do this, remove the wire insulation at a distance of 12-15 centimeters, trying not to damage the main insulation of the cores.
- To connect the outlet itself, we connect the bare wires to the contacts. For better contact, we twist 4-6 millimeters of the core into a ring and put it on the clamping screw of the terminal.
- The socket is installed in the mounting hole after all wires are connected. Distortions are unacceptable. The wires must be carefully laid deep into the socket box and secured with clamping paws.
- Install the cover.
Types of blocks
Before you study information on how to connect an outlet with a switch, you need to know that when choosing, they pay attention not only to the design of the product - its color, shape. Before purchasing, you need to evaluate the technical parameters and the capabilities of the electrical network
The last point is especially important for apartments in old housing stock, where electrical wiring is often in critical condition. The next question is the functionality of the product. When choosing a particular unit, be sure to take into account which devices will be connected to the outlet and what their power is.
Before purchasing, they decide how many devices will be connected to the network in a particular room. When work is planned in wet rooms, the unit must be equipped with special protective curtains or covers.
Types of combined devices
Nowadays it is easy to find products with various combinations in stores. One device may contain sockets (1-2) and several switches with one/two/three or even four keys. Just like regular blocks, combined structures can be internal or external. The latter look too cumbersome, but they are the only option if there is simply no possibility of making hidden wiring.
Despite the relatively wide range, several types of designs remain the most popular.
- Block with socket and one switch. These simple designs are usually used for garages, basements and other small outbuildings. This minimum will allow you to turn on the lighting and take advantage of the benefits of civilization - heat up the electric kettle, turn on the radio or fan. Connecting a tool is an option for skilled owners.
- Device with two keys. This type of paired blocks is optimal for corridors and combined bathrooms, since it already makes it possible to get a minimum set of amenities - turn on electricity in the hallway, bathroom, connect a mobile phone charger, a vacuum cleaner, a hairdryer or any tool to the network.
- A block with three switches is suitable for small apartments with separate bathrooms/toilet rooms. In this case, a block would also be the most logical solution.
In other rooms (living room, children's room, bedroom), the presence of such structures is unlikely to be advisable, but installation in any room is still not prohibited. Blocks with several keys will help you connect multi-lane lighting devices, and an additional socket will never be superfluous. If electrical appliances are not “going to” work from such an outlet all the time, then the option is well worth considering.
Main varieties
In general terms, triple sockets are a plastic box with a decorative overlay, which contains 3 sockets located inside a triangle or in a line. Inside, the socket can consist of one or three ceramic cores, which contain terminals with springs where the phase and neutral wires are fixed. The product can be produced with or without grounding, then another terminal is added to connect the grounding wire. Triple sockets are of the following types:
- C5 – standard, for Soviet-style plugs and without a ground wire. They are less common on sale, but can often be found in apartments where renovations were last done at least two decades ago.
- C6 are more modern, contain different types of grounding, and are equipped with wider holes for the plug pins. Available in a very wide range with the ability to choose a suitable design.
Depending on the modification of the outlet, the following categories are distinguished:
- with a circuit breaker that trips in response to overloads,
- without grounding or with it,
- overhead or built-in,
- external (external) with a protective cover,
- internal, designed specifically for connection when organizing hidden wiring.
You can also find not solid triple sockets, but block sockets, which are assembled from three separate devices, but are fixed with one frame. When choosing, you need to pay attention to the sizes and compliance of the blocks with the dimensions of the frame. Advice: Triple sockets with a common socket are more compact, easier to install, but less safe and convenient to use.
Selecting a device for installation
The market offers a wide range of different models of sockets, both universal and special. And only a small part of them can be used in everyday life:
- C1A is a distribution device that does not have the possibility of grounding. Works with direct current no more than 9A, and alternating current up to 15A. Maximum voltage up to 250 volts.
- C2a - sockets with lateral grounding contacts, the design provides a contact for connecting a PE wire. Designed for connecting energy-intensive consumers such as electric stoves and washing machines to the network.
- C3A - The grounding contact is made in the form of a pin; it differs from the option described above only in the design of the grounding contact.
- C5 is a classic type of Soviet sockets. A square with a cylindrical cutout for an electrical appliance connector. Nowadays they are losing their relevance, since there is no possibility of connecting modern European plugs for electrical appliances. Can withstand current up to 7 amperes.
- C6 - modern Eurotype sockets. Installation is carried out on top of the wall when the junction box is located on top of the mounting hole.
The choice of a specific outlet model depends on the purpose and operating conditions. In rooms where there is high humidity and there is a risk of moisture getting into the outlet, a special model with protection parameters from moisture and dust is required. The level of such protection is determined by the markings on the case.
Installing a triple socket in one socket box
Yes, there are models that have as many as three sockets on the front panel, but the entire mechanism of the product easily fits into one standard socket.
Triple socket in a housing designed for one socket box
By and large, there is nothing special to talk about the installation of such a product. There are the usual three terminals: L, N and PE. And the method of mounting the device in the socket box is also simple: self-tapping screws and sliding tabs, as in all built-in sockets and switches.
In a word, if you have ever tried to install a regular socket, then you can handle a triple socket like this. Usually they are not installed in a new place, but instead of old, single ones, in order to immediately and quickly increase the number of connection points. It must be said that such devices have not gained much “folk love” - they look unimportant, and do not particularly “raid away the rubble” of connected wires. And from the point of view of operational safety, they may not be all right
So it’s better not to seriously consider this option. As a temporary one, until the upcoming repair, still here and there, but then - change to full-fledged sockets.
Another option for connecting a triple socket can be the installation of a ready-made overhead block - for example, such as shown in the illustration. Such sockets are good for rooms with high humidity and for outdoor installation - a housing protection degree of 54 and higher guarantees the safety of devices in such conditions.
Block of three overhead splash-proof sockets
But again, such products have only three terminals, and then the “distribution” goes along the standard brass busbars. That is, installation is even simpler, it just comes down to attaching the unit to the wall in the right place and connecting the wires to the three labeled terminals.