Repair technology
So, to make the repair instructions clear to you, we will consider it step by step, with photo examples for each important point of repair.
- First you need to prepare a tool: a marker, fine-grained sandpaper, an indicator and a regular screwdriver.
- Turn off the circuit breaker at the input panel to de-energize the electrical network in the house and protect yourself from electric shock.
- Make sure there is no voltage in the room by checking the presence of power at a nearby outlet yourself using the indicator. If you do not know, we recommend that you read the instructions to which we referred.
- Remove the light switch from the gate. Before repairing the product, you need to remove the decorative cover yourself, check again that there is no voltage with an indicator screwdriver, unscrew the side screws and pull the housing out of the socket.
- Disconnect the wires. If the light switch is a two-key switch, we recommend marking with a marker which of the wires is the input one, so as not to confuse it later and to make the connection correctly on your own.
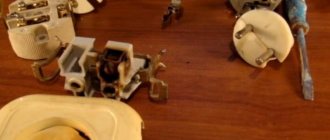
- Disassemble the case and get to the contacts, which are most likely the cause of the repair. These structural elements are located immediately behind the plastic key, which is secured with screws. Repairing them will not be difficult, as you will see further.
- Visually inspect the contacts in the form of a hemisphere (you can see them in the photo) and if they are burnt, use fine-grained sandpaper to clean them to a metallic shine. If you cannot remove the carbon deposits well with sandpaper, you can carefully clean it with the tip of a screwdriver. This is enough to fix the light switch yourself.
- Reassemble the housing in reverse order. The video below shows how a light switch is disassembled and assembled at home.
- Connect the wires and install the housing in the socket box.
- Turn on the machine on the dashboard and check if the light switch works. If the switch does not crack and works correctly, you can be proud - you managed to fix the product. If the light is on when the switch is off, it means that you did not clean the contacts properly or did not connect correctly, so you will have to do everything again.
Video instructions for assembling the case
Thus, in 10 steps you can repair the product yourself. As you can see, the repair is not difficult and even a novice electrician can do it. We also recommend that you familiarize yourself with the tips provided below, which will allow you to quickly and correctly repair a switch in your apartment.
- If an old-style switch breaks, you can of course fix it, but there is no point in doing so, because... Every part wears out over time, and in electrical work it is very dangerous to use old switches and sockets, especially if they often break down. Today, even such leading companies as Legrand have inexpensive but reliable products, even with lighting, a chain (cord) or a dimmer.
- The reason why the contacts on the key switch burn out quickly is because the light bulbs are too powerful. We recommend replacing incandescent lamps with more efficient and at the same time less powerful light sources -. In this case, you can forget about repairing the switch for a long time.
- Before proceeding with complete disassembly of the case, check how well the wires are tightened with screws. You may be able to fix the switch simply by tightening the screws with a screwdriver.
- In order not to confuse the order of assembly of spare parts of a disassembled case, we recommend using a camera: take photographs of each of the disassembly stages one by one and, if necessary, assemble the structure from the photo.
One of the main malfunctions of switching devices is sparking contacts or their complete absence. The main cause of this problem is wear of the contact system or failure of other components of the device. If you do nothing about it, you will end up having to completely replace the switch, relay, or other switching device. In addition, sparks and heat can cause a fire. But let's take a closer look at the reasons for sparking contacts and how to eliminate them.
Repair algorithm
Dismantling the switch
If the switch shorts, you can repair it yourself, working in stages:
- Line loss. The machine in the input panel is turned off.
- Checking for voltage. This can be done by touching the indicator screwdriver to an outlet in another room.
- Dismantling the device. You will need to remove the switch from the groove and remove the decorative trim. After this, the voltage is checked again, the screws on the sides are unscrewed, and the housing is removed from the socket.
- Disconnecting cables. For two-key models, you will need to mark the input wire with a marker.
- Disassembling the case and searching for contacts. The contact group is located above a plastic button mounted on screws.
- Troubleshooting. The contacts are cleaned or the device is completely replaced.
- Reassemble the case in the reverse order, reconnect the wires. The finished mechanism in the housing is returned to the socket box.
- Turning on the machine in the panel and testing the switch for serviceability.
There is no need to repair the old switch - the light will flash again. Better change your device.
Why do energy-saving lamps that are turned off blink?
The blinking of electric lamps is clearly visible at night or in a dark room. These are noticeable flashes of light with a frequency of approximately once per second. Here the problem may also be hidden in the backlit switch. The problem does not exist on switches that do not have such backlighting.
The reason is this. Every energy saving lamp has a capacitor that runs the lamp. When the switch is turned off, its LED backlight is on. This means that a small electric current passes through it (from the mains and through our energy-saving lamp).
It is this small flowing current that charges the capacitor, which at a certain point in time starts the energy-saving lamp. Then a small flash occurs and the capacitor discharges again and the process repeats. This is why energy-saving light bulbs flicker.
How to repair touch switches
Touch switch board
Touch modifications are equipped with a remote control and special boards with control chips. It is worth disassembling such a switch after reading the manufacturer's instructions.
Device repair:
- Removing the decorative trim.
- Visual search for the panel with sensors, which is located under the plate. Depending on the number of lines served, there are 1-3 elements.
- Search for a sensitive area on the pad - sensors are indicated by circles.
- Detection of LEDs indicating the position of the switch (red - on, blue - off). Under this panel there are nodes to which conductors are connected.
- Disconnecting inputs and outputs. You need to remove the clips that secure the touchpad.
- Removing the bolts from the housing mounted on the socket box and inspecting problem areas.
- Checking voltage on individual cables. The faulty wire is replaced.
- Reassembling the mechanism. The main unit is connected to the power supply, placed in the socket and secured with screws. After this, the touch panel and decorative overlay are attached.
What to do if there is a wiring smell in the apartment
It is difficult to notice a wiring fault if there are no obvious signs, and they appear late.
Therefore, in fire reports there are many cases with the most common problem being a short circuit. What to do if the smell of burnt wiring appears in the apartment?
#2
Posted May 28, 2008 - 12:59
Well, what can I tell you, climb into the panel and look for short ones and twists. If the stop lights are constantly on, it means the limit switch is jammed under the pedal or the wiring from it. If the backlight of the buttons does not light up, the brightness control has probably failed. It's easy to check, remove the connector from it and short-circuit it. You can only get rid of the rest by picking the wires.
General progress of repair work
Checking for no voltage
Important! There is no need to make special efforts to disassemble the case, since usually the cover of a closed switch can be easily removed
Removing the switch housing
Removing the switch cover
If a switch with two buttons is closed, then mark with a felt-tip pen the wire that supplies electricity and is common to both switching modes.
Switch screw location
Removing the mounting screws
Almost every apartment owner is faced with such a problem as a faulty light switch. If such a situation arises, you do not need to immediately call a specialist to your home. Most often, you can fix this problem yourself. A light switch malfunction is most often caused by poor contact between the connecting plates of the electrical wires. To fix it, you just need to clean the contacts and check the tightness of the wires in the switch connectors.
The whole process consists of three stages: preparatory work; disassembling and cleaning contacts; assembling and installing the light switch in its original place.
Preparatory process
At the initial stage of repairing the switch, you need to completely de-energize this section of the electrical network and prepare the necessary devices and tools. To clean the disassembly and strip the contacts, you will need a screwdriver, an electricity indicator and regular sandpaper or a file.
It is important that there is no electricity in the network. This is why you need an indicator. A file is useful for removing plaque from the contacts, and a screwdriver for unscrewing and assembling the entire installation
A file is useful for removing plaque from the contacts, and a screwdriver for unscrewing and assembling the entire installation.
Disassembling the switch and cleaning the contacts
First you need to make sure that there is actually no electricity going to the light switch. Then, prying the device button with a screwdriver, remove it from the device. The plastic shell can also be removed with a little force.
The next step is to remove the switch from its mounting location. To remove it from the plastic shell in the wall, you need to loosen two screws. After unscrewing them a little, we pull the device out of the wall. To disconnect the light switch from the wires, loosen the fasteners and pull them out of the clamps.
Having seen blackened and coated contacts, we clean them with a file or special sandpaper. The cleaning process must be continued until plaque and fumes are completely removed.
Assembly and installation of the switch
After completing all the steps to clean the contacts from plaque, you can begin assembling the device. To do this, you need to connect all the wires to their original place and tighten the clamps
It is important to create excellent communication to prevent bad interactions. Having assembled the entire structure, we insert the switch into the plastic case. After making it level and even, tighten both fastening screws
If the plastic frame is not put in its original place, you will have to loosen the screws and put it on until the switch is completely installed in the network. Although, if the switch is properly mounted in the wall, this should not be a problem.
After making it level and even, tighten both fastening screws. If the plastic frame is not put in its original place, you will have to loosen the screws and put it on until the switch is completely installed in the network. Although, if the switch is properly mounted in the wall, this should not be a problem.
At the final stage, insert the power button and start the central electricity monitoring device. Now we check the functionality of the switch. To do this, turn on the light in the room several times. If everything works stably, then calling an electrician will not be necessary.
If the switch has stopped working, then you should look into the root cause of its failure. Today there can be many reasons. You don't necessarily need to call a professional. You can repair the light switch yourself. The causes of failure are usually minor and therefore almost anyone can cope with them.
Sometimes, in order to restore the device's operation, you will need to clean the switch contacts. In this article we have provided detailed information on how to fix a light switch. The reasons for breakage of the switch can be varied, and in this article we will look at them.
Causes of sparks and arcs
Before we look at why contacts spark, let's understand the basic concepts. The switching device and its contact system must provide a reliable connection with the possibility of breaking it at any time. The contacts consist of two electrical plates, which in the closed position must be securely pressed against each other.
An arc occurs when switching inductive circuits. These include various electric motors and solenoids, but it is worth remembering that even a straight piece of wire has a certain inductance, and the longer it is, the greater it is. At the same time, the current in the inductance cannot stop instantly - this is described in the laws of commutation. Therefore, a self-inductive emf is formed at the terminals of the inductive load, its value is described by the formula:
E=L*dI/dt
Interesting! In our case, the rate of change of current plays an important role. When turned off, it is extremely high, and accordingly the EMF will tend to large values, up to tens of kilovolts (for example, a car ignition system).
As a result, the EMF increases to such an extent that its value breaks the gap between the contacts - or sparks are formed. The quality of any connections is described by their contact resistance: the lower, the better the connection and the less heating. When they open, it increases sharply and tends to infinity. At the same moment, the area of their contact heats up.
In addition, between the open contacts against the background of increasing self-induction EMF and increased air temperature due to heating of the surfaces when the plates are opened, air ionization occurs. As a result, all the conditions for arcing and sparking are present.
If we talk about why contacts spark when an electrical circuit is closed, then this happens not with an inductive load, but with a capacitive load. You see this every time you plug in your laptop or phone charger. The fact is that the discharged capacitance (capacitor) at the input of the device at the initial moment of time represents a short-circuited section of the circuit, the current of which decreases as it is charged.
If you observe sparking in a relay or switch in the closed position, the reason for this is the poor condition of the contact surfaces and their high temperature.
The terminal gets hot. Causes and consequences
The conductive elements of the network are characterized by an increased temperature (different from the environment). Ohm's laws and conservation of energy work here 100%. An increase in resistance is the main reason why the negative terminal heats up. The reason for this is weak contact, as well as the presence of:
- Oxide between battery electrodes and wire terminals;
- Air gap;
- Reduced cross-section of current-carrying circuit elements.
As you know, an electrolysis reaction occurs inside the battery, where the role of a conductor is played by a very aggressive environment - sulfuric acid and distillate. A battery terminal covered with a white coating (lead dioxide) is the first sign that the connection is coming into direct contact with the electrolyte or its vapor.
Another reason why the terminals on the wires and the battery itself heat up can be the long operation of the starter. When starting the motor, the starting current often exceeds 150 and even 200 amperes, and this can heat up a fairly thick wire and melt any insulation.
Advice! When starting, do not allow the starter to operate for a long time (more than 30 seconds). If you fail to start the car the first time, try again at intervals of at least half a minute. But remember that each time the terminal heats up more.
As an additional measure to combat the inrush current - in general and the fact that the terminal is heating up - in particular, the negative wire can be replaced with a similar one, but of a larger cross-section.
Eliminating oxidation
The main materials for the terminals of the lead wires from the plus and minus electrodes on car batteries are active metals: lead, brass or copper. That is why their interaction with air oxygen is inevitable. The appearance of a characteristic coating (oxide) on the compounds is the first confirmation of this. This is one of the answers to the question “why does the negative cable from the battery get hot?” We list several ways to eliminate sulfation:
- Cleaning contacts with sandpaper.
- Removing oxide with a file or metal brush.
Signs of malfunction and main types of breakdowns
The switch is faulty if you hear a crackling noise when you turn it on.
Before you can fix a faulty switch, you first need to understand how it works and also become familiar with the main reasons why it could break. Characteristic signs of failure:
- when you press the key, the changeover mechanism begins to jam and does not move to the desired position;
- at the moment of switching, you can hear a crackling sound, and sometimes you can notice something sparkling inside;
- After pressing the button, the device simply does not turn on the lighting.
Typically, these malfunctions are observed with only one of the keys, but the possibility of failure of two or even 3 switching mechanisms at once cannot be ruled out.
In the first case, the axis on which the base of the key is fixed could presumably fall out or a foreign object could get inside (dust accumulated). With characteristic crackling and sparking, one of the closed contacts or both of them has probably burnt out. If the light does not turn on at all after pressing the key, the problem is most likely that the contact at one of the points where the conductors connect to the terminals is broken and the current is not supplied to the load. In this case, it is first checked to see if the voltage has gone out in the entire apartment and that the light bulb is fully operational.
Main causes of the problem
Weak contacts or oxidation may cause a crackling sound when the switch is turned on.
The crackling noise may sound like a buzzing or buzzing sound. There are several reasons for a breakdown.
Oxidation of contacts
If the contacts of the device become overgrown with carbon deposits or oxidize, an electric arc occurs the moment they come together. The cause of sparking is complicated by the size of the deposit. When shoots form on the end plates, the wiring can catch fire, i.e., the contacts close.
Plate loosening
The spring that presses the contact at the moment of switching on weakens - the characteristic sharp and clear click is no longer heard. A problem is indicated by the device turning on softly and the need to press the button for the light to appear. The danger is that the switch sparks constantly, causing a fire risk.
Lamp power mismatch with contacts
A halogen lamp or high-power LED source creates a load on the contacts. The simplest way to solve the problem is to replace the switch with one that corresponds to the lighting power indicators.
Poor quality of contacts and plates
A breakdown typical of budget models. The button operates on the principle of soft start, which, in combination with low-power automatic machines, provokes sparking.
A serious malfunction is accompanied by sparks, heating and crackling at the same time.
Other causes of contact failure
High humidity provokes oxidation of the switch contacts.
Factors that provoke sparks and switch crackles also include:
- high humidity – activates the oxidation reaction;
- incorrect or weak connection of cores;
- increased load on contacts - humming occurs;
- constant voltage fluctuations.
Broken contacts will lead to failure of household appliances.
Repair procedure
If the switch sparks due to a loose contact, it is necessary to ensure a continuous connection between the pair and the receiving plate when the light is on.
When a light switch crackles, there is probably a short circuit in the circuit, so you need to clean the wire contacts and reconnect the device to the line. If it continues to work incorrectly, you need to replace the device with a new one. A shorted switch cannot be used.
How to repair your device:
- Disconnect the power supply and check with an indicator screwdriver that there is no voltage.
- If the key switch sparks, you need to pry off the housing with a screwdriver.
- Pull out the circuit of the switch cover, check the voltage at the terminals.
- If there is carbon deposits on the wires, they need to be disconnected from the socket and cleaned.
- When the indicator sparks due to unstable contact, it is enough to tighten the terminals with screws.
After this, you need to assemble the device in the same sequence
It is necessary to pay attention that a phase should be connected to the contacts of the key switch - this guarantees the safety of replacing lamps in lighting fixtures. By pressing the key the phase is switched off
- The current and operating voltage are indicated on the inside of the case.
- An important parameter is the build quality, on which the operation of the device depends.
- The optimal height for installing the switch from the floor is one meter.
- Installation of devices is carried out on phase wires in socket boxes.
- First you need to connect the wires, then install the mechanism in the box.
- The screws are tightened alternately to avoid distortion of the device.
After snapping the frame, the switch should not wobble. The functionality of the device is checked after turning on the network. If the device sparks when the light is turned on, there is no stable contact between the wire and the plate. The device will heat up, causing the plastic case to melt. Any breakdown of electrical devices must be corrected in a timely manner.
One of the main malfunctions of switching devices is sparking contacts or their complete absence. The main cause of this problem is wear of the contact system or failure of other components of the device. If you do nothing about it, you will end up having to completely replace the switch, relay, or other switching device. In addition, sparks and heat can cause a fire. But let's take a closer look at the reasons for sparking contacts and how to eliminate them.
Typical causes of failure
The light switch serves to close/open the circuit and supply electricity to lighting fixtures - chandeliers, lamps, lamps. The operating principle of an electrical device is based on the formation of contact between the receiving plate and a contact pair (one or more depending on the type of switch).
If there is poor contact between the plate and the wire, a spark is formed - an electric arc, indicating an interruption (break) of the contact. The switch shorts out, causing sparking to occur, which further causes the light to crackle and flicker.
- High humidity in the room or directly at the installation site, which leads to oxidation of wires and contacts.
- Insufficiently well secured contact, wear of the working mechanism - as a result, the device shorts.
- Using a broken device. Some consumers continue to use the switch if it crackles, buzzes, or sparks.
- Violation of the voltage parameters of the electric current on the current-carrying conductors connected to the switch.
- Stable voltage drops in the network, which provoke failure of the internal mechanism of the device.
- The total power of lamps switched on by the device exceeds the permissible value for a specific switch.
It is extremely rare that a device has a manufacturing defect, which leads to malfunctions. Mostly devices begin to spark due to the direct or indirect fault of the user. A common cause is moisture in rooms such as the bathroom or kitchen. High indoor humidity and constantly changing temperature can cause oxidation of contacts.
List of required tools
Some consumers, if they detect a malfunction of the switch due to sparking, crackling or humming of the device, immediately turn to electricians. However, damage that can be repaired can be repaired yourself. In most cases, it is enough to bend the contacts for the device to function normally.
The following tools are needed for repairs:
- indicator screwdriver with a lamp or electronic display;
- a regular type screwdriver for unscrewing screws/screws;
- insulating tape and fine-grain sandpaper;
- pliers, marker, knife for stripping wiring insulation.
All switches have a plastic housing, a protective frame and an internal operating mechanism. The frame can be attached to the mechanism with latches or screws. The socket box contains a working mechanism, fixed with spacer tabs or screws. To perform repairs, you need to provide access to the contact group by removing the outer box from the device.
Tips for selection and installation
You need to choose electrical devices responsibly so that incorrect operation of the devices does not lead to a fire in the wiring. Minor problems lead to home discomfort - the lights flicker, the room lighting is dim.
Useful recommendations on how to choose a device and install the device so that the switch does not spark:
- The current and operating voltage are indicated on the inside of the case.
- An important parameter is the build quality, on which the operation of the device depends.
- The optimal height for installing the switch from the floor is one meter.
- Installation of devices is carried out on phase wires in socket boxes.
- First you need to connect the wires, then install the mechanism in the box.
- The screws are tightened alternately to avoid distortion of the device.
After snapping the frame, the switch should not wobble. The functionality of the device is checked after turning on the network. If the device sparks when the light is turned on, there is no stable contact between the wire and the plate. The device will heat up, causing the plastic case to melt. Any breakdown of electrical devices must be corrected in a timely manner.
What could be the consequences?
If you do not detect in time that the socket is sparking on its own or heating up, then the result can be disastrous consequences. First, the plastic case will begin to melt, at the same time the contact will slowly burn. In the future, the electrical wiring will ignite, which will cause a fire.
In addition, no one can rule out electric shock and short circuit, the damage of which can be quite large-scale.
That's all I wanted to tell you about what to do if the socket sparks when you turn the plug on and off. Before starting repair work, you must turn off the power to the room so as not to receive an electric shock. We hope that the information was useful to you and was used only for self-development.
Related materials:
- How to disassemble a light switch
- The socket falls out of the wall - what to do?
- Double socket connection diagram
When an outlet sparks, it means it is not working properly. The device must be repaired or replaced before it causes injury or fire.
Why is this happening
There can be several factors for sparking an outlet. Regardless of the cause, sparking is the passage of current through the air from one contact to another, similar to lightning. As a result, the contacting edges of the wires heat up sharply and very strongly, often burn and melt, which leads to breakdown.
Sparking is caused by the following reasons:
- Inconsistency between the standards of the socket and plug of the connected device. For example, if the plug is from a Soviet household electrical appliance, and the socket is of a new standard. Soviet forks have a 0.8 mm smaller electrode diameter, but even such a small gap leads to sparks.
- Low quality materials used in manufacturing, poor quality assembly.
- Worn electrical wires supplying voltage to the socket contacts. The reason may be operation in conditions that do not correspond to the required temperature conditions and permissible current. This reduces the insulation resistance and, as a result, breakdown of the insulating layer occurs. A sign of an insulation breakdown is that the socket is short-circuiting.
- Loose clamps are the most common cause of sparking. The malfunction occurs during operation of the equipment and is caused by poor contact between the electrical wires and the elements of the outlet. This happens when clamping elements are used in the design of the device (the clamping spring weakens), or when the screws in the screw structure are loosened. A sign of loosening clamps is a crackling sound in the socket.
- Current overload often leads to sparking. Overcurrent occurs when connecting devices of greater power than allowed by the parameters of a particular model. For example, when tees or extension cords are connected to a single device. A sign of overload is sparking when the plug is plugged into the outlet.
- Mechanical wear, loose contacts. Occurs if the product is often used, plugs of different devices are inserted and removed. Without being able to replace the device, you need to disassemble the socket and tighten the contacts.
- Carbon formation. In this case, the socket often cracks. If the contacting surfaces are covered with a layer of soot, and it is impossible to replace the product, you need to clean them.
What to do to avoid breakdown
You can prevent a malfunction by fulfilling the following conditions:
- When using a switching connection in the form of a plug connector, use the same type of connection elements; use the socket only for its intended purpose and in accordance with the operating rules.
- If the product is made of poor quality materials, it must be replaced.
- Use tested devices that have certificates of conformity. Purchase in specialized stores, not in markets.
- If the electrical strength of the insulation of wires and cables is low, replace them with new ones that meet the requirements for electrical wiring. The need for replacement is determined during preventive tests or when emergency situations occur in electrical networks.
- If the screw connection of the wires with the contacts is loosened, they must be tightened. When using clamps (spring mechanism) in a specific model, the correct solution is to replace the product with a new one equipped with screw clamps.
- Use devices and devices that correspond to the rated current of the installed plug connection. The rated current value is displayed on the socket body, and on devices - in the passport and on structural elements (housing, inventory plate, tag, etc.).
- If carbon deposits appear on the contacts, you need to thoroughly wipe the connection points with a rag moistened with solvent.
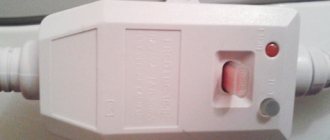
- If the connected device has a toggle switch or an “On/Off” button, always use them, and not just pull the plug of the working device from the socket.
- In wet rooms, use only sockets with an appropriate level of protection.
- Install a circuit breaker on the line of outlet groups that matches the wiring capabilities.
What a malfunction can lead to
The breakdown of any electrical device can lead to negative consequences for both buildings and human health.
The most likely scenarios for this development are:
- A fire occurs in the premises.
- Failure of devices connected to the electrical network.
- Damage to wires and cables that supply voltage to a specific device.
- Electric shock to people using a faulty device.
Everyone should know how to identify a malfunction and how to fix it. Even an ordinary user who does not have special knowledge and skills can prevent such malfunctions.
Topic: what to do if an electrical outlet sparks, causes and solutions.
The phenomenon when an electrical outlet starts or continues to spark in the house is not uncommon among people who use electricity from electrical networks. This phenomenon, in addition to the mysterious, abnormal effect, also has a potential danger, at a minimum of failure of this very outlet, and at most it can lead to an emergency situation followed by a fire. To begin with, I propose to understand the physical processes themselves, due to which the manifestation of this abnormal phenomenon is possible. And then we will consider specific cases that are accompanied by sparking sockets, and options for solving these problems.
So, why and under what conditions does an electric spark form? I'll explain. A spark is a special case of an electric arc, which is an ionized gas gap through which an electric current flows. If a current moves in a metal invisible to the eye (at normal temperatures), then the movement of charged particles in the gas is accompanied by the release of a light flux. It turns out that when we have a potential difference between two electrical conductors (their role is played by a plug and socket), and there is a sufficient number of electrons that will create this very current, then at the moment the conductors touch, an electrical breakdown will naturally occur at the initial moment places of contact. The greater the voltage in the network and the power of the connected device, the more noticeable the spark will be at the point of electrical contact.
The first reason why an outlet sparks is that you are connecting an electrical appliance to the outlet that already has a certain resistance on the input power cord. That is, the connected device may initially have a power button in the “on” position, or this button may not be present at all (the device starts when you put the plug into the socket), or the device has an electronic circuit that initially has some electrical resistance (the presence of a capacitor on input increases the effect of spark formation). Consequently, when you insert the plug of this electrical appliance into even the best socket, a spark will still appear at the moment the current-carrying parts come into contact. In this case, try to turn the device/devices on and off only through a special, main switch.
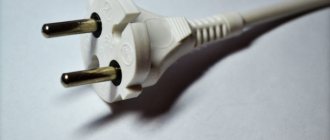
The second reason why a socket sparks is the situation when you use new sockets (Euro standard) and old plugs on electrical equipment. It turns out that the new sockets are designed for one standard, and the old GOST has a different one. That is, the diameter of the contact parts of old plugs is slightly smaller than that of the female contacts of new sockets. This difference leads to the fact that the plug in the socket will either be loose or partially in contact. This is equivalent to you and I constantly interrupting electrical contact by periodically touching and tearing off live parts. In the place of such intermittent contact, sparking will constantly occur, which will subsequently lead to complete failure of the outlet (no matter how high-quality it is). To combat this, simply start using sockets and plugs of the same standard.
The third reason why an outlet sparks is wear and tear on the old outlet. Old sockets that have served you reliably for a long time may develop the following faults over time - a layer of carbon deposits appears on the inside of the crimp contacts (jaws), which appears as a result of natural small sparks upon contact. This deposit is a kind of obstacle, which has its own relatively high resistance. And when you next insert the plug into this socket, the contacts of the plug first come into contact with this layer of carbon deposits, and instead of good electrical contact with the jaws, we have weak contact and, in addition, this place will also spark when turned on. The second problem may be looseness and weak crimping ability of the contact jaws of the socket (due to the same aging). This also leads to sparking in the outlet. To combat the problem, either replace the socket with a new one, or clean and properly tighten the contacts of the old one.
The fourth reason why an outlet sparks is an overloaded electrical circuit. As was noted at the beginning of the article, the greater the power of the electrical appliance that is connected to the network, the stronger the spark will appear at the point of initial contact. For example, you have an extension cord that has a splitter. You have connected several devices with quite a lot of electrical power to this extension cord. That is, this entire load is summed up and comes down to the fact that the plug of this extension cord bears a significant load. When you plug such a plug of a loaded extension cord into any socket, you thereby create all the conditions for the appearance of a weak spark in the socket at the moment of connection. If this is repeated constantly, then in the near future even the best socket will begin to deteriorate and eventually fail. For this case, try to turn on electrical appliances, either individually or by pressing the existing switch located on the housing of the splitter (surge filter).
PS Even the most reliable equipment can easily break if used carelessly. Try to treat any equipment, both electrical and any other, with care and thrift. This will save you from premature breakdowns and unnecessary spending of your finances on upgrades and repairs.
Why are Chinese machines so unreliable?
Everyone understands that the only advantage of the “Chinese” is low cost. But it is achieved precisely by saving on materials. Budget Chinese models have cheap everything: plastic, metal, release mechanisms.
All these reductions in price will sooner or later come out sideways. For example, even due to elementary savings on rivets, the strength of the entire structure is lost. As a result, some parts fall off over time and the cocking mechanism weakens. This causes the problems listed above and will require replacement soon.
Electricians often swear at the “Chinese”. In fact, if you take the cheapest ones and take them apart to see what's inside, you'll be surprised how they even work. They usually have a lightweight design, thin springs, power contacts that barely hold, and other obvious problems. This doesn't inspire confidence.
Even worse are Chinese counterfeits of well-known brands, sold below the cost of the originals. Unfortunately, there are a lot of them on the CIS market. It is quite natural that the most popular brand, ABB, has the most counterfeits. This is a Swedish-Swiss manufacturer that produces fairly high-quality machines. Accordingly, you yourself must understand that they will not be too cheap.
To achieve high reliability and quality of releases, more expensive metals are needed: sputtering of silver, gold, etc. In addition, Europeans usually do not skimp on materials. There will definitely be an arc chute there and a heat sink will be made. And this all increases the cost, so there are no good machines cheaper than $3.
Screw clamps are loose
Any dismountable product tends to wear out over time. All screws, latches, springs are unscrewed and weakened over the entire period of operation. The result of this, again, is poor contact of the electrodes with the network, as a result of which you can see how the socket sparks on its own (without plugging in the plug).
If the wiring consists of aluminum conductors, then the screw terminals need to be tightened several times a year, because aluminum tends to “leak”, as a result of which the contact weakens, from which it begins to spark. The connectors themselves where the plug is inserted may also be worn out. The plug is fixed using special clamping jaws, which unbend when frequently connected/disconnected. In this case, you need to bend them inward with pliers.
These two reasons are the most popular, and if sparking is detected in time, the situation can be saved by ordinary repairs. If you have already disassembled the outlet, carefully examine all other elements of the structure: perhaps intervention will be required somewhere else.
Video instructions for repairing an outlet that sparks
Why is the switch rattling?
The switch may crackle and even spark with a bang for the following reasons:
Poor contact, the screw clamps are loose, you need to turn off the electricity in the panel, remove the switch keys and tighten the screw clamps of the wires, it is important not to confuse them with the screws securing the switch, these are the screws in the photo. Perhaps your chandelier or lamps have too powerful lamps, the switch is not designed for such a load (I mean the total load from all the lamps), it gets hot, sparks and crackles
Perhaps your chandelier or lamps have too powerful lamps, the switch is not designed for such a load (I mean the total load from all the lamps), it gets hot, sparks and crackles.
The lamps in the lighting fixtures must be changed to less powerful ones.
High humidity in the premises leads to oxidation of the contacts; the contacts must be cleaned and tightened (again, first turn off the electricity in the panel).
The wear and tear of the switch (its operating mechanism) can only be helped by replacing the switch with a new one; switches have their own service life, apparently it is completely exhausted.
Constant voltage drops in the network can lead to crackling and sparking of the switch.
Installing a voltage stabilizer will help.
The spring (more precisely, the plate) that presses the contact when the switch is turned on has weakened; it can also crack, the contacts are not fully closed, in this case either the spring or the switch changes completely.
Several times I encountered factory defects in the switch; they bought inexpensive and therefore low-quality switches.
Started cracking immediately after installation.
In this case, it is better to simply replace the switch with a new, better one.
Very often we are faced with such a problem as the sudden appearance of an abnormal operating sound from a circuit breaker in the panel room.
A slight hum from an electromagnetic starter surprises few people, and some even consider this effect to be its usual mode of operation, although this is not the case for new devices. So what should you do when your machine buzzes like this or buzzes?
Is it worth changing it right away, or is the reason not in it at all, but in the electrical wiring or connected load? Let's take a closer look.
If this sound appears, then first of all decide what it sounds like:
All your further actions will largely depend on this.
Such sounds appear when the machine is energized and under load. That is, current flows through it. Moreover, the greater the load, the louder the machine can make noise.
Circuit breaker hums
Let's look at the first fault, namely humming. If your machine makes a sound during operation like a starter or contactor, this indicates a defect or defect.
Signs of a faulty switch
If the light bulb burns out when turned on, this indicates a malfunction of the switch.
The following signs will help you understand that the switch is broken:
- the device may not turn on at all;
- a cracking sound appears when you press a key;
- at the moment of switching on the light bulb burns out;
- when turned on, the lighting device will blink and crackle;
- the case heats up if the switch is operated for a long time;
- a key gets stuck – you need to press it several times;
- the lighting does not turn on.
Most problems are caused by improper wiring or the switch itself.
How to prevent sparks
To prevent sparks from forming at the contacts, manufacturers install arc suppression chambers that cool the arc. Some brands may make solderings from materials that are not susceptible to oxidation. Current will pass through them. You can use several methods yourself.
Spark arresting circuits
Suitable for high-speed devices that generate sparks at the moment of closing. Most often there are two options:
- For relays and DC starters. You will need a diode with an anode on the negative pole and a cathode on the positive pole. Energy dissipation occurs on the active part (self-induction). The diode will close the circuit.
- Snubber. The shunt RC circuit is designed to dissipate the energy accumulated in the inductance at the moment of active resistance of the network.
The contacts are located close together, so the spark extinguishing circuit reduces the load.
Pressure plates
The method is suitable for sparking contacts of a starter or machine. A special spring mechanism ensures tight contact between the contact pads. To connect, you will need to install a spring mechanism in the closed contact position, retracting it and lowering it back. A click/thump should be heard.
Removing carbon deposits
You can clean the surface of conductors not only with fine sandpaper. An eraser or a wooden match will ensure a smooth surface and eliminate the risk of increasing contact resistance.