While doing repairs, everyone has faced the need to hammer a nail or drill a hole in the wall.
And then the question arises: will I get caught in the wire under the plaster and how to avoid this? In order to find hidden wiring, it is not at all necessary to resort to the services of professional craftsmen; a hidden wiring detection device can easily cope with this task. There are many reasons why you might need a device to detect hidden wiring:
- ⚡
major renovation of the apartment with redevelopment of rooms. You need to cut additional openings for doors in the wall - ⚡
loss of voltage in the outlet due to a break in the hidden wiring. Here you will also have to establish the location of the break. - ⚡
hanging various household items on the walls - TV, lamps, paintings
Factory detector circuits
There are several types of factory-made detectors:
- Electrostatic. The advantages of such a device are the simplicity of the internal structure and the ability to find metal objects at a considerable distance. The disadvantage of the detector is that it can only search in a dry environment. Otherwise there will be false positives. In addition, only those wires that are energized can be detected.
- Electromagnetic. Advantages include simple circuit design and highly accurate wiring detection. There is only one drawback, but a significant one: in addition to voltage, you need a fairly powerful load - at least 1 kilowatt.
- Metal detector. This device is a standard metal detector. The main advantage is that there is no need for tension. Disadvantages: detects any metal (not just wiring), and is also structurally complex.
How to find wiring in a wall without a device?
Here we will consider two methods of indicating hidden wiring, which do not require any additional equipment at all, except for ubiquitous gadgets and the simplest devices from the arsenal of a home electrician.
In the first case, you will need a smartphone whose functions include the “magnetic sensor” option. In order for this function to work, you must download the Metal Detector application. The sensor is not particularly accurate, however, it is quite suitable for determining the place where you should not drive a nail, or where the approximate location of a wire break is located.
After downloading the program, it will begin to function immediately: when the smartphone approaches the wall where the antenna is located, the coordinates of the test site immediately appear on the indicator, as well as a diagram of the strength of the magnetic induction field in microtesla. The sensitivity of the scale is 0.01 μT (for comparison, a souvenir magnet attached to a refrigerator creates a magnetic field with an induction of 500 μT, and the intensity of the magnetic field from alternating current wiring of normal frequency is 0.2...0.3 μT).
Moving along the wall with your smartphone turned on, you can observe an increase and decrease in the magnetic field induction, and at a certain threshold, a sound signal will also turn on. The result is shown not only on the scale, but also in the center of the gadget screen.
A regular probe screwdriver is also suitable for detecting hidden wiring; It’s better if you have an advanced model, with a built-in amplifier and sound signal generator. This screwdriver is used in reverse mode: you touch the blade of the screwdriver with your hand, and then slowly move it along the wall of the room being examined. This uses the effect of capturing an electromagnetic pulse from a network that is under load, so when approaching the place where the wire is laid, the intensity of the light and sound signal will increase.
The simplest circuits of homemade devices
There are several schemes of such devices.
With sound indication
You can make a simple hidden wiring detector with your own hands using resistor R1. This resistor protects the circuit from induced voltage. Moreover, even if you install it, this most likely will not affect the operation of the device.
Hidden wiring detector circuit with sound indication
A copper conductor with a length of 5 to 15 centimeters is used as an antenna. When wiring is detected, a specific crackling sound is produced. The piezo element is connected according to the bridge circuit principle, which allows you to control the volume level.
Sound indication combined with light
This circuit is also simple - you only need one chip.
Hidden wiring finder circuit on a microcircuit
Features of the circuit: the value of resistor R1 must be equal to or greater than 50 MOhm. The LED is used without resistance limitation, since the microcircuit performs this task independently.
On a field-effect transistor (first circuit)
Transistors of this group are extremely responsive to an electric field. This feature is used in the diagram below.
Field-effect transistor wiring finder circuit
From the picture you can understand that the device is very simple; you can make it yourself, without using any special devices. The supply voltage indicator is from 3 to 5 V. The current required is so small that the detector can operate for 5-6 hours without shutting down. The antenna coil is fixed with a 0.3-0.5 mm wire to the core, which, in turn, has a diameter of 3 mm. The number of turns depends on the wire itself: 20 turns for a 0.3 mm wire and 50 turns for a 0.5 mm wire. The antenna can function both with and without a frame.
On a field-effect transistor (second circuit)
Another option for making a hidden wiring detector with your own hands using a field-effect transistor is to use the KP103 microcircuit . This field grass is characterized by high sensitivity. If its gate is in close proximity to the wiring, the resistance is reduced, which leads to the opening of other transistors. After this, the LED begins to glow.
Note! Polevik KP103 can be used with any letter, just like the AL307 light diode. The fact is that bipolar transistors with such conductivity have low power, and the transmission coefficient must be significant. Therefore, instead of KT203, it is recommended to choose KT361.
The device is small in size - assembly can be done even in a marker housing. The antenna extends through the hole in the marker. The antenna length is from 5 to 10 centimeters. However, if the wiring is not too deep in the wall (no deeper than 10 centimeters), you can get by with the length of the field-effect transistor leg.
Hidden wiring detector circuit using transistor KP103
The KP103 transistor is installed horizontally, and the gate must be bent so that it is located directly above the transistor body.
Metal detector
The metal detector circuit looks like this:
- frequency generator (100 kHz) - VT1;
- detector - VT2;
- indication - VT3, VT4.
Generator coils are wound on a ferrite core. The rod diameter is 8 millimeters. The number of turns on the first coil is 120, on the second – 45. The wire is selected as PEVTL 0.35.
The metal detector should be adjusted away from metal products. The adjustment is made using trimming resistors R3 and R5 in such a way that the generation practically disappears (uneven glow of the diode and low brightness). Next, the R3 tincture occurs in order to extinguish the emitter.
The next step is to adjust the sensitivity. This is done using a piece of metal (you can use a coin) and a pair of resistors. Moreover, it is recommended to repeat the sensitivity adjustment periodically. To optimize the process and make it more convenient, regulators can be built into the body of the metal detector.
The configured device turns on when the antenna is close to metal - the light diode begins to blink.
Wiring alarm without batteries
This detector uses the network directly as a power source. This circuit is possible through the use of a high-capacity capacitor (indicated in the diagram as C1). The capacitor is charged from the network. In a charged state, the capacitor transmits a voltage of 6-10 V. In this case, only the brightness of the light diode depends on the voltage, but this indicator does not affect the sensitivity of the device.
Schematic diagram of a hidden wiring finder without batteries
Microcontroller detector
The diagram above shows a hidden wiring detector built on a PIC12F629 microcontroller. The operation of the device is based on responsiveness to a magnetic field. This field is formed by current flowing through a conductor located in the wall.
The circuit can use an LED lamp or a piezo emitter. When a magnetic field is detected, a lamp lights up or a piezo emitter begins to crackle, depending on the preferred type of indication.
The advantage of the device is its ability to respond only to a frequency of 50 Hz, which is the frequency of alternating current. Thus, false alarms of the finder are excluded, since the device will not respond to other frequencies.
Read also: Dimensions of a homemade plow for a walk-behind tractor
Two-element indicator
In this case, you need a microcircuit and a light diode. You can choose DD1 as the microcircuit, and it is recommended to take HL1 for the LED. The task is to connect the leads in such a way as to create three inverters in a circuit. As a result, the device will amplify the currents that flow to the device from the alternating current field in the wiring located in the wall. When wires are detected, the diode lamp begins to glow. When moving away from the wall or breaking the chain, the lamp goes out.
There are two options for implementing the circuit:
- Connection of terminals: third to eighth, second to tenth, fourth to seventh and ninth, first to fifth, eleventh to fourteenth.
- Connection of terminals: third with eighth, tenth with thirteenth, first with fifth and twelfth, second with eleventh and fourteenth, fourth with seventh and ninth.
Popular models
It is very difficult to say unconditionally which indicator of hidden electrical wiring is the best. The choice is influenced by many factors, ranging from the purpose of application, ending with the manufacturer and price. A review of several models gives an idea of which hidden wiring indicators are in greatest demand.
Interskol ED-0.2
Interskol ED-0.2
Interskol ED-0.2 (Fig. 9) is a budget version of the hidden wiring indicator, designed to search for de-energized wires and metal fasteners in wooden structures. Light and sound alarms are used to indicate the result. Detecting cables at a depth of up to 20 mm, the device gives an error of 3 mm. Does not require calibration, controlled with just one button.
Price from 500 to 1000 rubles.*
When choosing a hidden wiring indicator, it is advisable to give preference to well-known manufacturers whose specifications focus on the production of these devices.
DEFORT DMM-20D
DEFORT DMM-20D
Using the DEFORT DMM-20D four-mode multitester (Fig. 10), you can search for a live cable in the wall. In addition, the device is used to identify wooden supports, metal elements and voids. The device provides ideal conditions for work related to drilling holes and installing attachments. Search results are displayed and accompanied by a sound signal. Electrical wiring detection depth is up to 50 mm. When idle without manipulating the controls, the device turns off automatically, which has a beneficial effect on the battery life.
Price from 800 to 1200 rubles.*
KWB 0116-20
KWB 0116-20
The KWB 0116-20 indicator (Fig. 11) is used when searching for connected and de-energized wires hidden in walls. The device distinguishes wooden floors and provides information about the reinforcement of reinforced concrete walls. The device detects energized wiring at a distance of up to 38 mm. The device is equipped with an intelligent calibration system that allows you to obtain results with great accuracy. To control the scanner, only one button is used, which reduces operation to maximum simplicity.
Disadvantage: It is not recommended to move the calibrated device away from the wall that is being examined.
Price 1600–1800 rubles.*
ADA Wall Scanner 80 A00466
ADA Wall Scanner 80 A00466
The device for detecting hidden wiring ADA Wall Scanner 80 A00466 (Fig. 12) provides a search for live wires and is also designed to detect wooden floors, ferrous and non-ferrous metals. The professional device is enclosed in a shock-resistant case that protects internal elements from mechanical damage. In addition to the LCD display, on which the scanning results are displayed, the detector has a sound and light alarm. The scanner, which detects wiring at a depth of up to 50 mm, is easy to operate and contains a minimum number of controls. Visualization of search modes and results is carried out using easy-to-understand icons.
The price of the device ranges from 2700–3000 rubles.*
The best detector for finding wires running through a wall will be useless in the wrong hands. Therefore, to effectively use the device, you need to acquire minimal knowledge of electrical engineering or use the services of a specialist.
*Prices are current as of October 2022.
Industrial circuits of professional detectors
You can assemble a professional-level device at home. However, such equipment has a rather complex design, and its manufacture will require a lot of effort. Below are two diagrams to choose from: the first refers to an industrial device, the second to a homemade Woodpecker device.
Scheme of an industrial signaling device for hidden wiring
Scheme of a homemade wiring detector “Woodpecker”
You can also make a device like YADITE 8848. Below are two options for such a device.
Schematic diagram of the detector on TC4069UBP
Wiring locator diagram for 74HC14AP
Checking homemade wiring finders
Before using a homemade device, it is recommended to test its performance. Checking will show correct assembly.
The test is performed as follows:
- We find an area where there is definitely hidden wiring. For example, it is guaranteed that there are wires in the wall leading to switches and sockets.
- We check the selected area. To do this, we bring the device to the wall and observe the indication.
- If the signal is received only at the point where the cable passes, the device is working properly and can be used.
- If the signal appears and disappears in different directions, it means the device is faulty.
Advice! Before starting the test, the wiring must be subjected to maximum stress. To provide such a load, we connect as many electrical appliances as possible to the network. As a result, the magnetic and electric fields to which the devices respond are enhanced.
So, it is not necessary to purchase a wiring detector in a store. This device can be made at home if you follow the above diagrams.
A hidden wiring finder is an indispensable device if you need to detect wires in a wall or floor. In addition to electrical repair work, the device can also be useful for other work when you need to find wiring without damaging it or getting an electric shock.
There are quite a lot of devices for this purpose; they differ not only in manufacturers and models, but also in methods of detecting wires. One of the interesting options is a device called “Woodpecker” made in Ukraine. You can assemble it yourself if you wish.
Operating principle of the device
Metal and hidden wiring detectors can use:
- The effect of the appearance of an electrostatic field in the area of a conductor (it occurs in any conductor, even one that is not energized).
- The appearance of an electromagnetic field when an electric current flows through a conductor with sufficient power.
- A well-known metal detector method is when a magnetic field is induced around a massive ferromagnetic object.
With the electrostatic method of detecting conductors, the following occurs. An energized AC line creates a field that attracts magnetized particles. If the distance to the source is relatively small (up to 30...50 mm), then in the absence of external interference and screens (even a wall with high humidity can serve as one), the emitted signal is easily captured and recorded in any way convenient for the user.
The reliability of the response of such a hidden wiring detector will be determined by the load power on the network, which, judging by user reviews, should be at least 1000 W, as well as the presence of steel embedded structures in the walls (with the exception of stainless steel). However, if you have a building plan for a house or apartment, such details are easily recognized.
Unlike the previous method, an electromagnetic field is created even in the absence of an external load, because in this case there is no interference. The sensitivity of such a metal detector increases with increasing field strength (it will always be there unless the electricity supply to the apartment is turned off). The method is suitable for detecting hidden wiring in wooden buildings, but is not practical for reinforced concrete walls.
The magnetic method is the least reliable, since it definitely reacts to a bracket forgotten by builders in the wall, and to a self-tapping screw screwed into it.
It is possible that all of the above options can be implemented. Such combined devices are called multi-detectors, and are used primarily by professionals. The most popular are imported multi-detectors from the brands Bosch, Mastech, domestic Dyatel, etc.
While multi-detectors can only be made by trained radio amateurs with their own hands, simpler designs can easily be assembled independently.
Features and Specifications
First of all, the devices differ in their operating principles. Electrostatic devices are able to find wires if they have voltage. If the line breaks, they become ineffective or do not work.
Electromagnetic types are capable of detecting the electromagnetic field of an object, in particular an electrical cable. For inductive devices, the detection method is identical to that used by a metal detector. The detector itself creates an electromagnetic field, so it is able to detect faulty wiring.
Combined - such devices use several detection methods at once, which makes them the most effective. Such multifunctional devices include the Woodpecker. The signaling device is made in a black plastic case, the weight is about 250 g. An antenna is provided in the upper part of the case.
The Woodpecker alarm is powered by a 9 V battery, which is inserted from the back by unscrewing a screw. There are 4 buttons on the front panel that are responsible for the sensitivity range. One is the weakest sensitivity (radius up to 1 cm), four is the strongest (50 cm or more). During operation, the Woodpecker alarm makes characteristic sounds and flashes the light.
The best premium hidden wiring detectors
The 2 devices presented below for detecting hidden wiring are selected from the 5 most popular premium devices. These devices have a wide range of functions and are often used for professional work.
E121 Woodpecker
Alarm E121 Woodpecker is an easy-to-use device intended for professional use. The detector operates on an electrostatic principle and allows not only to detect hidden wiring, but also to identify devices with a grounding break, check the serviceability of fuses, fuse links and determine a break in live wires. The front panel of the device has 4 buttons for selecting sensitivity, increasing the chances of successfully detecting objects.
Advantages
- Easy to use;
- Finds wires quickly;
- Availability of light and sound indicators;
- Good search depth – up to 50 mm;
- Ability to adjust sensitivity level.
Flaws
Designed mainly for searching live wires.
Bosch GMS 120 Professional
The Bosch GMS 120 professional-grade hidden wiring detector quickly and efficiently detects them under voltage and with a current frequency of 50 Hz. The scanner also allows you to determine the location of pipes, fittings, metal profiles, and wooden parts not indicated on the drawings. The tester body is made of high-quality plastic with rubberized areas, which makes it convenient to use and increases its service life.
This hidden wiring finder differs from analogues in the presence of a through hole to indicate a safe drilling zone. The detector has LED backlighting, which greatly facilitates work in twilight and poorly lit conditions.
Advantages
- Compact dimensions;
- “See” wires well;
- Multifunctional;
- Simple and easy to use;
- Battery included;
- There is a hole for marking;
- It is possible to turn off the sound signal.
Flaws
High price.
The Bosch GMS 120 Professional alarm system is well-deservedly popular among customers and has mostly positive reviews. Only some users note that the scanner may not accurately find wires under the tile surface. However, these search conditions cause difficulties for almost all wiring determiners.
Search for wiring
“Woodpecker” is not only a sensitive indicator of hidden wiring, but also a device capable of performing a number of related tasks. It will help detect metals in the walls that interfere with drilling or repairs.
The Woodpecker alarm will notify you of a find using a sound signal. If the wiring is live, the device will easily detect it, focusing on the pulses supplied by the electric current.
The Woodpecker device searches for hidden wiring without contact. “Woodpecker” will help you detect wires under a thick layer of plaster, drywall and even concrete. The detector is quite accurate, so you don’t have to additionally destroy the plaster to identify where the wiring is located. Often wires run far from the intended path, so a device is necessary when searching for them.
If there is no wiring diagram for the building's power supply, or it is not highly accurate, you can easily locate the wires.
Similar devices are used by professional electricians, who every day have to look for wiring at various facilities, which include residential, office, and warehouse premises.
Even if you just want to hang a shelf on the wall, it doesn’t hurt to check if there are any dangers in the form of wires, because hitting them with a drill or screw will not end well. By ringing the wall with the Woodpecker alarm, you can work in complete confidence that you will not encounter such problems.
The device uses an antenna to strengthen the signal, which allows it to recognize obstacles more clearly. You will be able to detect the wire through which the phase passes. The Woodpecker detector will help detect not only those cables that lack insulation, but also well-insulated wires. In this case, there is no need to make direct contact with them.
Detector MS-158
This detector is made in China and, like many things made in China, it has its own disadvantages and features to which you need to adapt.
One of the inconveniences is that the device equally detects both live wiring and other metal objects in the wall - fittings, nails.
It is necessary to acquire skill in operating the device in order to accurately distinguish signals. Not all electricians prefer to use it precisely because of the large error. But for household use, especially one-time use, this is the most optimal option.
The detector must be tested and calibrated before use. The switch is placed in the second position. The probe extends 90 degrees. Then touch the metal contact plate with one finger, and press the electrode located on the side surface of the case with the other finger. The device should beep.
To calibrate, place the switch in the first position (I). The instrument begins to signal with an LED and an audible signal. Gradually turn the adjustment wheel to minimum until the signal and sound fade out. Then check the functionality of the device by holding it close to a metal object. It should make a sound and the LED light should light up. If everything happened exactly like this, the tool is ready for use.
To search for wiring, turn the probe 180 degrees and turn on mode 1. Apply the detector to the wall and slowly move along it. There is metal where the detector beeps. As you understand, you at least approximately need to know the location of the wiring, otherwise you can easily get confused in the instrument’s readings. The depth of detection of hidden wires is up to 5 cm.
Checking the phase connection
“Woodpecker” E 121 can also be used to check whether the phase in the electric meter is connected correctly. To do this, you do not need to remove the cover from the meter or break the seal: the antenna will pick up electrical impulses from a distance.
Woodpecker alarms are used to detect faults in electrical substations; they are used by professionals in critical areas and by amateurs at home. Any cables can be detected, regardless of how many phases the system has, and direct contact with the wiring is not required, which makes use safe.
“Woodpecker” is suitable for checking wiring in machines, panels, meters, detecting cables in hay, floors, regardless of what finishing material was used. The device perfectly detects live wires, which is important from a safety point of view. In addition, using the device you can also find the place where the wires broke.
Read also: How to sharpen a Gillette razor blade
“Woodpecker” E-121 is produced in different modifications, which differ in sensitivity to the electric field; the maximum distance that the detector is capable of scanning reaches 700 mm.
Instructions for using the detector
Due to the variety of designs of hidden wiring indicators, it is necessary to consider the instructions for their use using the example of a specific model. For this purpose, the inexpensive electrostatic ISP “Dyatel E-121”, widely used by domestic installers, was chosen. But first you need to prepare for the search procedure.
Preparing for upcoming work
To speed up the detection of electrical wiring using any detector, experienced specialists suggest following a number of simple rules.
You can test the new detector using a regular extension cord that is plugged into an outlet. You can use books or ceramic plates as a barrier.
Below are the main ones:
- Initially, test the functionality of the device on any live wire. The batteries in the detector may simply run out and it will not work correctly.
- Calibrate the device at a distance of 1 meter from the walls, if such an option is present.
- The surfaces to be tested should not be wet.
- If possible, turn off all working electrical appliances in the apartment, including telephones.
- The accuracy of electrical wiring detection will be greatly reduced if conductive wallpaper adhesive was used.
These recommendations will eliminate wastage of time due to inoperative equipment and unacceptable parameters of the surface under study.
Using the Woodpecker E-121 detector
The Woodpecker E-121 detector is capable of operating in 4 sensitivity ranges.
The procedure for using this device to detect wiring is as follows:
- Press the sensitivity range buttons one by one. In this case, the signaling device should emit a short light and sound signal. If the device does not respond, check the battery.
- Press button “4” (provides maximum sensitivity), bring the detector to the surface being analyzed and, if there is an indication, reduce sensitivity by pressing buttons “3” to “1” in sequence.
- Simultaneously with the decrease in sensitivity, it is necessary to reduce the distance to the detected object, localizing the alarm zone.
- To detect the location of the conductor, move the detector along the wall, trying to find the area with the maximum electromagnetic field.
- To neutralize interfering surrounding currents, place your hand on the surface to be analyzed near the detector. If there is no conductor near the hand, then “Woodpecker E-121” will stop giving signals.
- When searching for a broken wire, apply voltage to the damaged core and ground the rest.
The accuracy of determining the location of an electrical cable depends on the degree of humidity and the materials surrounding the wire.
Locating electrical wires in plaster walls, reinforced concrete panels and ground shields will be difficult.
The domestic detector “Woodpecker E-121” effectively detects wiring at a depth of up to 8 cm and costs around $15, which guaranteed its popularity among electricians
To test fuses and fuse links, you must turn on mode “1” or “2” and touch the antenna to the contacts before and after the fuse. If there is a malfunction, the detector will not generate a signal.
The Woodpecker E-121 detector has a combined light and sound alarm system, which allows you to maintain the functionality of the device if one of the alarms breaks down
To correctly interpret the results of the device’s operation, you should first read its instructions, because almost every detector requires correct initial settings.
Features of application
In order to achieve high results, the device must be used in dry weather with low air humidity. If it is raining outside and damp indoors, the analyzer will begin to make errors, as water distorts its signals. Various aggressive gases, as well as dust, have a negative impact on the operation of the hidden wiring detector e121 Woodpecker.
When searching with a signaling device, the house should not be de-energized. Before you start working, you need to turn on the device and hold it near the walls for some time. This will allow the alarm to configure itself automatically. If you start working right away, perhaps “Woodpecker” will make mistakes. If you are dealing with the device for the first time, practice on open wiring first. To do this, you can use electrical appliances connected to the network, working - you will learn to accurately recognize the signal supplied by the sensor.
How to build the necessary device yourself
The circuit for creating a device, similar to the Woodpecker alarm, includes a field-effect transistor. Such a detector will be able to record electric fields.
Of course, it will be useless if there is a break in the wiring, but it will be able to detect working cables. You will need the following tools:
- soldering iron;
- knife, wire cutters, tweezers;
- field effect transistor (KP103 is suitable);
- a speaker with a resistance of no less than 1600 and no more than 2200 ohms;
- The device can be powered by 1.5 - 9 V batteries;
- switch button;
- wires;
- the container in which the device will be located, for example, a plastic box;
- seeker.
The home-made device will operate in a similar way to the “Woodpecker” hidden wiring alarm. The speaker will report the difference in network frequency, and you will be able to hear a hum that differs in tone. The closer the alarm is to the obstacle, the louder the noise will be. It is important that the transistor is soldered correctly. Factory devices have slightly different sounds, since the design is more complex. It is easier to recognize what exactly the “Woodpecker” wants to tell you than when using a homemade device, which still needs to get used to.
An important part of the device is the gate, so when purchasing a transistor, choose one that has a metal body connected to the gate.
Metal will increase the signal and act as an antenna. For convenience, you can connect a small ammeter or indicator with an arrow to the alarm, borrowing it from an old tape recorder. The rating should not exceed 1-10 kOhm.
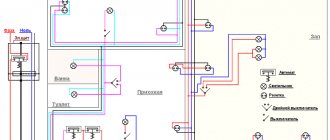
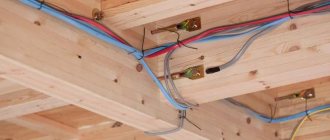
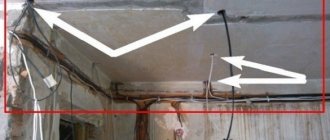
During renovation work, it is quite common to drill and break walls where electrical cables run under the plaster. It is not always possible to use a wiring diagram, but if it is, there may be little benefit from this - you cannot be sure that the previous owners of the premises or builders did not change the location of the wires without making changes to the diagram.
Finding hidden wiring
It turns out that detecting wiring is an integral part of not only repair work, but also everyday life, since when driving a nail for a new painting, you can easily damage the cable.
Before you hammer a nail into the wall, look for hidden wiring.
Contents of step-by-step instructions:
Features (advantages, disadvantages)
“Woodpecker” is capable of working with 4 different ranges, with different thresholds of sensitivity in relation to the parameters of the electric field created by the working conductor. More detailed features of each range are presented in the table below:
| № 1 | The creation of light and sound signals occurs if the signaling antenna is positioned from the conductor at a distance of 0...10 mm |
| №2 | The device emits a sound and light alarm if the antenna is placed at a distance of 0...100 mm from the working conductor |
| №3 | In this range, the device emits a sound and light signal when the antenna is located from the conductor from 0...300 mm |
| №4 | The range is distinguished by the longest gap length from the conductor, from 0...700 mm. |
Source: ulys.ru
The article describes the principle of operation of several different devices for troubleshooting electrical wiring. This article will be useful both for novice electricians and for people who are simply interested.
Almost every man has hammered a nail into a wall at least once in his life. Someone to hang a beautiful, expensive painting that they recently purchased at an exhibition. Someone just nailed a shelf for a flower. And probably every second person had a thought: “Isn’t there an electrical wire or fittings here?” And it’s good if you have a drawing according to which the electrical wires were laid. What if there is no such drawing? Then everyone acts at their own peril and risk.
But in order not to get into trouble and not get into trouble, there are special devices that will relatively accurately indicate the presence of electrical wiring or fittings in a given place.
In this article we will look at the most popular and affordable devices for searching hidden electrical wiring .
To understand how these very devices work, you need to know a little theory.
So, live electrical wires create an electric field around themselves. It is this electric field that these devices detect. Next, a special amplifier amplifies the signal and shows where our conductor is located.
Depending on the type and complexity of the device, the indicator can be a simple LED, a dial indicator or a digital display. Prices for these devices can range from $1 to several hundred or more, depending on functionality and purpose.
There is another type of device for searching hidden electrical wiring. The operating principle of these devices is the same as that of a metal detector. There is a coil that creates its own magnetic field. If some foreign metal object enters this field, the field changes. This is a rough theory, but I think you understand the principle of operation.
Well, the third type of devices are hybrids of two main types. These devices have a built-in generator and amplifier. But these devices are already quite expensive and are used, as a rule, in laboratories. Although there are simple analogues for home use.
Let's look at the most common and affordable devices for finding hidden wiring that are available on our markets.
One of the most popular devices for detecting hidden wiring faults, which is used by many professional electricians, is “Woodpecker” . Officially it is called “hidden wiring alarm E121” .
This device is already more than one year old. During this time, it has established itself as one of the most reliable devices. The device is quite simple and easy to use. With the help of "Woodpecker" you can detect wires under a layer of plaster up to 5-7 cm. This is, perhaps, one of the few affordable and high-quality devices that are produced by us. Also, this device responds well to electromagnetic radiation, which is created by almost all household appliances - televisions, ovens, computers, etc.
Various Chinese-made devices from the MS series (metal sensor) are quite common in our country. They gained particular popularity due to their low cost.
Device for detecting metal parts and hidden wiring MS-158 M. It is not particularly popular among professional electricians, as it reacts to everything - nails, fittings, wires. In order to use it correctly, you need to get used to it. After some time, with constant use of this device, it is already possible to distinguish reinforcement from nails and wires by signal strength.
MS-58 M. An earlier model of the MS-158 device. It differs from MS-158 only in the design of the case. The 158 is more modern and practical.
Due to their low price, these devices are purchased mainly by novice electricians and home craftsmen.
MS-48, MS-18 and other indicators of this class . They are made in the form of ordinary indicators. These devices must be used very, very carefully. Even knowing the principle of operation of this device, but not having the appropriate experience in using these indicators, every second person has a chance to become more familiar with electricity than they would like.
If the wall in which the wire is laid is slightly damp, or the humidity of the room is higher than normal, the indicator will constantly glow wherever you bring this “miracle device”. Although, in fairness, I would like to note that with appropriate preparation and “skill,” the device can relatively accurately + -15-20 cm determine the location of the electrical wire. And with a little practice, you can even find the place where the wire broke.
For a more professional approach to the problem of troubleshooting, there are better devices. The principle of operation is based on the fact that a generator of a certain frequency is connected to one of the ends. A receiver tuned to the same frequency is passed along the cable. The place where the tone has changed is where the cable is damaged. But these devices are relatively expensive and are used, as a rule, in mobile electrical laboratories. A similar, but more compact, device is used by telephone operators to locate cable damage.
There are also many foreign, fairly high-quality devices for detecting electrical wiring in the wall. But these devices are quite expensive and not everyone can afford them. And, frankly speaking, their performance leaves much to be desired.
An example of such a device is BOSCH DMF 10 zoom . The device is good for everyone. It’s beautiful, compact, easy to use, but what distinguishes it from its Chinese counterparts is only the build quality and performance. The operating principle is approximately the same.
But in any case, to work with these devices you need appropriate skills and knowledge. With appropriate proper handling, any of the above devices, even the simplest and cheapest, will greatly facilitate the troubleshooting of electrical wiring.
Trust the professionals, and you will be happy. Good luck to you!
Sergey Seromashenko
Source: electric.info
Why do you need to look for wiring?
Many unfortunate builders do not think about wiring at all when carrying out repair work, thereby violating safety regulations. The consequences of such negligence can be the most dire, so it is advisable to first identify old wiring in order to protect yourself and your loved ones from unjustified risk.
Here are the main reasons for searching for hidden wiring:
Repair and replacement of cables
And now – the consequences of neglecting safety precautions:
- short circuit;
- improper functioning of the electrical network;
- electric shock;
- fire.
In the worst case, such carelessness will lead to death.
Consequences of neglecting safety precautions
Finding hidden wiring with your own hands: a review of the most effective methods
The most effective way, of course, is to contact a specialized company - using professional equipment and many years of experience, it will not only find all the wires, but also provide an exact diagram of their route. But such companies are not available in all cities, and such services are quite expensive, so let’s look at how you can independently find an electrical cable in the wall.
Method one. Set the maximum load on the wiring. Next, take a regular compass and, guided by the deviations of the arrow, determine the place where the electrical wire goes.
Method two. You can also mount your own device, consisting of three transistors - one field-effect and two bipolar. The first transistor will be an electric switch, a couple of others will form a multi-vibration installation. Such a homemade device will pick up electromagnetic waves emanating from the wires. If wires are detected, the light on the device will light up, and the device itself will begin to vibrate.
Method three. Another version of a homemade device can be made from a field-effect transistor, batteries and a head unit (telephone, that is). To search for wiring, you need to run the transistor along the wall - if the device makes a sound, it means the cable has been found.
Headphone TA-56M 3200 Ohm
Method four. It is only suitable for major renovations. Note that it is not always effective and is more suitable for rooms with “old” finishes.
Its essence is as follows: it is necessary to remove wallpaper or any other finishing material from the walls. Under it, if you are lucky, you will find a strip that is a different color from the rest of the wall, or represents an unevenness. This is probably where the electrical wiring runs.
Method five. The classic version, which was used before the advent of wiring finders. The radio receiver must be tuned to a frequency of 100 kHz and moved along the surface of the wall. Where the wire runs, the receiver will emit a characteristic noise resembling interference. Since this method was popular among professional electricians, there is no reason to doubt its effectiveness.
Note! During the procedure, pay special attention to sockets and switches - it is near them that cables mainly pass.
Method six. In this case, the electrical wiring is detected using a conventional hearing aid, which makes it possible to perfectly listen to frequencies up to 50 Hz.
Method seven. As an alternative to a radio receiver, you can use a microphone, preferably an electrodynamic coil one. It must be connected to any equipment capable of capturing and reproducing the signal. The search procedure itself is no different from that using a receiver.
Method seven. You can also tie a small magnet to a string and move it near the wall. It is typical that this method is ineffective in panel houses and on ceilings.
Read also: How to charge a battery
Method eight. Don't be upset if none of the methods are successful. You can always resort to reliable technology for searching electrical wiring that demonstrates one hundred percent results. We are now talking about hidden wiring detectors.
Today, wiring finders are sold in all electrical stores. By running such a device along the walls, you can easily identify not only the location of the cables, but also determine the strength of the voltage in them.
Note! Such devices react to both electrical wiring and metal fittings. Therefore, it is recommended to connect a more powerful device to the electrical point to enhance the radiation.
Which hidden wiring detector is best to buy?
Particular attention should be paid to the depth of the device’s search for hidden wiring. For ordinary apartment repairs, large indicators are not needed, but for high-quality professional work it is better to choose a signaling device with the maximum level of sensitivity
Some testers only see live wires, while others can see not only live wires, but also fixtures, fasteners, wood and metal structures.
At the end of the rating, the following conclusions can be drawn:
- The most budget-friendly, but at the same time high-quality model is the MS8902B Mastech detector.
- The Duwi 26032 5 signaling device is considered one of the most compact and convenient to use.
- The DSL-8220S detector detects wires at a considerable depth with high quality.
- The Zubr detector has a wide detection range and the ability to determine not only wiring, but also the location of wooden and metal structures.
- If the main goal is to search for metal objects and fasteners, then the TS79 multiscanner will cope with this task efficiently.
- The E121 Woodpecker device will be able to accurately determine the location of any live wire.
- For professional work of any complexity, the Bosch GMS 120 Professional signaling device is suitable.
When deciding which hidden wiring detector to buy, first of all you should decide on your budget, and only then select a model that is suitable for its characteristics in the desired price segment.
How Wiring Finders Work
How Wiring Finders Work
Live electrical wiring produces an electromagnetic field. Devices for its detection are aimed at identifying the sources of this field, and built-in amplifiers make it possible to more accurately determine the location where the wire runs. But in order for the finder to perform its functions, certain rules must be followed when laying cables.
- Cables should only be laid parallel to architectural lines.
- Horizontal wires should be located at a distance of 1.5 cm from the ceiling slabs.
- If the finishing layer is thicker than 1 cm, then the cables should be laid along the shortest route.
- If you do not follow these rules during installation, it will be quite difficult to detect the wiring.
Types of hidden wiring finders
Types of hidden wiring finders
Such devices may vary in detection method and design complexity. The price range is quite wide - from 100 to 3000 rubles.
Note! When identifying wires, the finder can provide both light and sound signals.
Below is a classification of detectors by design complexity.
- Devices that, in their operating principle, vaguely resemble metal detectors. They are equipped with a special coil that generates a small electromagnetic field. If a foreign electrical or iron object gets into such a field, it will immediately change.
- Devices that detect electromagnetic waves emanating from live wires.
- A hybrid of previous devices, which is very expensive, therefore it is used mainly by professionals.
According to the type of design, finders are divided into:
The design of testers is much more complex than that of screwdrivers. Modern models are equipped with laser pointers and are capable of detecting not only electrical wiring, but also telephone cables. Moreover, the testers will allow you to detect even underground wiring. The devices are equipped with a screen backlight, a flashlight and fuses that protect against overvoltage.
An indicator screwdriver is a simpler and cheaper device for detecting wiring, but it is effective only in cases where the wires are located at a depth of no more than 2 cm.
This screwdriver can be used in two ways:
- non-contact search allows you to determine the location of the wiring;
- contact - makes it possible to measure the voltage.
More modern models of screwdrivers are equipped with a display showing voltage data; As for other devices, they use sound signals for notification.
New Woodpecker M E-121.3 hidden wiring alarm and metal detector.
E-121.3 Woodpecker M, the improved, well-known Woodpecker E-121, has gone on sale
We invite you to familiarize yourself with the description and characteristics.
- Purpose and use of the device
- Woodpecker M E-121.3 is a non-contact device that is used for:
- Detecting a phase in wiring in which the voltage is no more than 220V and the frequency is no more than 50Hz, finding hidden wiring in the wall;
- Detection of metal objects that are hidden in the wall or located under another surface.
- Area of use – Woodpecker M can be used during repair, installation and construction work.
- Alarm characteristics
2.1 Sensitivity of Woodpecker M in the air during detection:
- Electric current in the wire – from 0 to 500mm;
- Metal-containing objects – from 0 to 50mm;
2.2 Triggering of light and sound alarms when a search object is detected.
2.3 The device is equipped with an alarm that goes off when the battery is low.
2.4 Battery – crown, 9V.
2.5 Current consumption:
-in standby mode – about 8mA;
-during operation – about 25mA.
2.6 Temperature conditions at which it is recommended to use the alarm device from -20°C to +40°C and air humidity 80% at +25°C.
2.7 Dimensions of the device – 160x42x33 mm.
2.8 Weight including battery is 120g.
- Device contents
The kit consists of:
- The device itself – 1 piece;
- Krona, 9V – 1 piece;
- Carrying case – 1 piece;
- Accompanying documentation – 1 pc.
- Operating principle and internal structure of E-121.3 Woodpecker M The alarm itself is a plastic case with a printed circuit board with the necessary elements installed on it. On the reverse side, in the body, there is a compartment for the crown. On the front side there are device control buttons and LED alarms. On the right side of the case there is a dial that adjusts sensitivity. The working area of the alarm is indicated by a red stripe.
- The principle of operation of the alarm when detecting electrical cables under operating phase voltage, places where wiring hidden in the walls is laid, which is under alternating current voltage, is that the device begins to respond to the electric field that appears during the passage of current through the conductor. It must be remembered that the higher the electric field voltage in the conductor, the more powerful the device signal will be. By adjusting the sensitivity settings of the alarm, you can accurately determine the presence of hidden wiring in the wall, or simply determine whether there is voltage in the conductor.
4.3 In order to use the E-121.3 Woodpecker M as a metal detector, electromagnetic induction is used. When metal-containing objects appear in the electromagnetic field of the generator, it leads to a decrease in the amplitude of oscillations in the generator, which triggers an alarm.
6. Commissioning and use of the signaling device E-121.3 Woodpecker M
6.1. Unscrew the locking screw on the crown compartment cover and install the battery. Tighten the locking screw.
6.2. Turn on the alarm and check its functionality:
6.2.1. If, when pressing the “E” button, the device emits a short sound and light signal, the alarm is operational and ready for operation.
6.2.2. E-121.3 Woodpecker M is ready to work as a metal detector if, when you press the “M” button and rotate the sensitivity dial towards increasing the range, a sound and light alarm starts to sound.
6.2.3. If the device does not give a light signal, this indicates that the battery needs to be replaced.
6.3 The procedure for searching for hidden wiring in the wall, or a wire through which current flows. You need to press the “E” button and hold it, bring the alarm to the wall. When wiring is detected, it is necessary to rotate the sensitivity dial in the direction of decreasing it. This will allow you to more accurately detect hidden wiring in the wall, since in the place where the wire runs, the electric field strength will reach its maximum value. In order to further increase accuracy, attach the end side of the alarm to the wall. It is necessary to determine the operation limits of the device. The middle between the alarm limits will be where the hidden wiring will lie.
To detect the neutral wire and live wires in a socket, and when connecting other electrical devices, it is necessary to use the end part of the alarm housing. It is necessary to set the sensitivity such that the alarm will be stronger at the point where the live wire is connected than at the point where the negative wire is connected. If you bring the alarm close to the wire, it may go off in metal detector mode.
Important! The depth of detection of hidden alarm wiring depends on the wall material. Detection also deteriorates if the walls are damp or the wiring is located in reinforced concrete structures. Detection of hidden wiring is impossible in a situation where a metal screen or casing is placed over the wire.
6. 4 Use of E-121.3 Woodpecker M to search for metal-containing objects.
To use the alarm as a metal detector, you need to press the “M” button on the surface of the device and, using the sensitivity regulator, set the range at which the signal level is minimal. To increase the search area, it is recommended to use the side of the alarm, and to localize the search location, use the end of the housing. To localize an object, it is necessary to determine the limits of the device’s response, the middle between the boundaries will be the place where the object is located.
Important! The sensitivity of E-121.3 Woodpecker M to non-ferrous metals is several times less.
In a separate article we will test the alarm and consider the difference between the Woodpecker and the Woodpecker M
"Woodpecker" - the most popular wiring finder
In Russia, one of the most popular devices for searching electrical wiring is considered to be the “Woodpecker” (officially, then E121). It makes it possible to determine the location of cables under plaster up to 8 cm thick.
Wiring finder "Woodpecker"
The technical features of the Woodpecker are as follows:
- operation from voltage up to 380 Volts;
- weight – 250 grams;
- possibility of contactless search;
- the ability to search for wiring, phase cables, broken electrical appliances and breaks;
- monitoring the operation of the meter and fuses;
- four sensitivity modes.
Let's take a closer look at these modes. Below is the distance from the device antenna to the wire for each of them:
The set with the Woodpecker device includes a case, batteries and a registration certificate.
Manufacturing a hidden electrical wiring detector
If for one reason or another it is impossible to purchase a finder, you can always make such a device yourself.
Stage one. First you need to select the body of the future device. For example, a plastic box from a fluorescent lamp may be suitable for this.
Stage two. Next, you should glue aluminum tape to one side of the case - this will be a kind of antenna.
Stage three. Then you need to install 5-volt batteries, then drill a small hole in the housing and insert an LED lamp there.
Stage four. Next, you need to install the BC-547 transistor, and connect the antenna and batteries to the tape.
Stage five. All that remains is to secure the cover and test the device. It will notify you that hidden electrical wiring has been detected by a lit lamp.
Note! If the wiring was laid in accordance with all requirements, then it will run vertically or horizontally.
Detecting a broken hidden wiring
If one of the hidden cables has been damaged, you can use one of two existing methods to find it.
Device for searching electrical wiring and break locations
Method one. First you need to find out which cable is damaged - neutral or phase. Here you will need an indicator screwdriver, with which you need to check all the contacts of the failed electrical point (switch or socket).
Detection of hidden wiring
In a switch that is turned off, only one of the contacts will be energized, but in a switch that is turned on, both contacts will be energized. Regarding the socket, there will only be one live contact in it in working condition. In a word, if there is definitely a phase, then you can be sure that the neutral wire has broken.
Note! If the wiring is damaged in some inaccessible place, then it is better to seek the help of specialists, since it is unlikely that you will be able to find the damaged area on your own.
Method two. If you have full access to all sections of the wiring, the problem area can be identified with an ordinary tester. Here is an approximate scheme of work.
- First, the electricity supply is turned off at the electrical panel.
- Then you need to make two notches on the wire insulation, exposing the metal - one near the outlet from the distribution box, the second two meters from the first.
- Next, using a tester, you should determine the resistance in this section of the wiring. If it is low, then there are definitely no cliffs there.
- The following sections of electrical wiring are checked in the same way until a section without low resistance is found.
Main characteristics of E121 hidden woodpecker wiring and its application
Renovating a country house can be a complex and demanding process, so you need to take advice from experts and use the appropriate equipment. Unforeseen obstacles may arise due to changes in the location of electrical wiring. It is to find it that you will need specialized devices that are capable of performing such complex functions. Modern developments never cease to constantly amaze, so such a device is regularly improved, and it would be optimal to use one of the latest models.
The purpose of the E121 hidden woodpecker wiring and the technology for performing the task
Any communication system in the home requires regular maintenance to ensure high-quality and long-term operation. To perform these tasks you need to use appropriate modern equipment. The special woodpecker hidden wiring detector e121 performs a number of functionalities for detecting electrical networks and wiring. Its main advantages are its small dimensions, as well as the absence of the need to operate from the mains. To implement a complete power supply scheme for a private home, this device performs a number of functions:
- Devices with a broken current grounding or grounding are identified;
- There is no need to remove the seal for servicing household meters to check phasing;
- Detailed detection of hidden wiring elements is performed;
- It is possible to find a phase wire on non-insulated and insulated parts of the network. There is no obligatory need for point touches;
- Live wires can be checked for serviceability;
- Checking the functionality of fuses and fuses.
Due to its unique characteristics, the device has the ability to emit sound and light signals when pressing buttons of any range, which is a property of complete self-control. The service life of the device is more than 10 years, which automatically classifies it into the category of affordable and economical equipment.
power supply diagram for a private house; power supply diagram for a private house
Criteria for implementing the power supply diagram for a private house from specialists
To implement this issue, existing norms and rules will be needed, which must be used without fail in order to ensure the required level of security. There is a slight difference between creating a power supply diagram for a private house and an apartment. In the first case, this is the so-called overhead line, and in multi-storey buildings the project is carried out depending on the location of the panel using a cable line. But in any case, you will need the woodpecker hidden wiring device E121, which today has no high-quality analogues. Key tips from professionals for high-quality completion of the task:
- You must first coordinate everything with the relevant power supply organizations;
- There are rules for installing electrical installations that you need to familiarize yourself with in detail and use in the future;
- The task must be carried out by a specialist with all the necessary knowledge on this topic;
- The technical conditions of the permissible load must be determined, which in the future must not be exceeded;
- Modern developments include taking into account the parallel design of computer cables for the Smart Home;
- It is better to place meters outside on the facade of the building, but in a place convenient for maintenance;
- The optimal degree of protection for the installation of the switchboard is IP65;
- Leaks are calculated using the above model detector.
You should not save on the power supply circuit of a private home, as this is a very important component in the safe provision of full human life. It should be recalled that the entire range of work should be performed only by a professional with modern equipment.
In practice, for the correct use of special devices, it is necessary to know their basic functionality, as well as technical characteristics. Many people do not even realize that such devices exist, so having the information provided is especially valuable. Thus, you can not only save money and time, but also eliminate the need for forced destruction of walls. To perform construction tasks efficiently, you need to try to follow new products and keep up with the times.