Any professional installer can handle the installation of electrical wiring indoors, but laying cables over the air almost always causes certain problems and difficulties.
There are two main methods that allow communications between buildings - by air and underground. In each case there are certain advantages and disadvantages.
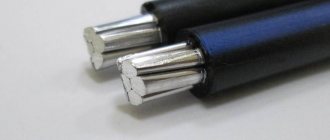
Installation of SIP wires over the air
Advantages of the method:
- less labor-intensive work;
- in comparison with underground communications, it is almost always possible to lay a cable over the air;
- shorter cable length.
Aerial cable laying is simpler and cheaper than underground
. Disadvantages:
- poor resistance to static electricity and lightning discharge;
- the need for high strength and resistance to severe weather conditions;
- the likelihood of timely failure, which may be due to friction against other objects or cracking due to moisture accumulation.
However, there are special recommendations for the selection of materials, installation and operation technologies that make it possible to eliminate all of the listed disadvantages.
Application area
Cable laying over the air is possible in electrical networks whose voltage does not exceed 1000 V, which complies with the rules of the PUE. Most of these procedures are performed to connect two buildings or a building to a power line, and the distance between objects should be small. This option is suitable in all cases where it is not possible to place power line supports or dig trenches, or customers want to save money, since installing underground wiring will never be feasible from a financial point of view.
Air laying is usually used when the distance between buildings is short
These technologies can be used to equip lighting systems indoors with high ceilings, which include production workshops and huge warehouses. Special cable braces allow you to organize high-quality street lighting.
Owners of country or private houses can avoid the labor-intensive work of digging trenches, since it is much more economical and easier to stretch the cable over the air from the main distribution board to many outbuildings, including a workshop, garage, summer kitchen or bathhouse.
Air supply of electricity to a private house
Thanks to the presence of the cable, it is possible to lay both three-core electrical wiring of low power and a cable with a large cross-section designed to power powerful equipment.
Methods for connecting wires to a support
To connect the SIP wire to current-carrying power lines on a support, several options are used, depending on the power line cable.
For insulated cable lines, special piercing clamps are most often used, which are available in a wide range for various sections and types of insulation. Some clamps can be used without removing the voltage from the line: in their design, the stripping head is made in insulation, which allows you to safely connect the self-supporting insulated insulated insulated wire to the power line. At the same time, the design of the piercing clamps does not allow them to be reused, so everything must be calculated correctly, without any room for error.
But for bare conductors, special clamps are used that have contacts with a smooth surface and do not have piercing elements.
When connecting a house to a power line, it is better to coordinate all actions with the energy supply organization. Such organizations may have their own requirements for connections and materials used.
Some “masters” lower the SIP along the pole and lay it underground to the house
But it is important to understand that the self-supporting SIP cable is not intended for such installation, since it does not have special protection from harmful influences and armor from mechanical damage, as a result of which it is intended only for laying in the air
Preparatory work
Any installation work begins with a preparatory stage, including calculations. First you need to calculate the required wire cross-section. This characteristic directly depends on the total power of the switched electrical devices. After this, you need to measure the distance from one connected object to the distribution panel. It is important to take into account the rises and turns of the cable line.
As soon as the previous calculations are completed, you can proceed to the selection of the cable. This element of the system must withstand the load of the installed cable on each section of the route. To avoid line breakage during external installation, to calculate the strength of the cable and other fasteners, take the weight of the cable multiplied by three. It is almost always enough to take a galvanized cable with a diameter of 4.5 or 6.7 mm. For the string method, steel or hot-rolled varnished wire with a thickness of at least 5 mm is suitable.
Laying the cable along the support cable
Selecting the diameter and material of the cable
Galvanized steel wire is suitable for supports located at a distance of no more than 6 m. Provided that the weight of the wiring is small, its diameter can be 2-3 mm. If the distance between supports is higher, especially more than 10 m, and a heavy cable is used, it is imperative to choose a galvanized cable with a diameter of about 6 mm. It is able to withstand cable loads with a cross-section of up to 10 square meters. mm. Large-sized products are rarely used in private homes, which is due to the lack of need for high power. The above cable can be used to install a heavy cable followed by fastening 5-6 street lights equipped with a lightweight housing.
To calculate the weight of the cable, wind it and use a regular scale. This value can be calculated based on the product brand indicated in the technical data sheet. There you will find the cable weight per 1 m length. It remains to multiply this value by the length of the cable route, as a result it will become known what load it will exert on the steel wire or cable.
Weight and other technical characteristics of the SIP-2 cable
In domestic conditions, a hidden wiring cable can be used. To protect the insulation, it is enough to hide it in a light weight corrugated pipe. The Internet and various reference books are full of tables that allow you to determine the weight of a cable based on its brand. There are also special calculators.
For high current loads, it is recommended to use products designed for air installation:
- AVT and ART brand cable with built-in support cable;
- АВРГ, АПВГ and АВВГ, attached to a steel cable.
Independently connecting your home with SIP wires to the line
You can connect the SIP to the house yourself, but you will have to entrust its connection to the line to electricians. However, in order to correctly install the cable, you need to familiarize yourself with the technical standards, which can be obtained from the relevant organization. Making such demands is justified by the safety of the entire line, and not just your home.
Basic Installation Requirements
To install a SIP cable from the line to your home, you need to know the basic requirements:
- the minimum height of the supply cable above the ground is 2.75 m;
- a similar distance must be maintained from windows, doors and loggias.
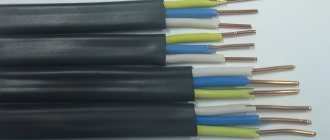
Typically, the consumer connection is made using a SIP 4 cable without a supporting core. The cross-section of such a wire is 16 mm2, which meets the requirements of the PUE. Conductors of a smaller cross-section may not withstand the load, so such cables are prohibited from being used for entry into the house.
Before you start pulling the cable into the house with your own hands, you need to draw an exact diagram of its passage from the pole to the building. This will help you take measurements to purchase the wire. Moreover, you need to buy SIP with a small margin, taking into account measurement errors
It is important to pay attention to the number of cable cores. If the connection is single-phase, it is enough to connect 2 wires to the house, that is, a phase and a zero. For a three-phase connection you will need 4 wires
For a three-phase connection you will need 4 wires
For a three-phase connection you will need 4 wires.
The house input will have to be connected to the main line. To do this, you will need to install a special connector on each core. It is best to connect SIPs with piercing clamps. They will eliminate the need for stripping cable ends and ensure a tight connection.
When laying an overhead connection line from the pole to the house with your own hands, you must take into account the PUE standards. The rules clearly state that the maximum distance from the consumer input to the support is 25 m, otherwise an intermediate pole will have to be installed.
Input connection options
You can extend SIP from the pole to the house by air or underground. The first method is easier. In addition, the cable is always under supervision and has free access for repairs. Underground installation is more difficult, however, it protects the wire from accidental breakage.
Which method is preferable is chosen by the owner of the house himself, and installation work is carried out as follows:
- For an aerial connection, the cable is secured with anchors to the facade of the building. For aesthetics, it can be laid inside a corrugation or plastic case. For your information, if the walls of the house are wooden, then the use of a box is mandatory.
- An underground connection involves digging a trench from the house to the pole at a depth of 800 mm. The wire is laid in a PVC pipe or corrugation. Only the ends of the pillar and the façade of the building come to the surface. The cable is fixed to the wall with anchors in the same way as for the air connection.
Further work involves introducing the wire into the building.
Which wire is better to introduce into the house?
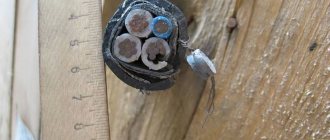
A dispute often arises that SIP is not suitable for entry into a building. Why? After all, it is isolated and also resistant to many negative factors. In fact, this is true, and it can be introduced inside the house. However, SIP is very rigid and does not bend well, which increases the complexity of installation. It is recommended to lay a cable with copper conductors inside the building, since this metal is the best conductor of electricity. Many electricians recommend making internal input using a VVGng cable.
To make an entrance to the house, a distribution panel is installed on the facade. A self-supporting insulated wire is connected to it, inside it is connected to automatic circuit breakers and an electric meter, and from them a copper cable is brought out into the house.
Connecting SIP on a support
The final work is to connect the entire input to the main line. When laying underground, the SIP coming out of the sleeve is lifted along the pole, securing it with clamps
It is important that the plastic sleeve extends out of the ground to a height of 2 m
For an air connection on the facade, the SIP is fixed with a clamp to the anchor bracket. A roller block is installed on the pole and the wire is pulled along it. The end of the SIP on the pole is secured with a clamp with a loop, placing it on the anchor bracket.
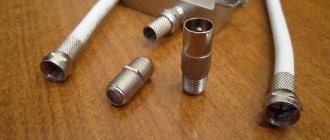
Connecting the SIP to the insulated main line is done with the same piercing clamps. If it is necessary to connect SIP with bare line wires, connecting aluminum sleeves are used. The ends of the main and SIP cores with the insulation removed are inserted inside, after which the sleeve is pressed. Bolted connectors for subscriber branches can also be used.
The first supply of electricity to the consumer is carried out in the presence of a representative of the energy company.
Fastening the cable to the cable: support and tension elements of the air wiring
There are several fasteners used for mounting on the walls of buildings and other objects to secure guy wires. The design of the future fastening depends on the material and overall dimensions of the cable.
Let's list a few varieties:
- Tension bolt, hook and anchor. This configuration is suitable for a flexible multi-core cable, which can be laid using rolled steel wire with a diameter of 6 mm.
- Several anchors for tensioning strings of small diameter are suitable for a light cable, the cross-section of which does not exceed 6 mm, and the distance between the switched objects is 10 m. In this case, the installation of lighting devices is unacceptable.
- Special cable and wire rod anchors can support heavy electrical wiring connecting objects at any distance with support spacing up to 12 m.
Installing a tension coupling for the support cable
There are also fasteners that allow you to connect two parallel lines. One is used to organize power supply, the other is used to install lighting fixtures. In the first case, a power cable with a cross-section of 10-35 square meters is installed. mm, in the second - lighting devices and distribution boxes containing copper wires 2.5-4 mm.
In the figure below you can see the variety of fasteners used for installing overhead wiring:
Methods for attaching aerial cable
Requirements for installation of end fastenings and installation features
It is highly not recommended to fix end/fasteners to the roof or decorative cladding of a building. If a cable is used that must withstand significant loads, then for fastening you should use steel plates installed on load-bearing walls and then tightened using through bolts.
Above pedestrian areas, cable lines should be laid at a height of no lower than 2.7 m, on roadways - 6 m. String anchors for light loads can be tightened with simple concrete screws.
The best option is to install tension anchors in the walls of the building during its construction, but in practice this approach is used extremely rarely. Therefore, in the future you have to create holes in the walls using a hammer drill. A metal plate equipped with a bolted contact for grounding is mounted below the end fastening. It usually drops by 20-30 cm. The plate is connected to a rolled wire for grounding by welding. Grounding can be done using a copper conductor with a cross section of 2.5 square meters. mm.
Fastening to a concrete wall with anchor bolts
Preliminary measures before installation
At the first stage, it is necessary to determine how much power will be consumed by electrical appliances in the structures that are planned to be provided with electricity. Based on the power consumption, the cross-section of the cable wires is calculated, its length and weight are taken into account. These parameters determine which fasteners to use, the diameter and material of the cable. To calculate power consumption and cable cross-section, a more detailed study of a separate topic is required. In simplified form it looks like this:
- The power of all electrical appliances that are supposed to be used in the calculated network is summed up. The power of each device is indicated in product passports or nameplates on the housing. The simplest example of a lighting lamp is always written 40 on them; 60; 75 or 100 or more watts.
∑Р = P1 + P2 +…Pn = 3.7 kW. (3700 W) – Total power.
- Determine the maximum possible current in the circuit
I = ∑Р/ U=3700 W/220 V = 16.8 A. – Maximum current.
U – network voltage.
- To determine the cross-section of wires in a cable, use the table
In our case, we choose a maximum current value slightly greater than 19A, taking into account that additional household appliances may be used in the future. According to the table, we obtain a power of 4.1 kW, which corresponds to a copper wire cross-section of 1.5 mm. You need to understand that the cross section is not the diameter, it is calculated using the formula:
Formula for calculating wire cross-section
Experienced electricians are well aware of the standards of cables and wires and determine the cross-section by eye. For ordinary consumers, there are tables for determining the cross-section by diameter ; it is enough to measure the diameter of the wire with a micrometer or caliper and determine its cross-section using the table.
Determining wire cross-section by diameter
- The next stage of preliminary work is measuring the length of the cable from the distribution board in the house to the switchgear (switchgear) on the building to which the cable structure is stretched. This can be done with a regular tape measure,
Tip #1. Be sure to take into account the cable reserve for cutting and connecting to the control panel; add approximately 30 cm at both ends.
Installation technology
After carrying out calculations and purchasing materials with the necessary technical parameters, they begin to install anchors and other fastening elements of electrical wiring. In most cases, they make do with steel plates, which are tightened with special pins. The rings necessary for fastening the cable are welded to them. Tension avoids sagging by evenly distributing the load along the wall.
One end of the cable is secured using loop clamps. Then screw couplings are attached to the second end in order, for example, to tension the cable between posts and bring it to the state of a string. A special bandage is used to tie the cable to the strings. For installation of cable wiring outdoors, ordinary plastic clamps, strips of galvanized iron or wire are suitable. The distance between the wire fastenings to the cable should not exceed 0.6-0.8 m.
Recommendation from practice
If you use a tying wire to secure the cable to the cable, be careful not to over-tighten it so as not to accidentally cut the insulation or strands. To eliminate such situations, you can place a strong gasket made of insulating material between the bandage and the cable.
At all attachment points, you must adhere to the same winding pattern - at least 7 turns of the bandage. If plastic clamps are used, make sure that their operating parameters comply: they must withstand low and high temperatures, otherwise they may dry out and fall apart.
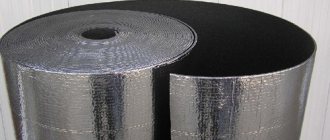
For additional line protection and cable insulation, it is recommended to use corrugated pipes. This will reduce the negative impact of bad weather conditions, reduce the financial costs of operation and subsequent possible restoration of the route.
Carrying wires through the air in a corrugated pipe
If it is not possible to collect the line from above, you can try to do it on the ground. You should attach the cable to the cable right there, and then pull it between the supports.
Features of laying cables in plastic pipes
Installation of electrical cables in low-density polyethylene pipes has several features that are worth paying attention to. First of all, in order to exclude unforeseen circumstances, it is recommended to prepare a drawing of the future route
It is advisable to fix the communication at certain intervals, which, depending on the specific case, can range from 60 to 80 cm. The structure is secured along its entire length with special staples or clips.
Pipes with cables inside should be securely fastened to all surfaces along which wiring runs.
In order to pull the power line through the pipe, special broaches are used, with which the pipe is equipped at the factory. If there is no broach, it can be replaced with ordinary metal wire.
Unlike a metal route, the elements of which are joined using threaded connecting elements, the joining of individual segments of a plastic pipeline is carried out using special soldering equipment. The electrical cable is connected using special couplings. In addition, if the communication is mounted vertically, it is recommended to slope it to eliminate the possibility of condensation accumulating in it. Compliance with the above rules will allow you to obtain a durable and reliable design.
Homemade sliding suspension
Construction stores sell a variety of hangers for cable wiring. However, with a small amount of work, you can do it on your own by creating a homemade fastener.
For this you will need:
- wire cutters;
- round nose pliers;
- galvanized steel wire (preferably more flexible);
- a rod whose diameter is higher than the given value of the cable being installed.
Using wire cutters, create several pieces of wire 25-30 cm long. Take the pliers and make an air loop in the middle of each of them. Its diameter should be equal to the size of the cable being laid, since the next step is to thread it through the “rings”.
Wrap the wire around the rod to create the components to secure the cable to the cable. First, wind one end, then the other end. The pitch of the resulting spiral should be about 20 mm. With these steps you will create a homemade cable hanger.
To lay the cable through the air, secure the cable, then place the hangers at intervals of 50-80 cm and thread the cable through them. After this, the free end of the cable is fixed to the second building.
The procedure for underground cable laying
In places that are marked with pegs and/or sand, a trench is dug. Its depth is from 80 to 90 cm, the second figure is preferable due to the layer of cushion sand. In addition, a large cable depth is synonymous with optimal temperature conditions for the operation of the electrical network. The width of the trench depends only on the number of cables: for one, 20-30 cm is enough, each subsequent one requires adding at least 10 cm to this value (this is the required distance between the conductors, 15 cm can be provided) and a separate armored hose.
- Conduct an inspection of the excavated hole. Remove stones, roots, and other sharp and hard objects that can damage the insulation. The bottom, cleared of dangerous debris, is leveled by eye, making sure that there are no sudden changes in height. Then the trench is compacted.
- A layer of sand is poured into it, its thickness is 10-15 cm. To protect the cables, quarry sand is sieved to ensure the absence of sharp objects. To remove depressions and humps, it is leveled and then compacted with feet.
- Protective cases (pipe sections) are put on the cable, which are transferred to places with increased load. Then they begin laying, making sure that the wire lies freely - in waves. If somewhere they forgot about the case, the mistake is corrected with an asbestos-cement pipe cut lengthwise into half-cylinders. The parts are connected with tape.
- The wire is checked visually for absence of damage to the sheath, and by ringing to eliminate possible breaks. The trench with the laid cable is filled with sifted sand. The thickness of the layer is the same 10-15 cm. The sections of cable protruding from the sand are pressed down with wooden pegs. After lightly compacting the sand (with your feet), add soil (about 10-15 cm). It is checked in the same way: all foreign, potentially dangerous objects are removed.
- A warning tape is laid on the layer of earth, then the trench is filled up above the ground level, since it will settle after some time. A replacement for the tape is a row (or two) of solid bricks, asbestos-cement slabs or other “warning” materials at hand. If there are several cables in one trench, several signal strips are used - 2, 3 or more. They must reliably protect the highway.
The final stage of work is testing the integrity of the power line with a megohmmeter (a tester with an ohmmeter), and then a test connection.
Is it possible to replace a cable with a rope?
In short, it’s impossible. The rope does not have the necessary properties and qualities, since when exposed to negative environmental factors, fabric products quickly fail. The rope is stretchable, easily frays and breaks. Due to low strength, sagging occurs, and a wire break will create an electrical and fire hazard.
Cable wiring installation technology
Theoretically, installing cables over the air is easier than organizing underground communications. However, in practice it involves meeting important requirements and performing work that only qualified and experienced electricians can do. The slightest mistakes can lead to a decrease in the safety of the cable line, so it is recommended to contact professional technicians for at least a consultation.