When hidden laying of cables in the wall is impossible, and this happens quite often, especially in old buildings, where a reinforced concrete Soviet wall may unexpectedly come across, in which it is in principle impossible to break through a groove, laying wiring in cable channels comes to the rescue.
In addition to the example given, under certain conditions, such problems accompany absolutely normal walls; under certain conditions, for example, immediately after repairs, an additional outlet was needed; it is expensive to break only a plastered and painted wall.
This solution is also used in offices when the issue of saving is relevant, as well as in rooms with high humidity (baths, swimming pools).
In damp rooms the situation is generally special. There, the need to use cable channels is dictated by the rules of the PUE (Rules for the Construction of Electrical Equipment). Therefore, in such specific buildings the need to use cable channels cannot be avoided.
In this article we will understand the intricacies of installation, preparation for it and doing the work yourself.
What is important to know
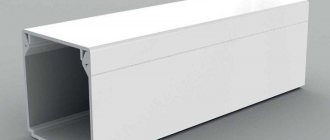
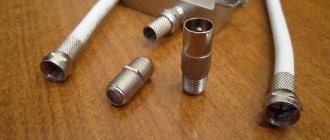
The key elements of the cable channel are the “U” section profile, the standard length from the manufacturer is 2 m. Also included is a lid (a strip of plastic) to cover the insides. Essentially the design is a long plastic box for storing wiring.
The structure is fixed to a plane (wall, floor, ceiling), cables (wires) are “laid” into it, when everything is laid, the channel is closed with a lid. The cover is a separate advantage of this design; it can be quickly removed, which allows you to repair the electrical network, change the wiring, or add new elements.
With a little effort, cable channels can fit into any interior, because in addition to the standard white solution, manufacturers produce many colors that allow you to choose the palette necessary for the interior.
Preparing for installation
When purchasing a cable channel directly, pay attention to the functionality of the lid lock; it could have been damaged during delivery to the store, and it should close easily, with a typical click, and prevent spontaneous opening.
Mounting methods
In order for the design on the wall to look organic and not be conspicuous, it is necessary to first level the wall; there are also flexible materials, but attached closely to a curved wall, they will only emphasize the curvature
The material from which the cable channel and walls are made determines the method of fastening. There are several mounting methods:
- Lightweight plastic products adhere perfectly to ordinary construction glue; you can also use liquid nails; theoretically, they can be glued to putty, but the weight of the wires may cause the structure to come off. This method is considered the simplest, but it is fraught with some difficulties: firstly, it takes away the “right to make mistakes”, because once you glue it, you can tear it off along with the wall, and damage to the box and wall cannot be avoided at all, and secondly, in this way impossible to attach to a wooden wall.
- It is better to attach to wood with classic self-tapping screws. When using self-tapping screws, the required step width is half a meter, the profile must be pre-drilled, and when attaching them to a brick wall, you will have to use dowel nails and a hammer drill with a “Pobedit” drill.
- There is an option with adhesive tape, either applied by the manufacturer, or, very inexpensive, double-sided tape, but this is only a temporary and therefore short-lived solution.
Mounting a cable channel on a brick or concrete wall: is it possible without drilling?
You can draw the route as you please. The main thing is that there are no situations for accidental damage to the electrical network, and also that the switches and sockets “attached” to it are convenient to use.
Expert opinion
It-Technology, Electrical power and electronics specialist
Ask questions to the “Specialist for modernization of energy generation systems”
Installation of electrical wiring in cable channels - All about sewerage The cable should be laid in a cable channel, the size of which allows you to freely place the entire set of required wires in it. Ask, I'm in touch!
Installation of a cable channel to the wall: selection of dimensions and material, methods of fixation
- When installing electrical wiring in an electric baseboard, the wire that is located lowest must be at least 1.5 cm from the floor covering. The insulation box can be installed as an electric baseboard if it has a protection degree of at least IK 07.
- If there is no plinth and you are going to install a box, then its lower part should be at least 10 cm from the floor covering (as shown on the left side of the picture).
- The insulation box must always be accessible so that, if necessary, the cover can be removed from it. Therefore, recessed installation of boxes in walls (there have been such cases) or covering them with any materials (wallpaper, fabrics, etc.) is always prohibited.
- It is prohibited to install all electrical ducts less than 10 cm from chimneys.
- All wires and cables must be located freely in the grooves of the electrical channels.
- Wires from multiple circuits may be placed in the same slot as long as all wires are insulated at the highest voltage level.
- Low-current lines should be laid in separate grooves.
- If electrical installations cut into electrical ducts, try to connect them to the base of the duct. This is done in order to subsequently avoid the electrical device falling out or being torn out from its installation location.
Installation Tips
So, so that you can install the cable channel correctly and at the same time quickly, we recommend that you familiarize yourself with the following installation nuances:
- First of all, carefully align the wall with the ceiling and prepare it for attaching the plastic box. The smoother the surface, the larger the pitch between fasteners can be. In addition, the absence of gaps will have a positive effect on the interior of the room.
- To connect the cable duct at corners (external, internal, the junction of a vertical route with a horizontal one), make special angles at 45 o. To do this, you can use a miter box, as shown in the photo.
- In addition to point 2 - in order not to bother with cutting out identical corners, use ready-made components from the manufacturer: internal and external plastic corners, T-shaped connectors, plugs, etc.
- The cable channel must be fastened evenly, both vertically and horizontally. To attach the box horizontally and level, use a building level. To level the route vertically, it is best to use a plumb line.
- Before installing a cable channel on the wall with your own hands, you need to mark these walls. There are certain standards on this issue, which we discussed in detail in the article - how to install open electrical wiring.
- If you need to mount a plastic electrical box on a plasterboard or wooden wall, do not drill holes in the surface in advance. The self-tapping screws will fit into the wall well without this. As you understand, this option for attaching the cable box will not work with concrete and brick.
- If possible, start laying the cable duct from a corner, so that later it will be easier to join sections and trim them if necessary.
- There is not much difference in when you decide to install the cable duct - before or after the decorative finishing of the walls. We recommend laying the product last, because... Installing a cable channel on wallpaper is much easier to do than gluing wallpaper, cutting it due to the already laid route.
- If you decide to place plastic wire protection on the ceiling, do not forget to prepare the ceiling surface in the same way as the walls. The cable channel is attached to the ceiling in the same way as on the walls.
That's all you need to know about how to attach a cable channel to a wall with your own hands. We hope that the provided detailed description with photos and video examples was useful for you!
Also read:
Installation of open electrical wiring
Open electrical wiring involves laying wires along the surface of walls and ceilings. Let us immediately note that we are not talking about disfiguring the room by hanging cables along the walls. Today there are some methods that make it possible, if possible, to disguise the very fact of the presence of cables, and their installation in
Laying cables throughout the premises can be done in most cases in two ways.
The cable cross-section is selected based on the power of the consumers. It is worth taking into account the following rules for selecting cross-sections of copper conductors:
Cable cross-sections depending on power are given in the table; more detailed information on the selection of cable cross-sections and brands can be found in reference and regulatory literature.
Installation of cable channels for open wiring
The main method of installing open electrical wiring remains laying cables in cable channels.
Cable ducts can be glued to certain types of wall surfaces (paint, panels, etc.). This is the fastest installation method, but it is not always suitable and is not very reliable. Only small channels designed for 2 to 3 wires are suitable for stickers. More massive channels can only be mounted using dowels or screws.
Interior doors and partitions remain difficult places to install open wiring. To pass cables through, it is necessary to drill a hole in the interior partition into which to insert a plastic tube of the required diameter. Cables are then laid in this tube.
Laying cables in baseboards has the disadvantage that usually the volume of the cable channel in baseboards is not large and only 3 medium-diameter wires can be placed in it. But in most cases this is quite enough. Otherwise, laying electrical wiring in the baseboards is quite convenient, and the apartment is less cluttered with various structures, maintaining its original design.
What kind of lighting do you prefer?
Built-in Chandelier
Electrical wiring can be hidden or open. Methods of installing electrical wiring completely depend on the type of its placement.
How to cut plastic boxes quickly and accurately
Those who work professionally as electricians have more than once encountered the problem of cutting corners on plastic boxes in the absence of fittings (in 99% of cases there is none and there never will be).
Of the adequate methods (safe and relatively neat) for cutting boxes, I can highlight 3:
1. An ordinary miter box and a hacksaw
2. Miter saw
Summer is ahead, which means summer houses and wiring in boxes. To increase the speed and quality of the cut, I chose from these 3 options.
1. Poor accuracy, quality of cut, since the distance where the hacksaw is inserted is 3-4 times greater than the thickness of the blade, the blade itself moves, which results in 87 or 94 degrees and then is difficult to adjust accurately. It is also difficult to hold the box itself when cutting, especially if it is 5-10 cm in length.
2. Suitable only for thick and hard boxes, thin ones will simply fly apart at the cutting site, there are no saw blades for it (at least I haven’t found any).
3. Size restrictions for the box, up to 150mm, but it doesn’t happen much more, mostly up to 100mm
Especially for those who can even cut a box with nail scissors:
I’m talking about an option that is fast, convenient and reliable; the price of the device does not matter. I believe that it’s easier for you to use wire cutters or a grinder, but these options are collective farm.
I used the first option all previous years, I was simply tired of it due to its inconvenience and crookedness. The second option is not suitable for small and thin-walled boxes. Stopped at 3rd.
There are different manufacturers of similar saws, but the price tag is approximately the same for all, around 2-3 thousand. If you work on installation, or just do wiring for yourself in your dacha/apartment, you will recoup the cost of the saw at least by spending your time.
Specifically, I bought my saw for 1800 in a yellow store from St. Petersburg.
It is delivered unassembled in a cardboard box, in this case the manufacturer is kwb, but I repeat: almost all of them, from any manufacturer, are the same in design and appearance. Surprisingly, everything is very neatly laid out and preserved from rust.
Assembled. The stops for securing the workpiece are very flimsy and not very comfortable (Left). Everything comes together quickly, literally 6 bolts, which is surprising, a hexagon for assembly was included in the kit. Instructions are also included.
The essence of the main saw is that the blade does not move freely, and the warping of the blade is firmly held on the scale with degrees, preventing it from going astray. A smooth cut allows you to cut very thin and flimsy boxes (those who have cut them will understand what I mean), the saw does not get stuck. After cutting through to the 0th point, there is space left under the canvas, not like a simple miter box, allowing the canvas to avoid cutting into the body of the miter box. On the base there is a ruler up to 20 cm. For the test, I took the smallest and flimsiest 16x16 box and cut different angles on it from 45 to 90
The quality of the cut and finish is immediately visible. Of course, the burrs remain, but trimming them is a matter of seconds, the main thing is that the degree is correct and the length is appropriate. And most importantly, this cut takes literally seconds!
Use cool solutions to simplify your work, thank you all for your attention!
Happy holiday of great victory!
Mounting methods
Despite all the versatility of cable boxes, you will need to perform the correct installation of the elements. There are various options for this. The choice of a specific one depends on the type of surface on which you plan to install the box. The following are common options for attaching cable ducts.
Self-tapping screws
Dowel-nails
"Bedbugs"
The use of “bugs” is the best option for fastening cable ducts to an aluminum profile or metal surface with a thickness of no more than 2 mm. “Bedbugs” are metal screws that are equipped with a press washer. Screwing them in does not require preliminary preparation of the surface, but it is better to use a screwdriver.
Liquid Nails
How to attach a cable channel: nuances of installation and laying of the box
This type of product in private homes is used mainly for laying wiring in combustible walls - during the construction of frame or panel houses. Trays are placed inside the wall and ceiling, cables are pulled into them, and in the right places they are led out through the wall or ceiling cladding.
Expert opinion
It-Technology, Electrical power and electronics specialist
Ask questions to the “Specialist for modernization of energy generation systems”
Cable channels: types, sizes, colors, installation Legrand Legrand has two mini series with sizes 20 12.5 mm, 32 12.5 mm, 40 12.5 mm, 32 16 mm, 40 16 mm, 60 60 mm, 60 20 mm, 75 20 mm. Ask, I'm in touch!
Cable channel. Types and application. Installation methods
A cable channel is a special box used to create protection for various types of wiring. The box is made in the form of a profile made of aluminum or plastic. If you are going to conduct open electrical wiring, then the best way to hide it is in plastic boxes.
Electrical wiring should not spoil the appearance or stand out. All installation work is done during renovation or construction. There are many types of cable channels that make it possible to install wires in any place with different conditions.
The mini-channels and boxes produced make it possible to install wiring systems of various configurations. Different standard sizes and colors create high aesthetics for any type of premises. All accessories for a systematic approach to creating electrical connections are available for sale.
Standard sizes of cable channels
Types and properties
There are different forms of cable channels available for sale in building materials:
- For outdoor use.
- Flexible.
- For baseboards.
- Stairs.
- Trunk.
- For mini cables.
- Transparent.
- Parapet.
- Angular.
With perforation.
Products are made of steel, plastic, aluminum:
- The most popular has become a plastic box , which has the best properties. These types have become widespread in street installations. Floor cable ducts are used indoors . Their special design makes it possible to install wiring in difficult places. The oval shape prevents wires from damage and has a pleasant appearance. — In the private sector and apartments, baseboard options are used, the advantage of which is their curly shape, suitable for any interior. — The parapet type of wire channels has proven itself in offices for protecting cables from various equipment; it has geometric shapes.
- Aluminum is famous for its fire-fighting properties. They are used in industrial production because they are moisture resistant and durable.
- Steel products are painted in various colors. The galvanized cable channel is coated with a special layer that prevents corrosion. The service life of steel channels is longer than other types. The base of the channel is perforated, which makes installation quite simple.
According to the color scheme, the plastic cable duct is produced:
- White.
- Light.
- Under the tree.
- Colored. The most popular cable channels are made of PVC wood and white. They are most often used for offices.
In order to carry out high-quality installation of electrical wiring, you need to have a certain range of auxiliary accessories, which are available in sufficient quantities today:
- Plugs.
- Angles for connections.
- L-shaped corners.
- T-shaped corners.
- Inner corners.
- External corners. Today, many firms and companies are engaged in the sale of wiring protection boxes.
The main advantages of cable channels are the double lock. It provides structural strength, elasticity, and flexibility. The plastic material allows installation of power cables up to 1000 volts and is self-extinguishing.
The mini-channels are made in a special shape with rounded corners and a special cover fastening, creating the appearance of structural integrity and covering the appearance of seams. This provides an aesthetically pleasing look for offices. The channel cover completely covers the base; no cleaning is required after installation. High-quality cable boxes are certified by Rostest, designed for outdoor and indoor installation, protected from moisture and dust.
When choosing channels, the main criterion is the size of the wire cross-section. A small 10x15 mm model is suitable for an Internet cable; it easily fits into the interior of the apartment and has the following advantages:
- The material used is environmentally friendly.
- Aesthetic form.
- Curved look. There are standardized devices for fastening channels on the sales market, which have different parameters. Installation of boxes is carried out in two ways.
The first method is to mount it with latches. They provide quick installation of the cable channel. The second method is to fasten the box with self-tapping screws. Couplings are used to lengthen channels. They are sold in strips of two meters.
Preparation for installation
Before attaching the box, you need to carefully plan the marking of the cable path, taking into account all the features, turns, and descents of the lines. With proper marking, you can choose the correct size and type of channel for the cable, and purchase the necessary accessories for installation.
Fasteners for installation are selected according to the material of the mounting surface. Most often, the cable is laid on the following surfaces:
- Wooden walls, piers.
- Plasterboard surfaces.
- Brick partitions.
- Concrete walls and ceilings.
- Metal walls. For wood surfaces, self-tapping screws have become a more suitable option. Dowel-nails with a diameter of 6 to 8 mm are suitable for concrete. The same fastenings are suitable for brick walls as for concrete.
To fix the wire channel to the drywall, use ordinary wood screws. If the cables are heavy, then it is better to use “butterfly” or “screw-in” dowels.
To attach the box to metal materials, you need to determine the thickness of the wall. Using metal self-tapping screws, you can attach the box to a wall made of metal up to 2 mm thick. Such self-tapping screws are often used under the name “bugs”.
Installation methods
More often, the cable channel for the wire is fixed to the wall with self-tapping screws. There are other ways: using double-sided tape, liquid nails.
The length of the box blank is measured with a tape measure, or applied to the wall, marked with a pencil. To ensure a high-quality joint, the channel is carefully cut with a knife, scissors, or a hacksaw. The material of the boxes does not fade, does not turn yellow, and is resistant to aging. Plastic is used with self-extinguishing property. This prevents a fire from occurring.
The cable duct is made immediately with holes. There is no need to drill them during installation, this saves time. Using these holes you can level the channel. The profile is attached to the wall in the classical way, or with a special tool using dowels. When making a joint, connecting accessories cover the joint and are glued to the joint.
The procedure for installing the cable channel:
- Unpacking.
- Marking the wall.
- Cutting the workpiece.
- Remove the cover.
- Place the box in place.
- Level.
- Make holes for fastening with dowels.
- Secure the box.
- Place the wires in the channel.
- Close the lid.
At the initial stage of repair, cables are always laid: television, twisted pair for the Internet, telephone cables, power cables, electrical. In plasterboard partitions and sheathing, the cable is laid under the hollow wall structure in a corrugated pipe. After laying the cable, it is advisable to write down where the cable runs and the distance from the ceiling to the cable. It happens that the cable runs at an angle. Although, according to the rules, cables must be laid strictly vertically or horizontally.
Installation stages
Installation of wire routes consists of a set of measures. They require a responsible approach. In addition to installation, a number of preparatory tasks should be completed. Next, we will dwell in detail on each of the stages.
Wiring diagram
First, a diagram of the electrical wiring in the room is made. You can create it yourself if you have an understanding of electricity. Otherwise, you will need to use the help of specialists.
Drawing of cable channel passage
The next step will be to make a drawing of the cable trays, taking into account the location of all junction boxes, switches and sockets. To do this, it is better to use a program with the ability to display three-dimensional images.
Purchasing an electrical box with accessories
Next you need to calculate the required number of accessories. They are necessary for the aesthetic appearance of butt joints. To avoid further problems with installation, you should purchase accessories and cable routes of the same brand.
Marking the cable channel route
According to the previously prepared drawing, the markings for laying electrical trays are transferred to the walls. To maintain horizontal and vertical lines, use a plumb line and level. If you have a laser level, just use it.
Preparing the cable channel for installation
At this stage, you will need to prepare the appropriate lengths of cable channels. It is recommended to cut as the boxes are installed. It is also necessary to keep in mind that mini cable routes are not equipped with longitudinal connecting accessories. To get a beautiful connection you need:
- Use two boxes, one of them mounted in one piece.
- Cut the second one to the required length along with the protective cover.
- First, the cut-off lid is installed on the solid box, and then the undamaged lid is snapped on.
Fixing the cable channel along the marked route
Fastening the electrical tray to the wall can be done with liquid nails, wood or metal screws, or dowel nails. It is recommended to screw in the fasteners in a staggered pattern. When using liquid nails, glue should be applied to the back of the box in a zigzag pattern.
Laying and securing cables in the channel
When laying wires in a cable channel, you will need to adhere to the following rules:
- Power cables must be placed without twisting each other.
- Telephone, computer and television cable lines must be laid separately from power electrical wiring.
- The wires laid in the box are secured with spacers and clamps.
Installation of electrical elements
All that remains is to connect the switches and sockets, securing the devices in the prepared places.
Closing the lid
Snap the protective covers along the entire length of the mounted cable route.
Preparation for installation
Necessary tools and equipment
To install the cable channel, the following tools are required:
The fastening of the channels depends on the surface. For wood, self-tapping screws are used; for stone or concrete surfaces, the channels are attached to dowel-nails. Liquid nails are used to attach the cable duct to smooth tiles or metal.
Before starting installation of the cable channel, it is necessary to perform calculations.
- First, decide on the material and type of channels. Create a plan of your room, which will indicate the necessary types of ducts for all rooms. In the plan, show the route of each cable, the location of additional accessories in the form of connectors or bends. All this should be recorded in footage. Consider outlets and switches in your plan. Also, when drawing up a plan, keep in mind that the main canal should be thicker than the adjacent canals.
- The cable channel can be placed at any wall level. The location of the channel depends on the interior of the room. If you plan to attach the channels with glue, make sure the walls are level in advance. Adhesive fastening can only be used for small channel models containing no more than 3 wires.
- Before starting work on installing cable ducts, prepare fasteners suitable for your surface. For a concrete wall, use dowels; for a wooden wall, use regular metal screws. For gypsum board, butterfly dowels are most often used.
- After preparing the fastening materials and necessary tools, the last preparatory step will be marking the wall. Mark the straight lines of the future channel with a pencil. Use a level to get straight lines.
- Another important preparatory step is to determine the location of the base, as well as an idea of which wires will go into the cable duct. The cables must be freely located inside the channel. A large number of wires can cause them to overheat.
- If the walls are uneven, the base may become bent and the lid may be difficult to snap into place. When installing the system after finishing work, do not stain the channels.
- If you do not have the opportunity to purchase fasteners, you can purchase special channels in the store with adhesive tape attached to the base. These fasteners are considered temporary, as they are not capable of performing their function for a long time. You need to cut such channels with the lid latched.
What to attach it to?
During the installation process for electrical wiring into a cable channel, it may be necessary to make corner joints in the corner of the room or between the horizontal and vertical parts of the channel on the wall. In order to make a joint in the corner of the room, the end of the cable channel should be cut on the side that will be adjacent to the corner, at an angle of 45 degrees. Start installation from a corner.
To create a junction between the horizontal and vertical parts, the cable channel should be cut at an angle of 45 degrees, but in a different plane. You can do it differently - cut the lid to the full width of the box. Small defects can always be covered with sealant.
To make a cable channel for an outlet, you need to attach socket boxes to the wall near it. Connect the wires to the outlet after the wires are laid in the box. Next, place the socket cover on top.
The plinth can be in the middle with a cable channel or even consist of a profile that is attached to the wall and a plug, and in the second case the cable channel will be located between the plug and the profile.
Regardless of the type of structure, such a plinth can be installed in several ways:
To install a plinth on an outer corner, you need to press it against the wall and make a mark at a distance of 0.3 cm from the corner, and then saw off the profile and plug from this mark (for this it is most convenient to use a hacksaw for wood/metal and a miter box) and install it on the wall. After this, place a special corner on the corner, which can be with brackets or simply inserted.
To attach the cable channel to the floor, you should install a threshold with a box in the gap between the floor covering of two different rooms. Like the baseboard, it will have a base and a cover. Depending on the model, the base can be installed using self-tapping screws or there are self-adhesive bases.
When a channel cable is damaged or during renovation work in an apartment, it sometimes needs to be dismantled. To do this you will need:
Once you remove the cable, it can be reused. So, you can install a cable channel yourself and even without professional training.
Expert opinion
It-Technology, Electrical power and electronics specialist
Ask questions to the “Specialist for modernization of energy generation systems”
How to attach a cable channel: nuances of installation and laying of the box To organize open-type electrical wiring, they now produce a wide range of products of different shapes, dimensions and colors. Ask, I'm in touch!
Laying electrical wiring in a box (cable channel)
Electrical wiring is installed in a box when its aesthetic appearance is important and easy access for maintenance is required. Laying electrical wiring in a box is widely used when it is necessary to carry out additional electrical communications without resorting to repairs.
Tools and materials
- construction knife
- scissors
- hacksaw for metal
- screwdriver
- pencil
- cable channel
- fasteners for cable duct
- We fix the cable channel on the wall according to the markings made with a construction pencil.
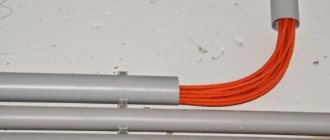
We lay the cable channel so that the joints look neat. To cut it and put the joints in order, you should use a hacksaw, a construction knife and scissors.
We put the wire in the box.
As you lay the wire, install the box cover. It is rare when it is possible to first lay the entire wire and then cover everything with covers.
Snap the lid of the box, pressing it against the box until a characteristic click appears.
Methods for laying cable ducts
We cut pieces of the cable channel with a fine-toothed hacksaw, using a miter box to ensure an even cut. For better rigidity of the cable channel, when applying the cover (after laying the cable), it is advisable to cover the junction with the cut fragment with the whole cover, and attach a piece of the cover to the remaining intact section.
A 90° rotation is carried out by cutting the ends of the cable channel at 45° (using a miter box) or as shown in the photo: on one piece we remove the wall closest to the joint (to the width of the base), and on the other we cut off part of the base of the near wall (leaving one far wall).
When connecting cable channels in the inner corner, we proceed in a similar way: either cut both ends at 45°, or remove both walls at one end to the width of the cable channel, leaving the base, or, as shown in the photo, remove the top wall at one end by the same width, and on the other - the lower one.
After the ends of the cable channels are secured, we slide the covers onto them (into the corner).
When connecting the cable channel at the outer corner, we do the opposite: we cut off the base at one of the ends, leaving the walls - they will hold the lid. Remove the walls from one of the joined parts of the lids.
Options for mounting the electrical box
The method of fastening electrical boxes is determined by the material from which the walls are made. Those wishing to independently install a plastic cable channel can:
- it is commonplace to glue the base to a wooden, wallpapered, painted wall, to a partition made of moisture-resistant plasterboard or lined with plywood, or any board made from pressed wood waste;
- screw with galvanized screws to a wooden surface;
- fix the base on a concrete or brick wall using dowel nails;
- combine the adhesive method with self-tapping screws.
Boxes with adhesive tape placed on the base in the factory are available for sale, but they are preferred to be used for organizing temporary wiring due to doubts about reliability.
The boxes must be cut together with the lids snapped on them. When constructing a route from several segments, you must try to ensure that the junctions of the two bases do not coincide with the junctions of the lids. Simply put, swap the lids: first cover the long section with the short lid, then the long one, and vice versa.
Specifics of gluing cable channel
Gluing is as easy as shelling pears, but you need to take into account that you need to completely forget about dismantling the glued box. You can’t just tear it off, only together with a piece of the wall or its decoration. True, installation will require a minimum of effort and time; the only consumables are glue, for example, “liquid nails.”
- We apply the adhesive composition in a kind of zigzag with a step between the “tops” equal to approximately 1.5 times the width of the box;
- We apply the base treated with glue to the wall, but do not fix it on it, but remove it to the side;
- wait until the remaining adhesive trace on the wall thickens;
- install the channel in place and press firmly;
- again we wait for the glue to harden.
For your own peace of mind and increased reliability, you can supplement the adhesive fastening with nails driven along the central axis of the box in increments of 50-60 cm.
Only after hardening will it be possible to begin laying the cable, which for convenience needs to be fixed in the channel. For permanent fixation, special plastic holders are useful. Thrifty craftsmen can use available devices: pieces of the cover or the cable channel itself. Temporary fixtures will undoubtedly need to be removed before attaching the cover.
Advice. It is more convenient to lay the cable in the constructed system, alternating with snapping the cover. Installed part of the wiring in the channel, then clicked it, etc.
The nuances of using self-tapping screws
We apply the section of channel cable prepared for installation to the wall and screw the screws through the formed holes.
How to choose a cable channel
The cable channel allows you to quickly troubleshoot hidden electrical wiring. You don't have to drill into the walls to do this. Installation of electrical trays can be completed in the shortest period of time. This will require minimal costs.
Expert opinion
It-Technology, Electrical power and electronics specialist
Ask questions to the “Specialist for modernization of energy generation systems”
Marking the cable channel route To fix it on a concrete or brick wall, you will need a hammer drill, a drill with a Pobedit tip with a diameter of 6 mm and dowel nails. Ask, I'm in touch!
Installation features
When installing, cable channels are located horizontally or vertically. Sloping areas are only allowed on stairs or attic floors. At the branch points, junction boxes are placed in which all connections occur.
Only vertical and horizontal
Fixation methods
There are two ways to install cable channels: with dowels/screws and with glue/adhesive double-sided tape. The first method is universal. Suitable for all types of bases. Only the types of dowels need to be selected (plasterboard and foam blocks have their own fasteners). When choosing fasteners, look for dowels or self-tapping screws with large diameter heads so as not to tear the plastic. If you don't find any, you can use washers.
The amount of fasteners for a 2-meter-long tray (standard length) depends on how smooth the wall is. If it is perfectly aligned, 3 fastenings are enough - at the beginning, at the end and in the middle. If the wall is curved, more fasteners are needed so that the tray fits tightly to the wall and does not “bulge.” If there are a lot of cables or very curved walls, installation every 20 cm may be necessary.
To prevent cable ducts from bursting when installing cable ducts on screws or dowels, first drill holes in them with a diameter slightly smaller than the diameter of the fastener. Then the tray is applied to the wall, and the holes are marked with a marker/pencil/felt-tip pen. Remove the cable channel, drill holes, and install plastic plugs. Then apply the tray and secure it with dowel nails).
When tightening fasteners, be careful not to damage the plastic
In some cases, you don’t want to drill into the surface. Then you can use glue or adhesive tape. The glue must be used with quick initial fixation. The tray does not weigh very much, but if the fixation force is insufficient, it will “crawl” down. To prevent this from happening, you can install spacers in the opposite wall (if distances allow) or secure the box with pieces of adhesive tape.
Floor adhesive tape requires a smooth, dust-free base. It is better to take it on a foam basis. In this case, the requirements for the “smoothness” of the wall are reduced. Due to the foam base, small pits/protrusions are smoothed out.
How and what to cut
If you need to cut a piece of cable channel of a certain length, first put on the cover and align the edges. Then, using a felt-tip pen, a mark is made on the tray and on the lid. After this, you can cut the cable channel separately: the tray and the cover. In this case, their length will be the same.
To achieve an exact match in the places of cuts, you can use a carpenter's miter box. Even better is to find a special saw for plastic. In this case, the cut will be neat and, after a little sanding of the edge, everything will match perfectly.
How to cut plastic straight
It is better to cut cable trays with a fine-tooth metal saw. The edge turns out smooth. If necessary, it can be sanded with fine-grain sandpaper. You can also use metal scissors, but then there is a high probability that the edges will wrinkle and/or lose their ideal geometry.
Additional electrical wiring in cable duct
- if the task is to install an additional switch or socket, it is enough to purchase an overhead version of this electrical installation product and buy one mini-channel for it;
- if the electrification of the bathhouse will be done from scratch, it makes sense to buy partially or completely a set of channels with accessories: corner and T-shaped adjustable elements, plugs, devices for installing sockets, distribution boxes, switches, etc.;
- If you plan to set up a simple circuit yourself with cable routing in inexpensive plastic boxes, you need to first draw up a diagram, calculate the footage of the channels and stock up on accessories of the same brand.
Tips for installing corners and joints of cable channels
When using special accessories, the places where plastic CC passes through the external and internal corners of the walls or floor are closed, respectively, with external and internal corners, aesthetically fitting into the interior of the room. The joints of the KK boxes can be trimmed with slight deviations from right angles and straightness of the cut if connectors are used that hide the joints of the sections.
In the absence of factory-made elements, corner transitions can be made as follows:
- To pass the internal corner you need:
- in the place where the KK route bends, make cuts along the sides of the box with a cutting depth to the level of the plastic base;
- bend the box at the desired internal angle;
- install the box at the transition site and attach it to the wall using one of the previously described methods (depending on the wall material);
- close the box with pieces of lids.
- To install the CC on the outer corner, the box is cut and fixed in the same way as the work for the inner corner. However, cuts are made on the lid at an angle of 450 with the center of the angle on the bend line.
The use of cable channels when arranging home and workshop electrical wiring greatly simplifies the design and installation of cable networks, speeds up installation work and allows the full reuse of wires and cables after dismantling the wiring.
CC with cable wiring
Types and sizes
Types of cable channels differ from each other mainly in shape, only some use special materials - for example, transparent plastic or aluminum and its alloys.
Skirting cable channels
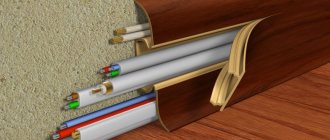
If you want to covertly lay cables without having to dig into the walls, take a closer look at plinth cable channels. These are a kind of plastic plinths, in the internal cavities of which wires are laid. They are available in different colors and will suit different decor styles.
Manufacturers of entire systems of plinth cable channels, in addition to long trays, produce a number of additional devices that allow the construction of any shape. These are external and internal corners, bends of various shapes, plugs, mounting and multi-module boxes on which switches and sockets can be installed.
There is also an option to install sockets directly at the baseboard level. For older people, this option is not the best, and for young people, low slopes are not a problem. But it doesn't attract as much attention.
This type of cable channels is available in different color variations - from white, gray and black to colors that imitate wood and metal surfaces. The disadvantage is the rather high price, although it cannot be compared with the payment for wall gating.
Available sizes of SL Hager products are 20*50 mm, 20*70 mm, 15*100 mm, 25*100 mm. The Legrand company has two series: mini with dimensions - 20*12.5 mm, 32*12.5 mm, 40*12.5 mm, 32*16 mm, 40*16 mm, 60*60 mm, 60 *20 mm, 75*20 mm. The second series - DPL has the following dimensions: 35*80 mm, 35*105 mm, 50*80 mm, 50*105 mm, 50*150 mm, 65*150 mm.
Another video about another system of baseboard cable channels.
Floor-standing
This type of cable ducts also differs in shape and installation method. It is installed on the floor, so on one side it has a rounded shape, so it does not interfere with movement. Available in impact-resistant plastic or aluminum. The shape is the same.
Floor cable trays are used as part of a system - when you need to route wiring to a table or lighting fixture that is located far from the walls. It successfully replaces carriers and extension cords.
The color scheme is not very diverse: usually there are gray, white and black. The joints of two strips, corners and turns can be designed using shaped products of a suitable size. First, the lower part is mounted, the conductors are laid, after which the cover is snapped on.
Rules for installing floor cable channels from Legrand
Then accessories are installed in the right places - corners, joints. They are made in such a way that they simply snap into place, providing a secure fit. At the same time, the degree of protection is even maintained (usually IP40).
Parapet
Parapet cable channels (also called main cable channels) are similar in structure to plinth ones. They differ slightly in shape, but mainly in that they are mounted above floor level. They also consist of various elements that allow you to assemble any configuration.
Expert opinion
It-Technology, Electrical power and electronics specialist
Ask questions to the “Specialist for modernization of energy generation systems”
Dowel-nails In this case, it is possible to avoid work on making corners of a certain degree and it is easier to lay wires, ensuring their protection from mechanical damage, and in some cases, correcting uneven corners. Ask, I'm in touch!
Scope of application of the cable channel
Why do you need a cable channel?
Cable channels are used to disguise electrical wires. They are usually used after repairs are completed. In addition to their camouflage effect, the channels provide free access to electrical networks. Cable ducts are mainly made of self-extinguishing PVC and are designed for a long service life. The channel is an oblong rectangular limiter with a lid with latches. The wires are placed in this limiter and closed at the top. The rigid design allows the channels to be mounted on any surface. The wires are protected from dust and dirt thanks to the cover. All cable channels do not conduct electricity, they are durable, flexible and resistant to chemical environmental influences. The scope of application of the cable channel is wide. Depending on the task, different types of cable channels are used. The following channels are distinguished by purpose:
- Modular cable channel
. The design has a large cross-section and is designed for sockets. - Trunk cable channel
. The design is also made in a large cross-section, as it is intended for laying wires over long distances. - Electrical cable channel
. Has a small cross-section for routing a small number of wires. - Floor cable channel
. This type is designed for running wires along the floor. - Plinth cable channel
. To carry wires along the junction of the wall and the floor, a plinth type cable channel is used. Outwardly it looks like a plinth and hides all the wires perfectly.
In addition to the area of application, cable channels are distinguished by the materials manufactured:
- Metal cable channel
. This channel is suitable for both internal and external work. It differs from others in its wide color spectrum, which makes it possible to choose a color to suit any interior. The metal channels are galvanized, thereby protecting them from corrosive processes. - Plastic cable channel
. It is distinguished by its low cost, which is why it is in demand among most electricians. The plastic channel is flexible and durable. Also available in a variety of colors, most commonly found in white.
Pros and cons of cable channel
Among the advantages of the cable channel
One can note its dielectric capacity, fire resistance, strength and flexibility.
The channels are made from chemically resistant PVC components. Provides mobility to electrical networks. The low cost of components and installation organization are also advantages. Also, the advantages include easy access to the cable, providing additional protection to the electrical conductor. One of the disadvantages of the cable channel
is the need for additional space for the channel. For example, when placing wires behind a chest of drawers, it will not be possible to place the chest of drawers close to the wall. Also, the cable channel is not suitable for every type of interior.
Installation rules
How to choose a size
If you decide to route wires into cable channels, first you need to decide what size they are needed. Dimensions are selected based on the number and size of conductors that will need to be laid and some reserve added for the future - so that if necessary, one or two more wires can be laid.
When choosing a size, you need to take into account the number of cables that will need to be laid
The number of conductors in a cable channel is not standardized. The main thing is to be able to close the lid without problems. A limitation may be the need for separate placement of power and low-current cables. In this case, select the cross-section so that there is at least a small distance between the groups of cables.
Features of open wiring in a box
Open wiring using electrical boxes is attractive due to the ease of installation, repair and simplicity of carrying out an ongoing inspection of the condition of cable lines inside the box.
Note! Installation of hidden wiring is inherently comparable to the overhaul of the entire room. During the replacement of hidden wiring elements, the room is virtually unsuitable for work or even staying in it due to clouds of dust formed when previously sealed grooves are opened.
The industry produces sets of accessories for cable channels, with the help of which an external type cable route is mounted, duplicating the outlines of the walls, floor and ceiling of the room.
During the operation of cable lines, if it is necessary to repair or replace the electrical wiring laid in the box, it is enough to remove the cover and perform the required work. An important advantage of open wiring in cable channels is the ability to lay additional wires and cables in already laid boxes without finishing work.
Method No. 2 – Dowel-nails
If you need to attach a cable channel to a concrete or brick wall, which is a typical situation for an apartment or a house, you cannot do without dowel nails, also called “quick installation”. In addition, for fastening you will need a hammer drill with a 6 mm drill. So, in order to independently fix the electrical box for the cable on a wall made of concrete or brick, you need to perform the following steps:
- Pre-drill 6 mm holes in the bottom of the cable channel every 40-50 cm.
- Attach the box to the wall according to the markings (more on this later) and mark the drilling points that coincide with the finished holes in the cable channel.
- Drill holes according to the marks on the wall.
- Place the plastic box and drive the dowels into the appropriate places.
- Hammer the nails.
Using these simple instructions, you can install the cable duct yourself in a wall made of concrete or brick. We draw your attention to one very important point - you should not drill holes with a drill while leaning the box against the wall. When drilling plastic, the impact mode can provoke the appearance of cracks, which will have a negative impact both from the visual side and from the durability of the finished wiring.
Fastening methods
Attaching the cable to the wall is done in various ways. The choice of a specific option depends on the composition of the working surface. The materials used and work with them are discussed in the table.
| Fastening method | Operating procedure, tips | Mounting surface |
| using self-tapping screws | wood screws are screwed in with a screwdriver on average every 50 cm; It is recommended to use them with a length of about 40 mm; used for quick installation of plastic channels; no pre-drilling required | |
| dowel-nails (quick installation) | the lid is removed from the box; holes are drilled in it in increments of about 45 cm; it is adjusted to the surface, marking the location of the drilling points on it; use a hammer drill to make a hole in the wall; the plastic part of the nail is inserted through the box into the hole, the metal part is then hammered in | allows you to securely attach it to a concrete wall, brick, stone |
| "bugs" | screwed with a screwdriver through the distance indicated above | thin metal (less than 2 mm) |
| glue (liquid nails) | apply the adhesive inside out the prepared section; lean it against the marked place for a few seconds, move it away; wait for the glue to thicken; pressed back; additionally it is required to use dowels and screws | wood, drywall, wallpaper, tiles, can also be glued to a concrete surface |
The step width is adjusted based on surface unevenness. For more information on how to select and install a cable channel, watch this video:
The first 3 methods provide the ability to dismantle the elements intact, and the 4th - only with fragments of finishing. The installed box looks great only on smooth walls.
It is recommended to install wiring in the cable channel after all finishing work has been carried out (pasting wallpaper, applying decorative plaster).
With this method of laying lines, the rules of the PUE are observed, and you can easily get to the place of the problem.
The presented fastening options reliably join the surfaces. The variety of materials fits the laid routes into the apartment’s decor.
General rules for marking QC
Correctly executed markings clearly indicate how to attach the cable channel to the wall, taking into account all the executive elements of the electrical wiring. To apply marking lines you need to prepare:
- ruler and pencil;
- bubble or other type building level;
- beating cord, also called coated thread, with pigment.
The sequence of applying QC markings is as follows:
- In accordance with the architecture of the room and the electrical wiring diagram from the distribution board, the placement points for sockets, switches, and mounting boxes are determined. The optimal dimensions of their distance from the joints of the floor with the walls, corners, etc. are measured with a ruler. Appropriate marks are made on the walls with a pencil.
- In all places where the cable route is supposed to be laid, straight lines are drawn with a tapping cord.
- The construction level controls compliance with the vertical and horizontal lines.
QC marking