During winter thaws and off-season periods, the operation of drainage systems is at risk. Ice forms in gutters and pipes, which can quickly grow and form entire ice plugs. They slow down the drainage system and sometimes block it completely.
In addition, frozen ice increases the weight of gutters, leading to their collapse and rupture. Such consequences can be avoided with the help of anti-icing systems, the main element of which is a heating cable for gutters and roofs.
Heating cable functions
Let's start with the main concepts. What is a heating cable? It is a current conductor capable of converting electrical energy into thermal energy. The amount of heat generated depends on the strength of the current and the resistance of the conductive material. If you remember the school physics course, it turns out that any conductor has this ability. But! For an electrical wiring cable, such a thermal effect is undesirable, so they try to reduce it through the design. And for the heating cable it’s the other way around. The more heat it can convert from electricity, the better.
In an anti-icing system, the heating cable performs the most important function of heating the gutter and roof elements, making the formation of ice, icicles and snow canopies impossible.
Electric heating prevents:
- formation of icicles on gutters and roof edges;
- blockage of drains with ice;
- collapse or deformation of gutters under the weight of ice, icicles and snow masses;
- rupture of pipes under the influence of ice.
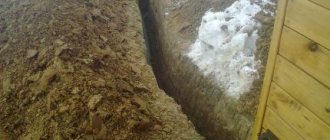
Why does ice form on the roof?
There are two main reasons:
- If the day is warm, the snow begins to melt . The resulting water flows down the gutters. At night, when the temperature drops, the remaining water turns into ice . Such a difference in temperature in winter and spring is observed within the city. When a large number of houses are clustered, the air is always warmer. Metal gutters are sometimes covered with a thick crust of ice, which is very difficult to remove from the gutter without breaking it.
- The reason for the formation of ice is the roofs themselves, especially if the roof is of the attic type . The snow melts from the heat emanating from the house. Water flowing onto the cornice cools and freezes again. Unreliable or poorly designed thermal insulation can trigger snow melting . Through cracks and unreliable joints in the thermal insulation material, internal heat comes out, warming up the snow. It turns into water and then into ice.
To get rid of this problem once and for all and protect the drainage system, it is necessary to install heating for the drainpipes. There are a number of anti-icing systems.
Causes of ice formation
Those that restrain snow from falling off the roofing and heat cables that serve to heat gutters. Their main function is to free the roof from the ice crust and prevent dangerous icicles from forming.
Modern storm drainage systems must be equipped with an anti-icing system for the roof surface. What is she like?
Performance characteristics of heating cables
Electric cables for heating drains and roofs operate in difficult conditions - under the influence of moisture, negative temperatures, and mechanical loads. Therefore, it is necessary that the cables have the following set of characteristics:
- the tightness of the shell and resistance to atmospheric moisture;
- resistance to UV radiation;
- the ability not to change its properties at high and low (negative) temperatures;
- high mechanical strength to withstand loads from snow and ice;
- safety associated with high electrical insulating properties.
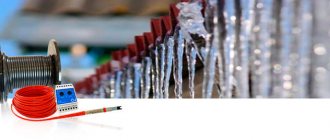
Cables are supplied in coils or ready-made heating sections - cut pieces of a fixed length with a coupling and supply wire for connection to the network.
Sections are a more convenient option, which is easier to install. Cable in coils is usually used for drainage systems and roofs of complex configurations, for which standard sections are not suitable.
Video description
Video on installing a heating wire on the roof and in the gutter:
Connecting the heating cable
This operation must be carried out carefully.
- Remove the plastic insulation.
- The shielding braid is cut lengthwise, rolling it into a bundle.
- Cut off the bottom insulating layer.
- The matrix is cut to a length of 3 cm.
- The conductors of the supply cable are also cleared of insulation.
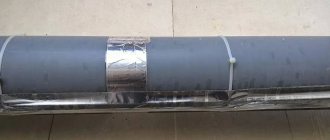
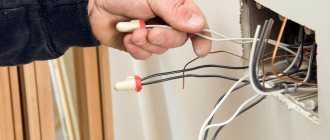
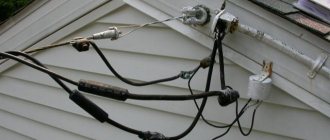
- The wires are connected in pairs using a thermal tube. This is a plastic tube into which a heating conductor core is inserted on one side. It is pulled out from the opposite side of the tube and connected to the core of the supply wire. The connection is made by soldering. Then the heat tube is pulled over the joint and heated with a hairdryer. It expands, becomes soft, and after cooling decreases in size, compressing the veins together. The thermal tube performs insulation functions.
Using a heat tube and a hair dryer to connect two wires Source sosyalforum.org
- In this way, two wires are connected. And then two of them are immediately clamped with a sleeve, which will protect the connection from mechanical loads.
The supply wire is connected to an alternating current network with a voltage of 220 volts. An RCD is installed between the connection point and the wire. This device will protect the entire system from stray currents that appear if the insulation of one of the elements of the anti-icing system has been broken. That is, even when a person touches the wires, the current will not strike.
Please note that the anti-icing is a grounded system. Therefore, the shielding braid rolled into a bundle is connected to the grounding conductor of the supply wire in the same way as the wiring. In this case, two conductors (zero and phase) are connected by one sleeve, the grounding circuit by another.
When it comes to network connectivity, the anti-icing system is straightforward. It consumes little electricity, so a regular outlet will be enough. Although other options are not prohibited. For example, to the switchboard via a machine.
Types of heating cables
Anti-icing systems can operate on the basis of two types of heating cables: resistive and self-regulating. Let's look at the features of each of them.
Type #1. Resistive cables
The most common, traditional option, characterized by the same output power along the entire length and the same heat dissipation. To heat drains, resistive cables are used with a heat release of 15-30 W/m and an operating temperature of up to 250°C.
A resistive cable for heating gutters has a constant resistance and heats up equally over its entire surface. The degree of heating depends only on the current strength, without regard to external conditions. And these conditions may differ for different parts of the cable.
For example, one section of the wire may be in the open air, another in a pipe, and a third hidden under foliage or snow. To prevent ice from forming, each of these areas requires a different amount of heat. But a resistive cable cannot self-adjust and change the degree of its heating. Any part of it will have the same power and degree of heating.
Therefore, part of the thermal energy of the cable will be wasted on heating those parts of the pipe and roof that are already in “warm” conditions. Due to this, the electricity consumption of a resistive cable is always relatively high, but partially unproductive.
Depending on the design, resistive cables are divided into 2 types: serial and zone.
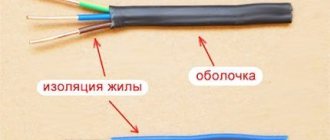
Serial cables
The structure of a serial cable is very simple. Inside it, along its entire length, there is a continuous conductor core, covered with insulation on top. The core is a copper wire.
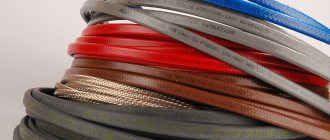
To prevent it from causing negative electromagnetic radiation, a shielding braid is placed over the wire. Additionally, it acts as a grounding connection. The outer layer of a resistive cable is a polymer sheath that serves to prevent short circuits and protect against external conditions.
A feature of a serial cable is that its total resistance is equal to the sum of the resistances of all its pieces. Therefore, when the length of the wire changes, its thermal power also changes.
Since the heat transfer process cannot be adjusted, constant monitoring of the cable is required, including removing accumulated debris. Leaves, branches and other debris can cause the cable to overheat and burn out. It cannot be restored.
Serial cables can be single-core or double-core. A solid conductor has one core. In a two-core wire, there are two wires running in parallel and carrying currents in opposite directions. As a result, electromagnetic radiation is leveled, making two-core cables safer.
Serial resistive cables have the following strengths:
- affordable price;
- flexibility, making it possible to place the cable on surfaces of various configurations;
- simple installation, in which there is no need to use “extra” parts.
Disadvantages include stable heat release, independent of weather conditions, and failure of the entire cable if it crosses itself or overheats at one point.
Zone cables
In addition to the usual resistive cable, there is an improved version of it - a zonal (parallel) cable. Its design has two parallel insulated conductors. Around them is a high-resistance heating wire wound in a spiral.
This spiral (usually nichrome) through the contact windows in the insulation is closed alternately to the first and then to the second core. Heat release zones independent from each other are formed. If the cable overheats and burns out at one point, only one zone fails, the rest continue to work.
Since the zonal heating cable for roofing and gutters is a chain of independent heat-generating sections, it is possible to cut it into fragments directly at the installation site. In this case, the length of the cut pieces must be a multiple of the size of the heat-generating zone (0.7-2 m).
Advantages of using a zone cable:
- affordable price;
- independent heat release zones, the presence of which allows you not to be afraid of overheating;
- easy installation.
Disadvantages include stable heat dissipation (as with a serial cable) and the fact that the size of the pieces cut for installation depends on the length of the heating zone.
Type #2. Self-regulating cables
This type of cable has great potential in heating systems for gutters and roofs.
Its structure is more complex than that of its resistive analogue. Inside the element there are two conductive cores (like a two-core resistive cable), connected by a semiconductor layer - a matrix. Next, the layers are arranged as follows: internal photopolymer insulation, shielding shell (foil or wire braid), plastic outer insulation. Two layers of insulation (inside and outside) make the cable resistant to shock loads and increase its dielectric strength.
The main distinguishing detail of a self-regulating cable is a matrix that changes its resistance depending on the ambient temperature. The higher the ambient temperature, the greater the resistance of the matrix and the less heating of the cable itself. And vice versa. This is where the effect of self-regulation manifests itself.
The cable automatically and independently regulates power consumption and heating level. In this case, each section of the cable operates autonomously and, independently of other sections, selects the degree of heating for itself.
A cable with a self-regulating effect costs 2-4 times more than a resistive cable. But it also has many advantages, the most notable of which are:
- changing the degree of heating depending on environmental conditions;
- economical energy consumption;
- low power consumption (about 15-20 W/m on average);
- durability associated with the absence of the risk of overheating and burnouts;
- easy installation on any roof;
- possibility of cutting into suitable pieces (from 20 cm long) directly at the installation site.
In addition to the high price, the disadvantages of this option include long heating times, as well as a high starting current at low ambient temperatures.
Anti-icing system design
As already noted, the cable is the main (heating) element of the anti-icing system for gutters and roofs. But not the only one. To assemble a fully functioning system, the following components are used:
- heating cable;
- supply wire used to supply voltage (it does not heat up);
- fasteners;
- couplings;
- power unit;
- RCD;
- thermostat.
The productivity of the heating system largely depends on the thermostat. This device allows you to turn heating sections (cable) on and off, limiting their operation in a pre-fixed range of weather conditions. The thermostat can determine their value using special sensors that are installed in places of greatest accumulation of water.
A conventional thermostat is characterized by the presence of a temperature sensor. As a rule, for small systems, a dual-range thermostat is used with the ability to adjust the cable on and off temperature.
A specialized thermostat, called a weather station, controls the operation of the system more effectively. It contains several sensors that record not only temperature, but also a number of other parameters that affect the formation of ice. For example, air humidity, the presence of residual moisture on pipes and roofing. Weather stations operate in the mode of established programs and allow you to save up to 80% of electricity.
Installation work
Installation of roof heating is done step by step. First you need to outline the areas for laying the wires, taking into account turns and other factors.
If the turns are very sharp, then the cable is cut into small pieces and secured using couplings. The photo shows how to properly install a roof heating cable.
Heating cable installation
To install an anti-icing system, heating cables are laid:
- at the edge of the roof;
- in the valleys;
- along the line of intersection of the roof and adjacent walls;
- in horizontal gutters;
- in vertical drainpipes.
Features of cable laying in these areas have their own differences and features.
On the edge of the roof
In this area, the cable is laid in a snake so that it is 30 cm above the edge of the outer wall. The height of the snake in this situation is 0.6, 0.9 or 1.2 m.
When installing a cable on a metal tile, a turn of wire is laid at each lower point of the wave. Installation on a metal seam roof requires a different approach. The cable rises along the first seam to the desired height, then descends to the gutter on the other side of the same seam. It passes along the gutter, reaches the next seam and repeats the cycle again.
If there are no gutters on a pitched roof, then significant ice build-ups and icicles can form on its edges. To prevent this from happening, the cable is laid according to one of two possible patterns: a “dripping” loop or a “dripping” edge.
The "drip" loop design assumes that melting water will flow and drip directly from the cable. To do this, the cable is mounted with a snake so that it hangs 5-8 cm from the edge of the roof.
The “dripping” edge scheme is organized according to a similar principle. Only the cable is fixed to the edge of the roof (dripline), laying it traditionally with a snake.
In valleys and at the intersection of roof and wall
Ice easily forms in valleys and other places at the junction of roof slopes. The cable here is laid in 2 threads, along the joint, 2/3 of its length. Due to this, a frost-free passage is formed through which melt water can flow.
A similar method of constructing a frost-free passage is used at the intersection of the roof and wall. Here the cable is also laid in 2 threads at 2/3 of the height of the slope. The distance from the cable to the wall is 5-8 cm, and the distance between its threads is 10-15 cm.
In gutters
In a horizontal trench, the cable is laid along its entire length in one or more parallel threads. The number of threads depends on the width of the gutter. If in a tray up to 10 cm wide it is enough to put one thread of cable, then in a tray with a width of 10-20 cm there are already two threads. For a wider gutter (more than 20 cm), their number is increased by adding one thread for every next 10 cm of width. Lay the cable so that there is a space of 10-15 cm between the threads.
To secure the cable in the gutters, use mounting tape or special plastic clips. It is also possible to make fasteners in the required quantities yourself - from steel tape, which can easily be shaped into a clamp. Clamps and elements of the mounting tape are secured to the walls of the gutters with self-tapping screws. The resulting holes are sealed with silicone sealant. A distance of 0.3-0.5 m is maintained between fastening elements.
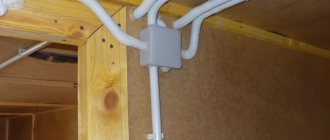
In drainpipes
Ice often forms in drain funnels, blocking the path for melt water to drain from the roof. Therefore, cable laying is mandatory here. One thread of cable is placed in a pipe with a diameter of up to 10 cm, and two threads with a diameter of 10-30 cm. At the entrance to the pipe, the cable is secured to the walls using steel brackets.
In the upper and lower parts of the pipe, enhanced heating is required, which is carried out by laying additional cable strands - in the form of a “dripping” loop or several spiral turns.
If the length of the pipe exceeds 3 meters, a chain or cable with fasteners is used to lower the cable and secure it. The chain (cable) is suspended on a hook screwed into the wooden elements of the roof or a metal rod fixed to the gutter.
How can you heat your gutters?
The climate of many regions can hardly be called mild; the winter months are usually quite harsh, snowy, and temperatures can drop to fairly low values. At the same time, the roofs of buildings on which large masses of snow and ice accumulate are strongly influenced, and this is fraught with a number of problems: icicles form on the edges of the roofs, dangerous to human health and life; snow and ice on the roof contribute to the fact that the roof structure can collapse.
Heating the drainage system with your own hands is necessary to melt snow and ice.
In order to avoid such troubles, it is recommended to heat gutters using special cable systems that allow you to melt snow and ice in gutters and drainpipes, and drain melt water to a safe distance from the house and its foundation.
Installing such roofing systems is quite a complex and costly task, but it is completely worth it. Many people prefer to reduce the cost of work by laying the cable only on the roof surface, believing that this is quite enough, but this is far from the case. Often, snow and ice completely clog gutters and downpipes, and melt water can only harm the roof, it has nowhere to go down, and downpipes clogged with ice can simply burst.
Heating of gutters can be carried out using several methods, which differ not only in the method of laying the cable, but also in its type. Such a system can be installed with your own hands, but its calculation and testing before launch is best entrusted to professionals who can guarantee the safe operation of cable electric heating.