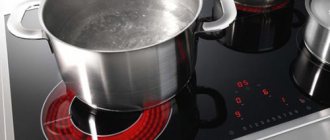
There are more and more appliances in the house, and willy-nilly you begin to think that it would be nice to be able to fix even simple damage yourself. To help, this article will discuss a simple DIY hob repair. Please note - if the equipment is under warranty, it is better not to mess with it at all. All that is possible in this case is to replace the power cord. In other cases, it is better to contact the service. Well, if there is no warranty for a long time, you can try to repair the hob yourself.
Types and design of hobs
The hob is an electric or induction hob covered with ceramic or glass ceramics. The following surfaces are currently produced:
- induction They work on the principle of electromagnetic induction. Cookware made from special materials and the burner create a circuit with electrical oscillation;
- spiral. Current passes through the spiral element, then heat is released, which heats the cookware;
- corrugated tapes. The operating process is similar to spiral devices. The only difference is the accordion heater;
- halogen. A stove with a tubular heater filled with halogen vapor heats up in 2 seconds. After warming up, the heating element turns on.
To quickly detect problems during the repair process, it is important to know the structure of the equipment.
How does the hob work?
The main components of the device are burners with contacts for connection and a thermostat. The burners are connected to the control panel via contact wires. Using a thermostat, heating is controlled and power is turned off. The control unit is responsible for executing the main programs. To turn on, use a button, gas tap or cord with a plug.
Types of heating elements of cooking surfaces
Several types of burners are used in hobs:
- induction - they only heat the dishes, while the work area itself is practically cold. Temperature and power can be adjusted from minimum to maximum;
- rapid - spirals that heat up and cool down in 10 seconds;
- halogen - a spiral with a red backlight that heats up in 2 seconds and releases a large amount of heat;
- Hi-Light is a very thin spiral tape that heats up instantly. The high-resistance resistance of the alloy ensures minimal energy consumption - up to 2 kW per hour;
- gas burners - automatically supply fuel, are smoothly regulated and heat up gradually;
- electric - cast iron pancakes, the heating of which is indicated by a red circle in the center.
Interesting to know! Depending on the diameter of the heating element, the flame of gas models can burn in 2-3 rows (“crowns”).
Hob fault groups
Regardless of the type of heaters, the main failures of the panels are similar. Repair of your hob is necessary when typical faults are detected.
Damage to heating elements
Parts damaged mechanically are repairable. For halogen models, the heater needs to be replaced, and the induction winding is almost not subject to failure.
Failure of switching elements or conductors
You can troubleshoot contacts, thyristor switches, relays in 1 day. Repair work will not be difficult for you if you know the design of the slab and have the appropriate skills.
Electronic circuits
If the user does not know how power supplies, controllers, generators and transformers work, it is better to entrust the repair to a specialist. The burnt element must be dismantled and replaced with a new one.
Important! Before starting work, you should check the power from the outlet, the presence of moisture on the panel or dirt on the sensor unit. They may interfere with button sensitivity.
The tap is jammed (does not turn)
A dangerous defect that can lead to the loss of the entire device. If the tap jams, we advise you to turn off the gas at the lower end of the stove and call the emergency service. Cause of occurrence: increased humidity inside the panel structure; lack of crane maintenance. A jammed gas tap should be eliminated as part of the service repair of the stove, namely: disassembling the tap, washing and cleaning the rotating parts from dirt and outdated lubricant. Applying graphite lubricant with lapping of the cone plug.
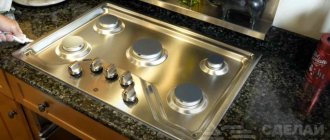
Electric hob - common faults
During operation, equipment may malfunction due to voltage fluctuations, improper care or manufacturing defects.
Repair of a built-in electric kitchen hob is relevant in the following cases:
- The hob does not turn on. The phenomenon occurs due to a lack of voltage in the outlet or faulty parts. The socket is checked with a multimeter. If everything is fine with it, there are risks of fuse burning, contact breakage, cord chafing or squeezing, heating element breakdown;
- One or two burners on the hob are not working. The heater contacts that can be soldered have broken. The burnt-out heating element is replaced with a new one. If the contacts are broken, the control unit switch is repaired or replaced;
- The burner does not heat up well. The problem is due to overheating of the heating element, thermostat, or thermostat. Some parts are repaired, but the thermostat needs to be replaced;
- The fuse has blown. The failure occurs when the voltage fluctuates in apartments without ultrasonic systems on electric mains. The part is replaced, especially since its cost is inexpensive;
- the sensor does not work. The element is checked with a multimeter. If it does not respond to the device, the panel is changed completely. Sensor breakdowns occur due to improper operation of the stove or burnout of the control unit after cleaning with saline solutions;
- The hob gets very hot, works, and does not turn off. In 95% of cases the thermostat fails. The part is not repaired, but only replaced.
Glass on glass-ceramic surfaces sometimes cracks. The cause of the breakdown is a manufacturing defect or improper operation. Repair work is carried out exclusively by a master.
Important! Before inspection, electrical equipment must be disconnected from the network.
Reviews and advice from experts
It is important to remember when replacing or repairing a glass-ceramic stove yourself:
- If there is voltage on at least one contact of the terminal box, there is no need to check the voltage in the power cord and socket. This fact indicates the serviceability of these parts and a malfunction in the built-in elements themselves.
- Sometimes a regulator breaks down and an identical replacement can be found. In some models it is located on the same board along with the radiator. When the stove burner is in working order and turned on to maximum, the heating control cannot be changed. This means that the regulator broke down for an unknown reason. Finding out is long and expensive. You need to immediately replace it with a new one.
- Temperature control devices in electric stoves break down only for two reasons: due to oxidation and malfunction of the contacts or due to breakage/deformation of the plates. If, after restoring reliable contact at the terminals, the functionality of these units is not restored, then they must be replaced.
- Any breakdowns of glass-ceramic slabs can be prevented by careful handling. To do this, study the operating instructions and strictly follow them. Another common cause is a voltage drop. In this case, breakdowns associated with overheating and deformation of wires are considered complex. You need to contact the master.
You can repair glass-ceramic hobs yourself or invite a specialist. In the first case, you need to have knowledge in the design of slabs, and the second is suitable for difficult situations when it is not possible to find the cause and fix it.
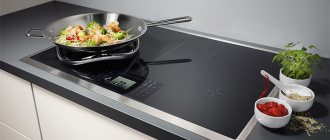
Induction hob
Despite the build quality, innovation and technology, induction cookers fail. The main device failures include:
- The stove does not turn on or turns off immediately. This is not a breakdown, but a feature of the functionality of the equipment.
There is a blockage on the hob due to unsuitable material or utensil diameter. When removing the pan, the burner switches off automatically.
- heats for a long time and weakly. Incorrectly selected dishes;
- turns on automatically. You need to remove metal products from the stove and remove salt from it. If there is no switch on, the control unit is broken, which is repaired or replaced at the service center;
- the panel doesn't work. The fuse has blown, the power circuit has broken, or parts have burned out.
The main failures of induction cookers occur due to failures in the induction generator circuits. The problem is related to improper operation and is rare.
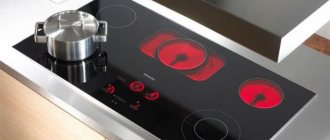
Gas hob
Gas stoves are complex and explosive equipment. If you discover at least one of the following breakdowns, immediately begin repairs:
- The burner does not light or turns off. The cause of the failure is clogging of the injectors with product residues, cracks, problems with the spark plug insulation, solenoid valve, thermocouple combustion. Models with automatic ignition do not turn on at low mains voltage;
- The burner goes out during operation. Self-repair consists of cleaning the injectors and adjusting the intensity of gas fuel supply. Extinction is possible due to thermocouple combustion;
- Electric ignition does not spark or click. There is no voltage in the network, the ignition unit has burned out, or the contacts of the connection keys have oxidized. The contacts should be cleaned with alcohol, and the ignition element should be replaced;
- low flame or smoking burners. The jet is clogged or the air damper needs to be adjusted or the injector cleaned;
- It is difficult to turn the adjustment tap. There is grease stuck to the rotary system, which can be washed off with soapy water. The second point is that the graphite grease on the tap has dried out. It needs to be updated;
- The oven does not turn on. The spark plug has worn out, but you should not replace it yourself;
- you can smell gas. Connection failure. The user needs to ventilate the kitchen immediately. Breakdowns can only be repaired by specialists;
- The burner turns off when the handle is lowered. Malfunctions in the gas control system or thermomagnetic valve. The part is being replaced.
Electric ignition does not work (does not click, no spark)
This breakdown is not the death of the panel; most owners switch to matches.
Cause:
1. No voltage in the network; 2. The spark generation unit (ignition unit) has burned out; 3. The contacts of the power buttons have oxidized.
Troubleshooting begins with checking the outlet. Plug a known working household appliance into the outlet. The contacts are visually inspected and, if necessary, cleaned with alcohol. If these manipulations do not help, change the ignition unit.
Do-it-yourself diagnostics and repair of a hob
Assessing the degree of damage and repairing an electric, induction, or gas kitchen hob is carried out sequentially with your own hands in several stages.
Required Tools
For repair work you will need:
- screwdrivers with tips of different diameters for dismantling;
- a screwdriver with an indicator to check the voltage;
- a stationery knife for stripping cable cores or trimming them;
- pliers for cutting wires.
To measure the electrical current parameters, you will need a multimeter. A soldering iron is also used during the work process.
Diagnostic measures
Diagnostics are carried out with or without disassembling the device. In the first case:
- check the voltage with a multimeter;
- inspect the power cord of the switched off stove;
- the cable is tested for integrity and breakdowns;
- contacts are checked - untwisted and inspected for oxidation;
- the fuse is located at the input and inspected;
- The terminal block is tested for damage with a multimeter.
Important! Check the cable and inspect the fuse after unplugging the appliance.
For diagnostics with disassembly you will need:
- disconnect the stove from the power supply;
- remove the panel with screwdrivers;
- lay it on the table, remove the fasteners, and, supporting it, remove the surface;
- inspect the wire for breaks;
- check the thermal relay by tracing it along the wires;
- check the transformer and thermal fuse with a multimeter;
- measure the resistance of the burner - increased resistance indicates burnout.
Important! The contacts of the electromechanical relay are inspected with the cover removed.
Specifics of repair work
Activities for repairing electric stoves are carried out in several stages:
- Removing the lock. How to properly unlock the working hob? Press the key button and hold it for several seconds. The indicator becomes active and the lock disappears from the panel.
- Disconnecting the device from the network.
- Dismantling the device using screwdrivers, laying it on a clean surface.
- Removing fasteners, carefully removing the surface.
- Checking parts for damage.
- Installing screw terminals or rivets on a burnt coil.
- Replacement of parts - thermostat, power relay, halogen burners.
- Replacement of wiring - an identical wire is selected, assembled and installed with end switches.
- Installing a new power supply.
- Changing the control circuit of the hob through a manual unit located outside the body.
- Assembly and installation of the hob.
Important! Electronics fail due to unstable voltage, local overheating occurs when using the wrong utensils, and moisture on the surface leads to cracks and chips.
How to eliminate the main breakdowns of gas stoves?
In case of problems with the gas hob, you will need:
- install traverses and tighten the screws when the burner axis shifts;
- remove the handle and use a screwdriver to stretch the slots on the rod if the switches are loose;
- disconnect the door cover, tighten the spring and place the axle in the eyelet if the oven does not close tightly;
- repair the tap and nozzle if the oven heats up poorly.
Advice! If there is a smell of gas, check the tightness of the contacts with a soap solution, tighten and lubricate the taps.
Mechanical dismantling: rules and technology
A set of necessary tools for dismantling:
- screwdriver “+”;
- pliers;
- side cutters;
- wrench 8*10;
- gas key.
Special tool for dismantling
First of all, use a screwdriver to loosen the fastening of the surface with the table top of the kitchen module. If the wire is laid permanently (for electrical panels), the terminal box is disassembled and the supply wires are disconnected. The grounding conductor from the device body is disconnected last.
Then the mounting screws are completely unscrewed and removed from the tabletop. Removal of the hob is considered complete.
Dismantling the gas cooking structure is carried out in the same way. In order to stop the supply of natural gas to the surface, it is necessary to close all fittings and visually ensure that the handles of taps and valves are in the “closed” position. Next, loosen the clamp and install the standard plug on the hose.
Correct removal of the hob
So what is the correct way to remove the hob from the countertop? In order to properly remove the gas surface, it is worth considering the entire process in detail:
- the first step is to find the centering screws that hold the entire structure;
- then the screws on the centering screws are unscrewed;
- after this you need to find the corner mounting hooks. The screws on them are unscrewed, but the main thing is not completely, they must remain in place;
- the hooks will be loosened, so the product can be easily pulled out through the hole in the tabletop;
- After the structure is removed, you can begin installing another new device. If it has not yet been selected, then it is worth choosing it correctly;
- if you have already purchased a new hob, and it does not fit the size of the hole in the table, then cut a new one using a file;
- Next, another panel is installed in place in the countertop.
Glass panels must be removed by specialists
Recommendations from experts for repairing hobs
- Screw terminals and spiral rivets are used as temporary measures.
- The main cause of breakdowns of hobs is failure to follow the manufacturer's instructions.
- Induction hobs should only be repaired by a specialist.
- If you don’t have a multimeter, you can use an induction screwdriver for individual sections of the circuit.
- The hob is dismantled after disconnecting the wires and unscrewing the fasteners.
- Thermocouples are soldered to the chip or connected via a cord.
We repair the hob with our own hands
What do you need for daily cooking? High temperature and ability to control the heat source. As it turned out, there are not many types of home “hearth”.
- kerosene burner - 5 decades ago it was the main element in any kitchen;
- a gas stove is by far the most popular “hearth”;
- electric stove - can be a separate element or a built-in component of the kitchen.
Let's consider the last option in more detail. When visiting the kitchen was an exclusively utilitarian matter (that is, the housewife was only interested in the process of cooking), no one thought about the appearance of the electric stove.
Accordingly, from a technical point of view, it was a very primitive device:
- frame;
- heating element (spiral or heating element in its own housing);
- thermostat (not present in every model);
- mechanical heating regulator (spiral resistance switch).
It was possible to repair such a stove with a screwdriver and pliers in hand. Even the heating coil was easy to make with your own hands: nichrome wire was wound around an ordinary pencil. More advanced craftsmen used an electric drill and a wooden mandrel. The steel rod was inserted into the chuck and the winding process was much faster.
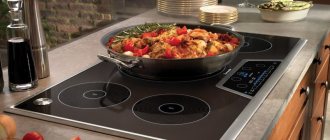
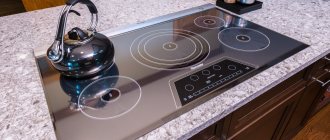
Modern hobs
Then fashionable trends in modern design came to the kitchen, and simple electric stoves no longer fit into kitchen corners and furniture sets. Hobs have appeared that are built into the countertop.
Such household appliances are not only beautiful, they are distinguished by advanced functionality. The heating element is controlled using electronic controllers, and various security systems are present. Most products are equipped with touch control panels; you won’t find a mechanical handle even in economy class models. To repair a modern hob yourself, you need to have basic knowledge of electronics.
Types of heating elements of a modern electric stove
The usual spiral in ceramic insulator holders has not been used for a long time. Instead, 3 types of electric heaters are used, both direct and indirect:
- The HiLight direct heater is nothing more than a progressive descendant of the nichrome spiral. It is a corrugated tape made of high-resistance metals.
Looks and works exactly like a wire coil. However, due to the design, it releases thermal energy more efficiently and lasts much longer. Some manufacturers produce stoves with traditional wire heaters. There is no fundamental difference (slightly lower efficiency and reliability). But repairing a burnt-out spiral is easier. The dishes (and their contents) heat up very quickly. However, such a system has a serious drawback: it is difficult to regulate the degree of heating. In fact, the heater operates in two modes: “on” and “off”. This does not mean that it is impossible to set the operating temperature, it’s just that this process is implemented somewhat unusually. The electronic controller periodically turns off the power and turns it on again. In this way the amount of total thermal energy is regulated. In this mode, it is difficult to cook dishes that require “low heat”, as on a gas burner. Another problem characteristic of this type of hob is the high temperature of the decorative surface. Externally, the plane does not look hot, so there is a danger of touching and getting a thermal burn. - Direct heating emitters "HaloLight" are made in the form of ordinary incandescent lamps that heat dishes using infrared radiation. Probably everyone has tried to put their hand near a working car headlight: the warmth is clearly felt. Kitchen appliances use halogen emitters, which have the highest efficiency when generating heat. Such heaters operate according to an algorithm similar to HiLight, only the heating and cooling speed is much higher. Manufacturers often combine HaloLight elements with others in the same burner.
The possibility of burning your hand is the same as with the previous design, in addition, there is one more drawback. Halogen heaters have a limited lifespan, so repairs to hobs with such heaters occur much more often. - Indirect heating induction burners. They transmit energy in the form of an alternating magnetic field with a high frequency, causing the metal in their area of action to heat up. Technically they are designed like a regular inductor, only the turns are located in the same plane (for compactness).
The system operates on the principle of a transformer. The high-frequency generator generates the corresponding alternating current on the primary winding (coil located under the burner). The secondary winding is a utensil, which must be made of a metal with ferromagnetic properties, otherwise the magnetic field from the “primary” will work idle. Suitable steel or cast iron (can be checked with a magnet or by the presence of the “for induction cookers” icon). Copper and aluminum cookware will not heat up on such a burner. Eddy currents in the bottom of the cookware instantly heat the metal, and the pot or pan acts as a heating element (that’s why this method is called indirect). Without utensils, the hotplate remains cold, which reduces the risk of scalding. This can be clearly seen in the illustration:
You can adjust the degree of heating, but many housewives are confused by the restrictions on the material of the cookware. In addition, some buyers are wary of induction radiation. In vain, this is not a microwave: the electromagnetic field is no higher than that of a switched-on iron. And malfunctions can only be associated with the electrical circuit: the coil does not burn out. The main disadvantage of an induction burner is its high cost, which somewhat limits mass promotion to the masses.
Once you understand the design of heaters, you can repair your own hob.
Hob malfunctions
If one of the burners does not work, you can survive it. But the breakdown of the entire slab is already a problem. You can take the equipment to a workshop, but in addition to the cost of spare parts, you will be charged money for the work performed. If you know how to hold a soldering iron in your hands and have at least a multimeter, you can repair the hob yourself.
All faults can be divided into 3 groups
- Broken heating elements: For spiral or halogen burners, this is more of a mechanical problem than an electrical problem; the parts are completely repairable. In extreme cases (for example, a halogen heater) a simple replacement. The induction emitter (winding) does not break in principle; the problem may be in the electronics.
- Failure of switching elements or conductors. These can be relays, contacts, thyristor switches. They are not the most difficult elements to repair.
- Electronic circuits: generator, transformer, controllers, control unit. Without deep knowledge of electronics, it will not be possible to repair these elements. In the best case, you can dismantle the faulty element and install a new one.
Before you begin complex repairs, try to diagnose “problems” that can be fixed without disassembling the structure.
For example, check the power supply from the input circuit breaker before connecting the direct power cable from the panel (including the socket, if any). The presence of power is checked with a multimeter on the contact block of the stove.
Video on the topic
The hob is one of the most important appliances in the kitchen, and like any other equipment, it is susceptible to breakdowns, but it’s quite easy to repair it yourself. If a malfunction is discovered during the warranty period, your stove will be repaired free of charge. But if the breakdown occurs several years later, you can try to repair the hob yourself, since contacting specialists may cost little less than buying a new stove.
In this article, our specialists have listed all the malfunctions of hobs and step-by-step disassembled the process of repairing faults with their own hands.
Repair of direct heating hob (individual components)
Diagnosis of faults is carried out from simple to complex. After the fuse, we check the electrical wiring and the functionality of the heating elements. Control of turning the heating filament on and off is carried out using PWM (pulse width modulation). Don't let this bother you. All the same, power supply is supplied by conventional relays, which are checked with a multimeter.
A burnt-out spiral (tape) is usually replaced entirely; this is not the most expensive element. As a temporary measure, a mechanical connection can be made (rivet or screw for tape, and screw terminal connection for helix). This will allow the stove to work for a while. This “joint” will last for several days, so buy a new spare part as soon as possible.
Power relays cannot be restored; they definitely need to be replaced.
The same applies to halogen heaters. Thermal elements are not repaired (in fact, this is an electric lamp), they are replaced with new ones.
As for burnt wiring, you should select a wire with similar characteristics, make a complete harness, and replace it using end switches.
Before reassembly, contact groups are checked for strength and absence of thermal damage, cleaned and reassembled.
If after checking it turns out that all power conductors and elements (including heaters) are in order, the electronics remain. Self-repair is possible only if you have specialized skills and a detailed electrical diagram.
If you know for sure that it is the electronic module that is not working, and there is no way to professionally diagnose it, you can take this particular unit to a branded workshop. It will be tested (for a small fee) on a stand, or in a similar model of hob. You can install a repaired or new unit in place yourself.
Some craftsmen restore the functionality of the hob by changing the control circuit. For example, you can power the heating elements from a homemade manual control unit located outside the main body. If the cost of restoring standard modules is too high, and the stove heats properly when connected directly, this method has a right to life.
Repair of contact connections
Since the currents consumed by the heating elements of the stove are large, the requirements for the quality of contact connections are high. And there are many connections in a kitchen stove: heating elements are connected through switches, and they are connected to each other in a common circuit.
Switching is done using connectors, the wires to which are connected by crimping . You cannot solder - the temperature will destroy the connection. The connectors themselves must be tightly fixed to the terminals of the elements. As soon as they weaken, transition resistance appears in this place. Under the influence of load current, it heats up, the surface oxidizes, and contact is broken. You can find the break point by the blackened connector and burnt wire insulation.
The connector will have to be cut off and replaced with a new one, and the wire insulation will have to be restored. You cannot use electrical tape to repair wires in electric stoves - it will melt and burn. Special fiberglass tubes sold in electrical goods stores are suitable for this.
A new connector can be purchased there; car connectors of the same size are also suitable for this purpose. Brass products are sold that have more disadvantages than advantages. The most important thing is that you won’t be able to crimp it on a wire without a special tool. You can use two pliers to tighten its clamps, one pair of which clamps the wire, and the other its insulation. But this process will require maximum perseverance.
The worst tip
Their second drawback is that while a flexible wire can still be clamped, a rigid wire with a cross-section of up to 6 mm 2 is unrealistic. If a strong crimp does not work, after a while you will have to do it again, but again with a new connector.
The situation is better with insulated tips . To crimp them you will also need press pliers ; they are inexpensive and will come in handy in the future.
Crimping pliers for insulated terminals
There are many tips available:
| Types of insulated tips | |
| RPI-M | Flat insulated connector (female) |
| FIR-P | Flat insulated connector (male) |
| NKI | Round insulated tip |
| NVI | Insulated fork tip |
The boards use RPI-M ,
Tip RPI-M
but for screw connections, NKI and NVI .
Diagnostics and restoration of indirect heating panels
Repairing induction hobs can only be done by experienced electricians. Without knowledge of the material, with a simple multimeter and pliers, the operation is doomed to failure. At the same time, many problems are not malfunctions at all: a normal violation of the operating mode.
Typical malfunctions of induction heating systems
- The induction hob either does not turn on at all, or the power disappears immediately after starting operation. This may be a protective function: if you remove the dishes from the heating plane, or the size does not match the diameter of the burner, the automation blocks operation. The same applies to aluminum or copper cookware.
- The same problem (wrong cookware) can result in the induction hob not working at full capacity.
- The heater turning on independently may be due to contamination of the stove, or the presence of a massive steel (cast iron) object next to it.
Real malfunctions, not related to violations of the operating mode, appear in the inductive field generator circuit. As we have already noted, the winding fails extremely rarely.
Typical diagram in the illustration:
In fact, there is no space technology here. The transformer converts the supply voltage, and the generator creates an increased frequency of oscillations of the electromagnetic field. After a visual inspection (for obviously “burnt” radio elements), the generator is checked using a home oscilloscope. If you have such a device, there is no point in explaining the principle of checking the inductance generator; your level is sufficient for repair.
If you do not have sufficient experience, you will have to turn to the experts. In any case, repairing a separate unit will not cost as much as buying a new panel.
If it doesn't turn on at all
If the equipment does not turn on at all, check the voltage immediately . If the voltage is low, the hob may not turn on. To avoid such situations in the future, it is advisable to install a stabilizer. This will significantly extend the life of the equipment, since electronics are very sensitive to power quality, and electronics are the most difficult to repair (and more expensive).
If the voltage is normal, we will continue repairing the hob by inspecting the power cord . Oddly enough, many breakdowns are associated with its damage - frayed, bent, crushed, insulation burst/melted, etc. First, we inspect the cord (disconnecting it from the network), then we check for the integrity of the wires and for insulation breakdown (each wire to the ground and to each other).
What to do if the hob does not turn on? First of all, check the cord and contacts
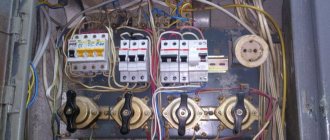
The next step is to check the contact in the terminal block . A loose or oxidized contact can also cause the hob to not turn on. What to do in this case? Unscrew the contact, clean it from oxides, and tighten it well again.
If the stove still shows no signs of life, find the fuse . It stands at the entrance, burns out during power surges - to protect more expensive parts from damage. It can look different, but most often it is a glass or ceramic tube with metal caps on the edges. Some types of fuses are shown in the photo below. There may be such options.
Types of fuses
We found the fuse, then take a multimeter and measure its resistance. It should be small. If the device shows an open circuit (infinitely high resistance), the fuse has blown. Another way is to put the multimeter in test mode and touch the probes to both ends of the fuse. The device is silent - it has burned out.
We take out the blown fuse and replace it with a similar one. Exactly a similar one - with the same parameters (indicated on the case). It is not recommended to install a “bug” or one with less sensitivity - with the next power surge the breakdowns will be much more serious.
The only easy check left is to check whether the power is reaching the control unit from the terminal block. Maybe the wiring is damaged or the contact is loose/lost somewhere. Do this again using a multimeter. We check the wires for integrity (you can do this by testing, you can by measuring the resistance) and the presence of insulation breakdown (on the body and between each other). If all parameters are normal, you can turn on the power and carefully measure the voltage at the input of the control unit. The voltage is normal, but the hob still does not turn on - the problem is in the control unit. Further repairs to the hob are related to this unit.
Users prefer electric, induction and gas stoves for cooking. If they malfunction, it is better to contact specialists. But, if you have the skills, knowledge and ability to work with tools, you can repair household kitchen hobs yourself.
Causes of malfunctions
With the exception of a minimal percentage of real factory faults, most breakdowns occur due to improper connection and operation.
- Unstable mains voltage damages electronics;
- the use of cookware that does not correspond to the size of the heating surface leads to local overheating;
- Impacts and spilled liquid on a hot surface form cracks and chips through which moisture penetrates into the housing.
But still, the main reason for equipment failure is ignoring the requirements of the instructions.