The video signal that a television receiver receives and displays on the screen is electromagnetic waves from broadcast stations. In order for the signal to be available to a larger number of receivers, the television tower is installed as high as possible. To amplify the signal, a whole family of repeaters has been installed, which receive, amplify and distribute it within their reach. There are always a number of obstacles along the path of a video signal that interfere with its stable reception. These are high-rise buildings and structures, relief features and much more. A satellite dish helps get rid of these problems.
Satellite TV dish
Do you need satellite TV?
In mountainous areas or in dense urban areas, catching a direct signal from a television transmitter is not an easy task. You have to rotate the TV antenna in different directions to catch a signal that is reflected from any obstacle. Decimeter and meter waves of terrestrial broadcasting cannot go around obstacles. In addition, due to such wavelengths, even under the Ostankino television tower itself there is no direct signal reception, only reception of reflected waves from high-rise buildings located nearby.
There are places where satellite television acts as the only and reliable source of television signal. It has the ability to capture television broadcasting areas in regions where continuous coverage is impossible due to the large distance between populated areas.
Advantages of satellite television
DIY 4G antenna for modem
Satellite television is called so because the satellite acts as a repeater. While in its orbit, the device receives a signal from the provider and distributes it in different directions. The dish is a concave mirror that catches a powerful and clean signal directly from the spacecraft. The antennas are installed so that the dish is pointed at the satellite; due to the rotation of the earth, there is more than one satellite in orbit. The network of devices makes a circular motion in the equator belt towards the direction of the Earth's movement. Thus, the next satellite is constantly located at the point where the dish is pointed.
Location of satellites in Earth's orbit
In addition to the fact that the quality of the signal ceases to depend on many factors influencing it, a satellite antenna allows you to catch more than two dozen channels, unlike a conventional antenna. You can install it with your own hands anywhere and choose the operator yourself. The existence of open free channels allows you to use them for unpaid services. They are on almost all satellites, but there are few Russian-speaking ones among them.
DIY satellite dish
It was a long time ago when people were still thinking about creating a homemade satellite dish. Nowadays, purchasing a satellite dish is not difficult. They are at almost every step.
But still, offset antennas are very large, more than 2 meters, and now it is very difficult to find or purchase, since the price will be prohibitive. Several years ago I had an idea to create a satellite dish myself. Yes, it was possible to rivet a flat one, on Fresnel rings, but I simply didn’t like it.
A long time ago, satellite antenna mirrors were made from alabaster and cement.
Yes, the wind was definitely not terrible for such antennas. But you understand that such a homemade satellite dish and the technology for its production are not for our time.
Some craftsmen later made a simple 0.6 m in diameter from epoxy resin and foil, or using polyurethane foam, and at the end of the description of their work, they indicated that it was advisable to install such antennas away from human eyes - so as not to laugh.
And the cunning Chinese simply rivet small direct-focus antennas together with pots and basins made of tin on an adapted lathe.
Of course, there are always gifted people, real specialists who do truly good things. Some did direct focus, and some did offset. I came across pictures online of an offset satellite dish about 3 m in diameter. It’s simply impossible to look at this without delight. It's like an exclusive thing.
Article on the topic: How to choose a good TV 2016
Homemade satellite dishes made of tin deserve special attention. There are also original solutions.
If you decide to make a satellite dish yourself, some materials from the archive may be useful
Calculation of satellite antennas instructions download
How does satellite TV work?
The television signal from the provider is transmitted to the spacecraft. One of the satellites, located in the reception area, emits an encrypted signal to Earth. The frequencies at which satellite signals are heard are much higher than the frequencies of terrestrial television. To obtain them, special antennas are used, their shape resembling a plate. The receiving head is installed on the plate.
DIY Mimo 4g lte antenna
The satellite signal falling on the surface of the mirror (dish) is focused when reflected on the head. It is called a converter or irradiator. To completely remove the signal and amplify it, the head irradiates the reflector. After which the output is a converted and reduced frequency signal. From the output of the converter, the signal goes through the cable to the receiver, where it is processed into a television format. The receiver connects directly to the TV via cable. The number and quality of channels depend on the receiver and installed software.
Important! The waveform emitted by satellite transmitting antennas is shaped like a flashlight beam. The signal intensity is maximum in the center of the radiation spot hitting the Earth and decreases towards its edges.
Satellite TV video signal flow diagram
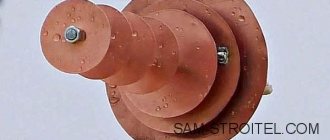
Parabola made of plexiglass or plexiglass
One of the distinctive properties of this material is that plexiglass, when heated moderately, becomes plastic and can take the shape of the object (blank) on which it is placed. Therefore, you can take a plexiglass blank with a thickness of 3...5 mm and a circle diameter with a size slightly larger than the diameter of the original factory-made plate. After the plexiglass has softened under the influence of heat, it is carefully leveled on the blank, trying to give it the most similar shape. After the plexiglass has cooled, its concave surface is evenly covered with thin foil, which will work as a reflector. The disadvantages of this method of manufacturing a satellite dish include the high cost of plexiglass and the need for a heating chamber with a large internal volume.
Article on the topic: Why is there no sound in a movie on TV via a flash drive?
Antenna operating principle
DIY digital TV antenna
A satellite dish collects the received signal at one point and amplifies it. The size of the mirror directly depends on the range of the orbital position of the space device. The parabolic shape of the mirror reflects the received signal to the antenna, which is installed in the center of the structure. A horn feed with automatic adjustment is attached to the plate coordinator. This element is an amplifier of reflected signals. The front heads of the converter remove radio waves from the focal point and transmit them to the down-conversion unit. The horn converts electromagnetic signals and radio waves into electrical vibrations. In this case, their spectrum is adjusted. The signal then moves along the converter – receiver – TV chain.
Parabolic wire antenna
To make such an antenna, you need a large inflatable ball. This will serve as a template for the antenna wire frame. On the ball, using a pencil, we mark the maximum radius of our future plate. That smaller part of the ball, which will be separated by the drawn circle, will represent a curved surface. Then we take a coil of copper wire with a diameter of 2...3 mm (for example, wound from an old electrical transformer) and make circle No. 1 from it, which we place on the ball. We make the next wire circle (No. 2) slightly larger so that the distance between it and the previous one is about 20...30 mm. Thus, we gradually reach the maximum diameter that we need. We connect the finished circles with radial beams, and the intersections are either twisted with thinner wire or soldered with tin solder. We leave the space inside the smallest circle empty - the plate stand will be fixed there later. We carefully cover the finished frame with fine-mesh aluminum mesh or foil so that the specified curvilinearity of the reflective surface is maintained.
Article on the topic: Why the TV from Rostelecom does not work
Types of plates
Satellite TV receivers belong to the category of mirror devices. They are the most popular type of this line, used in the range from UHF to Ka-band. They are installed both for private use and when organizing space projects. The sizes of the devices range from a tenth to tens of meters. For individual use the following types are used:
- direct focal antenna;
- offset design - type with an offset head.
If the focus is located on the axis of symmetry with the reflector, then this is a direct focal antenna. Its irradiator is located in the center of focus directly in front of the reflector.
Straight focus antenna device
Offset designs are made using a cut from a parabolic mirror. They have a shift in the radiation pattern relative to the mirror axis by an offset angle. This is called the offset angle. Unlike the direct focal position of the feed, in this case there is no shading of the antenna mirror, and the surface utilization factor increases.
For your information. The holder and the irradiator itself do not block the direction of the device towards the satellite. The adjustment when aiming at the signal source is vertical. This reduces rain and snow from entering the antenna receiver.
Antennas with a diameter of up to 2.5 m, receiving signals coming from the satellite, are made according to this principle. With these dimensions, a plus in gain is added by the ability to use the entire reflector mirror due to the absence of shading areas. This type of antenna has its own drawback: a low class of polarization isolation, leading to increased interference from the adjacent polarization of its own source. With large dimensions, it is more difficult to manufacture and install offset reflectors than direct focal mirrors.
Attention! At a small vertical pointing angle, even if the antenna is aimed at the source, the bowl looks down. Monitoring a spacecraft near the horizon for devices of this type is a minimum interval of 0-10 degrees. In this case, the rotation adjustment device reduces the rotation angle for guidance.
Information required for installation
When purchasing a set of equipment, you need to select an operator. Up to 30 Russian-language channels are broadcast by a satellite named Yamal 201. The following operators work with it: NTV - plus, Tricolor - TV, Raduga - TV. To receive them, it is important to know and set the frequency. Spacecraft are invisible from Earth, but each of them has its own exact coordinates. The numbers present in the name of the spacecraft indicate longitude: 5W, 9W, 16E, 85E, 90E.
Satellite visibility sector
Before you install and configure the antenna with your own hands, you need to determine which side is south. This is easy to find out using a regular compass, which is found in every smartphone. But how do you know what angle to set your satellite dish to? You need to find out from the seller the azimuth corresponding to the installation location, or look on the Internet. For example, it will be 205 degrees. To “take” the azimuth, set the compass so that the zero mark of the scale is at the bottom, the arrow points to the north. Holding the compass motionless, mark 205 degrees on the scale and visually mark this direction on any stationary object: a tree, a pillar, a building.
Finding the azimuth when installing the dish
Antenna installation location
Installation of satellite antennas yourself and installation of the receiving device mount is carried out on the south side of the building in a convenient place. The height does not matter, the main thing is that it is convenient to maintain, and there are no obstacles between the installation point and the sun: roofs, high-voltage power lines, etc. You can even install it on the site, right on the ground. The main thing is to have more space to rotate the signal receiver.
Attention! Installing a bowl on the roof is justified only when there is no other place to get rid of interfering structures and objects. But there are a lot of inconveniences when servicing and adjusting the device associated with raising it to a height.
The incidence and reflection of waves on the reflector bowl, depending on the angle of the device
Satellite dish mount
To mount the satellite dish yourself and at the same time spend less effort and money, it is better to buy a mounting bracket separately from the device. The one included in the package may not be suitable. The chosen mounting option must meet the requirements:
- withstand the load of the device with large diameter plates;
- allow the mechanism to rotate along the vertical and horizontal axis;
- wall supporting devices or vertically located supports should not have their own movement around the axis.
Fastening to the wall of a building is carried out using wedging anchor bolts or self-tapping screws with a diameter of at least 10 mm, excluding homemade wooden seals. Both of them are selected with a place for turning with a wrench, and not with a screwdriver.
All holes available on the mounting area must be used. Installation on wooden surfaces is undesirable due to unreliability. When using the standard brackets included in the kit, it is advisable to use additional braces.
Important! Signal stability and operational safety depend on the reliability of the entire structure. If the receiving device falls, passers-by may be injured, and the antenna itself may be damaged and cannot be repaired. An economical mounting option is inappropriate here.
Material of manufacture
What a satellite dish consists of, namely the construction material, essentially has no effect on the quality of the received signal. The main thing is that it fulfills its reflective function. But there is another important criterion: satellite dishes are always installed outdoors, which means they must be resistant to various external factors.
The coating of the dish is designed to effectively protect it from corrosion, and in this regard, antennas made of aluminum have proven themselves well; they make up the majority of manufactured models. But they have one minor and completely removable drawback - a certain softness. A gust of strong wind can tear the antenna bowl off its mounts: the screws that come with the fasteners can be torn out through the soft metal and your satellite dish may well become “flying.” From the outside it may look comical (a UFO is flying), but in reality it is dangerous, because the device is installed at a height and it is unknown where it will land.
Despite this, we recommend aluminum plates, but with rigid mounting. You can strengthen the mount yourself by using stronger screws and larger washers. A satellite dish made of aluminum, even after several years, will look like new, but will cost you more.
A more economical option is a steel antenna. There is no doubt about its strength; its service life is more than 10 years. If this seems not enough to you, then do not forget that progress is unstoppable, and during this time technology will definitely step forward, as is the case with information compression. But when buying a steel plate, inquire about its protective coating; if it is of poor quality, it may rust.
Plastic satellite dish
Plastic dishes with metal coating are an innovation in the satellite TV equipment market. The ubiquitous plastic has penetrated here too. Whether this is good or bad, time will tell. According to some observations, the price of these antennas is quite high, and the performance is worse than that of aluminum dishes; there is no need to talk about durability. So nothing interesting, except for easy installation.
In areas where frequent and strong winds blow, where installation is carried out at high altitudes, a perforated metal antenna is recommended. The “sieve” effect helps reduce the windage of the antenna.
Satellite TV set
When purchasing a set for watching television channels, you need to know what should be included in it. The main components of a satellite TV set are:
- satellite dish;
- signal converter;
- controlled DiSEqC switch;
- bracket with fastening elements;
- DVB receiver;
- F-connectors for cable connection.
All components are indicated in the operating instructions or in a separate list included in the package.
The dish (reflector) receives a signal from a space device. Mirrors with a diameter of 60 cm - 1.2 m, depending on the obstacles located along the signal.
The head (converter) converts the signal taken from the plate before being fed to the receiver. Conversion devices can be designed for multiple inputs to connect more than one receiver at the same time.
The Disek Managed Switch (DiSEqC) is designed to connect multiple converters.
The fastening device (bracket) serves as an element for fastening the antenna. Requires a careful approach when choosing the geometry of the structure.
The DVB receiver is the most expensive element of the kit. It all depends on the number of encodings supported by the receiver. To view more paid channels, you need a receiver that has a slot for installing an additional module, which increases the number of encodings. The price range depends on the parameters that the devices support.
World Vision Premium Combo Receiver
The connector connecting the cable to the equipment is an F-connector. Minimum quantity – 8 pcs. With its help, cable ends are terminated without the use of a soldering iron. For mechanical strength and insulation, heat shrink tubing can be used on top after connection.
The length of the cable required to connect the dish to the receiver is determined in advance; the choice of brand depends on the characteristics of the equipment. The cable and mounting anchors are purchased separately and are not included in the kit.
Converters
Reducing the frequency of electromagnetic radiation of the signal in the “Ku” (10-13 GHz) and “C” (3.5-4.5 GHz) bands to intermediate values with a frequency of 0.95-2.5 GHz occurs thanks to the converter. This is necessary in order to reduce losses between it and the receiver. As a result, it is also possible to increase the cable length up to 100 m without loss of the carrier signal.
High-quality converters have low intrinsic noise. This is one of the characteristics to consider. Manufacturers indicate a noise range of 0.3-0.6 dB. There are practically no devices on sale with a noise value of less than 0.3 dB, and if the label indicates a parameter of 0.2 or 0.1 dB, it is worth carefully studying the quality certificate and accompanying documents.
Of the models presented on the consumer market, the most commonly used ones can be identified:
- "C" band device;
- “Ku” band converter having circular polarization;
- universal “Ku” band converter, working with horizontal and vertical polarization.
For your information. When choosing a converter, you need to pay attention not only to the noise level, but also to how many outputs this device has. There are converters that have independent sockets for 2, 4 and even 8 outputs, allowing you to connect several receivers with a TV. This allows you to view channels that have different polarizations.
To connect two receiver-TV pairs, you need to buy a converter that has two separate outputs.
Multiswitch connection diagrams
Multi means a lot. To connect several receivers to several antennas so that the receivers work independently, use a multiswitch. While DISEqC allows you to connect only one receiver, the mutiswitch is limited only by the number of its outputs. Do-it-yourself connection is made taking into account the fact that the multiswitch has input and output connectors. Converters are connected to input jacks, receivers are connected to output jacks.
The scheme is assembled according to the following rules:
- the number of receivers corresponds to the number of multiswitch outputs;
- the number of inputs required for one converter is four.
The signal flow is divided into two subranges: upper and lower, as well as horizontal and vertical. Therefore, connecting it will take 4 inputs.
Preparing to install satellite equipment
To understand how to connect and install a satellite dish yourself, there are many tips for “dummies.” All of them can be combined into several points:
- choose the location of the satellite dish;
- determine the direction to the satellite;
- secure the bracket to the supporting base;
- measure the required amount of cable and install F-connectors at the ends.
How to collect a multifeed
When using several converters tuned to nearby satellites, it is necessary to assemble a multifeed for the offset dish. You can do it yourself like this:
- a piece of 30-60 cm is cut from an aluminum tube with a diameter of 12 mm;
- one end is flattened, two holes are drilled in it for 3.5 * 25 mm self-tapping screws;
- the improvised axis is fixed to the existing mount of the main converter;
- two clamps for clamping water pipes, with a diameter of 25 and 16 mm, are threaded into one another;
- a large clamp is used to compress the head in its cylindrical part, and a smaller clamp is attached to the prepared axis;
- adjustment of distances and directions is carried out with loosened clamps.
There are a number of other solutions on how to do this correctly, all of which have practical applications. The main task of the assembly is to obtain a strong and stable fixed position of the transducers.
Installation of F-connectors
There are usually no difficulties in connecting connectors with your own hands. The coaxial cable is released from the outer sheath at a distance of 15-20 mm, the shielding mesh and aluminum foil are turned back. The central core is stripped so that a 5 mm long end is exposed. The lower part of the connector is put on the cable, screwing along the thread. The exposed central core is inserted into the upper part until completely immersed, and both halves are twisted together.
Diseqc connection
When connecting a controlled tunable antenna switch, you need to remember that it does not serve as an amplifier. The numbers 1.0, 1.1, 1.2 indicate the operating protocol, not the gain value. The actual number of connections of controlled or switched devices is determined by the protocol version.
Connecting Diseqc protocols 1.0 and 1.1
Video tutorial by a Polish craftsman on how to make a super radio
Everyone knows that when your child asks you for something, it is very difficult for him to refuse. Just as the author of the proposed story could not after his son approached him with an unusual question: is it possible to obtain photographs of the Earth from satellites?
It turned out it was possible. And not only them.
Weather satellites fly at an altitude of 800 kilometers from the Earth, orbiting around it with a frequency of 100 minutes/orbit. During each orbit, they photograph our planet and broadcast these images.
They can be hacked.
Do you think you will need super expensive and super complex equipment? No matter how it is: an antenna and a cheap TV tuner. Moreover, the antenna is loudly said: a piece of electrical wire is enough to catch the signal. The tuner is also the most ordinary, available in any specialized store. The main thing is that it has the function of an SDR receiver with an RTL2832 chipset.
Article on the topic: How to connect an hdmi cable to an lg tv
2 wires (can be taken from a regular electrical cable)
some plywood or wood for the antenna base
coaxial cable (TV cable)
Father and son hastily put together an antenna from two pieces of plywood, turning them 120° relative to each other, attached 2 pieces of wire to it and installed it on their fence.
To begin with, it was decided to intercept the signal from NOAA satellites. These satellites fly at an altitude of about 800 km above the Earth, orbiting it every 100 minutes. During this flight, they take photographs of her, which are then transmitted on a frequency of 137 MHz to Earth.
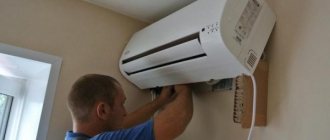
Setting up a satellite dish
For those who have never configured or installed satellite equipment, there are recommendations in the operating instructions. Tuning the antenna to the satellite with your own hands is done by performing the following adjustments:
- next to the fixed reflector there is a receiver, which is included in the kit, and a voltage of 220 V is supplied to it;
- a TV is installed in the immediate vicinity;
- adjustment is made by changing the position of the dish and converter, taking into account the readings of the receiver and observing the “quality” and “level” characteristics of the signal in the menu.
The set speed and frequency on the receiver should be 27500 and 11766, respectively, with polarization “H”. When a dish is connected and there is a satellite signal, a red bar lights up on the screen in the receiver menu. Now you need to make sure that the yellow bar appears - the signal level. The antenna is slowly rotated up, then to the left all the way to find the maximum level point. After finding it, if necessary, correct it by turning to the right.
If the result is negative, lower the plate 2-3 mm along the fastener marks and repeat the procedure.
Satellite dish tuning device
The main inconvenience when setting up satellite dishes this way is the need to bring the TV and receiver close to them. How to quickly set up an antenna if it is located on the roof? Using the satfinder device when setting up the device greatly simplifies the matter. The device is powered from the receiver, signal level readings and spacecraft data are displayed on the display.
Head settings
The minimum satellite signal level for the channels to operate on the tuner is 40%. This is not yet a guarantee of stable operation. Increase the level by adjusting the head by turning it clockwise and then moving it in the opposite direction. You need to choose a higher quality wave. If the mounting design allows, you can work with the displacement of the converter relative to the surface of the bowl. Achieve signal quality of 60-70%.
Setting up side converters
Setting up the side converters comes down to the fact that you need to slowly move the antenna in the horizontal plane from one side to the other and monitor the scale. At values on the quality scale of 15-20%, movement stops. Sometimes when searching you have to change the vertical position of the plate and move it horizontally again.
Finishing setup
The satellite dish is tuned to the satellite, the fastenings are tightened, the cable is laid. How to set up channels? The SCAN function in the receiver menu will create a list of available channels for viewing.
Advantages and disadvantages
If we compare the two most popular types of television satellite receivers - with direct focus and with shifted focus - the picture will be as follows.
Direct focus paraboloid mirrors are available with a larger circumference to reduce transducer interference. These antennas will be useful for those who need a strong signal, and they are also characterized by broadband. But their main disadvantage lies in the complexity of installation, which is made difficult by the bulkiness of the plate and the requirements for its placement. In a direct-focus dish, precipitation will inevitably settle and accumulate, because it “looks” at the sky line at an obtuse angle. They cover the reflective surface, blocking the signal, and cause corrosion, which has a detrimental effect on the working surface. During snowy winters, you will have to clean the antenna bowl frequently.
Offset plates have a number of advantages:
- they are more compact, but this has little effect on the signal quality;
- they are easier to install;
- the position of their fixation prevents the accumulation of sediments;
- have the ability to connect an additional converter.
A slight inconvenience is the periodic cleaning of the offset plate converter from frozen sediments, because... its receiving surface faces the sky. This may make the device difficult to operate in winter.
How to set up a satellite dish tuner
Setting up a satellite dish yourself is completed; now you need to figure out how to set up a satellite dish tuner. To do this, use the “Setup Wizard” option, following its menu, step by step selecting the necessary options from the list of proposed ones. Navigation through menu windows is done from the remote control using the joystick. The selection is confirmed by pressing the “OK” button. The procedure is divided into stages:
- selecting language and time zone;
- selecting settings for connecting to a TV;
- settings of plate parameters;
- automatic channel search.
A message is displayed on the TV screen when the settings are completed, and the TV receiver automatically switches to TV show mode.
How to make a receiver (receiver)
A TV tuner, according to the author of the simplest invention, can be used by anyone, provided that it is built on the RTL2832U chipset (at least, this model was used in the experiment). Its advantages: it’s cheap, can be found on the Internet for less than 600 rubles, easily connects to a computer via USB like a flash drive, and most importantly, it works.
Article on the topic: How to choose a good TV 2016
You can find the model on any Aliexpress and eBay: as an example link: ru.aliexpress.com
The tuner is actually an "SDR" device - a software defined radio, which means it can receive FM frequencies and can be controlled by computer software, which is what we need.
After installing the tuner on Windows, you must "hack" it by replacing the original drivers with the Zadig software. Launch it and click the "Replace Drivers" button.
On Linux the procedure is different and can be found at this link
Installation and connection errors
Connecting satellite dishes yourself and setting up tuners does not always go smoothly. The inability to find a good signal can be caused by installation errors. Anyone who has installed a dish and configured a tuner knows that an incorrectly installed F-connector prevents the signal from passing through. If the cable braid is shorted to the central core, the operation of the entire system is impossible. An incorrectly selected disc output on the receiver also leads to setup problems.
Do-it-yourself installation and configuration of a satellite dish saves the family budget. Despite the complexity of the terms, the initial installation stage does not pose any particular problems. You can see where the bowls of your neighbors’ already installed plates are pointing, and start tuning from this position. The picture quality and large selection of TV channels will reward your time.
General characteristics
A satellite dish for a TV is the first link in the entire home satellite installation. The choice of her model deserves your attention. A properly selected design will last over ten years. The exception may be rare atmospheric conditions such as tornadoes and storms.
Despite their apparent external similarity, satellite antennas have a lot of design differences. Not all devices for receiving communications from a satellite are round and point straight towards the sky. There are complex array and multivibrator antennas that have different radiation patterns. For which a high noise level is allowed, because they perform no less important functions than receiving television programs.