A properly functioning fluorescent lamp lights up immediately after switching on. Blinking once or twice during startup is allowed: this happens as a result of igniting the gas. However, if the fluorescent lamp blinks during operation or the flickering at the start is too long, there is reason to think about the serviceability of the device.
In addition to blinking, symptoms of problems include extraneous sounds made by the lamp, including crackling or humming.
Types of ballasts and features of the electromagnetic choke
There are two types of ballasts: electromagnetic choke and electronic ballast. Each system has its own disadvantages and advantages.
The electromagnetic choke is inexpensive, easy to install and control. Its main disadvantages are great noise and fragility. It is also worth noting that 25% of the power is spent on electromagnetic ballast, as a result of which the efficiency is significantly reduced.
An electromagnetic choke is installed less and less today. But it will also suit you if there are no excessive requirements for the quality of lighting in the room. Moreover, if you choose a good quality throttle (Osram, Philips or Eurosvet), it will serve you for a long time.
Flickering of the switched on lamp
It's easy to find out why your LED spotlight is blinking. Just turn it on and look at the LED. To protect your eyes from bright flashes, you need to use dark glass:
- All crystals are connected in series with gold wires and glow blue.
- In operating condition, they heat up and transfer heat to the metal plate.
- If one of the crystals goes out, the contact between the wires is broken and the circuit stops working.
There are two reasons why an LED lamp may flicker when turned on. This is insufficient voltage in the network and a low-quality power supply. Sometimes the junction between the crystal and the wire shorts temporarily. The spotlight begins to blink periodically or constantly, then recovers. It is difficult to determine such a malfunction.
The LED element has two types of flicker: low frequency and high frequency. The mains current range changes at a frequency of up to 50 times per second. It is called sinusoidal. If the power supply is low, the LED lamps blink when turned on. This problem is most often observed in villages and some regional areas. The electricity supply is weak, and the voltage in the outlet does not exceed 200 V. What to do:
- In order for an LED light bulb to work stably and without interruptions, it must be equipped with a high-quality driver. For residents of such areas, lamp models with a voltage of 180-250 V are suitable.
- Sometimes low voltage appears if the device is turned on using a dimmer. If you do not turn it on completely, models that do not support dimmer will begin to flicker. To fix the problem, you need to increase the power. To do this, the adjusting knob is raised to the rated voltage.
- Any electrical appliance will work poorly and quickly fail with unstable voltage in the network. An installed resistor with a power of several kW will ensure stable voltage in the network.
- If the 12V lights that are connected to the power supply are blinking, this may be due to a lack of power. Most often, this problem occurs in spotlights when LED bulbs are installed instead of halogen models. There is a parallel connection here, which results in an additional load and a voltage drop.
If the LED is equipped with a bad power supply, then it will not be able to sufficiently smooth out the rectified voltage in the network. When the pulsation of light occurs with a small amplitude, it may not be noticeable to a person. But too much flicker, which occurs every day, affects the retina of the eyes, causing them great harm. A device with a pulsation of more than 20% affects mental activity and ability to work. You cannot read or work on a computer with this lighting:
- In Russia there are acceptable CP standards, which are regulated by SanPin 2.2.1/2.1.1.1278-03. Therefore, product manufacturers indicate the pulsation coefficient on each package. But products from Chinese manufacturers have inaccurate data. Most often, the CP indicated on the packaging exceeds the figure several times.
- If you purchased a product from an unknown manufacturer, you can try to change the technical characteristics of the device yourself. To ensure that the light bulb works without flickering, the smoothing capacitor is replaced. The base of the device is opened, the capacitor located inside is replaced with a similar model of higher capacity.
You can fix all problems with LED lamps yourself. The main thing is to establish the cause of the blinking and determine what method is best to get rid of the problem.
If the lamp blinks even during continuous operation, then a possible cause may be large (more than 5%) deviations in voltage. In this case, it is worth checking and eliminating these faults by calling specialists. After all, such deviations in the power supply of your home negatively affect not only the operation of LED light bulbs, but also all electrical equipment.
There are several reasons why a switched on LED lamp blinks. First of all, this includes poor-quality installation. If the circuit contacts are not connected securely enough, this leads to various unfavorable phenomena. One of them is the flickering of the LED device.
When connecting wires, the correct polarity must be observed. If the conductors are color coded, the connection is easier. But in old houses you have to use a special device. It will help you figure out where the “phase” and “zero” wires are located. Otherwise, a small voltage will constantly be present in the circuit. This will cause the light bulb to flicker.
Why do lamps that are turned off flicker?
Before looking for the answer to this question, it is necessary to consider the design of the LED lamp. Despite the fact that it is connected to a network that supplies alternating current, its operating state is maintained constant. In addition, LEDs can operate at voltages less than 220 V.
The design of such lamps includes a device called a driver. It changes alternating current to direct current, simultaneously reducing the voltage. In the place where the input to the driver is located, 4 diodes are located. Electrolytic capacitors are responsible for leveling out the ripples that occur during the conversion of alternating current to direct current. Similar components are used in rectifiers. The voltage is supplied to a capacitive filter, after which it is supplied to an electrical circuit, which converts it and stabilizes the output.
Often the reason that explains the flickering of a switched-off lamp is backlit switches. The latter regularly supplies current to the LED. That is, when the switch is on, electricity flows directly through the contact system, and after it is turned off, it goes through a neon light bulb built into the structure. This light bulb operates under a low load, through which current, in turn, flows.
Gradually, the energy passing through the LED rectifiers charges the capacitor installed in the LED lamp. As the voltage accumulated due to the process described above increases, the amount of voltage reaches a value sufficient to trigger the LED. At the moment the flash occurs, the capacitors are completely discharged, and in the future this process is repeated again. The frequency of occurrence of the described phenomena depends on several parameters of the LED lamp, including the capacity of the built-in capacitor and its power.
Grounding and standards for its installation
Before proceeding directly to the search for protective grounding, let's define what it is and why it is necessary at all. After all, knowing this, it will be much easier for us to identify it on a diagram or in place.
What is grounding?
According to clause 1.7.29 of the PUE, protective grounding is the grounding of electrical installations and devices, performed for electrical safety purposes. This wire does not take any direct part in the process of transmission and distribution of electricity. Its main purpose is to reduce the potential on the housing of electrical equipment in the event of emergency situations.
What is protective grounding?
So:
- Let's look at this issue in more detail. So, we have a phase and neutral conductor through which the operating current of electrical installations directly flows. The grounding conductor does not take part in this process at all, so why is it needed?
Note! Here and below we consider a single-phase electrical network as the most common.
- The grounding wire connects the body of your washing machine, iron or any other electrical equipment to the ground. As we have already noted, under normal conditions it is without tension.
- Current flows through the phase and neutral conductors. But, now let’s assume a situation where the insulation on the phase or neutral conductor is damaged and it comes into contact with the body of your electrical installation. It turns out that tension appears on the body. Therefore, touching it will give you an electric shock.
- If your case is connected to the ground by a grounding conductor, then the excess potential along the grounding wire will go into the ground. This formulation is not entirely correct from a technical point of view, but it most accurately explains the processes taking place. Therefore, I ask professionals not to criticize me. As a result, even if the insulation of the wire is damaged and there is a short circuit to the housing, you can safely touch the housing of the electrical installation.
Requirements for the grounding wire
In general, an entire section 1.7 is devoted to issues related to protective grounding in the PUE. Various grounding options for electrical installations up to and above a thousand volts, issues of protective grounding schemes, cross-sections for each individual case, and much more are discussed here.
We will focus only on issues related to single-phase electrical networks:
- The easiest way to find out which wire is grounding is to identify it by color. According to clause 1.1.29 of the PUE, the protective gap must be indicated in yellow-green color.
The photo shows the most common grounding schemes for electrical equipment for a single-phase network
- The protective grounding wire is also designated by letter symbols - PE. Mostly this designation can be found on diagrams or in places where electrical equipment is connected.
Note! In some circuits you may see the designation PEN. This means that a combined laying of the neutral and protective wires is used. That is, we attach both the neutral and protective wires to a given core or bus.
- If you do the wiring yourself, then you should know that the protective ground wire should not have switching devices.
- As for the cross-section of the protective grounding, it must correspond to Table 1.7.5 of the PUE. For wires with a cross-section of up to 16 mm2, it must correspond to the cross-section of the phase wire. This rule applies to all wires and cables that contain both a neutral and a protective core.
- If the neutral wire is laid separately from the power wire, then according to clause 1.7.127 its cross-section must be at least 2.5 mm2 if the protective wire is protected from mechanical damage, for example, laid in a corrugation. If it does not have such protection, then the instructions require choosing a copper conductor with a cross-section of at least 4 mm2.
- It is also worth noting the material of this conductor. It must match the material of the phase conductor. But since since 2001, only copper wiring has been allowed to be installed in domestic premises and apartments, the protective grounding wire must also be made of this material.
Why does the energy-saving light bulb blink when the switch is turned off? Reasons
Energy-saving lamps are a worthy replacement for conventional incandescent lamps. But, despite many positive qualities, they have a number of negative ones. The most common is the flickering of the lamp after the switch is turned to the “off” position.
Main reasons:
- Malfunction of the lamp itself;
- Incorrect connection;
- Lighting in the switch.
Today, there are a huge variety of energy-saving lamps. They differ in different parameters, one of which is price. Trying to save money, many people do not take into account such important features as the manufacturer and warranty when purchasing. When choosing the cheapest options, it is often discovered that the lamp is faulty even before work begins, and this is followed by additional waste of money. To avoid this, choose trusted manufacturers. Also, a malfunction of the lamp itself may appear after a long time of operation or a power failure. Fixing the problem is quite simple - replace the non-working lamp with a new one.
Flickering can also be caused by incorrect electrical installation. This means that the switch in the circuit with the lighting device in which the flickering occurs does not interrupt the phase, as usual, but the zero. This problem can be easily resolved. If you have basic knowledge of electrical installation, you can do this work yourself. If you don’t have the skills, you can call a professional for this.
Due to the design features of the switch and the operating principle of the energy-saving lamp, flashing occurs. It happens this way. When the lighting is turned off, electricity stops flowing to the lamp and is supplied directly to the LED. A certain charge accumulates in the capacitor and after discharge the lamp flashes. There are several ways to correct the situation. Disconnecting the LED from the power circuit will also help by replacing all backlit switches with regular ones without backlight.
Common causes of malfunction and repairs
The quality of operation of a lighting device of this type depends on many factors. And if at least one condition is not met, then proper operation of the lamp is no longer possible, and flickering of fluorescent lamps is ensured. Starting to understand the reasons for the breakdown of the lamp, it is worth considering the most commonplace options.
First, a damaged fluorescent lamp. If the reason is in the light source itself, then it is worth replacing the lamp with a properly working one and the problem will be solved.
Replacing a faulty lamp
Secondly, a breakdown of the electrical network in which the LDS is connected. There may be voltage surges, disconnections or poor contact that are affecting the correct operation of the fluorescent light source. If you most likely have to put up with power surges, then breakdowns in the electrical network can be eliminated. Check for interruptions in the power supply line and the quality of the connection contacts of the lamp itself.
Third, if the room temperature is below 10 degrees Celsius, the lamp may blink or not light up at all.
Are you sure this is not the reason? We are looking for another option.
Why does an incandescent light bulb blink?
The main reasons for the blinking of incandescent lamps in an apartment are poor-quality contacts in the circuit or faulty electrical wiring and equipment. Before trying to eliminate the cause of the lamp blinking, it is necessary to identify some features that cause it to occur.
Main reasons:
- The lamp connected to the socket blinks;
- Flashing occurs in the lighting fixture connected to the key switch;
- Lights flicker throughout the entire apartment or in one room.
A flashing portable lamp that is powered from an outlet must be checked for functionality by connecting it to different outlets, the reliability of which you are absolutely sure of. The lamp has stopped blinking, a certain socket is faulty. If the blinking continues, you should disassemble the lamp, check and, if necessary, clean the contacts.
If the lamp(s) in the lighting fixture connected to the key switch blinks, then most likely the lamp itself or the wiring section is faulty. First of all, replace the flashing lamp with a working one. If this does not help, you need to check the switch contacts or ring the wiring going from the switch to the lighting fixture.
Flickering of light throughout the apartment or in a certain room indicates several reasons. If the lighting is not stable not only in your home, but also in nearby houses, and flickering occurs in all rooms, then there are two reasons for the malfunction. Poor quality supply of electricity by the supplier company or malfunction of power equipment. If everything is flashing in only one room, this indicates an uneven distribution of electricity in the apartment.
Over the past couple of decades, a movement that cares about preserving the environment on our planet has become very fashionable. But such fighters often encounter completely unexpected problems and try to find out why an energy-saving lamp blinks when the light is turned off, how the stroboscopic effect affects human vision, why there is mercury in fluorescent lamps. What can I say, sometimes you have to pay for your desire to help the planet.
Reason one: backlight on the switch
Nowadays, backlit switches are quite common. An ordinary LED or neon lamp built into the standard design added convenience - it became easier to find the switch in the dark. However, when combined with this add-on, the energy-saving lamp flickers. The answer why is quite simple. The power circuit in such lamps is designed so that a certain charge can accumulate on the filter capacitor.
And everything turns out like this:
- when the switch is on, all the current goes to the lamp
- when the light is off, current flows to the LED, and a small charge also accumulates on the condensation filter
- As soon as the capacitor is sufficiently charged, the energy-saving lamp flashes
- then the cycle repeats
A switch with an LED is the answer to the question of why the lamp blinks. There may be several solutions to a problem. First of all, an energy-saving lamp can be replaced with an incandescent lamp, which will not blink due to the principle of its operation. But this is rather an escape from the problem than a solution to it. Another way to partially escape from such trouble is to sacrifice the backlight by breaking the power circuit. The next option is more acceptable, but has its own characteristics: if there is room for two light bulbs, you can put one energy-saving lamp and the other incandescent. Then, when the light is off, nothing blinks. And the most drastic option is to replace all backlit switches with switches without backlight.
The device of fluorescent lamps
The glow in a fluorescent lamp occurs due to an arc discharge between two opposing electrodes. Inside the flask there is a gaseous environment where an inert gas is mixed with mercury vapor. The generated radiation remains invisible to the human eye until it is converted into visible light due to the luminescence effect. This reaction is a non-thermal glow of a substance that occurs as a result of its absorption of energy received from outside. The inner walls of the flask are coated with a phosphor that absorbs ultraviolet radiation and emits visible light.
Note! Light shades can be changed. To do this, it is enough to change the composition of the phosphor.
The arc discharge is maintained due to thermionic emission of charged particles (electrons) from the cathode surface. To start the light bulb, the cathodes are heated or current is sent through them. Ion bombardment is possible in a glow discharge at high voltage. The limitation is ensured through the use of ballast.
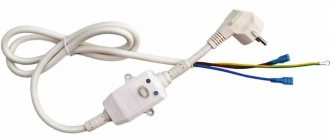
The fluorescent lamp consists of the following elements:
- frame;
- fluorescent light bulb;
- cartridges (there are two of them in each flask);
- starter and throttle (thanks to them, the necessary voltage is supplied to ignite the gas);
- capacitor (allows you to get rid of interference that occurs when turned on from other devices).
The most common causes of malfunction
The quality of operation of a lighting device of this type depends on many factors. And if at least one condition is not met, then proper operation of the lamp is no longer possible, and flickering of fluorescent lamps is ensured. Starting to understand the reasons for the breakdown of the lamp, it is worth considering the most commonplace options.
First, a damaged fluorescent lamp. It may be time to replace the old lamp with a working one and the problem will be solved.
Secondly, a breakdown of the electrical network in which the LDS is connected. There may be voltage surges, disconnections or poor contact that are affecting the correct operation of the fluorescent light source. If you most likely have to put up with power surges, then breakdowns in the electrical network can be eliminated. Check for interruptions in the power supply line and the quality of the connection contacts of the lamp itself.
Third, if the room temperature is below 10 degrees Celsius, the lamp may blink or not light up at all.
Illuminated switch
As mentioned earlier, such switches are often the cause of failures in the operation of the LDS. The point is that when the switch is turned on, the power contacts of the switch are closed to each other and the mini-light in the switch does not work; when turned off, it lights up. And if it burns, it means that electric current is flowing to it. The current flow diagram in such a circuit consists of a network, an indicator and a chandelier. Yes, this current is small, however, it can serve as a good charge for the capacitor of a fluorescent lamp. At the moment when the capacitor reaches a sufficient charge level to turn on, a flash occurs. It discharges and the process starts again. The cycle continues until the light is turned on.
Incorrectly connected electrical wiring
The fluorescent lamp connection diagram is correctly constructed - this is undoubtedly an important part. If you do not follow the banal rules of radiophysics, you can not only ruin the LDS, but also harm yourself and others. There are various connection schemes, but their general principle is simple. When the power supply is connected, a discharge occurs in the starter and the electrodes close, after which the current in the circuit of the electrodes and the starter is limited by the resistance of the inductor - the current in the lamp increases, the electrodes heat up. At the same time, the bimetallic contacts of the starter cool down and the circuit opens. At the same time, the choke breaks, thanks to self-induction, creates a triggering high-voltage pulse, which leads to a discharge in the gas environment and the lamp lights up. After which the voltage on it will become equal to half of the mains voltage, which will not be enough to re-close the starter electrodes. When the lamp is on, the starter will not participate in the operating circuit; its contacts will and will remain open.
Read also: How to bend an aluminum profile at 90 degrees
If the cause of the malfunction is an incorrectly constructed connection diagram, then you need to completely disassemble all parts of the circuit. Arrange them in the correct order. Test the operation of the lamp.
Remember that to repair equipment dependent on the electrical network, you need to have a certain set of radio engineering knowledge. You also need to have specialized tools with you: a multimeter, a soldering iron, a set of screwdrivers, spare parts for the device, and more.
We repair lamps with fluorescent lamps
The use of fluorescent lamps has become widespread both in industrial and office premises, and in everyday life. Compared to traditional incandescent lamps, their use provides significant advantages in terms of energy savings. But almost everyone has had to deal with a situation when either a fluorescent lamp hums or it starts to blink. Just 10 minutes of being in a room with a faulty lamp is enough for a person to completely lose their ability to work. It is recommended not to delay lamp repair for a long time.
What to do if the lamp is humming
Sometimes owners of lamps with fluorescent lamps notice that it not only blinks, but also hums. However, the LDS itself cannot produce such a sound, the reason is the throttle, which starts it and keeps it running. The ballast may produce a hum if you purchased a low-quality device.
To avoid problems with fluorescent lamps, you need to know how to choose the right ballasts.
The starter is used to create an arc in a gas-discharge light source. This device heats the electrodes, provoking ignition, and after breaking the circuit, an increased voltage pulse is formed, due to which a breakdown of the gaseous medium of the flask occurs.
The table lamp is blinking
Is your table lamp blinking? I have a local lighting lamp, or rather a table lamp. I use it all the time and everything would be fine, but the 11 W fluorescent lamp used, at times, doesn’t want to light up, but instead just constantly blinks. As I understand it, the lamp cannot reach normal operation. Needs improvement. To light it, you first need to apply increased voltage to the electrodes, if this is not the case, then the table lamp blinks. There is a choke installed in the plug of our table lamp, and this is exactly what it does together with the starter.
In large lamps, the starter is installed separately; in my case, it is located in the lamp base. However, the problem is not in it, not in the lamp or inductor, but in the floating mains voltage and old electrical wiring in the house. But, you can still get rid of the fact that the table lamp is blinking if you make some improvements. Now many people use energy-saving lamps; in the collapsible base of this lamp there is an electronic circuit called electronic ballast. In my experience, the filament of the lamp itself often burns out, but the electronics can continue to work. This is what I used to refine it.
It is only important that the power of the table and energy-saving lamps coincide or do not differ significantly. For example, for 11W, I installed 9-watt energy-saving electronics on one of the modified lamps. But the ideal option is one to one. What needs to be done to improve the table lamp:
- Change the plug to a regular one
- Find and disassemble an energy-saving lamp of the same power.
- Take the electronic circuit from there, carefully disassembling the base.
- Make sure the electronics are in good working order.
- Place the board in a table lamp and solder the wires from the plug to the contacts where the wires from the base went.
- Remove the lamp from the table lamp and carefully disassemble the base and remove the starter
- There is a capacitor on the board, it needs to be unsoldered and installed in the base, instead of the starter. Here's how it is in the diagram.
- Connect 2 wires from the lamp to the circuit, where the wires went to the bulb of the energy-saving lamp.
That's it... I haven't had any more problems like this, the modification helped a lot, the table lamp lights up immediately and has been working for several years. I hope I explained what to do clearly. Good and long-lasting lamps for you!
There are no similar articles.
Reason three: poor quality lamp
Sometimes the simplest answer is the most correct. Why does the switched-off lamp blink - because it is faulty. An energy-saving lamp in itself is a great way to save money, but many people try to save even more by buying light sources of unknown origin. Unfortunately, now there are really a lot of products that do not comply with GOST. In this case, correcting the situation is quite simple - just buy a new lamp.
When choosing, you should pay attention to:
- package integrity
- manufacturer
- mandatory check upon purchase
For an apartment, energy-saving lamps that provide warm light are more suitable. For non-residential premises - cold. It is most important to install compact fluorescent lamps, since they have already proven themselves. But you should base your choice on the situation.
Reasons why a fluorescent light bulb blinks and how to eliminate them
Flashing after switching on
There may be several reasons why the light bulb blinks after turning it on. First of all, this is a low network voltage, which prevents the structure from igniting. In this case, it is necessary to check the voltage and, if it deviates greatly, contact the appropriate technician. It is worth noting that with constant deviations in the network voltage, the service life of any lamps is reduced by about a fifth.
The next reason for the blinking of the luminescent structure may be a malfunction of the trigger circuit of the light bulb itself. In this case, you can’t do anything with it, and all that remains is to change the light bulb for a new one. The last reason that the light bulb blinks is constant power surges. This may be the fault of both the electrical energy supplier and other residents of the house who connect powerful equipment to the network.
Blinks for a while after switching on
If the light blinks for the first few seconds after switching on and only then lights up, this indicates a failure of the starter, which simply needs to be replaced.
Blinks after switching off
There may be several reasons for the luminescent structure to blink after switching off, as in the first option. The most common is blinking due to the use of a light bulb and an illuminated switch. The energy that is used to power the backlight ignites the light bulb, but it is not enough to start it, so the design blinks only for a while. To fix this, you simply need to replace the switch with a new one without backlight.
Algorithm for repairing serious damage.
When starting to repair non-surface faults, you need to determine why they arose. Here are some popular options.
An unconnected fluorescent light source blinks
Often the cause of this problem is a simple backlit switch. It is he who switches the lamp into emergency mode. Many manufacturers indicate operation information on the packaging of lamps: it is not recommended to use them together with dimmers and switches with LED elements.
The lamp blinks for a while after switching on
If your lamp blinks 1-2 times after turning it on, then there is nothing wrong with that. This factor is the norm, not a deviation. No worries. This is due to the fact that the installed LDS has an electromagnetic starting system. However, if the delay when fully turned on exceeds 5-10 seconds, the starter is faulty.
Why does a fluorescent lamp blink but not light up?
Several options are possible: failure of the starter, capacitors, choke, cartridges, or breakage of the lamp electrodes. If the starter, choke, cartridges fail, or if current leaks from faulty capacitors, they simply need to be replaced with new ones. You can purchase the elements at any radio parts store. You can find a video with installation instructions on the Internet.
Operation of lamps with electronic ballast
The outdated electromagnetic ballast is gradually being replaced by more modern and reliable electronic circuits. In this case, fluorescent lamps are turned on without a choke, using only one electronic unit. In this device, all processes are sequentially formed, including those associated with voltage changes during ignition.
Compared to electromagnetic ballast, electronic circuits have significant advantages:
- Starting with any time delays is possible.
- There are no large-sized elements in the form of a throttle and starter.
- The lamp does not hum or flicker during operation.
- Electronic equipment increases luminous efficiency.
- These devices are much lighter and more compact, they have a longer service life.
In everyday life they are called drivers. Their small size allows them to be placed inside the sockets of compact fluorescent lamps and used together with conventional standard-type sockets.
Electronic equipment converts ordinary current into high frequency voltage. First, the electrodes are quickly heated, after which high voltage is applied. High frequency improves efficiency and completely eliminates flicker during operation. The creation of increased voltage occurs due to the oscillatory circuit. It causes resonance and subsequent ignition of the lamp. After the starting voltage is reduced, the discharge is maintained at the required level.
Over time, the characteristics of the lamps change and they gradually lose their quality. In this regard, the electronic circuit has a function of automatic adjustment to current parameters. For example, a worn lamp requires increased voltage when starting, and if it simply does not start with an electromagnetic ballast, then the electronic circuit can easily adapt to the changed characteristics and ensure normal operation.
Electronic ballasts (EPG)
Invented about 30 years ago, and every year it is more and more actively used in conjunction with fluorescent lamps. Allows you to get rid of most of the shortcomings of the electromagnetic choke, while significantly increasing the efficiency (reaches 95%) and reducing power consumption by 30% in comparison with an electromagnetic starter.
Electronic ballasts are electronic ballasts that both start and power the lamps. Can be used both for one lamp and for the entire raster lamp. There is only one drawback - the cost is more expensive than the electromagnetic unit.
Advantages of electronic ballasts:
- doesn't make noise
- allows you to eliminate flashing at startup,
- and also extends the life of light sources.
It is worth noting that an electronic choke takes up much less space and is lighter - such mini chokes are installed in miniature lamps.
Malfunctions of fluorescent lamps and ways to eliminate them
Such lamps are a technically complex device. Characterized by a large number of structural elements that have many contacts. Such a complex structure simply has to fail from time to time. And problems can be different. For example, such as:
- The lamp begins to blink rapidly, but does not turn on. Most likely it has malfunctioned. If the contacts are serviceable and there are no short circuits in the wiring, it needs to be replaced.
- There is a glow at both ends of the lamp for a long time, but it does not light itself. Check the starting starter, the integrity of the wires and the condition of the contact groups of the socket so that the lamp lights up evenly;
- Periodic dim orange glow at the ends of the lamp. This means that the cartridge is depressurized and air is entering the flask. Such a lamp must be replaced immediately. When removing it from the cartridge, be sure to follow safety precautions. If you twist the bases or break the glass covering, toxic mercury vapor can enter the air;
- If it starts to burn out quickly, burns dimly, turns black at both ends, and the glow is uneven, the culprit is the starting choke or electronic ballast;
- Unpleasant hum of the lamp. Actually, there is nothing to buzz in the lamp itself; there is nothing in it except gas and a spiral. Most often, the reason lies in the starting throttle. This effect was seen in Soviet-style lamps. In those days, electricians simply removed the protective covers from the windings. If this does not help, place a thin rubber gasket under the fastenings. The buzzing has not stopped - it is better to replace the throttle. In modern lamps, the lamp or starter can be replaced;
- The lamp does not fit into the mounting sockets. The reason is a broken or bent contact. This can happen if transported or stored incorrectly. In case of such a breakdown, the lamp must be replaced with a working one;
- The lamps were on, but suddenly went out. It happens that the vibration of the lamp breaks the wire. Usually near the lamp holder or choke. You will need to solder the wires to restore the circuit.
Modern fluorescent lamps have a special ballast resistor. Thanks to it, a high voltage is provided to ionize the filler gas, which instantly drops immediately after the glow appears. Such instantaneous lamps are gradually replacing outdated devices with a starter from everyday use.
Main types of faults.
Before we look at the causes and consequences, let's look at several types of manifestations of incorrect operation of a fluorescent lighting device in order to correctly determine the cause of the breakdown and how to eliminate it.
- The lamp does not blink, but does not turn on either.
- When the LDS is turned on, light appears only from one end of the lamp, and during operation the brightness does not increase.
- Doesn't blink, but crackles and buzzes.
- Some time after switching on, it begins to get dark at both ends, and interruptions in the light supply appear.
- The switched off fluorescent lamp blinks.
Principle of operation
To understand why a fluorescent lamp blinks, you need to understand the technical characteristics of the device. Electrical equipment is classified as gas-discharge type. For most models, the body is made in the shape of an elongated cylinder, although complex geometric designs are found. Tungsten electrodes, reminiscent of incandescent coils, were placed at the ends of the device. The elements are soldered from the outside to the pins to which current is supplied.
Daylighting equipmentSource 220.guru
A gas environment with negative resistance was created inside the glass flask. To connect to electricity, the circuit uses a ballast (choke). The part generates a voltage pulse, due to which the fluorescent lamp turns on. The design also includes a starter operating in an inert environment and a bimetallic plate.
In the inactive state, the electrodes are open. When the current is turned on, the energy moves along the spirals, gradually heating them up. Electricity enters the starter, in which a glow discharge appears. When the contacts heat up, the plate closes and the functions of the conductor are transferred to the metal.
Device operation diagramSource bigslide.ru
When the temperature in the network decreases, the contact opens. As a result of self-induction, the ballast creates a high voltage pulse. As a result, the fluorescent lamp lights up. Electricity flows through the device, which is reduced at the throttle and is halved. A capacitor protects the equipment from network interference.
Gas-discharge lamps are divided into different categories according to their parameters. For convenience, manufacturers classify devices according to four criteria:
- Power. The main characteristic, which is indicated in watts (W).
- Diameter. The larger the bulb, the brighter the light. The cross-section is indicated in millimeters; additionally, data on the length of the body is entered through a fraction.
- Start type. Models working with a starter are marked with the abbreviation “PHs”, designs without a part - “RS”.
- Form. In shaped devices, Latin letters are used to indicate the type of flask.
Standard lamps with single-layer phosphors emit different tones of white, so they are suitable for residential and industrial premises. Models with improved light transmission use up to 5 tiers of spraying. The devices are 12% brighter than traditional types, which allows them to be used in shop windows and exhibition halls.
Luminescent models in the interiorSource masterpotoku.ru
Fluorescent lamps have high luminous efficiency. 20 W models provide the glow that 100 W incandescent devices have. When used correctly, the structures last up to 20 thousand hours.
How to extend service life
The longevity of lamps depends on proper use. Do not use the equipment at low temperatures, otherwise it will quickly fail. When working in wet conditions, preference is given to models with an increased degree of protection against water (IP). Elements that are too powerful should not be screwed into a home chandelier. The manufacturer indicates on the packaging the purpose of the devices.
The soft-on function will extend the life of the light bulbs. Ignition cycles have a greater impact on the longevity of devices than operating time. You should not install fluorescent models in rooms where the lights are constantly turned on.
Rules for operating lampsSource businessman.ru
Professionals recommend sticking to the 10-minute rule. Switching on or off again can only be done after this period has ended. Over time, the discharge between the electrodes improves and the mercury is transformed into a gaseous state. The device switches to glowing with maximum efficiency.
The durability of a fluorescent lamp depends on the installation method. When positioned with the base up, the device heats up, which leads to damage to the electronic unit. It is better to screw the devices in with the base down.
Extend service lifeSource buildoman.ru
Overheating often occurs due to the technical characteristics of the lamp. Professionals do not recommend installing compact fluorescent lamps in a model with a closed shade. When switched on, the equipment generates heat, which does not escape from the internal space of the structure. With regular use, the device quickly breaks down.
Advantages and disadvantages of LL
LL is a gas-discharge light source with a high degree of light output due to the passage of electric current through the gas that fills the glass bulb. In everyday life and in industry, low-pressure mercury lamps are used for lighting, which are a glass tube, sealed at both ends, with external contacts. The inside of the glass surface is covered with a thin layer of phosphor, and the tube itself is filled with inert gas argon and mercury vapor.
But unlike conventional incandescent lamps, their operation requires additional control equipment - a choke and a starter.
Therefore, the use of fluorescent lamps has its pros and cons.
Among the advantages:
- They have good light output and higher efficiency (than an incandescent light bulb);
- The light is not narrowly focused, but more diffuse;
- Large variety of color shades of emitted light;
- They are distinguished by a long (from 2000 to 20,000 hours of continuous operation) service life, subject to no more than five starts per day.
The disadvantages include:
- Due to the use of mercury vapor, they have a high chemical hazard;
- The radiation spectrum is unpleasant for the eyes, which can cause distortions in color rendering;
- The phosphor coating itself tends to age over time, leading to a decrease in light output, which also leads to a decrease in efficiency;
- A working lighting fixture flickers at twice the frequency of the mains voltage;
- The presence of additional ballasts - throttle and starter. Due to the large number of connections of auxiliary devices, operational reliability is reduced;
- The lamps themselves have a fairly low power factor.
LED lamp repair. detailed instructions
Do-it-yourself repairs > Lighting > LED lamp repair. detailed instructions
Hello! Has your LED lamp stopped glowing? Then this article is for you. After all, many people think that it is difficult to repair an LED lamp on their own and often throw them away. And in vain! After all, the cost of LED lamps today relative to simple incandescent lamps is quite high.
From the practice of repair, it is easy to repair lighting devices based on LEDs, without having in-depth knowledge of electronics. At the same time, by repairing an LED lamp with your own hands, you can save a lot of money from your family budget.
LED lamp device
A simple low-power LED lamp consists of a housing, a base, a matte light diffuser, a block of LEDs, and a power supply driver (in cheap low-power LED lamps a simple transformerless rectifier is used).
Operating principle of LED lamp
Let's look at the operating principle of an LED lamp using an inexpensive Chinese one as an example. To do this, look at the diagram below
220V LED lamp circuit
A network voltage of 220 volts is supplied to the diode bridge rectifier circuit through the current-limiting capacitor C1 and resistor R2. At the output we obtain a constant voltage, which is supplied to the LED block HL1 through the current-limiting resistor R4. At the same time, the LEDs begin to glow. Capacitor C2 is designed to smooth out ripples of the rectified voltage. Resistor R1 is designed to discharge capacitor C1 when the power to the LED lamp is disconnected from the network.
How to repair an LED chandelier or lamp with your own hands
If a chandelier or lamp stops glowing, then first of all I recommend starting to check the presence of supply voltage supplied to the lamp. If, when you turn on the chandelier with the switch, there is no voltage on it, then you need to carefully check the electrical wiring. If voltage is present at the contacts of the socket where the LED lamp is screwed, then the reason is in the lamp.
DIY LED lamp repair
As I said above, an LED lamp consists of a power supply circuit and the LEDs themselves. You must first carefully disassemble the LED lamp and carefully inspect the power supply (rectifier) for external damage (burnouts of parts, burnt out traces of the printed circuit board). If this is not visually detected, then we proceed to checking the elements using a digital multimeter. Often the cause of the malfunction is a faulty current-limiting capacitor C1 with a capacity of 1 μF with a voltage of 400 volts. You can't check it without unsoldering it from the circuit. It is best to replace it with a known good one.
Checking the rectifier diodes is carried out using a multimeter. We switch it to diode measurement mode and call
If the capacitor and diodes are in good condition, pay attention to the condition of the current-limiting resistors R2 and R4. They may outwardly seem undamaged, but when dialed they may have a break
Checking the Lamp LEDs
Depending on its power, a lamp can have from several LEDs to several dozen.
Sometimes, when examining a board with LEDs, you can immediately see the burnout of some of them. Such LEDs must be replaced. Other LEDs also need to be tested with a multimeter or a voltage of 2.5-3 volts must be applied to them from an external source through an ohmic resistance of 100-200 Ohms. If they light up, then they are working properly. LEDs can be used from old LED strips. You are required to be able to use a soldering iron.
Why do LED lights blink?
The reason is that the lamp manufacturer used a low-quality current-limiting capacitor C1. Replace it with another one with a rated operating voltage of at least 400 volts. I don’t recommend setting it to 250 volts, as it will quickly fail and the entire circuit will simply smoke. My lamp is shining brightly after replacing the capacitor! ))
Good luck in repairing LED lamps and lamps based on them!