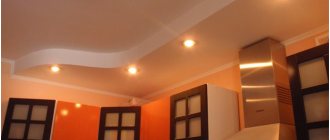
In this article we will look at how to correctly and quickly install a spotlight with your own hands in a plasterboard or slatted ceiling.
To begin installation, we must carry out preparatory work:
first, turn off the power to this group of electrical appliances, but since the installation of a spotlight should be carried out in a well-lit place, it is necessary to take care of sufficient lighting of the room.
Tip: Turn off the electricity using the required automatic circuit breaker or a general switch; do not rely on the room switch, often it opens only “zero” and not “phase”.
Preparatory work
If there are several spotlights and they are located at a small distance from each other (up to 500 mm), then it will be enough to stretch the wire to the nearest one. This process is carried out before the installation of the ceiling structure begins. Then, after the ceiling is completely installed, the cable is routed from device to device. Which wire should I use? Of course, from the point of view of ease of connection to the marks, it is flexible multi-core, but from the point of view of quality and reliability of installation, it is necessary to choose the same one as for all wiring. More often it is a hard copper wire, for example VVG-2x1.5.
We fix the wires in the terminal block
If a step-down transformer is used, then there is one important nuance. When using low supply voltage for halogen lamps (12 Volts), the voltage drop in the wires will be of great importance. In short, the wire must have a cross-section of more than 1.5 sq. mm, preferably 2.5. And the length of the cable to each lamp must be the same, so that the voltage drop is the same.
Operating principle and design
The spotlight consists of three elements:
- a base that is attached to the surface;
- housings with clamps;
- connecting cable.
The vast majority of devices have a solid type housing.
Spotlights for incandescent lamps are structurally divided into two types:
- The open type is characterized by a U-shaped design.
- The closed type involves the use of a casing to protect the lamp from condensation; it is optimal for use in damp rooms.
Additional protection of the housing from high operating temperatures is not required. It is provided by the features of lamps built into the points. Their flasks are coated on the outside with mirror amalgam, which serves to protect the structure from overheating. The back surface of the bulb is matte, which promotes uniform distribution of light.
For correct operation of points with halogen lamps, a transformer is required. The principle is simple: the more lamps, the more powerful the transformer is needed. An induction or electronic option is suitable. During installation, the distance from the lamps to the device is taken into account - if it exceeds two meters, up to 100 W of power is lost due to resistance.
Making holes for spotlights
The correct installation of a spotlight in drywall or plastic is done as follows: you need to make a hole of the required size for it. The diameter of the hole to be made is often indicated on the packaging of the lamp, but to check it is better to measure it again. The most popular hole diameters for spotlights are 60mm and 75mm .
After marking, we use a drill and a special bit to cut a hole of the required diameter in the drywall (the size of the hole should be as close as possible to the size of the lamp), and pass the connection wires through it.
In Armstrong-type suspended ceilings, drilling is not required - just use a sharp utility knife.
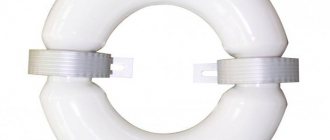
If you have suspended ceilings, then everything is more complicated - here all the holes and their sizes and positions on the canvas are designed in advance at the stage of drawing the ceiling. Special thermal rings are installed that prevent the ceiling film from overheating from the temperature of the lamp. Thermal rings also add mechanical strength to the area where the spotlight is installed.
Which ones are better
The simpler the design of the lamp, the easier it is to maintain. More often this applies to kitchen lighting fixtures, on which, in addition to dust, grease deposits accumulate over time.
- Rounded models are better suited for suspended ceilings - during their installation and subsequent maintenance, damage to the material by sharp corners is unlikely.
- Devices with incandescent lamps project bright, familiar light, but their mounting is not very compact. Ceiling and wall frames are mounted taking into account the size of the fasteners, as a result, precious centimeters of height or space of the room are “eaten up”.
- Lamps for halogen lamps can be built into the frame at a close distance from the surface - only 4 cm is lost. Additional advantages are reduced energy consumption, brightness and durability. Lamps with a ceramic socket and glass diffuser do not create problems with overheating.
The use of spotlights in conjunction with suspended ceilings implies a limitation on the power of the installed lamps. For halogen options, the threshold values are 35–40 W. For incandescent lamps this figure should not exceed 60 W.
DIY spotlight installation
Installation must be done after all finishing work has been completed (pasting or painting the ceiling). This process already refers to finishing work.
You need to start by running a wire into each hole.
Afterwards we proceed directly to the installation of the spotlight. Along its edges there are special pressure springs, with the help of which the device is held in the plane of the ceiling. You need to bring them together, then insert the lamp into the drilled hole in the ceiling, and then they will move apart and press the lamp.
All this is not very inconvenient. In addition, there is a possibility of damage to the expensive ceiling, especially if the springs are tight and the lamp does not immediately fall into place and has to be moved.
In this regard, it is better to bring the antennae together “on the ground with a small piece of cable, which is then cut in the ceiling.
This solution is quite convenient when you have to install a lot of expensive lamps in a beautiful ceiling, and when you don’t want it to get dirty and scratched.
Which is better: heated floors or radiators?
Warm floorBatteries
We carefully mount the lamp in place, then cut the wire with wire cutters - and the lighting fixture now stands as it should without much effort or problems.
GX53 base - what is it?
It would be a good idea to understand the meaning of the word “base”, and in this case it is a part of a lighting device intended for fastening and transmitting voltage to the lamp bulb, although there are other meanings (in construction). As mentioned above, lamps with such a base are usually used for suspended ceilings of various types, such as polyvinyl chloride (PVC), plasterboard (gypsum plasterboard), slatted and panel PVC or MDF structures. This lamp is a recessed spotlight that allows you to reduce the space between the main and suspended ceilings to 15 mm, which is very important for low rooms.
The base is the part of the lamp through which electric current is supplied to it, and the lamp is attached to the lamp shade Source bclight.ru/blog
The GX53 socket is not similar to the threaded models we are used to, but has two pins, which, when turned, secure the device into the socket. This method of connection in luminescent devices means contact with a spiral in a flask filled with gas, and in LED or, as they are often called, tablets to the anode and cathode through a microboard - connection diagrams are always printed on the packaging. Lamp sockets with a GX53 base made of dielectric refractory materials in the form of a plane with two contact slots for the base pins. That is, to install a lighting device, the GX53 base is inserted into the socket and rotated until it stops, which is indicated by a click.
The letters and numbers in the GX53 markings have their own purpose:
- G indicates a pin connection to the socket.
- X indicates that at the end of each contact there is a thickening in the form of a cap, like on a nail or screw.
- The numbers 53 indicate the distance between the pins, which in this case corresponds to 53 mm.
The LH50 socket is designed for connecting lamps with a GX53 socket to a 220 V power supply; the device body is made of self-extinguishing plastic Source ntersvet.pro The
size of the LED lamp with such a socket is 75×27 mm, and the parameters of the socket are 75×10 mm, which allows you to leave a thin ceiling sinus no more than 15 mm. If we talk about apartments where the ceiling height is 240-250 cm, then a lamp with this geometry will be a panacea for low rooms.
Connecting spotlights
Connecting recessed luminaires means connecting our mounting wire to a base with flexible leads.
So, let's start electrical installation work, strip the ends of the connection wires from insulation and use terminal blocks to make a connection to the lamp (if you have a 12v lighting device, then the intermediate link in this connection may be a transformer or an electronic converter)
Next, you need to wear gloves if you have halogen lamps.
We put the socket on the lamp, install the lamp in the lamp, and fix it with a latch.
That's it, the installation of the spotlight is complete, we supply electricity and check our work.
Installation of spotlights in a plasterboard ceiling
Interior design often includes structural changes to the ceiling. Gypsum board is a very popular material used for ceilings. It is used for various design options. This is either a solid suspended ceiling or relief ceiling structures. In any case, a gap is created between the main ceiling slab and the drywall. It is used for installation of spotlights.
In any project, plasterboard lamps built into the ceiling are one of the best solutions for high-quality lighting. In some design projects, these light sources may be the main lighting instead of a chandelier. This article will tell you how to install LED spotlights for plasterboard ceilings, as well as what other light sources can be used in these structures.
Where to begin?
Before starting work on upgrading the ceiling, it is recommended to make a preliminary design. It depicts the ceiling, the contours of plasterboard sheets, if any construction of them is provided, ceiling lights built into the plasterboard structure, electrical wiring to power the light sources. It should be attached to the ceiling with clamping brackets on dowels, in holes drilled in the ceiling slab. Properly installed wiring uses a corrugated tube. If the base of the ceiling is made of wood, the corrugation is selected from metal. If the ceiling is concrete, it can be plastic.
In those places of the supporting ceiling slab, under which the mortise lamps will be located in the plasterboard, a loop is made from the cable. The location of the loop must coincide with the marking at the point for installing the light source on the drywall. It is best to drill small basic holes in the drywall for the lamps before attaching the sheets to the ceiling. This is more reliable than marking with a pencil or marker. After installing the electrical wiring, which is more convenient to do with a multi-core cable on the main ceiling, drywall is attached to it.
Holes for lighting fixtures
The areas where there will be holes must be marked in advance on the drywall. This approach will allow you to avoid future inconsistencies between hinges and prevent damage to the fasteners of plasterboard sheets when drilling holes.
When preparing holes, it is recommended to follow these rules:
- Lighting fixtures are placed no further than 1.2 meters apart. It is important to observe the intersection of the angles of the light streams. At the same time, ceilings are characterized by insignificant dispersion angles.
- The distance between the place where the lighting devices are fixed to the plasterboard sheet and the wall should not exceed 60 centimeters.
- The holes are drilled using a wood crown or a circular adjustable drill. The latter option is optimal, since drills with adjustable cutters allow you to achieve better drilling quality.
- It should be kept in mind that the hole is blocked by the front side of the lighting fixture. In this case, the hole should not be larger than the internal cross-section. This is the only way to securely secure the device.
- Drilling is carried out at low speeds - this will avoid destruction of the finishing material.
Applicable light sources
Spotlights are very popular in both residential and office spaces. Structurally, they are all similar, despite the fact that the light sources can be halogen and xenon lamps, as well as LEDs. Models for lamps are made as a reflector with a socket into which the lamp is inserted.
Typically, LED luminaires are equipped with LEDs to achieve minimal dimensions. They are built directly into the reflector or light diffuser. Many spotlights have almost the same diameter. The main differences are in their length and depth. Halogen and xenon lamps installed in ceiling luminaires should not heat the housing more than 60–70 degrees Celsius. High temperatures are not good for drywall.
Cut with a knife
The most time-consuming and dangerous method, but if there is no other option, then it can be safely used. A circle is drawn along which they carefully begin to cut through the material.
An example of cutting a hole in drywall with a knife
Working with drywall is carried out in several stages, since in one pass you can cut no more than a millimeter. In total, you will have to make about 10 passes until the drywall breaks off. It is not difficult to do such work as making a hole in drywall, just follow the algorithm described above.
How big holes are made
Typically, installing spotlights in drywall begins with measuring the basic dimensions of the housing. For each of them you need to cut a mounting hole. To do this, you can use one of two special drilling attachments for an electric drill. The first one is a set of circular saws. A slightly larger blade is selected from the set to suit the diameter of the body.
Another device is a milling cutter on the rocker arm. It allows you to cut holes whose diameter is larger than the saws in the set. If you need to install large recessed lights in drywall, a milling cutter is the most suitable tool. These two electric drill attachments make it possible to quickly make perfectly round holes.
But if you don’t have a drill, you can do without it by using a short saw with a narrow blade. Before cutting holes, you need to make markings according to the template. The template can be selected from used rolls of adhesive tape, as well as any lids or boxes of suitable sizes and round shape. A template is applied to those places where the lamps should be installed in the plasterboard ceiling and outlined with a pencil or marker. This creates a cutting line.
If there is already wallpaper on the ceiling, before using the saw, the surface inside the hole must be cleared of it so as not to accidentally tear it. This is done by cutting the mounting knife along the intended line. Inside the resulting circle there should be a hole large enough for the saw blade to fit into. Using it, you can easily get a round hole with fairly smooth edges. Once installed, the recessed lights will cover them. But still, working with a saw requires a certain skill and accuracy. You should not move it back and forth with a large amplitude.
Connecting luminaires to electrical wiring
Then the cable is removed from the resulting hole. It must be prepared for connection to the light source.
Next, you can begin installing the housing into the resulting hole. In this case, you need to thread wires through it.
After installing the housing, it’s time to install the wires. The best connection for the passage of electric current is made by soldering. Light source connectors are pre-prepared. Short wires are soldered to them, which will then be connected to the electrical wiring. Since this will also be soldering, the ends of the wires must be well coated with solder. Before connecting the wire to the electrical wiring, a piece of insulating tube made of heat-shrinkable material is put on it.
When installing the electrical cable cores, it is recommended not to cut them. First, the outer layer of insulation that covers both cable conductors is removed. The cuts are carefully made with a mounting knife on both sides of the middle of the loop. Then, from one incision towards the other, a longitudinal incision is made two to three centimeters in length. This allows you to grab the outer insulation and pull it off the wires, trimming as necessary. Then each of the two wires is folded in half. At the bend point, the insulation is carefully removed with a mounting knife to a length of 2–3 cm.
After this, the stripped core is folded in half so that it covers the end of the short wire that is soldered to the connector. After this, twisting is done. To make it more durable, it is recommended to use pliers.
The finished twist is prepared for soldering. To do this, it is moistened with an alcohol-based liquid flux to remove the grease film. After this, the twist is well soldered. A pre-prepared tube made of heat-shrinkable material is put on the finished twist. It is heated with a soldering iron until the required shrinkage occurs. A light source is then attached to the connector.
In our case, the installed device is a reflector with several built-in LEDs. The wires are laid in a niche between the drywall and the main ceiling. In this case, the installation of lamps in a plasterboard ceiling is completed by the final fastening of the reflector to the body with a special elastic bracket. This completes the installation.
Wiring
Laying the electrical cable is a key step when installing fixtures in a plasterboard system. Lay the wires correctly not after, but before installing the drywall - this is the only way to perform the wiring efficiently.
The wire cross-section should not be less than 1.5 square millimeters. It is recommended to opt for a parallel connection diagram, which will ensure autonomous operation of all light sources.
When laying wires, loops (20–30 centimeters each) are left in the areas connected to the chain of lighting fixtures, which will ensure future maneuverability when creating connections.
It is recommended to hide the wires in special corrugated channels with a high level of fire safety. If the ceiling is already installed, then holes are drilled in the drywall and wires are pulled through them to the lighting fixtures.
The wires are connected in accordance with the colors of the cores. For example, blue color is phase, brown is zero. When the colors have been sorted out, the supply wire going to another lighting fixture is clamped in the terminal box. In this case, only wires of the same color can be combined with each other.
The switch can only open a phase. If the circuit has a transformer, it is placed between the floor slab and the plasterboard ceiling. Twists of wires are pressed using a sleeve and insulated.
Open twists are not allowed. Wires cannot be placed diagonally relative to each other, no matter what installation diagram of electrical appliances is used. If the circuit is complex - with an abundance of wires, you will need distribution boxes in which there is a main supply wire, and all other wires are its branches.
Diameter of the hole for a spotlight in plasterboard
When the holes are ready, you need to remove the ends of the supply wire, strip the insulation and make the connection. Then check whether the light is on or not. If it is on, you can continue installation; if not, you need to understand the causes of the malfunction.
Hello dear readers of the postremont.ru portal. In this article we will look at how to correctly and quickly install a spotlight with your own hands in a plasterboard or slatted ceiling.
- For lighting, it is convenient to lay a flexible cable with three cores with a cross-section of 1.5 mm2.
- It is not recommended to install powerful light sources. Economical lamp models are selected that are equivalent in luminous intensity to incandescent lamps with a power of 35–40 W.
- The ability to quickly replace the lamp allows you to subsequently select the device that is most suitable in terms of power, color temperature and dispersion angle.
When inserting a lamp into a drilled hole, you need to compress a special spring in the form of antennae. Then it unclenches, and the device is well fixed. All actions should be carried out carefully, as there is always a possibility of damaging the hole in the drywall.
That's it, the installation is complete, you can flip the switch and admire the new, stylish lighting of the plasterboard ceiling. In addition, it is worth paying attention to the degree of protection of the device. It determines in what places the lamp can be installed.
The first digit of the IP marking is the size of particles that can get inside the device, and the second is the degree of moisture protection. Dust protection is:
Final moments of the work process
After laying the wire or pulling out the loop, it is necessary to free the wire from the insulating layer for further fastening.
These bare wires are clamped into the lamp terminal according to the connection diagram that comes with the device. There are symbols on the spot according to which connections must be made: L - phase wire, N - neutral wire, PE - grounding. At this stage, everything must be done carefully, carefully and technically correctly, observing all safety precautions.
After connecting to the power supply, you need to insert the spotlight into the hole, slightly bending the clamps of the structure. This will allow it to fit tightly enough without forming gaps between the lamp cover and the hole in the ceiling. In this case, you must ensure that the fastening wires do not get between the brackets.
After this, the supply wire is connected to the switch, the bulbs are screwed in and a test run is performed. Once all the lamps are lit, the installation is considered complete.
Modern apartment design dictates new requirements for the design of ceilings.
Suspended and suspended ceilings, ceilings made of plastic panels and others are widely used. Do-it-yourself installation of spotlights solves the problem of a modern approach to lighting. Increasingly, a massive chandelier is being replaced by a source of directional spot lighting.
Properly installed spotlights illuminate the room well.
Installing spotlights with your own hands is quite simple. At the same time, the use of such equipment allows you to use the main advantage - uniform lighting of the room and ensure the absence of shadows. A large assortment of manufactured options allows you to choose your favorite shape and color shade of the glow.
Mortise hole diameter for recessed spotlights
When installing such products on a plasterboard ceiling or wall, cutting out space for the lamp is already done at the final stage of design (after finishing). If such lamps are provided in a suspended ceiling, then the holes must be made at the development stage. Depending on the style of the room, lamps are produced with different shapes of the lining: round, square, rectangular. When choosing spotlights, their number is taken into account.
And the number of holes made in drywall and other surfaces depends on this. As practice shows, the common diameter of the hole for a spotlight ranges from 60 mm to 75 mm. This size should not be confused with the outer diameter of the product.
For example, if the width of the lamp is 90 mm, then the diameter of the insert will be smaller - 60 mm. Therefore, the hole must be made with a size of 59-60 mm. To install a point light source in a ceiling or furniture, the diameter of the mortise hole is taken into account.
It is indicated in the main characteristics of the product. In rooms with suspended ceilings, it is preferable to install spotlights. This is the best lighting option, because such lamps evenly distribute light even in the largest room.
But before installing this type of lamps, you should understand the technology of their installation. Holes for lamps in drywall are very easy to make. Drywall is a flexible material for finishing and special equipment for its processing is usually not required. You can cut a hole in several ways, using professional drill attachments or improvised means: Holes for lamps on the ceiling in plasterboard. After this, knock out the perforated element with a sharp blow - the remaining teeth can be trimmed with a construction knife or sanded with sandpaper. A good option for wiring under drywall may be an RKGM cable of the appropriate cross-section. This flexible and easy-to-install wire has double heat-resistant insulation, can withstand high currents and can be laid without the use of corrugation.
Particular care should be taken when installing halogen light sources in drywall. The bulb of these lamps, even in open lamps, heats up to 250 degrees Celsius and higher. Recessed luminaires, the diameter of which mortise holes vary, are ideal for decorating and illuminating suspended ceilings. But when choosing them, you need to carefully study the characteristics in order to carry out installation correctly.
You can find out what the diameter of the hole for a recessed lamp should be below. Of course, we all want to choose not only effective, but also beautiful spotlights that will suit the interior of the room and no matter what room you want to install them in - the living room, bathroom or kitchen. You should always do everything with taste!
This is especially true in cases where the design of the house is made in a particular style. Today, spotlights are a very good option for ceilings. They have small dimensions, thanks to which they can be installed on any ceiling surface and at the same time efficiently illuminate the entire space of the room. To do this, such lamps are placed in a certain way throughout the ceiling. In addition, the dimensions of the device, as well as the depth of installation of different types (tension, suspended and plasterboard) will depend on the number of light sources.
Based on this criterion, two groups of spot lighting installations are distinguished: There is no need to talk much about the advantages. First of all, this is an opportunity to realize any designer’s idea and save space by hiding a light bulb and lamp in any cavity, of which there are many in a modern apartment. For example, suspended, suspended, plasterboard ceilings, hollow partitions. In order to install a spotlight in a plastic or plasterboard ceiling, you need to cut a hole of the appropriate diameter for it.
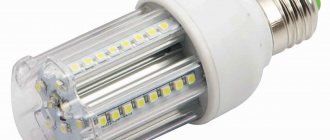
The diameter of the hole for a spotlight is usually written on the packaging of the lamp, but it wouldn’t hurt to measure it again. And as a last resort, LED lamps are presented, which are the most modern and currently the most widely used. They are economical and durable, have a high efficiency.
They create enormous opportunities for creating an expanded color spectrum and the full realization of creative ideas. During installation, their need to reduce the voltage with a transformer or other step-down device should be taken into account. Movable ones can either slightly shift the angle of the light direction (by about 45 degrees), or have an output hinge connection with wider possibilities for shifting the direction of illumination (up to 360 degrees).
Additional information on the topic:
- Drawing on the plasterboard ceiling in the living room photo
- Make your own garage shelves from drywall profiles
- How many hangers are needed for one profile on the wall for plasterboard?
- Comparison of plasterboard partitions and tongue-and-groove boards
- Plasterboard walls with niches and lighting photo in the hallway
How to treat the surface → Room decoration → How to choose the right paint → Surface treatment technologies → Leveling and finishing the walls → Selecting and applying a primer → Removal from the surface → Stretch ceilings and technologies → Reviews and testimonials
The nuances of installing electrical wiring for spots
The electrical wires hidden by the stretch ceiling should be pulled in a corrugation and attached to the base ceiling tiles with plastic brackets, or with homemade hooks made of thick wire, secured to the ceiling base with self-tapping screws. Do not allow cables to sag.
It is not necessary to conduct the wiring exactly according to the markings drawn on the base of the ceiling, since some lamps have their own small wiring. After checking the cable routing, the mounting brackets for the spotlights are installed (see below). Near each spot, the wires are attached to terminal blocks.
Embedded platforms for spotlights
Both types of canvases for stretch ceilings - fabric and film - are equally thin, several millimeters thick. Attaching illuminators, even small spots, to a tension surface is impossible. Each light fixture requires preliminary installation of a mounting platform.
The embedded platforms for illuminators as part of suspended ceilings manufactured by the enterprises are made of heat-resistant plastic. In their center there is a special hole designed to fit the size of the spotlight. These embedded products do not crack and retain their shape for many years of operation of the ceiling system. Factory platforms come in two types - universal and standard.
Standard mortgages. Their central hole has a fixed size, suitable for spots with a diameter of 60-112 mm. You should choose such platforms carefully, having previously decided on the models of spotlights. If the hole in the embed is small and the spot does not fit in it, then cutting it wider will not be possible. Compared to platforms of the second type, these mortgages are cheaper.
Universal mortgages. Having a square or round shape, they look like a pyramid of several rings with 10 mm diameter increments. An embed for the diameter of the lamp is prepared simply - a suitable hole is cut in it with a stationery knife along a special groove between adjacent rings.
Round platforms of this type are suitable for embedding spotlights with diameters of 50-305 mm into suspended ceilings, and square platforms are suitable for 90-200 mm spots. Thanks to the annular ledges, the universal mortgage is completely invisible behind the tension covering, i.e. does not appear underneath.
Standard and universal models of mortgages are placed on the ceiling slab (rough base). It is necessary to accurately measure and mark the positions of the mortgages, secure the metal hangers to dowels or self-tapping screws with a press washer, and then attach the platforms to them. When installed correctly, spotlight pendants can support weights of up to 40 kg.
Embedded platforms can be made independently. You need square or round pieces of plywood, in the center of which holes are cut to fit the diameter of the spotlights. During their manufacture, precision in cleaning and grinding edges, sharp corners and edges is important, since they can damage the vinyl film even at the stage of installation of the stretch ceiling system.