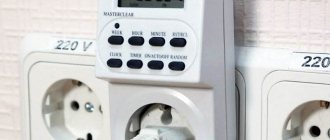
What is a timer socket
With the advent of smart homes, more and more people are thinking about automating their homes and increasing their level of comfort. And if you don’t have the money for a full-fledged system yet, you can start small and buy an outlet with a timer.
A special feature of the device is the ability to supply and remove voltage from devices automatically. The operating principle is partly similar to smart plugs, but still has significant differences.
After purchase and installation, you can set the on/off time and entrust the operation to automation.
Externally, a socket with a timer is a regular plug connector and an additional mechanism that is mounted inside the case and provides a time delay.
Depending on the model type, the surface may have a mechanical lever or buttons with an electronic display.
Guide: how to make a device with a mode setting for several hours with your own hands
If creating a programmable socket with a timer requires not only knowledge of electrical engineering, but also microcontroller programming skills, then making a device with your own hands that sets the mode for several hours is quite possible. Below is a schematic diagram of such a device.
What kind of lighting do you prefer?
Built-in Chandelier
Socket circuit with analog timer
- A, B – connectors for connecting the load;
- comparator DA1 – KR142EN19;
- resistors: R1 – 10 kOhm, R2, R3 – 1 mOhm;
- capacitors: C1 - 1 µF 400V, C2 - 1000 µF 16V, C3 - 100 µF 16V;
- diodes: VD1, VD2 – 1N4005, VD3 – D815E, VD4 – KD521A;
- K1 – any relay with an operating current of 50mA and a 12V winding, respectively, its contacts must be designed for switching voltage 220V;
- SB1, SB1-2 – power button;
- K1-1 – relay contacts K1.
The figure below shows an example of the circuit board layout for this device.
The operating principle of the device is as follows:
The shutdown time is regulated by variable resistor R2; if you need to increase it, you can install a larger capacitor C3. The device does not require configuration; it can be used immediately after assembly.
Of course, the functionality of this device will be significantly inferior to such models as EL-01 or EL-02 from Robiton (Germany), but on the other hand, it does not require fine tuning and can be used even in the cold, for example, an outdoor socket in a protective case.
In addition, the cost of a homemade socket with a timer (automatic shutdown function) will be significantly less than the price of a finished product with digital control.
For the price review, we chose the TMH-E-5 electrical socket from Elektrostandard, which has an information display. As the survey showed, this model is in significant demand.
Photo: model TMH-E-5
| City | Price $ | City | Price $ |
| Ekaterinburg | 11,30 | Krasnoyarsk | 11,10 |
| Irkutsk | 12 | Minsk | 10,85 |
| Moscow | 10,80 | Omsk | 12,00 |
| Permian | 11,00 | Khabarovsk | 11,00 |
| Chelyabinsk | 11,3 | Tomsk | 11,70 |
| St. Petersburg | 10,8 | Novosibirsk | 12,10 |
| Krasnodar | 11,00 | Dnepropetrovsk | 12,20 |
The table shows that a socket with a timer in Moscow, Minsk, Khabarovsk, Chelyabinsk, Novosibirsk and Krasnodar costs approximately the same. From this we can conclude that the price will not be much different in other regions, for example in Voronezh. Thanks to the development of online commerce, buying timer sockets or other products is no longer a problem.
Where can I use it?
The main area of application for sockets with timers is automatic control of equipment in a house or apartment. With their help, you can power household appliances, heating systems, irrigation pumps, heating and lighting systems.
Before connecting, the user makes the settings himself and sets the response intervals.
For a better understanding, here are some application examples:
- Turning on and off the lighting inside the house and in the local area. After selecting the mode, the outlet will itself supply or remove voltage from the lighting devices. The owner does not need to waste time performing these actions. The periodic on/off feature can be used to prevent intruders from entering. Periodically turning on the light will signal to thieves that the owners of the house are present.
- Indoor heating. Another way to use an outlet with a timer is to connect heating equipment to it. Electrical appliances will turn on and off at the specified time.
- Management of agricultural equipment. Devices help optimize agriculture. With their help, you can set up watering, organize the switching on of lighting and heating, resolve issues with feeding and perform other tasks.
- Turning on the water heater. Alternatively, you can turn on the boiler through an outlet with a timer and ensure timely heating of the water. This way you can avoid a situation where you forget to turn on the equipment and are left without the opportunity to buy.
The scope of application of the products is very wide, and an additional advantage is the opportunity to save up to 30-40% on electricity.
How to use
The setting of the electric timer depends on its type. The mechanical timer for turning electrical appliances on and off is easy to set - just spin the drum and set it to the desired mark. Segments are divided into 15 and 30 minutes. At the end of the specified period, the appliance will turn off.
- Please read the included instructions for the device first;
- press the power button and select the timer setting key;
- designate the setting period – day, week;
- use the hour and minute keys to select the timer operation interval;
- complete the setting by pressing the timer button;
- activate the settings by pressing the Clock button.
Functions of electronic socket buttons
What are there
When purchasing sockets with a timer, it is important to consider the types of devices. Depending on the type of control, they can be mechanical or electronic. Let's consider each type separately.
Mechanical
Such sockets have a mechanical timer installed, which delays time using a conventional clock mechanism. The user sets a specific time after which the device turns the equipment on or off.
The use of mechanics limits the capabilities of such an outlet. As a rule, the time is regulated within a day and no more.
Mechanical sockets with a timer are divided into two types according to the control method:
- Adjustment using a rotary dial, reminiscent of the regulator on a washing machine. When choosing such a model, you can set the exact time taking into account the available intervals.
- Setting the time using buttons. In this case, the time is set by pressing buttons, each of which sets a specific period. As a rule, these are 5, 10, 15 minutes and other settings. By combining presses, a suitable time interval is selected. Some models can configure up to 96 modes.
Depending on the design, receptacles with a timer can be configured to turn off only (simpler models) or perform two functions (on and off).
Electronic
A device with an electronic timer gives more opportunities to users due to more precise settings and the ability to select one of 140 operating modes (depending on the modification).
Some models allow you to program power on and off for a week in advance. In addition, the time of applying voltage or removing power can be any.
In other models, it is possible to work with several devices at once, and it is possible to control each of them separately.
Based on operating time, sockets with a timer are divided into two types:
- Daily allowance. Such devices allow you to set the regime within one day. The disadvantage is that the set cycle will run every day of the week. For example, if the program for Saturday differs from the rest of the week, the outlet will have to be configured again.
- Weekly. Unlike daily sockets, such products allow you to program each day of the week separately. Setting up several days by group is available. For example, you can make settings for Mon, Wed and Fri, as well as Tue, Thursday and Sat. In other words, the capabilities of such an outlet have no limitations.
According to the design features, sockets with mechanical and electronic timers are of two types:
- A complete device. The product is mounted in a box installed inside the wall and intended for an outlet. It is a stand-alone device.
- Adapter. The peculiarity of this product is that it can be installed into an existing outlet. There is no provision for separate installation here.
All models are conventionally divided into two categories - for outdoor or indoor installation. The peculiarity of the former is additional protection from moisture and other negative influences.
Electronic timers
These devices make it possible to set up to 140 programs for controlling electrical appliances. Many of them have an operating mode that creates a “presence” effect, which allows you to control the lighting in the house in a chaotic manner at a specified time (for example, from 19.00 to 24.00). The shortest period of time specified is 1 minute.
The advantages of electronic timers are:
- the ability to specify the days of the week for executing a given program;
- manual and automatic activation;
- autonomy – the capacity of the backup battery allows you to save settings for 4 days;
- availability of a separate program with a validity period of more than 2 years.
Design and principle of operation
Before installation and configuration, it is important to study the device and how it works. Here a lot depends on the chosen model.
Mechanical
Mechanical sockets with a timer are a design with two holes for a plug and a time regulator (push-button or disk-shaped). Voltage is supplied by closing or opening the contact group. Older models use a mechanism that is very similar in operation to a watch.
New devices are equipped with pulsed electric motors. They are characterized by quieter operation and power dependence. If desired, mechanical sockets can be set to two operating modes - constantly or with a timer.
Mechanical
The heart of the timer is a drum with switch levers installed on it. The drum is driven by a micromotor. The actuator is a microswitch with one pair of contacts. Sockets with a 24-hour cycle are very popular; they are also called a daily timer. As a rule, one hour is divided into four parts, fifteen minutes each.
As you can see in the photo, the design of the Feron TM50 socket is quite primitive. Setting up such a timer comes down to setting the switches on the reel in the desired order in a certain time sector and forcing the manual setting of the current time by scrolling the reel clockwise to the pointer arrow. A switch is installed on the side of the relay to force the load to turn on. Let's try to use a small example to figure out how to set up a mechanical socket with a timer, model Feron TM50.
In this diagram, the operating time of the filter pump in the pool is distributed over the day:
- No food is served from 1 a.m. to 2 p.m.
- After two in the morning the pump turns on for fifteen minutes.
- From four to five it is off.
- At 6.00 the pool filter runs for fifteen minutes.
- Afterwards this happens at nine and twelve o’clock, again for fifteen minutes.
- At 3:00 p.m., peak bathing time, we turn on the pump for thirty minutes.
- At six and nine in the evening we make the pump run for thirty minutes.
- And the final cycle at twelve at night is to filter the water for 15 minutes.
There is an opportunity to save money if you correctly configure the socket with a timer and use a two-tariff electricity meter.
According to the settings in the diagram, it becomes clear that the consumer switches off during peak tariff hours, when the price per kilowatt of consumed energy is one and a half times the normal price. From eight in the morning until eleven, the device is turned off. The same goes for the evening peak from eight to ten in the evening. The rest of the time, the socket with a timer keeps the consumer turned on.
You can learn more about how to set up a mechanical socket with a timer in the video below:
TM50
Another popular model from Feron is TM32. The configuration features of this outlet are also discussed in the video review:
TM32
Functional Features
All sockets with a timer differ in appearance, design and functional features. Let's look at the last factor in more detail.
Type of mechanism (electric or mechanical)
As noted, such models differ in design features, operating principles and capabilities. When choosing, you need to focus on the purpose of application.
For example, a mechanical socket is suitable for turning on a boiler or timed watering, but for organizing a complex system it is better to take an electronic version of the device.
Timer accuracy
The issue of accuracy concerns more mechanical models, because electronic sockets have minimal error. Again, when purchasing, you need to be goal-oriented.
If we are talking about performing simple actions, for example, turning on/off heating or lighting, great precision is not needed here.
It’s a different matter if the socket with a timer interacts with other systems and needs fine-tuning. From this position, German equipment is more attractive, but Russian companies also produce good equipment.
Timer time
Modern sockets allow you to set the time in a wide range. The maximum period can be 24 hours (daily) or more. Some devices even work in the monthly range. This option is rare and most often comes in conjunction with a smart home.
Number of programmable lines
Conventional budget devices have one line with the ability to connect only one equipment. Models with a more complex structure, allowing for more complex settings, are more expensive.
How to make a timer yourself: diagrams and recommendations
Electrical devices for controlling current supply have different designs. Relays are considered the most reliable. Triac and thyristor are also found. The connecting element on the general diagram can be located in several places:
- front;
- side;
- behind;
- connect using a separate connector.
To set the time, a potentiometer, switch, or buttons can be used.
How to create a time relay in a 220V socket with your own hands
If the device is intended to be operated under a 220V load, you need to take diode options that are equipped with a magnetic starter. The controller is assembled from the following elements:
- thyristor;
- diodes (4 pcs.), 1A and 400V output;
- resistance (3 pcs.);
- start button;
- capacitor with a capacity of 0.47 mF.
Relay circuit with one transistor
The operating principle of this scheme is quite simple. After pressing the start button, the network closes and the capacitor begins charging. At this moment, the thyristor is in the open state. When the charging of the capacitor is completed, it closes. As a result, the power supply stops and the device turns off.
To adjust the operation, you can select the appropriate capacitor power and resistance resistor (R3).
You can also use this option:
- Connect one of the contacts of the diode bridge together with the switch to 220V.
- The second contact of the diode bridge is connected to the switch.
- Thyristor VT 151 is connected to resistance resistors (1500 and 200 Ohms), as well as to a diode.
- The remaining contacts of the diode and 200 Ohm resistor are connected to the capacitor. In parallel with it, a resistance of 4300 Ohms is switched on.
Relay on a chip
Making your own time relay on the 555NE timer
Many electrical circuits are based on the NE555 integrated timer. Such a system is easy to create at home. The controller is assembled from the following elements:
- screw type terminal blocks;
- diode;
- board size 65x35;
- resistor;
- soldering iron for point connections;
- Sprint Layout program file;
- NPN type bipolar transistor.
A board is used as the basis for mounting the elements. The resistor is attached to the top or removed using wires. There are special places on the board for screw terminal blocks. After all the components are soldered according to the diagram, the excess at the connection points must be removed and the reliability of the contacts checked. To protect the transistor, you need to install a diode. It is installed parallel to the relay. Then the response period is set. If the relay is placed at the output, it will allow the load to be adjusted.
DIY timer
How this system works:
- Pressing the button starts.
- The circuit closes and voltage is supplied to the device.
- The light comes on and the countdown process starts.
- When the set time has passed, the light goes out and the power supply is interrupted.
This scheme allows you to adjust the response period within 4 minutes. If a capacitor is installed, the adjustable time increases to 10 minutes.
These are simple circuits that require minimal circuit board and electrical skills to create. A diverse and rich assortment of modern devices allows you to choose a connector for any need, so there is no need to independently manufacture sockets equipped with a timer. To find a suitable model, it is enough to compare its capabilities with the conditions in which it will be used, and also study reviews about manufacturers and the quality of their products on the Internet.
Settings
Installing a socket with a timer, as a rule, does not cause difficulties. Therefore, let's move straight to the setup process.
For mechanical model:
- Study the instructions and capabilities of the device in terms of time range.
- Set the mark on the socket to the current time. Rotate the regulator carefully to avoid accidentally damaging it.
- Set the time when the socket should operate (apply or remove voltage).
- Connect the equipment to the plug.
Disadvantages of use
GlobeTeck smart socket timer
As for the shortcomings, there are really few of them. The main drawback, which is not common to all models, is the difficulty of use. It is also associated with another drawback - the lack of instructions or user manual. The last drawback is more typical for Chinese products, which are present in huge quantities on radio beams and electrical markets.
Garden socket-timer MK IP66 Masterseal Plus
Another disadvantage that many users pay attention to is the cost of sockets with a timer. To be frank, not every pensioner is able to afford such a new product, as well as understand how to use it, but for an adult it is quite easy to evaluate the benefits received with its help, you just have to remember the tariffs for electricity supply
1 4
It is worth noting that some models are equipped with built-in batteries. They can become a limitation on the number of cycles of use of this household appliance.
Accordingly, when choosing, you should give preference to manufacturers with reliable suppliers of components.
Popular models and reviews about them
The modern market offers a large selection of timer sockets that have electronic or mechanical timers. Below we will look at the TOP 10 best models.
Feron TM22
Model Feron TM22 is a Chinese socket with an electronic timer, a small screen and push-button control. The device is designed to operate under a voltage of 230-240 V and a maximum load of 16 A.
Characteristics:
- accuracy - within one minute;
- number of programs - 10;
- backup battery - yes;
- selection of modes;
- daylight saving time option;
- 16 combinations of days of the week;
- warranty - one year.
Recommendations for selection
One of the main difficulties for buyers is choosing an outlet with a timer that meets all requirements, from cost to functionality.
When purchasing, pay attention to the main criteria that you need to pay attention to:
- Manufacturer. The modern market offers products from Camelion, DigiTOP, duwi, Electraline, Elektrostandard, FERON, Orbis, REXANT, Robiton and others.
- Country of Origin. The CIS market sells sockets with a timer made in Russia, China and Spain.
- The operating principle is mechanical and electronic. Sometimes there is an electro-mechanical one.
- Type: weekly or daily.
- Type - for installation in a socket or standard.
- Degree of protection - IP-20 or IP-44.
- Power - up to 1.5-3.6 kW.
- The minimum time setting is 0.5; 1.0; 1.5 and 30 min.
- Number of programs per day - 8, 48, 96.
Also consider a number of useful tips:
- Decide why you need such a device. If you want to solve simple problems, for example, turning on the heating, an inexpensive mechanical option is suitable.
- Buy the selected model only from trusted retail outlets. If necessary, do not hesitate to ask the seller questions about features and characteristics.
- If you need precision when it comes to switching on and off, choose sockets with an electronic timer. In this case, you can make more precise adjustments and be sure of a minimal time error.
- When purchasing, keep in mind that most models can turn on and off no more than five to seven times a day.
- Try not to skimp on your purchase. If we are talking about performing serious tasks, it is better to give preference to European brands. If in doubt, you should consult with a specialist in the store.
- If you often abandon your apartment or house, the option of randomly turning on and off the lights will protect your home from theft. In this case, it is desirable that the selected model supports control of two devices at once.
When choosing, try to pay attention to all the criteria and take into account the advice in the article. If there is such an opportunity, it is better not to save money and buy an outlet with good characteristics.
Possible problems
Most often, problems arise in the electronic timer. Problems with mechanical products are less common. Main types of problems:
The program on the electronic socket-timer has gone wrong. The main reason is poor or complete incompatibility with the household appliance. This is especially true for devices with inductive loads. When the relay opens, voltage remains, which produces a spark and interferes with the timer board. The problem can be solved by replacing the electronic timer with a mechanical one to work with an inductive load. You can also connect a device with a non-inductive load in parallel - for example, a lamp. The program is restored by completely resetting and re-setting the socket timer. Connecting devices with power above 3.5 kW to a mechanical outlet
Contacts can burn out, so it is important to correctly calculate the connected load. The lack of response to turning on and off may be due to the activation of the lock button. It needs to be set to inactive.
Each device comes with instructions in Russian. You should familiarize yourself with it before setting the settings and in case of errors and failures.
Both in industry and in everyday life, there is often a need to automatically turn on and off electrical appliances at a given time. To do this, use a mechanical or electronic socket timer. Each model has its own advantages and installation methods.
Advantages and disadvantages
In conclusion, we present the advantages and disadvantages of sockets equipped with a timer.
Mechanical models
Pros:
- low price;
- high switching speed;
- ease of setup.
Flaws:
- there is no built-in battery, so if there is no light, the settings may be lost;
- high error;
- dependence of the response time on the input voltage level;
- inconvenient to use due to large dimensions.
Electronic analogues
Pros:
- convenient control;
- the ability to set a complex program for the week;
- no voltage dependence;
- performing the function of a clock.
Minuses:
- higher price;
- complexity of setup;
- dislike of inductive loads (power supplies, fluorescent lamps, motors).
How to set up the main types of timers?
The simplest mechanical timer is the first step towards automating the growing process. At a minimum, it can control the light, fan or irrigation system. This article will tell you about the main types of device data. We will also give instructions on how to set up a mechanical timer and other more complex models.
Main types of timer sockets
Globally, they can be divided into 2 types - electronic and mechanical. Mechanical options are quite cheap, reliable (nothing to break) and easy to use. Electronic ones offer the user the ability to set different programs for a week in advance, and are generally more accurate. The most common among growers are simple electronic push-button timers.
There are also more complex versions of electronic devices. But by and large they are not needed. Therefore, we will not consider how to set up a timer with remote access, what is the setup algorithm using SMS codes, and other setup algorithms in the “smart home” complex, for example.
Regardless of the specific model, the operating principle of such devices is always the same. At the right time, they close the electrical circuit, supplying voltage to the device, and when it is necessary to turn off the device, they open the circuit.
How to set a mechanical timer
All similar models have a similar device. They consist of a “twist” that displays the clock and keys that indicate 15-minute segments. The latter have two working positions - pressed/released. When the button is pressed, current flows; when it is released, it does not.
How to set up a mechanical timer socket? Very simple! Turn clockwise to set the current time. Now all that remains is to press the required number of buttons from this mark. Remember that each key defines a segment of 15 minutes. This means that for the timer to turn off after 8 hours, you need to press 32 buttons. Now just connect your device to the network, you're done. Also pay attention to the button that switches the device to a regular outlet mode; it must be set to the “timer” position.
Among the most popular models of this type is the TM 32. The timer is very cheap and reliable, while performing its functions perfectly. The main inconveniences include the technical features of the design itself. Small buttons are not convenient for everyone.
How to set up an electronic timer with buttons
The presence of a screen makes the setup process simpler and more intuitive. You can also press the “reset” button at any time and reset all settings. Buttons and symbols on specific models may differ, but the basic setup is done the same way, plus or minus. You can also set a program for a week at once, with different on/off periods.
Instructions for setting the timer are as follows:
- Click on the “Clock” button and set the current date and time.
- Click on the “Timer” button and set the date and time when the device should turn on
- Click on the “Timer” button again, and set the date and time when the device should turn off

