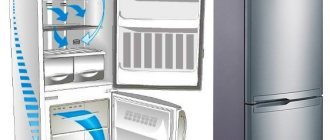
Before refrigerators with an ice maker appeared, this function was performed by a regular plastic tray in the freezer. This “option” is still provided in ordinary refrigerators, and the entire procedure for obtaining ice cubes is done manually. In modern models with the “icemaker” function, ice for cooling drinks is produced automatically. The only difference is the method of supplying water and the form of “dispensing” the finished product. More on this below.
- 3.1. Dispensers
- 4.1. Video: Samsung RSH5ZLMR1/BWT – modern Side-by-side refrigerator with minibar
Refrigerator with ice maker with water connection
An automatic refrigerator is a refrigerator with an ice maker connected to the water system. A removable filtration flask with a replaceable cartridge is mounted on the rear wall of the refrigerator. A tap tap is inserted into the common line; water enters the ice maker through a copper pipe or a soft hose made of food-grade polymer. The product is frozen by blowing it with cold air, according to the classic refrigerator scheme, or with technologically cooled water.
The ice maker is set to dispense cold water, ice, and crumbs in quantities of up to 4 kg/day. Unused product is not stored. The unused product is melted and fresh cubes are made. Depending on the design, you can get a portion through a dispenser or by pulling out a special container.
The equipment can be built-in or free-standing. The built-in refrigerator with an ice maker has design features:
- The dimensions of the built-ins are narrower than freestanding refrigerators with ice makers.
- Door canopies should ensure easy opening and tight fit of the structure.
- The door panel must have an attachment for the decorative panel.
Refrigerator with ice maker without water connection
Often, a refrigerator with an ice maker is used without a water connection. The device has a simpler design. Therefore, the cost of the models is affordable; the supply of cold water and ice is no longer the privilege of wealthy families. It took several automatic operations to be done manually.
Getting ice in an offline system:
- Purified, softened or bottled water is poured into a special container located in the refrigerator.
- The liquid flows through a tube into the ice maker, which is installed in the freezer.
- Once frozen, the cubes are discarded into a storage container.
At home, devices are used for freezing using the brine and compressor methods. If water cooled to minus 10 0 C is used as a coolant, then the method is called brine. The finished product can be in the form of cubes, granules or flakes; it is stored in a special container.
Video
We offer a visual video lesson on how to connect and maintain a refrigerator with an ice maker.
Competition in the household appliances market and increasing customer demands are forcing manufacturers of household appliances to improve their products. New functions appear and management is simplified. There is a tendency to combine different types of technology in one device. This is how a refrigerator combined with an ice maker appeared. Next, we will tell you what an ice maker in a refrigerator is, what are the advantages of using it and what is the principle of operation.
What is an ice maker in a refrigerator?
An ice maker in the refrigerator is necessary for lovers of noisy parties and cold drinks. It is a system for preparing and dispensing ice, and in some models, crushed ice and chilled water. Such ice makers have small dimensions and low productivity - about 4 kg of ice per day. Ice is fed through a special hole into a container or directly into a glass.
For convenience, manufacturers build a special dispenser into the refrigerator door. It allows you to get the “ice product” without opening the door. The dispenser also protects the cubes from contact with other products. An ice maker equipped with a dispensing unit dispenses a portion of ice or water when you press a button.
Purpose and capabilities of built-in ice generators
Initially, ice makers were intended only for bars and restaurants, since that is where a large amount of ice is used. Now at home, tea cubes are cooled, thrown into alcohol for dilution, iced lemonade is prepared, and frozen herbal compositions are used for cosmetic and medicinal purposes.
Some ice makers are equipped with a set of additional functions:
- supply of clean chilled water;
- the Crushed Ice function crushes ice - after crushing, the product is located in a removable or pull-out compartment;
- continuous freezing system – the ice is periodically renewed to maintain freshness;
- touch control panel is installed on refrigerators in the above-average price category;
- function of automatically preparing a new batch when the container is empty;
- dispenser, thanks to which the glass is filled with cubes or cool water without opening the door;
- filters – a system for purifying water from harmful impurities and foreign odors with a filter service life of about a year.
Simple homemade air conditioner
The principle of operation of such coolers is to blow room air through objects with a negative temperature. This capacity is usually served by ice or cold accumulators intended for special bags used for summer transportation of products.
Cold sources are placed inside a closed box, and an axial fan is built into its wall. On the other side, a hole is made to allow the cooled flow to exit. What is not used to make the case:
- an old car refrigerator with insulated walls;
- capacious plastic bottles designed for 5 liters of water or more;
- cardboard or plastic boxes with lids;
- canisters made of polymer materials.
This mini-air conditioner is also suitable for cooling the interior of a car; you just need to correctly connect the air blower to the on-board power supply and stock up on the required amount of ice in advance.
Advantages and disadvantages of the design
It is noteworthy that such devices actually drive cold air flow into the room. In addition, simple air conditioners are actually made from scrap materials, whose price tends to zero. The most you will have to spend on is an axial fan if you don’t have one in your household.
Installing and connecting the device in the car
Unfortunately, the disadvantages cancel out all the advantages of the cooler:
- No matter how much ice you put in the chamber, in hot weather it won’t last long, so you need to constantly freeze new water.
- While you are cooling one room, the next room is being heated by the refrigerator, where ice is being prepared. Plus, energy consumption increases.
- The duration of operation of the unit in the car depends on the supply of ice taken with you.
- The air passing through the ice is partially humidified. After some time, the room will become oversaturated with moisture, making you feel even worse than from exposure to heat.
Conclusion. The above-described air conditioners, made by yourself, can be considered operational. They can help you out in a hopeless situation, but operating the cooler is quite a troublesome task.
Types of cold accumulators
How long will the ice in the chamber last?
To answer this question, let’s calculate how much cold 1 kg of ice will release when heated from a freezing temperature of -6 °C to +20 °C. To do this, we will use the formula for calculating heat depending on heat capacity.
You need to perform 4 steps:
- We calculate the return of cold when ice melts: Q = 1 kg x 2.06 kJ/kg °C x (0 °C - 6 °C) = -12.36 kJ.
- We find the reference value of the energy released when ice melts - 335 kJ.
- We calculate how much cold the water will transfer when heated: Q = 1 kg x 4.187 kJ/kg °C x (0 °C - 20 °C) = -83.74 kJ.
- We add up the results and get -431.1 kJ or 119.75 W.
Even if you freeze ice to a temperature of minus 15 °C, you are unlikely to get more than 150 W of cold from 1 kg. This means that to intensively cool a 3 x 3 m room in heat over 30 degrees, you will have to add 1 kg of ice to your homemade air conditioner every 20-30 minutes and freeze the same amount. In practice, the consumption will be less if you are satisfied with a tolerable air temperature - 25-28 ° C.
How to assemble an air cooler
A mini air conditioner for a home or car is made as follows:
- Cut a hole in the side wall of the container equal in size to the working cross-section of the fan.
- Screw the cooler with self-tapping screws or place it on small bolts.
- Make a second hole to allow the cooled stream to exit. Another option is to attach a corrugated plastic tube to the neck of the bottle or canister. The device is ready.
All that remains is to install and connect the improvised car air conditioner. The wires from the cooler can be connected to the cigarette lighter connector, which has a powerful fuse in the circuit. The manufacturing and connection process is shown in detail in the video:
Preparatory work
Having identified the outlet pipe from the compressor, it is better to mark it immediately, because the oil filter will need to be attached to it. To ensure that the used compressor in a new device does not overheat and fail prematurely, it is better to install a new relay to it, ideally if the relay is original, corresponding to the brand of the old refrigerator. To correctly connect the relay, you need to study the refrigerator diagram and make the connection in exactly the same order that was in the refrigerator and which the diagram shows. If the documents for the refrigerator have not been preserved, the circuit diagram can be found on the Internet.
Also, the new device will have to be equipped with a receiver, which you can buy in a store or make yourself. For assembly, you will also need a plastic bottle, through the holes in the lid of which the inlet and outlet tubes will pass. After inserting the tubes, the bottle should be filled with epoxy resin, and the bottle should remain with the lid down until the resin hardens. After the resin has hardened, the tubes and cap will be tightly mounted into the bottle.
To connect the air pumping unit to some device, you will need windshield washer hoses, which, like the relay, can be bought at any car store. During operation of the device, you should carefully monitor the oil level, which prevents overheating. You should also remember that the compressor from an old refrigerator should not run for more than 45 minutes.
Option 1 – Without additional communications
In this case, we mean the simplest equipment that just needs to be installed and connected to the power supply.
Instructions for properly connecting a refrigerator with your own hands consist of the following steps:
- We check the product body and electrical cord for defects and damage that may have appeared after transportation.
- We prepare a suitable place, which should be close to the outlet so as not to connect through an extension cord.
- We place the housing at a distance of 10-15 cm from each wall (for air circulation).
- We unscrew the legs so that the body is in a strictly horizontal and vertical position (without distortions).
- We check the level for correctness of installation work so that the body stands level.
- We connect the cord to the network.
That's all the technology for connecting a new refrigerator to the network with your own hands. As you can see, there is nothing complicated and even a person who has not previously dealt with installing household appliances can cope with the connection.
Hob installation
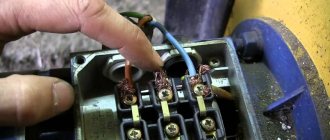
As a rule, tabletop induction cookers come complete with a cable and plug for connecting to an outlet, and the user does not need to purchase them separately. It should be remembered that in order to avoid overloads, a separate power line should also be installed for the hob. Otherwise, the simultaneous activation of two or more powerful devices will lead to the shutdown of the circuit breaker in the electrical panel, which will not withstand the increased load.
On average, the total load of the tile is about 32 amperes, so for its reliable and safe use it is necessary to place a separate 40A circuit breaker and a cable with a cross-section of 6 mm.
If there is a cable already connected to the tile, check it for correct connection. According to generally accepted markings, the conclusions are designated as follows:
- L - phase. L1, L2, L3 - phase taps for multi-phase connection.
- Pe - grounding.
- N - zero output.
There are models of slabs with several connected phase conductors. With a single-phase connection with 3 wires, everything is clear, with options for connecting several phases it is a little more complicated. It is ideal if the wiring in the house is made using several phase wires. In this case, the connection of the stove is carried out according to the manufacturer’s recommendations, without any changes. Unfortunately, this option for power supply to residential buildings is very rare, because the standard single-phase mode is more common.
In the case of a single-phase network, connecting the included cable with several phase conductors to a single-phase socket is unacceptable, since the load on a single conductor increases by a total of 2-3 times (depending on the number of terminals on the plate). There is a high probability that the wire will not withstand such power.
You can also purchase a three-core cable with a cross-section of such thickness that it can withstand the load of several phases on one wire, but this is not the best option.
https://youtube.com/watch?v=gZhAjE8tk2k
To make the refrigerator last a long time
You also need to take care of the correct installation of the device - it should not be placed too close to other devices or objects in the room, it should be kept away from the walls, and strong distortions should be avoided when installing and swaying the refrigerator.
Also, when connecting the refrigerator, you need to follow several rules necessary for the further long and proper operation of the device. You should not set the temperature regulator to the lowest level - usually a working refrigerator provides the temperature required to preserve food when the regulator is in the middle position, and if you set the temperature too low, this can lead to overload of the compressor and its rapid wear. As a result of such actions, the refrigerator will need to be repaired.
Also, when you turn it on for the first time, you need to ensure that the device operates with an empty chamber for some time - until it returns to normal operation. Do not rush to load products, this can also lead to overload of the motor.
The most frequently asked questions are presented below!
- Smell from the refrigerator?
- What happened to the refrigerator if it turns on and then turns off immediately?
- What if the light inside the refrigerator is on, but the refrigerator itself does not work?
- The refrigerator is not freezing well - what can help fix the problem?
- How long will repairs extend the life of the refrigerator?
- Why does the refrigerator freeze?
- Why did the refrigerator begin to make a lot of noise and how could this end?
- Did your refrigerator get electrocuted?
- Do refrigerators break? Why and from what, most often!
How to connect yourself
First of all, you need to find a suitable place to install such a refrigerator. It is not recommended to place it near radiators, gas or electric stoves, or in places with high humidity. You should also take into account the distance to communications, if the model is connected to a water supply system, the space for free opening of the door, and also leave enough space between the wall and the back wall of the device. This will prevent overheating of the motor-compressor and related malfunctions.
The connection is made by cutting the outlet into the cold water supply pipe and then laying it to the refrigerator. The tube itself must be made of flexible material labeled “food grade.” In addition, it is important to install a shut-off valve to shut off the water supply if necessary. After connecting the supply tube to the refrigerator system, you need to install a water purification filter cartridge. This cartridge needs to be changed once or twice a year. If the model operates autonomously on pre-filled water, filter replacement is not required. Thus, most of the manipulations can be performed independently, but it is best to entrust the connection to the water supply and laying communications to a knowledgeable specialist.


