Garden lamps powered by solar panels are a convenient and completely autonomous solution. There is no need to run a cable or spend money on communications; the equipment is inexpensive, and if desired, you can do it yourself. All components are on sale, you need to study the diagram, buy everything you need and carry out the work according to simple instructions.
A homemade garden light can be stylish.
Solar lamp device
First of all, you need to understand what parts the structure consists of and how it works. Garden lamps have a simple design, since they only have what is needed:
- A housing containing parts. Most often this is a plastic casing at the top, and the bottom is made in the form of a post tapering downward so that it can simply be stuck into the ground. The plastic is weather-resistant and impact-resistant, so it is not damaged by ultraviolet radiation and does not crack due to accidental impacts.
- Protective glass. There is a flat element at the top and a diffuser on the side. Most often, the manufacturing material is polymers, so even if broken, there will be no dangerous fragments on the site.
- Solar cell, usually a small cell with an area of about 9 square centimeters. The quality may vary, which is why the lamps work differently. When choosing a finished option, you need to carefully examine the surface of the panel; it should be perfectly smooth, without cracks or damage.
- The battery stores the energy converted by the solar battery to ensure the operation of the lamp in the dark. Capacity and design may vary, it all depends on the price of the product. When purchasing, you can clarify this point, since the battery life directly depends on it.
- LEDs provide good illumination with minimal energy consumption. The quantity depends on the brightness; usually small options are installed that save electricity.
- A photoresistor or light sensor automatically turns on the lighting in the area in the evening. When the amount of light in this node decreases, the resistance changes and the light comes on.
- The control board is a connecting element that connects all nodes and ensures their operation.
Garden lights can make the area much cozier.
If you need an AA battery, you can buy the cheapest garden light. From there you can remove the battery and its price will be several times cheaper than if purchased separately.
This option has many advantages:
- Autonomous: no need to do wiring, make a project, etc. You can simply place the lamp anywhere and it will immediately start working.
- The equipment provides diffuse lighting that does not hurt the eyes, but provides good visibility in the area in the dark.
- No care or maintenance required. It is enough to wipe the dust several times a season so that the solar battery accumulates energy more easily and the light dissipates better.
- The lamps are safe for children and pets. They do not contain any harmful substances or sharp parts.
There are a lot of different models on sale.
By the way! If there are cases left from old, broken garden lamps, they can be used to make homemade versions. This will make the job easier.
Pros and cons of a homemade device
In country houses there are often interruptions in electricity, or it is completely absent. The desire to make a lighting design for a garden plot can have great difficulties when laying wires. DIY LED flashlights will help solve the problem.
Their creation and use is associated with the following advantages :
can be made from inexpensive scrap materials;- do not require professional skills during assembly;
- easy to install and dismantle as needed;
- does not require any energy source other than natural light;
- does not involve expenses during operation;
- environmental friendliness of the device.
Despite the visible advantages, a homemade LED flashlight also has some disadvantages :
- In order for the flashlight to work, you will have to work on quality connections;
- if you install it in a dark place, the batteries will not be replenished and the LED will light up;
- when working on a lamp you will need to use tools that not everyone knows how to use;
- you will need to purchase some parts for the circuit board and organizing the parts of the lamp, which contributes to costs;
- cannot be repaired if broken.
Electrical diagram
Shown here is the simplest diagram that even a novice craftsman who has never created garden lamps and other similar products can figure out. The system has only 7 components.
Using this diagram, assembling a garden lamp will not be difficult.
To understand the diagram and understand why certain parts are needed, you need to consider how the finished product works:
- When sunlight hits the surface, the transistor is in the off state. Therefore, the accumulated energy is supplied to the battery and charges it.
- After sunset, when no light reaches the photocell, the transistor opens and voltage is supplied to the LEDs. That is, the equipment is charged for as long as possible during the day, and turned on at dusk.
- The operating time of the lamp directly depends on the battery capacity and the power of the LEDs used in the design. Usually the components are selected so that they are enough for 6-8 hours of work.
Criteria for selecting parts and prices
The choice of parts depends on how powerful the lamp you intend to make. We provide specific ratings for a homemade lighting device with a power of 1 W and a luminous flux intensity of 110 Lm.
Since in the above diagram there are no elements for monitoring the battery charge level, then, first of all, you need to pay attention to the choice of solar battery. If you choose a panel with too little current, then during daylight hours it simply will not have time to charge the battery to the required capacity. Conversely, a light panel that is too powerful can overcharge the battery during daylight hours and render it unusable.
Conclusion: the current generated by the panel and the battery capacity must match each other. For a rough calculation, you can use the ratio 1:10. In our specific product, we use a solar panel with a voltage of 5 V and a generated current of 150 mA (120-150 rubles) and a battery form factor 18650 (voltage 3.7 V; capacity 1500 mAh; cost 100-120 rubles)
Conversely, a light panel that is too powerful can overcharge the battery during daylight hours and render it unusable. Conclusion: the current generated by the panel and the battery capacity must match each other. For a rough calculation, you can use the ratio 1:10. In our specific product, we use a solar panel with a voltage of 5 V and a generated current of 150 mA (120-150 rubles) and a battery form factor 18650 (voltage 3.7 V; capacity 1500 mAh; cost 100-120 rubles).
Also for production we will need:
- Schottky diode 1N5818 with a maximum permissible forward current of 1 A - 6-7 rubles. The choice of this particular type of rectifier part is due to the low voltage drop across it (about 0.5 V). This will allow you to use the solar panel most efficiently.
- Transistor 2N2907 with a maximum collector-emitter current of up to 600 mA - 4-5 rubles.
- Powerful white LED TDS-P001L4U15 (luminous flux intensity - 110 lm; power - 1 W; operating voltage - 3.7 V; current consumption - 350 mA) - 70-75 rubles.
Important! The operating current of LED D2 (or the total total current when using multiple emitters) must be less than the maximum allowable collector-emitter current of transistor T1. This condition is met with a margin for the parts used in the circuit: I(D2) = 350 mA
Battery compartment KLS5-18650-L (FC1-5216) – 45-50 rubles
If, when installing the device, you carefully solder the wires to the battery terminals, you can refuse to purchase this design element
Battery compartment KLS5-18650-L (FC1-5216) – 45-50 rubles. If, when installing the device, you carefully solder the wires to the battery terminals, you can refuse to purchase this structural element.
- Resistor R1 with a nominal value of 39-51 kOhm - 2-3 rubles.
- We calculate the additional resistor R2 in accordance with the characteristics of the LED used.
List of required parts
There are only 7 elements in this list; most of the parts can be found in an electronics store. But to save money, you can order components through Aliexpress or other similar sites. The main thing is to select all the parts according to the markings so that you end up with a workable design:
- 3.6 kOhm resistor.
- 33 Ohm resistors (depending on the number and power of LEDs).
- Diode 1N5391 or analogues (there are both imported and domestic options).
- Transistor 2N4403 (there may be other types with suitable characteristics).
- Rechargeable battery 3.6 V. It is better to choose lithium-ion ones, since nickel-cadmium ones are not reliable.
- Solar photopanel, monocrystalline options are best suited as the most productive and durable. Polycrystalline elements can also be used. The main thing is to choose products of grade A or B, do not take options C and especially D, since their characteristics are much worse and their service life is shorter.
- LEDs. You can use 1 element with a power of 3 W, but it is better to take 3 pieces with a power of 1 W. In this case, it is good to use DIP diodes as they perform better in open air conditions than SMD.
Parts you need to have on hand when assembling a garden light.
It is worth deciding in advance in which housing to arrange all the nodes. Any options that provide a convenient arrangement of parts are suitable. You also need to purchase a soldering iron and all materials for soldering if they are not at hand.
How much will the parts cost?
In cheap Chinese lamps costing about 500 rubles. Only one LED is used, which is clearly not enough. Moreover, the battery voltage is 1.5V, which is why the light is very dim.
In order not to waste time, it is recommended to assemble lamps with an optimal configuration, which includes:
| Elements | Price | Qty | total cost |
| Solar modules Eco-Source 52x19 mm | 675 rub. for 40 pcs. (for 4 lamps) | 1 set | RUB 675.00 |
| Battery SONY HR03 (1.2 V 4300 mAh) | 885 rub. for 12 pcs. (for 4 lamps) | 1 set | RUR 885.00 |
| LEDs BL-L513UWC | 10 rub./pcs. | 12 pcs. | RUB 120.00 |
| Resistor CF-100 (1 W 33 Ohm) | 1.8 rub./pcs. | 12 pcs. | 21.60 rub. |
| Transistor 2N4403 | 6 RUR/pcs. | 4 things. | RUB 24.00 |
| Diode 1N5391 | 2.5 RUR/pcs. | 4 things. | 10.00 rub. |
| Resistor CF-100 (1 W 3.6 kOhm) | 1.9 RUR/pcs. | 4 things. | 7.60 rub. |
| Total: | RUB 1,743.20 |
It turns out that to assemble one high-quality lamp you need approximately 435 rubles worth of components. But from these same parts, by purchasing the last 3 items, you can make 12 analogues of cheap Chinese lamps.
Lantern layout
You need to carry out your work on a table that is well lit and has everything you need at hand. You may need tweezers, a knife and other tools. It's also a good idea to have some wires on hand. There are two ways to connect parts according to the diagram:
- Use a universal circuit board or make your own. In this case, the main components will be arranged in one place and securely fastened. The easiest way to buy one is in radio electronics stores; there are options of different sizes, so it’s not difficult to choose.
- If the board is not at hand, you can connect the parts using a hinged method. All parts have long legs, so they can be connected even without the use of wires, but if you need to move some parts further away (for example, take a solar panel outside or expose LEDs), use copper wires in insulation.
Think about the location of the parts in advance, lay them out and try them on to understand how best to connect them. At this stage, you can make amendments and avoid mistakes and difficulties.
The board is used in all ready-made lamps.
What to make a lampshade from and how to assemble a lamp
After choosing a layout option, you need to select a housing to protect the products from atmospheric influences. This can be a small plastic container that closes tightly or a glass jar with a lid. To make a solar-powered lamp with your own hands, you need to follow the instructions:
- Attach the solar battery to the selected lampshade (its upper part). Contacts must be attached to it; if there are none, a contact track is soldered in. It’s best to stick it with double-sided tape, but don’t press it hard. Pass the contacts through a cover or other element, after making small holes in suitable places. Once the wires are in place, seal the holes with a small amount of weatherproof sealant to prevent moisture from penetrating inside.
- Inside the case you need to secure the battery compartment; the easiest way is to glue it with sealant or a glue gun. Next, arrange all the other parts according to the diagram, connecting them securely. If the work does not use a printed circuit board, you can attach a small piece of foam and insert the legs of the electronic elements into it so that they are firmly fixed.
- LEDs are usually located at the bottom. If you use a jar, you don’t need to do anything special. But to increase the brightness, you can assemble a reflector using thick foil or a CD cut into suitable size pieces. It is difficult to determine the quality of lighting the first time; it is better to try different options to choose the one that will shine best.
- If an opaque lampshade is used, then one of its walls or lower part must be cut out and a diffuser or piece of transparent plastic of a suitable size must be inserted. Here you need to proceed from the situation and select what is at hand. You can use diffusers or glass from old lamps or flashlights. To secure the element and make the connection waterproof, it is better to use a transparent sealant that is UV resistant.
- After connecting all the parts of the circuit, it is necessary to check its functionality. If everything is fine, the connections need to be sealed with a special pencil or contact compound. Before assembling the case, you should warm it up from the inside with a hairdryer to remove excess moisture and prevent oxidation processes inside.
- You can attach a leg to the finished lamp to stick it into the ground in a suitable place, or you can hang it. The easiest way to do this is to make a hook or loop on the outside.
Types of solar lanterns
What do manufacturing companies offer today?
Models in the form of pillars with lanterns at the top, which are stuck into the ground with a pointed lower end. There are lamps in this category that must be buried and even cemented. Their height varies from ground-mounted, that is, laid directly on the ground, to 2.5-meter columns. Bollards. Wall option. They can be mounted on any surface, which can be a fence, the wall of a house or any other building on the site. Built-in. These models are used to illuminate stairs. Although designers manage to use them in many places, the main thing is to use imagination. Underwater. From the name itself it becomes clear where these lamps can be used
Please note that their installation is carried out before the reservoir is filled with water. Waterproof. These lanterns in the form of balls, water flowers (lilies) and other shapes are placed directly on the water
That is, they launch it into the pond, illuminating the surface of the reservoir. Glowing objects are constantly in motion after every breeze blows. Today, manufacturers offer decorative lanterns in the form of birds, butterflies, and so on. They are usually installed in flower beds. Fairy lights. There seems to be nothing unusual about the garlands. This is a traditional design element. But the trick is that this type of lighting does not need to be connected anywhere, which makes it easy to install and create shapes and figures. They decorate trees and shrubs, install them under roof overhangs, frame stairs and verandas.
Please note the convenience of using this type of street lamps. The thing is that any garden lantern from the above list can be installed where you need
That is, you want it on the street, you want it inside the house
It is important that the battery is located in the sun. Therefore, carefully select the location for its installation.
And one more note. Manufacturers are now offering solar-powered street lights with colored LED bulbs. Let's face it, there is no point in using them every day. But on holidays this is an indispensable attribute of a good mood.
By the way, if you add a motion sensor to the design of solar-powered lamps, then the energy from their batteries may last more than one day. So budget conscious people should think about this.
What are the differences between street lamp models
First of all, consumers pay attention to external attributes. Modern garden lanterns can be made of metal, wood or plastic
Metal lamps are usually powder coated, which allows them to be used outdoors for several years. And at the same time they do not lose their original appearance.
Wooden street lamps are treated with antiseptics and compounds that repel rodents and prevent the wood from cracking. Well, plastic is not treated with anything, because it itself is not afraid of natural stress.
But lamp shades can be made of glass of different structures;
- Tempered, which is considered the most reliable.
- Smooth transparent. It has the highest throughput.
- Reflex.
As for the types of solar battery batteries, there are only two of them:
- Nickel metal hydride is expensive, but has a long service life.
- Nickel-cadmium.
The principle of operation of a solar battery
According to the type of photosensitive element, the division is as follows:
- Polycrystalline.
- Multicrystalline.
- Monocrystalline.
The first one is the cheapest. After just a year of use, their charge lasts for four hours at most. The second ones, if you use street lights correctly, will last for several years. The third is the most expensive option, but it works for a very long time. The element is coated with a special oxide film, which prevents light from scattering.
How can you improve the finished model?
If the purchased garden lights do not work as expected, or their characteristics do not correspond to the declared ones, some modifications can be made. They will help improve the design and provide high-quality light:
- If the lamp produces dim light, it is worth disassembling it and removing one of the resistors. A jumper is placed in its place; everything must be done carefully so as not to damage other components. Usually this is enough for the brightness to increase by an order of magnitude.
- When the light starts out bright, but after a short period of time becomes dim and then goes out, you need to add a resistor of about 50 kOhm. This will allow the system to shine brightly for at least a few more hours.
- Another common problem is that the lights go out several hours after dark. Most often this happens due to the fact that the manufacturer saved on the battery and supplied an option with a small capacity. You need to disassemble the case and check the battery rating, if it is 600 mAh or less, change it to a model with 1000 mAh or more, it all depends on the performance of the solar module. Select a battery based on 8 hours of LED operation plus a reserve of approximately 30%.
- Some models have only one LED, which does not provide high-quality light. In this case, you need to clarify its power, then select 3 diodes, which in total will consume approximately the same amount of energy and place them around the perimeter of the lampshade at an angle of approximately 120 degrees.
- Instead of a standard LED, you can solder in an RGB version and then the light will be iridescent.
The design of ready-made lamps is simple; understanding it will not be difficult.
To save energy and turn on a garden lamp only when needed, you can solder a small switch into the circuit.
Anyone with at least basic soldering skills can make a garden lamp with their own hands. You can buy components online or in a radio electronics store. Also, using the recommendations, it is easy to repair or improve the operation of finished lamps.
How does a garden lamp work?
The absence of a power connection makes the LED flashlight a very convenient and cost-effective way of lighting. During the day, while the sun is shining, the flashlight stores solar energy in its battery.
The weather must be cloudless and clear to collect light as efficiently as possible. Some flashlights have a controller inside that turns on the light as soon as it gets dark enough outside. Then the accumulated energy in the batteries begins to be consumed.
When completely discharged, the lamp stops producing light. The work looks like this :
- During the day, the storage panel converts the sun's energy into low-power electricity.
- The resulting energy is redirected to the battery using a diode.
- The positive potential through a resistor controls the absence of glow before dark.
- As soon as dusk or another type of dimming sets in, the transistor turns on (the effect is obtained due to a small positive potential in contact with the base) and starts the LED to glow based on the energy contained in the battery. The flashlight emits light.
- The light diode evenly doses the energy production from the battery to prevent complete discharge.
- As soon as it starts to brighten, the positive voltage cuts off the transistor, as a result of which the LED stops receiving energy to glow. During this period, the battery charging process starts again.
Simpler models without a controller accumulate energy and spend it evenly, providing glow at any time of the day.
Solar battery connection options
Solar panels are made up of several individual panels. To increase the system output parameters in the form of power, voltage and current, elements are connected to each other using the laws of physics.
Connecting several panels to each other can be done using one of three solar panel installation schemes:
- parallel;
- sequential;
- mixed.
A parallel circuit involves connecting terminals of the same name to each other, in which the elements have two common nodes for the convergence of conductors and their branching.
In a parallel circuit, “pluses” are connected to “pluses”, and “minuses” to “minuses”, as a result of which the output current increases, and the output voltage remains within 12 Volts
The maximum possible output current in a parallel circuit is directly proportional to the number of connected elements. The principles for calculating quantities are given in our recommended article.
A series circuit involves connecting opposite poles: the “plus” of the first panel to the “minus” of the second. The remaining unused “plus” of the second panel and the “minus” of the first battery are connected to the controller located further along the circuit.
This type of connection creates conditions for the flow of electric current, in which the only path remains for the transfer of energy from the source to the consumer.
With a serial connection scheme, the output voltage increases and reaches 24 Volts, which is enough to power portable equipment, LED lamps and some electrical receivers
A series-parallel or mixed circuit is most often used when it is necessary to connect several groups of batteries. By using this circuit, both the voltage and current can be increased at the output.
With a series-parallel connection circuit, the output voltage reaches a level whose characteristics are most suitable for solving the bulk of household problems
This option is also beneficial in the sense that if one of the structural elements of the system fails, the other connecting circuits continue to function. This significantly increases the reliability of the entire system.
The principle of assembling a combined circuit is based on the fact that devices within each group are connected in parallel. And all groups are connected in one circuit in series.
By combining different types of connections, it is not difficult to assemble a battery with the required parameters. The main thing is that the number of connected elements must be such that the operating voltage supplied to the batteries, taking into account its drop in the charging circuit, exceeds the voltage of the batteries themselves, and the load current of the battery provides the required amount of charging current.
How to repair a solar battery yourself
Cheap garden lights with solar cells were purchased, twenty of them were purchased at once, the goods were cheap and working. All summer they stood in the garden and were a delight to the eye at night. But by the end of summer, some of the lights stopped working. The next summer, history repeated itself and by the end of the summer all the lights stopped working. It's a shame!
Analysis of the lamps revealed the cause of the breakdowns. Due to the leaky mounting of the solar cell, water easily penetrated into the flashlight body, and the presence of constant voltage caused electrocorrosion and, unfortunately, the rapid death of the electronics. In some flashlights, after disassembly, a very sad picture was observed: all the tracks on the boards disappeared, oxidized and turned into powder, the circuit was virtually destroyed, and the legs of the LEDs were eaten away by corrosion to the plastic housing, there was nothing even to solder the wires.
Of course, it’s easy to throw away the lamps, but a real master will try to restore with his own hands something that can be used in further crafts. The most valuable thing in a garden lantern is the solar battery.
During disassembly, not a single solar battery was working; corrosion did not spare the metal. The photo clearly shows how the metal coating on the positive electrode has been eaten away by corrosion. We carefully disassemble the flashlight so as not to tear off the metal electrode to which the conductors for discharging electricity from the solar cell are soldered. But on some solar cells, this electrode was destroyed by corrosion and attempts to solder to the metallization were unsuccessful. And how can you solder the wire to the glass?
Solar lantern Metallization eaten by corrosion Electrode eaten by corrosion
So let's begin the process of restoring the solar element, the most valuable part of the lantern.
Step 1. For repairs, you need to purchase conductive glue, such as the one in the photo.
Step 2. Solder the wires from the electrodes, if there are any left.
Step 3. Remove paint and varnish; if there is film, remove it too. The stripping width is several millimeters and in the place where the wires were soldered.
Step 4. Degrease the surface and apply glue according to the instructions. We use glue to restore the electrode eaten by corrosion by applying glue to the cleaned area. Let the glue dry.
Conductive glue Unsolder the conductors Clean up damage Apply conductive glue
Step 5. We lean the wire against the place where the glue is applied and drip solder, well, literally a little more. In this state, the wires are still weakly attached to the element; with the slightest tug, the wire will come off. We fix the wire to the glass with hot glue. In principle, at this step, the restoration of the solar cell with your own hands ends.
Attach the conductor Fix the conductor with hot glue Repaired solar cell
Repair results:
Of the twenty solar cells, nineteen were recovered, which is a good percentage. On a sunny day, each element produces a voltage of 2...2.5 volts at a current of tens of milliamps, which is quite enough to power various crafts from solar energy (Sekret-mastera.ru) or make a solar charger.
Material for publication was kindly provided by the author of Cosmogor. Thanks Cosmogor!
Basics and composition of solar stations
The purpose of solar panels is to collect and concentrate (attract) sunlight (ultraviolet), convert it through controllers, an inverter into electricity and supply it through batteries or directly to the 220 V (or 380 V) network at home.
Excess electricity can be sold. One of the advantages of the system is complete autonomy and automaticity. Disadvantage: dependence on weather, climate, shading.
The user’s standard goal is to select elements so that they pay for themselves in the shortest possible time. Therefore, correct assembly is very important - the efficiency of the equipment depends on it.
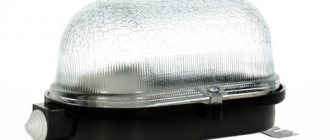
Lamps for installation on fence or gate posts
The case is plastic. An exclusively decorative element of the landscape, it shines dimly (1 LED), but allows you to place these flashlights at eye level. Housing protection degree: IP33. Price: 690 rub.
The body is plastic, but made neatly. An exclusively decorative element of the landscape, it shines dimly, which allows you to place these lanterns at eye level. Housing protection degree: IP33. Price: RUB 2,092
How does a typical LED light work?
Of course, they all look different.
The box contains the assembled lamp itself, two separate “legs” - short and long. There is also a black plastic tip that sticks into the ground, and instructions.
Having two “legs” is very convenient. After all, someone will want to “plant” a lamp directly on the surface of the soil. Then a short tube will do. Some may want to raise the lamp above the surface. Then the long one is used. In any case, you don’t have to immediately saw off anything or look for a suitable extension cord. This kind of concern for the consumer is always pleasant.
The ball itself is not glass, but plastic. This simplifies the design and makes it safer. True, glass, unlike plastic, does not scratch, but then the product would cost more.
How can you organize street lighting using solar batteries?
Outdoor lighting is a complex system and it is divided into several components:
- Security lighting, which must always work, as safety depends on it. As a rule, this is a fence, a wicket/gate, and sometimes an area in front of the house.
- Emergency lighting - turns on periodically, if necessary. For example, a driveway should be illuminated when a car or person is walking along it; bathhouse - if someone takes a steam bath in it; a barn that must be approached at night.
- Decorative. Illumination of decorative elements, bushes, trees, building fragments. It usually works in the evening and turns off at night.
- Functional. Most often, this is the illumination of the main paths (from the gate to the house, from the house to the garage, etc.). The working hours can be from evening to morning, or maybe only in the evening and as needed (if you return home late).
Not all parts are necessarily present in every single-family home outdoor lighting, but they all may be. Most, or even all, of this system can be powered by solar panels. Moreover, solar-powered street lighting can be done in two ways:
- The first is to install lamps and lanterns with their own built-in batteries. This method does not require large expenses, but its reliability is low. Each such lamp is equipped with its own small solar panel and battery, which stores energy throughout the day. Battery power and battery capacity are small. With a normal charge, the energy reserve is enough for 10-14 hours of operation, and in bad weather - depending on your luck. Maybe enough for an hour of work. Therefore, such a solar lighting system can be used in not very important areas. For example, they can be installed for decorative lighting of an area, garden, or vegetable garden.
- The second way to organize solar-powered street lighting is a whole system. You will need solar panels of a certain capacity, along with a battery that will store electricity for periods of cloudy weather. To prevent batteries from failing when the amount of energy is exceeded on sunny days, you need a battery charge controller. All of these are not cheap devices. But, with the correct calculation, illumination of the area from solar panels will be guaranteed.
Is it profitable to use solar panels to illuminate the area? The answer can only be given on a case by case basis. The efficiency of solar systems depends very much on the region and the number of sunny days. And the economic benefit (payback) comes from electricity tariffs.
Purpose and calculation of an additional resistor in the LED power circuit
The battery voltage may be too high for the LED (this may cause it to fail). To compensate for its excess we use an additional resistor R2. We calculate its denomination based on the formula: U(A) = U(D2) + U(R2), where:
U(A) – battery voltage;
U(D2) – LED operating voltage;
U(R2) – voltage drop across additional resistor R2.
For the TDS-P001L4U15 LED used in the above circuit with an operating voltage of 3.7 V, the use of resistor R2 is not required, since U(A) = U(D2). That is, our specific scheme will look like this:
As an example of calculating additional resistors, consider a circuit with the connection of two different types of LEDs: D2 - BL-L813UWC (operating voltage - 2.7 V; current consumption - 30 mA; cost - 15 rubles) and D3 - FYL-5013UWC/P (2, 2 V; 25 mA; 20 rubles).
We calculate the additional resistor R2 for LED D2.
U(A) = U(D2) + U(R2)
U(R2) = U(A) – U(D2) = 3.7 – 2.7 = 1 V
According to Ohm's law (familiar to everyone from school):
U(R2) = R2 • I, where I is the current consumed by the LED, therefore
R2 = U(R2) : I = 1 : 0.03 = 33.33 ≈ 33 Ohm
Similarly, we calculate the additional resistor R3 for LED D3:
U(R3) = U(A) – U(D3) = 3.7 – 2.2 = 1.5 V
R3 = U(R3) : I = 1.5 : 0.025 = 60 ≈ 62 Ohm
On a note! After calculations have been made, the values of additional resistors are rounded to the nearest standard values.
The final circuit with two different types of emitters will look like this:
Design and assembly of the lamp
The lamp requires a housing, preferably waterproof. It is very convenient to use an empty canning jar with a screw-on lid.
Example of parts layout
To assemble such a lamp, you need a piece of plywood to glue two rows of modules onto it. The proposed photocells have a size of 52x19 mm; folding them in two rows will result in a rectangle with dimensions of approximately 110x110. You can glue the modules using double-sided tape for mirrors, but do not press down too hard.
Before gluing the modules, cut a hole in the center of the board for the lid of the jar and secure it inside with a couple of drops of hot glue. You need to pierce two holes in the cover to enter wiring from the modules; do not forget to restore the seal later.
To conveniently place electronics inside, glue a small foam washer to the inside of the lid. If you don’t bite the legs when soldering the circuit, you can stick the elements into the foam and fix them that way. And if you make rectangular cuts in the foam, you can easily insert batteries into them. For contact, use a pair of flattened balls of aluminum foil with wires soldered to them.
Before closing the lid, warm the inside of the jar well with a hairdryer. This way the parts will oxidize less, and condensation will not appear on the walls of the jar.