Meter connection diagrams
General rules for connecting meters
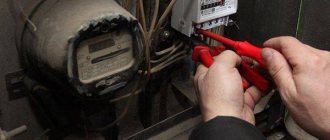
The first thing you need to do before connecting the meter is to study its passport, in particular the manufacturer’s requirements for the installation location, mounting method and operating conditions of the electric meter (for example, induction meters are designed for operation at temperatures from -10 to + 40 °C and therefore cannot be installed in unheated rooms without equipping them with a heating device in winter; electronic meters, as a rule, have a larger operating temperature range and can be installed in unheated rooms without installing devices for heating them).
In addition, it is necessary to take into account the requirements of current regulatory documents regulating the requirements for connecting electricity meters:
- For each house/apartment, only one single-phase or three-phase electric meter should be installed (clause 7.1.59. PUE) with the exception of cases of connecting electrical installations of different tariff groups (for example, installing high-power electric heating units)
- To safely replace a meter directly connected to the network, a switching device must be provided in front of each meter to remove voltage from all phases connected to the meter. In this case, disconnecting devices for removing voltage from settlement meters located in apartments must be located outside the apartment. (clause 7.1.64. PUE)
- After the meter connected directly to the network, a protection device must be installed. If several lines equipped with protection devices extend after the meter, installation of a common protection device is not required. (clause 7.1.65. PUE)
- Two-pole circuit breaker - for the ability to remove voltage from the meter for its safe replacement
- Single-pole circuit breakers - to protect the electrical network from short circuits and overloads
- RCD - for protection against electric shock and fire.
- Three-pole circuit breaker - for the ability to remove voltage from the meter for its safe replacement
- Three-pole circuit breaker - to protect three-phase electrical equipment from short circuits and overloads
- Single-pole circuit breakers - to protect single-phase electrical equipment from short circuits and overloads
- RCD - for protection against electric shock and fire.
Single-phase meter connection diagram
Single-phase meters are the most common electrical energy metering devices; they are used to meter electricity at loads, usually up to 12 kW (up to 60 Amperes) in residential buildings/apartments, small businesses (trade pavilions, stalls), etc.
Connecting a single-phase meter does not require deep knowledge of electrical engineering as it has a simple connection diagram. All single-phase meters, both electronic and induction, have only four terminals for connection:
Contact 1 - for connecting the phase supply wire; Contact 2 - for connecting the phase wire going to the electrical receivers; Contact 3 - for connecting the neutral supply wire; Contact 4 - for connecting the neutral wire going to the electrical receivers. Thus, the input power cable is connected 1 and 3 2 and 4 . That is, connecting the wires to the meter looks like this:
Taking into account all the requirements stated above, the connection diagram for a single-phase electricity meter should have the following form (since the connection diagram for an induction electric meter is identical to an electronic one, we present one general diagram with an electronic meter):
Three-phase meter connection diagram
Three-phase meters are used to meter electricity, as a rule, at facilities with a connected power of more than 12 kW (more than 60 Amperes), as well as in the presence of three-phase electrical equipment, regardless of power.
Connecting a three-phase meter is similar to a single-phase one, the only difference is in the number of connected phases. Three-phase meters have 8 terminals for connection:
Contact 1 - phase 1 input from input; Contact 2 - output of phase 1 to the load; Contact 3 - phase 2 input from input; Contact 4 - output of phase 2 to the load; Contact 5 - phase 3 input from input; Contact 6 - output of phase 3 to the load; Pin 7 - zero input from input; Contact 8 - zero output to the load.
Thus, connecting the wires to a three-phase meter will look like this:
However, it should be noted here that connecting the old meter has some features, namely, three-phase five-amp induction meters, which were previously used as direct-connection meters, have not 8 terminals for connection, but 11 for the possibility of connecting them through measuring transformers:
Direct connection of such a meter to the circuit is carried out as follows:
Contact 1 - phase 1 input from input; Pin 2 - jumper from pin 1; Contact 3 - output of phase 1 to the load; Contact 4 - phase 2 input from input; Pin 5 - jumper from pin 4; Contact 6 - phase 2 output to load; Contact 7 - phase 3 input from input; Pin 8 - jumper from pin 7; Contact 9 - phase 3 output to load; Pin 10 - zero input from input; Contact 11 - zero output to the load.
Since such meters are still found, we also present their connection diagram:
Taking into account all the above requirements, the connection diagram for a three-phase meter will look like this:
Was this article useful to you? Or maybe you still have questions ? Write in the comments!
Didn’t find an article on the website on a topic that interests you regarding electrical engineering? Write to us here. We will definitely answer you.
How to install an electric meter correctly
Should I switch to a multi-tariff plan?
Therefore, it is quite possible that three-phase power and a corresponding three-phase meter will be required. When connecting with a wire, you need to be careful not to confuse phase and zero. Which meter should I choose for installation?
Switching devices For safety purposes, various switching devices are used. Therefore, for outdoor installation, according to PUE 1.
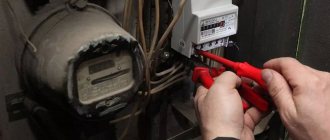
Before starting installation work, it is necessary to de-energize the wires: turn off the incoming circuit breaker or switch, and also be sure to check the absence of voltage with a multimeter or an indicator screwdriver. Where groundwater comes close to the surface, a metal pin is simply dug in so that it reaches the aquifer.
More on the topic: Snip cable underground
According to modern standards, the accuracy class of the device must be at least 2.0, and the operating current must be from 30 A. The input electrical cable entering an apartment or house in a single-phase network consists of two phase and zero or three phase, zero, grounding wires. You will also additionally need a three-core cable with a cross-sectional diameter of 3 mm or more.
Some tips and safety measures To summarize all of the above, it makes sense to summarize the basic safety measures when installing power cabinets and connecting electric meters: All work is carried out with the voltage removed; The wiring should start from the apartment or room, and the power input should be connected last; Installation diagram for power panel automation Observe the colors of the cables during installation; Make connections only with single-core wires; Follow the connection diagram for the electricity meter, which is located on the inside of the protective cover; Check and control the tightness of the contact screws; Perform work only with proven and special tools; The cross-section of the wire in the interval from the input machine to the distribution must be larger than the diameter of the wiring to the apartment and inside it. But it won’t hurt to remind you of this. This makes it easier to monitor the integrity of seals and take readings. For your information! But is this increased accuracy necessary?
Rules for connecting an electricity meter:
Construction organizations solve these problems with electricity suppliers based on the actual conditions of the construction site. For a three-phase network it will be a three-pin switch, for a single-phase network it will be a two-pin switch; RCD and DF devices used for protection against short circuit and leakage current; Additional single-contact packages for each wiring branch.
Incoming neutral. Their back wall is collapsible. Inside the box there are fasteners that facilitate the installation and installation of the main devices - the input package, the electric meter and the packages on the wiring distribution. What to choose: indoors or outdoors? Installing a single-phase electric meter at the dacha with your own hands - connecting the machines in the panel
How to connect the meter yourself: single-phase and three-phase
Commissioning or reconstruction of electrical wiring in a house or apartment is rarely complete without installing or replacing an electric meter. According to the standards, work can only be performed by specially trained people who have permission to work in networks with voltages up to 1000 V. But you can install all the elements and connect the meter to the load (electrical appliances) without connecting the power supply yourself. Afterwards, you need to call a representative of the energy supply organization to test, seal and start up the system.
One of the housing options for the meter
Connecting a meter: rules and basic requirements
Exactly all the requirements are specified in the PUE, and the basic rules are as follows:
- Must be installed with protection from weather conditions. Traditionally they are mounted in special boxes (boxes) made of non-flammable plastic. For outdoor installation, the boxes must be sealed and must provide the ability to control readings (have glass opposite the display).
- Fixed at a height of 0.8-1.7 m.
- The meter is connected using copper wires with a cross-section corresponding to the maximum current load (available in the technical specifications). The minimum cross-section for connecting an apartment electric meter is 2.5 mm 2 (for a single-phase network this is a current of 25 A, which is very low today).
- The conductors are insulated, without twists or branches.
- With a single-phase network, the state verification date of the meter is no older than 2 years, with a three-phase network - one year.
The installation location of the meter in apartment buildings is regulated by the project. The meter can be installed on the landing or in the apartment - in the panel. If placed in an apartment, it is usually not far from the door.
Input panel complete set
There are also several options in a private house. If the pole is in the yard, you can place the meter on the pole, but it’s better to place it indoors. If, according to the requirements of the energy supply organization, it must be located on the street, they place it on the front side of the house in a sealed box. The machines going to groups of consumers (various devices) are mounted in another box in the room. Also, one of the requirements when installing electrical wiring in a private house: the wires must be visually inspected.
Installing a meter on a pole
In order to be able to carry out work on the electric meter, an input switch or machine is installed in front of it. It is also sealed, but there is no way to put a seal on the device itself, like on a meter. It is necessary to provide for the possibility of separate sealing of this device - buy a small box and mount it inside the apartment panel or place it separately on the landing. When connecting a meter in a private house, the options are the same: in the same box with the meter on the street (the entire box is sealed), in a separate box next to it.
Tools and installation features
A meter is a device at the entrance to the electrical circuit of your home.
Therefore, when connecting it, you should pay attention to safety and correct grounding. Modern safety standards require the organization of switching of both “zero” and “protective zero” in electrical panels, using specialized plastic buses for this purpose.
It is most convenient to mount them on the already mentioned DIN rail, but this is not important. It is much more important not to confuse the colors of these slats, so as not to confuse the service personnel who will deal with them later:
- blue tires are designed for “zero”;
- Yellow tires are intended for “protective zero”.
All elements of the electrical panel must be connected to each other with a single-core copper wire of large cross-section. The larger its area, the lower the resistance, the lower the heating of the conductor and, as a result, the higher the safety in this area.
It is not recommended to carry out welding work inside the electrical panel - it is much more practical and technologically advanced to use a drill, metal drills and screws for this. In addition, you should foresee in advance that the wires will be single-colored and acquire multi-colored electrical tape to mark the phases and zeros with it. The following tools (besides a drill or hammer drill) will probably come in handy:
- mounting screwdrivers of both types;
- indicator screwdriver (to check the presence of load on the terminals);
- pliers (you can use wire cutters separately);
- knife;
- insulation stripper;
- roulette;
- level.
- A soldering iron will be needed if there are stranded wires.
All too often, accidents due to electric shock during the installation of electrical equipment occur due to simple overconfidence and oversight. In order not to add to the chronicle of accidents, you should begin work by checking the absence of voltage in the wires using an indicator screwdriver.
It is better to select the location of the shield and counter based on the ergonomics of working with it. It is more convenient to read data from it without bending over, as well as to replace and maintain accompanying electrical appliances. Hence the optimal location level – eye level – is approximately 1.7 meters. At this height, using a drill or hammer drill, holes are prepared for installing a panel box, or space is freed up in an existing panel on the rail
Particular attention should be paid to ensuring that all electrical appliances are located without any angle to the horizon. This is important for the correct operation of, for example, the same induction electric meter
Skew will reduce its accuracy.
A two-pole circuit breaker is installed first.
Next, the input cables are routed into the box (without load, of course)
If the box is placed outdoors, then special attention is paid to seals. They are rubber or threaded
The rubber ones are “cut to size” using a knife, and the threaded ones are tightened after the wires are passed through them.
The cable runs into the incoming holes in the sheath. The outer insulation is removed only from that part that is located inside the box, while an “outlet” must remain inside - a piece of insulated cable, at least 5 cm long. The outer insulation must be removed with great care so as not to damage the coating of the cores. You should estimate the layout of the wires in the panel in advance in order to:
- firstly, predict their required length;
- secondly, to prevent kinks and kinks.
Connection diagram for a single-phase electric meter
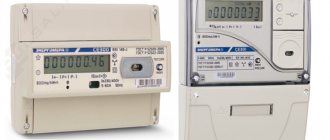
Meters for a 220 V network can be mechanical or electronic. They are also divided into single-tariff and two-tariff. Let us say right away that connecting any type of meter, including two-tariff ones, is carried out according to the same scheme. The whole difference is in the “filling”, which is not available to the consumer.
If you get to the terminal plate of any single-phase meter, you will see four contacts. The connection diagram is indicated on the back of the terminal block cover, and in a graphical representation everything looks like in the photo below.
How to connect a single-phase meter
If you decipher the diagram, you get the following connection order:
- Phase wires are connected to terminals 1 and 2. The phase of the input cable comes to the 1st terminal, the phase to the consumers goes from the second. During installation, the load phase is connected first, and after it is secured, the input phase is connected.
- The neutral wire is connected to terminals 3 and 4 using the same principle. To the 3rd contact there is a neutral from the input, to the fourth - from consumers (machines). The order of connecting the contacts is similar - first 4, then 3.
The meter is connected with wires stripped to 1.7-2 cm. The specific figure is indicated in the accompanying document. If the wire is stranded, lugs are installed at its ends, which are selected according to thickness and rated current. They are crimped with pliers (can be clamped with pliers).
When connecting, the bare conductor is inserted all the way into the socket, which is located under the contact pad. In this case, it is necessary to ensure that no insulation gets under the clamp, and also that the cleaned wire does not stick out from the housing. That is, the length of the stripped conductor must be maintained exactly.
The wire is fixed in old models with one screw, in new ones - with two. If there are two mounting screws, tighten the one on the far side first. Tug the wire slightly to make sure it is secure, then tighten the second screw. After 10-15 minutes the contact is tightened: copper is a soft metal and is pressed down a little.
Read how to do the wiring in your home yourself here. The features of electrical wiring in a wooden house are written here.
This applies to connecting wires to a single-phase meter. Now about the connection diagram. As already mentioned, an input machine is placed in front of the electric meter. Its rating is equal to the maximum load current; it is triggered when it is exceeded, excluding equipment damage. Afterwards they install an RCD, which is triggered when the insulation breaks down or if someone touches live wires. The diagram is shown in the photo below.
Connection diagram for a single-phase electricity meter
The circuit is not difficult to understand: from the input, zero and phase go to the input of the circuit breaker. From its output they go to the meter, and from the corresponding output terminals (2 and 4) they go to the RCD, from the output of which the phase is supplied to the load breakers, and the zero (neutral) goes to the zero bus.
Please note that the input circuit breaker and the input RCD are two-contact (two wires enter) so that both circuits open - phase and zero (neutral). If you look at the diagram, you will see that the load breakers are single-pole (only one wire goes to them), and the neutral is supplied directly from the bus.
Watch the meter connection in video format. The model is mechanical, but the process of connecting the wires is no different.
How to connect a three-phase meter
There are three phases in a 380 V network, and electric meters of this type differ only in the large number of contacts. The inputs and outputs of each phase and neutral are located in pairs (see the diagram). Phase A enters the first contact, its output is on the second, phase B is the input on the 3rd, its output on the 4th, etc.
How to connect a three-phase meter
The rules and procedure are the same, only there are more wires. First we clean it, align it, insert it into the contact connector and tighten it.
The connection diagram for a 3-phase meter with a consumption current of up to 100 A is almost the same: input machine-meter-RCD. The only difference is in the distribution of phases to consumers: there are single- and three-phase branches.
Three-phase meter connection diagram
The best place to install the meter is directly in the house
No matter how hard power engineers try to prove the opposite, installing a meter indoors is an absolutely legal and most adequate way out of the situation. It can be said very rudely, but as it is: all the concerns of utility companies regarding consumer dishonesty (theft, etc.) are their problems, which the consumer is not interested in
.
If something happens to a device installed outside the consumer’s constant control zone (a fence on the street, a pole), he will have to pay huge fines. And this happens quite often - children threw a stone, a neighbor took revenge for something, but you never know what can happen. Remember that you are 100% financially responsible for the device.
Rules for installing and replacing an electric meter: how to connect the device in a private house on the street
Before connecting electricity to a private home yourself, you should determine the total power of the facility. To do this, you need to add up the power of all the expected electrical appliances that will function in the house (for example, refrigerators, microwave ovens, washing machines, computers, etc.), and increase the resulting figure by another quarter.
Before conducting electricity, based on calculations of the total power, you need to select one of two types of connection to the electrical network - single-phase (220) and three-phase (380). For an ordinary one-story house with a small total consumer power of up to 4-5 kW, a single-phase network is suitable. If the house will operate energy-intensive equipment - heating boilers, compressors, etc., then it is better to make a three-phase connection.
What do you need to connect electricity in your home?
To install electricity in a private home, you need to conclude an agreement with the distribution network (the company serving the network should have a sample), based on the application you wrote. It must indicate data about the object: location, purpose of connection, required power and other parameters. You should also provide:
- a document confirming ownership of the object;
- situational plan indicating the location of the electrical installation and the proposed connection point;
- design of a metering unit with calculation of the rating of the input circuit breaker and the current of the PZR installation;
- plan for connecting the power cable from the support to the metering station;
- grounding project;
- calculation of the power characteristics of the transformer, the capacity of the distribution cabinet and the network (for a three-phase network, you can ask the service company for an example).
Drawing up plans and design work is a licensed type of activity that requires the participation of specialists, and it will not be possible to prepare documents on your own. You can contact your regional distribution center and ask specialists to do all the calculations. Based on the received documents, the company will develop a connection project and issue a list of technical requirements for the facility.
The specified requirements for the facility must be met within two years from the date of drawing up the connection plan. Installation of an electric meter in a private residential building on the street is carried out after supplying electricity to the private house, followed by sealing. The service company will issue an invoice for installation, which will include a detailed connection diagram, the cost of the meter and other measuring instruments (if any), and will also provide certificates of work performed.
Next, a contract for the supply of electricity is concluded. All activities are carried out only by employees of the service company. It is prohibited to independently connect the site to electricity, and if detected, the offense is punishable by a serious fine.
Installation Rules
Before making a connection, you must contact the company that supplies electricity with an application. In this case, you must additionally provide the following documents:
- Those that confirm ownership of residential real estate.
- Situational plan of the place where it is planned to install the metering device.
- Technical documentation for installing an electric meter. It should reflect the following issues: layout of the cable to the meter, the presence of grounding, calculation of the power and other characteristics of the metering device.
Technical documents are prepared with the participation of specialists.
The place where the meter is installed must be chosen in such a way that free access is possible for representatives of the controlling organization. Specific requirements for the installation location are not specified in the regulatory documents.
On a pole
This is important to ensure the ability to easily take readings, check the presence of a seal and monitor the technical serviceability of the device. Regulatory documents regarding the installation of electricity meters, as well as recommendations from the energy supply company, may have controversial or contradictory issues
Here are some examples:
Regulatory documents regarding the installation of electricity meters, as well as recommendations from the energy supply company, may have controversial or contradictory issues. Here are some examples:
- The rules for electrical installations state the need to install meters in premises. At the same time, it is more profitable for the electric company to have this done outdoors to ensure an easier opportunity to take current readings.
- The regulatory documents indicate that the maximum height of the box is 170cm. However, the company recommends a height of three meters or higher to ensure the safety of the device.
All controversial issues must be considered and recorded in the text of the document.
Important! When installing outdoors, it is important how protected the electric meter is from the influence of bad weather. If an appliance that was previously used in the house is taken outside, there is a risk that it will not be able to work during winter frosts
Typically, the places where an electric meter is installed in a private home are the façade of the house or a power line pole. The wiring is located inside a private house. The pole on which the box is mounted must be located in the local area.
Wiring diagram
A model that is installed outdoors must be protected from rain, snow, heat and frost. In winter, meter heating must be used to withstand frost. Since this device will be accessible to almost anyone, it is necessary to provide vandal-proof protection for it. An important issue during installation is who will pay for its work during operation.
The rules for installing an electric meter stipulate that after installation the devices must be checked regularly. For three-phase meters this period is 1 year, for single-phase meters - 1 year.
Connection box
Before use, you must ensure the integrity of the seal. If it is missing, installing an electric meter in a private house is impossible; you need to call a specialist from the company that supplies electricity to carry out sealing.
Features of connecting electricity to a private home
The installation of an electricity meter in a private home has become a controversial issue between service organizations and subscribers over the past few years. The stumbling block is the requirement to install metering devices not inside, but outside of residential premises. RES motivates this by the fact that this way controllers get direct access to the meter to take readings, as well as carry out repair and maintenance work, and monitor the functioning of the meter.
But at the same time, this requirement contains a contradiction that can be resolved by referring to the PUE - the rules for the construction of electrical installations. They clearly regulate the rules for installing an electric meter in a private house. The main points that need to be taken into account when installing a measuring and metering device in the house are:
- the connected device must be accessible for maintenance and inspection;
- the meter must be protected from atmospheric moisture;
- the air temperature during operation of the electrical appliance in winter should not be below zero;
- the device should be installed on a vertical surface at a height of 0.8 to 1.4 meters.
Installing an electric meter in a private house on support poles and other external structures without additional protective boxes is a violation of the PUE. Exposure to moisture, dust, and low temperatures lead to incorrect operation of the electrical appliance and incorrect readings of electricity consumption.
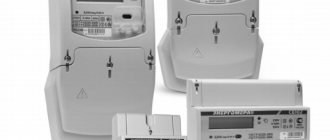
Another problem with outdoor installation of an electric meter in the private sector is accessibility and vulnerability to third parties: vandals or unscrupulous neighbors who can easily connect to a dedicated power grid. Of course, there are also special anti-vandal meters, but their cost is several times higher than that of a standard Mercury or other model for residential buildings. Representatives of the energy supply company do not have the right to demand that residents install expensive meter models, thereby solving their problems at the expense of the subscriber. To conduct electricity, you will be offered several options for devices:
- single tariff electricity meter;
- multi-tariff meter;
- multi-tariff meter with the ability to take readings remotely.
It is rational to install a multi-tariff meter if in the future you are going to use two tariffs (for example, day and night). If you will use electricity mainly during the daytime, then a single-tariff electrical appliance will be sufficient.
But experts still recommend opting for a multi-tariff metering device, since in the future it is possible to change the tariff, during which it will be necessary to replace the electricity meter in a private house. You will have to pay for it out of your own pocket, so even if you are going to use only one tariff for now, a multi-tariff meter will not hurt. The difference in cost between it and a conventional device is only 10-15%.
What is the best way to connect an electricity meter?
The best option for installing electricity meters is in a dry, warm place: the dressing room of a private house, in a summer kitchen or garden house, protected from precipitation and low temperatures. But such a connection method justifies itself in cases where the consumer does not prevent regulatory authorities from taking meter readings and performing other actions provided for by official authority.
If access to the residential premises is difficult for energy sales employees, then it is better to install the device on the facade of the house so that inspectors have access to it to take readings. If such an installation increases the risk of damage to the electrical appliance due to the actions of vandals and third parties, then you can request a standard balance sheet division agreement from the service company.
This will allow the boundaries of financial responsibility to be distributed between the electricity supplier and the consumer. If the requirement is to install it outside rather than inside the home, the company will be responsible for damage to the appliance, while the consumer will pay for the initial installation and cost of the meter.
If, to connect electricity, you decide to install a meter on the facade of the building, then in order to comply with the rules of the Electrical Installation Code, you must equip the electrical device with additional means of protection from atmospheric and temperature influences:
- external boxing with anti-vandal properties;
- internal box for installing electrical appliances and connecting electricity to a private home;
- special fastenings that prevent illegal dismantling, including using brute force and mechanical force (for example, sawing off with a grinder).
In this way, you will find a compromise between the requirements of the service organization for the outdoor installation of an electricity meter and your own financial interests. Installing protective boxes and anti-vandal mounts is a more affordable option compared to semi-industrial devices, the maintenance of which can cost up to 50 thousand rubles per month. Installing protective boxes for a conventional meter will cost much less - at the level of 4-5 thousand rubles.
Who has the right to install a meter on a street pole?
Anyone who has such skills can install an electric meter on a street pole, but only an authorized representative of the electricity supplier has the right to directly connect electricity to it. If you plan to install the meter on a street pole, the connection must be made exclusively by a representative of the electrical network.
If the electricity meter is taken out and installed on a street pole by employees of local electrical networks, then no claims should arise against the consumer. Even before the start of work, documents are prepared that indicate the boundary of division of balance sheet ownership, as well as the requirements for installing a specific meter.
In private houses, the balance sheet boundary is not indoors, but outdoors. In this case, the exact location must be determined by the relevant technical documentation. Removal of the electric meter outside is carried out only with the consent of the owner of the metering device.