The fine line of gradation
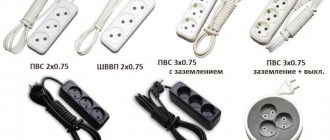
Conventionally, all existing electrical equipment according to the method of interfacing with the electrical network can be divided into two categories:
— Stationary, which is connected to the current source with a cable and a permanent connection. Of course, if you have the tools, you can turn it off, but only in emergency situations. An example would be equipment in production.
— Relatively mobile, allowing you to disconnect from the power source without using specialized devices. This group includes almost all household electrical appliances. Their distinctive feature is the plug.
What is a plug
Everyone has encountered sockets and power plugs. However, few people understand where the term “plug” comes from. It's actually simple. The word "plug" is of German origin. And it means nothing more than a traffic jam. Indeed, the plug, being in the socket, seems to clog the holes of the latter. Hence the term. Well, the additional word “fork” appeared due to its distant resemblance to the famous cutlery. Of course, the tasks of this device are completely different, although, it is worth recognizing, there are real plastic plugs for sockets on the market that protect curious children from accidental electrical injury.
Device
This plug, despite its external similarity, does not comply with the CEE 7/16 standard: the pins are not covered with insulation for half the length, do not converge and do not spring, and the wire appears to be single insulated
The Euro plug pins are 19mm long and 4mm in diameter. Each pin is covered with insulation over a distance of 10 mm from the body; the diameter of the insulated part is 3.8 mm. The two contacts are not parallel to each other, slightly converge and spring; their centers are 17.5 mm apart at the ends and 18.6 mm at the body. The elasticity of the pins creates sufficient force for reliable contact in sockets of any supported type. The fork body is 35.3mm wide and 13.7mm thick over 18mm. The edges of the body have bevels at an angle of 45°.
Fork Features:
- reliable contact is established only when the plug is inserted all the way;
- when the plug is inserted into a socket of any type, live parts cannot be touched;
- it is impossible to insert the plug in such a way that one pin touches the current-carrying contacts of the socket, and the other could be touched (although such inclusion is possible in some adapters and tees made without taking into account safety standards).
Europlugs are designed for low-power class II devices operating in the home and do not require protective earthing.
From theory to practice
In simple terms, what a plug is, is a device designed to provide the ability to make a secure detachable connection to a specially designed socket.
Old-timers remember that previously this type of connection was used even in places where it is now impossible to even imagine such a thing. Thus, during the Soviet five-year plans, special lamp designs were used everywhere in lighting networks, which made it possible, through simple manipulation without tools, to disconnect the block with the socket and lamp, leaving on the line... a plug socket. True, its design was somewhat different from the solutions familiar to the modern eye. Now, of course, they try to separate cable routes as much as possible, so lighting circuits, as a rule, do not allow the transmission of significant powers.
Incompatible with UK sockets
Europlug with BS 1363 adapter, protected by fuse
From left to right: adapter for Euro plug, BS 1363 plug and adapter for Schuko plug in BS 1363 sockets
The Europlug is not compatible with UK BS 1363 13A sockets for at least three reasons:
- BS 1363 sockets have a childproof shutter. The shutter opens only when the grounding pin is inserted.
- In the UK, the fuses for electrical appliances are located in the plug, and the electrical wiring is ring-shaped, protected by high-current fuses (most often 32 A). The Europlug is designed for radial electrical wiring, when small groups of consumers are protected by high-speed circuit breakers of 10-16 A. Therefore, a Europlug connected to a British socket can cause a fire if the cord is damaged.
- The distance between the pins of the Euro plug (13.5 ± 0.5 mm) is approximately 2 mm less than the corresponding distance of the BS 1363 socket (15.8 mm). To insert a Euro plug into a UK socket, you need to bend each pin approximately 1mm. Because the insulated section of the Europlug pin is smaller in diameter, the Europlug will be more difficult to pull out. Although the pin diameter of the Euro plug corresponds to the thickness of the contacts of the BS 1363 plug, the latter are 6.35 mm wider and spaced much further apart, so the reliability of the contact will depend on the design of the socket.
Despite this, in many countries where both BS 1363 and Euro plugs are available on the market (for example Malaysia), Euro plugs are still fitted into BS 1363 sockets.
Equipment fitted with Euro plugs must carry a warning that it is not suitable for use with UK sockets. To connect to a UK socket, an appliance with a Euro plug must be equipped with an adapter containing a fuse. This adapter is easy to manufacture and is almost indistinguishable in size from a conventional BS 1363 plug.
BS 546
While modern BS 546 sockets contain safety shutters similar to those of BS 1363 sockets, the Europlug must fit into a 5 A BS 546 type socket.
Plug device
There are several options for the design of this detachable connection element. Thus, there are special solutions designed for connecting fairly powerful electrical equipment to a three-phase network - they use four contacts (three for phases and a grounding one). However, in mass production, a simpler design is used - exactly the same as, for example, a table lamp plug.
Externally, these are two metal (copper or chrome-plated) rods, placed parallel at a certain distance from each other and located in a housing made of dielectric material. Inside each of them there is a bolt or other clamp designed for connecting current-carrying conductors and grounding. Through such a system, electricity is supplied to the device via a cord (cable). The housing can be dismountable, in which case its parts are assembled together using a screw. There are also monolithic modifications. The thickness of the rods and the method of making the grounding contact are determined by standards. So, speaking about what a plug is, one cannot help but point out a common misconception in the countries of the former USSR, according to which there are two types of power plugs (and sockets) - regular and euro.
Repair of dismountable plugs
Dismountable plugs
have a disassembled body. This fork can be disassembled and repaired yourself.
For collapsible forks
and portable sockets it should be clear how to release the tension and avoid twisting the wire:
- the device for clamping the wire insulation or part of it must be permanently fixed or must be permanently fixed to one of the parts of the plug or portable socket;
- It is unacceptable, for example, to tie a cable or cord into a knot or tie the ends;
- Screws, if present, are used to crimp the flexible cable and not for any other purpose.
NOTE This does not exclude a cover serving to secure the flexible cable in the cord securing device, provided that the cable remains in place in that device when the cover is removed;
- the insulation clamping device must be made of insulating material or equipped with an insulating gasket attached to metal parts;
- The metal parts of the insulation clamping device, including the clamping screws, must be insulated from the grounding circuit
.
Insulating parts
, on which live parts are fixed, must be securely connected to each other. It must be impossible to disassemble the connector without the aid of a tool.
The principle of repairing plugs
with a collapsible housing is to ensure that the design of the plugs ensures
correct and reliable connection of the wires and
that the following rules are observed:
- of wire strands
with each other must be prevented ; - It must be prevented from touching the conductors of wires connected to the contact terminals of accessible metal parts
; - It must be prevented from touching the core of the wire connected to the grounding terminal of live parts
.
Dismountable connectors
must be designed so that the screws or nuts of the terminals do not become loose or fall out of their recesses.
Plugs with split housings
Most have continuous pins. If such a plug breaks at the beginning, you should check the conformity of the plug and the socket.
The principle of design and repair of plugs
with a collapsible body is shown in Fig. 5
1- plug body; 2- working contact pins; 2a - threaded hole of the pin; 3- flexible plug cord; 4- screw securing the housing assembly; 5- core of multi-wire cord; 6- cord retainer with a metal bracket; 7- insulating gasket; 8- bracket fastening screws; 9- nut for screw; 10- contact loop for screw fastening; 11- washer; 12- screw for clamping the contact wire loop; 13-wire contact loop assembled with the fork pin; 14- grooves for working contacts; 15- groove for wire or cable; 16- groove for fixing working contacts; 17- through hole for assembly screw; 18-flex sealing and insulating tube.
Most often, damage to older removable plug configurations occurs due to loose or disconnected wires attached with screws.
(Fig.5 pos.13)
to the fork
pins.
At the same time, the plug with split body halves
(Fig. 5 pos. 1) is often equipped with a metal
bracket
(Fig. 5 pos. 6),
a gasket
(Fig. 5 pos. 7) made of insulating material and
two screws
(Fig. 5 pos. 8).
These fastening parts the flexible cord
(Fig. 5, item 3) on the base of the plug body.
To check the connection points of the pins and cores of the cords (Fig. 5, item 13), you must first unscrew the central assembly screw
(Fig. 5 pos. 4), tightening the halves of the body through
the hole
(Fig. 5 pos. 17).
Pin parts hidden in the body
(Fig.5 pos.2) come in different shapes.
But they have one thing in common - this is a threaded hole
(Fig. 5, item 2a) and
a screw
(Fig. 5, item 12)
with a washer
(Fig. 5, item 11).
If the puck
(Fig. 5, item 11) was a spring, then self-loosening of the screw due to mechanical loads would occur less frequently.
Often, simply turning the screw
(Fig.5 pos.4) or (Fig.5 pos.8)
the serviceability of the plug can be restored
.
Each pin
(Fig.5 pos.2) with a threaded hole (Fig.5 pos.2a) has a protrusion or groove for
screws
(Fig.5 pos.12).
Pin
the cord core loops
to it (Fig. 5, pos. 10), they are fixed in the corresponding
groove
(Fig. 5, pos. 16) of the housing.
This fixation ensures a constant distance between the pins, commensurate with the distance between the sockets of the plug
(Fig. 5, item 14) and the socket.
ATTENTION! You need to know that the conductor loop (Fig. 5, pos. 10) dangling on the pin (Fig. 5, pos. 2) and screw
(Fig. 5, pos. 12) is, as a rule, the main reason for the heating of the plug.
The hot fork pin (Fig. 5, item 2) begins to melt the plastic of the body. As a result, the fork becomes unusable. In this case, you will have to change the plug body, because half measures, such as winding electrical tape, will not work here.
Stranded wire core (Fig. 5, item 5) connected to the clamp
(Fig. 5, item 12), should not touch other live parts after installation.
Plugs must have cable entry
(Fig.5 pos.3) with elastic
seal
(Fig.5 pos.18) or a similar device.
It should be remembered that disassembling the plug
it is necessary above the table or over a cloth (rag) so that when unscrewing
the screw
(Fig. 5, pos. 4) on one side, you do not lose
the nut
(Fig. 5, pos. 9), which is located on the opposite side
of the body
(Fig. 5, pos. 1).
After removing the screw and disassembling the fork body, remove the strips
(Fig. 5 pos. 7 and pos. 8).
Disassemble the assembly (Fig. 5, item 13) on the pins
(Fig. 5, item 2) of the plug.
Cut off the burnt or broken part of the wire
(Fig. 5, pos. 5) and expose part of the wire for new contacts (Fig. 5, pos. 10).
Wire insulation
a length equivalent to the maximum length for making a contact loop and an additional length of
+2 mm is removed
from the end of a flexible wire of the appropriate cross-section.
Before you expose the wire
(Fig. 5, item 5), you need to use a sharp knife to make a small circular cut on the wire insulation. Then pull the wire lightly with your fingers or pliers.
After the insulation has been removed, the strands of the copper wire should be twisted into a flagellum, otherwise it will “fluff” again. You can also solder the rolled wire.
Cord cores
, protruding from the body, at a length of
10-15 mm
are cleared of insulation and
bent into loops
(Fig. 5, item 10), placed in the cavity (Fig. 5, item 2a) on the pin and secured
with a nut and screw
(Fig. 5, item .13).
The place where the end of the strand is twisted to form a loop
(Fig.5 pos.10), wrapped with electrical tape and secured with a metal
bracket
(Fig.5 pos.6) on the body.
Plank
(Fig.5 pos.7) made of insulating material
covers the hinges
(Fig.5 pos.10) in the cavity of the housing.
Then the pins
(Fig. 5, item 2) are screwed
into the special nuts
(Fig. 5, item 8) of the housing so that
the nuts
(Fig. 5, item 13) on the pins press the bar (Fig. 5, item 6).
Contact of veins
Without insulation at the through
hole
(Fig. 5, item 17), the housing does not appear.
End of cord
(Fig.5 pos.3) are placed in the groove of the through
hole
(Fig.5 pos.15) of the plug body and connecting
the two halves of the body
(Fig.5 pos.1) of the plug.
They are secured with an assembly screw
(Fig. 5, item 4) on one side of the body and a nut on the other side of the fork body. And secure the screw with the nut.
However, it happens that the current
still does not enter the electrical appliance.
This occurs because the inner diameter of the loop
(Fig. 5 pos. 10) was not chosen so that
nut could be screwed into it with some tension
(Fig. 5 pos. 13).
Larger loop diameter
(Fig.5 pos.10) than the outer diameter
of the screw thread
(Fig.5 pos.12) of the pin does not always guarantee
contact between these parts
.
If the contact wire
(Fig. 5, item 5)
is burnt
or very
loose
, then it should be cut to the length of the cut section of the wire - expose the wire and connect again, as indicated above.
ATTENTION! When the plug heats up
, it sometimes happens that a faulty plug socket is also to blame.
In this case, overheating is most dangerous for a fork with split pins
.
Special nut
(Fig. 5, item 13), embedded in the body of the plug,
will heat up and melt
the plastic around it.
At the same time, the hole in the gasket increases. As a result, you will still have to replace the plug
.
If the porcelain, bakelite or plastic parts of the plugs are cracked
, they should not be glued together with insulating tape or tied with wire.
Such disconnectors must be replaced
with new ones.
Fasten the lid
(Fig. 5, item 1) with insulating tape is only permissible for a short period, before purchasing a new one - because
such fastening can be a fire hazard
.
3.1. The procedure for disassembling and assembling plugs - briefly
To disassemble the plug, follow these steps:
- Remove it from the socket and unscrew the central screw
(Fig. 5, item 4), which tightens the halves of the plug body.
The screw is screwed into the nut
(Fig. 5, item 9), which is located in the hexagonal recess on the second half of the housing. When disassembling the case, you must carefully monitor the nuts and bolts so that they do not get lost. - Select a stranded wire (Fig. 5, item 3) for connection. The more powerful the core and its insulation, the more difficult it is to bend the wire.
- Expose the wire
(Fig. 5, item 5) to a length of
15-30 mm
; to do this, use a sharp knife to make a small circular cut on the wire insulation. - Then pull the wire lightly with pliers. After removing the insulation, twist the wire into a bundle.
- Make loops (Fig. 5, pos. 10) from the flagellum along the diameter of
the wine fastening (Fig. 5, pos. 12), clamp it between
the washer
(Fig. 5, pos. 11) and
the pin
(Fig. 5, pos. 2). And secure with a screw (Fig. 5, item 12). - Insert the pins (Fig. 5, item 2) into the corresponding grooves
(Fig. 5, item 14) in the fork. - Tighten the bracket (Fig. 5, item 6), which presses the input wire to the half of the plug body with screws
(Fig. 5, item 8). - Close the fork body with the second half of the fork body (Fig. 5, item 1) and screw in the outer central screw (Fig. 5, item 4) so that there is no gap between the body halves.
ATTENTION! It is necessary to take into account that overheating
or some other reasons lead to the fact that
the plug body
may
fall apart
into two halves.
Variety of modifications
The term “euro” is used in relation to the CEE 7/4 standard (Type F, or Shuko) - these are fairly large products that necessarily contain a grounding contact or rod in the design. The socket holes are deepened in such a way that when the plug is turned on, it is impossible to accidentally touch the half-extracted rods of the plug. The plug-in connection using CEE 7/4 is designed for 16 A and 230 V. The name “euro” was given due to the fact that in Soviet times, devices from the GDR and Czechoslovakia were supplied with exactly such plugs.
In fact, the Euro fork does exist. This is a solution based on the CEE 7/16 standard. Those who have ever wondered what the structure of a table lamp plug is, knows all the features of this type of design. For others, let us explain: a Europlug consists of two rods with a thickness similar to Soviet (ordinary) plugs, located in a thin monolithic body made of dense rubber. There is no grounding contact. The shape is such that such a plug can be easily inserted into a socket of almost any design. Safety from accidental contact is achieved by insulating most of the rods, leaving only the outer parts, about 5 mm long, exposed. These Euro plugs are designed for connecting low-power equipment, such as table lamps. The permissible current is 2.5A, although there are modifications for 5A.
Plug types EU Plug US Plug and UK Plug - what does this mean?!
I very often order household appliances and electronics from foreign trading platforms like EBay. Sometimes I shop on Aliexpress and Alibaba. So, quite often, when ordering something that can be connected to an electrical network, the types of power plugs that can be ordered are presented - EU plug, US plug, UK plug, AU plug. What does it mean?! For the average Russian, these designations are akin to Chinese literacy, that is, they are completely incomprehensible. Ok, I'll explain now! Go!
Historically, there are as many as 12 types of electrical outlets and their corresponding connectors in the world. There are Swiss, Italian, Thai, Israeli and even African outlets! For some species I couldn’t even find a photo. They are used much less frequently, but nevertheless they also have a place.
The whole point is that the types of plugs are quite numerous and are designated by the name of the country in which they are used. Electronics manufacturers have to somehow get out of this situation. Therefore, 4 main types were identified, which are used on 90% of equipment - these are US plug, UK plug, EU plug and AU plug. Accordingly, American, English, European and Australian. Here they are:
Let's look at each type of socket and the corresponding voltage of the electrical network.
EU Plug is a regular European socket familiar to all of us since childhood, which is called “Euro”. According to the international standard - type C, with or without grounding. The most common type of plug in the world! Used in Russia, CIS countries and the European Union, as well as in many other countries of the world - Turkey, Egypt, Algeria, Tunisia, etc. It may have an additional 2 more grounding contacts. In Soviet electrical engineering, a similar connector was used, but it differed in the diameter of the contacts. The voltage used in the network is 220-240 Volts, frequency 50 Hz.
US Plug is an American outlet. According to the international standard - type A without grounding and type B with grounding. Used in the USA, South America and Japan. Just like the European one, it has two types of design - with and without grounding. Without grounding - these are just two vertical flat contact pins. For grounding, a third contact is added, which is already made round. The voltage used is 100-127 Volts, frequency 60 Hz.
UK Plug - English socket (some call it British). In the international classification - type G. As you understand, it is mainly used in the United Kingdom of Great Britain and Ireland, as well as in countries that were former British colonies - Singapore, Malta and Cyprus. Has 3 flat contacts in the form of rectangular pins. Operating voltage 220-240 Volts. Frequency 60 Hz.
AU Plug - Australian socket. In the international classification - type I. Used in Australia, China, New Zealand and many other small countries in this Pacific region: New Guinea, Fiji, Samoa, etc. It has three narrow knife contacts, where the third contact is grounding. What is interesting is that in Australia the sockets are made with the grounding contact up, and in China - down. Operating voltage 220-250 Volts. Frequency 50 Hz.
PS: As I said above, there are 8 more types of sockets. Among them there are those that are more or less compatible - for example, French, German and Israeli. Here there are differences in grounding and somehow the issue can be resolved. And there are those that are gradually disappearing, since it was decided to stop using them and switch to an international standard.
What are the differences between EU Plug and AU Plug?
Currently, there are 4 main types of plugs that are widespread in the USA, European and Asian countries:
- AU Plug - has 2 flat pins located horizontally at an angle to each other. Devices with such a plug are designed for a network voltage of 220-240 Volts, that is, in fact, they can be used in Russia and Ukraine, but for this you will need to buy a special adapter. This type of device is used in China, Australia and some other countries.
- US Plug - has 2 flat, parallel, vertical pins. This option is typical for outlets in the USA, and is also used in Korea and Japan. Devices of this type operate from a network with a voltage of 100-127 Volts.
- UK Plug or type (G) - a British socket with three flat pins, 2 of which are located horizontally and 1 vertically. The operating state for equipment with such a plug is 220-240 Volts, that is, suitable for Europeans when using an adapter.
- EU Plug or Euro socket. It is distinguished by the presence of 2 round pins located vertically and parallel to each other. Operates from a network with a voltage of 220-240 Volts. Does not require the use of an adapter, suitable for all countries of the former CIS.
When purchasing electronics with a connector type EU Plug (what this means on Jum does not require additional explanation), you need to take into account that the plug has additional grounding, that is, the device will be more reliable in operation. By the way, no matter what connector you ordered, all of them will definitely go through the Joom external exchange office like any parcel.
Maintainability
The design of the table lamp plug used in mass production does not allow for acceptable repairs in the event of damage. Although such monolithic plugs can be cut and the internal contacts restored by soldering, after such an operation it is impossible to ensure electrical safety while maintaining normal appearance. This applies to all monolithic solutions. If they are damaged, the power cable is cut as close to the plug as possible, stripped, the grounding conductor is identified and connected to a new collapsible plug.