An electrical panel in a private house, country house, or apartment performs a dual function: it provides input and distribution of electricity and creates safe operating conditions. If you want to understand a difficult issue, you can assemble the electrical panel yourself. The input machine and the meter must be installed by representatives of the electricity supply organization, but then, after the meter, you can assemble the circuit yourself (although they do not like to lose money). True, before putting the house into operation, you will need to invite them so that they are present during the start-up, check everything and measure the ground loop. All of these are paid services, but they cost much less than a complete panel assembly. If you do everything correctly and according to the standards, it will turn out even better on your own: after all, you are doing it for yourself.
What should be in the shield
Both in an apartment and in a private house there are several options for the layout of the shield. This mainly concerns the installation location of the input machine and the counter. In a private house, the meter can be placed on a pole, and the machine can be placed on the wall of the house, almost under the roof. Sometimes a meter is installed in a house, but this is if it was built a couple of decades ago. Recently, metering devices are installed in the house extremely rarely, although there are no regulations or instructions on this matter. If the meter is located indoors, it can be placed in a panel; then when choosing a panel model, it is necessary to take into account the dimensions of the meter.
Read about how to connect electricity from a pole to a house here.
In some apartment buildings, meters are located in boxes on the staircases. In this case, the cabinet is needed only for RCDs and automatic machines. In other houses it is located in the apartment. When upgrading the electrical network, you will have to buy a cabinet so that the meter can fit in there, too, or buy a separate box for the meter with an input machine.
A simple electrical circuit diagram for a small house or apartment
Safety is very important when designing a power supply. First of all, it is provided for people: with the help of an RCD - a residual current device (number 3 in the photo), which is installed immediately after the meter. This device is triggered if the leakage current exceeds a threshold value (there is a short circuit to ground or someone sticks their fingers into the socket). This device breaks the circuit, minimizing the possibility of electric shock. From the RCD, the phase is supplied to the inputs of the machines, which are also triggered when the load is exceeded or when there is a short circuit in the circuit, but each in its own section.
Secondly, it is necessary to ensure the normal operation of household appliances and electrical appliances. Modern complex technology is controlled by microprocessors. They require stable power to function properly. Having observed the voltage in our network for some time, it cannot be called stable: it varies from 150-160 V to 280 V. Imported equipment cannot withstand such a variation. Therefore, it is better to turn on at least some groups of automatic machines that supply power to complex equipment through a stabilizer. Yes, it costs a lot. But during voltage surges, the control boards are the first to “fly”. They are not repaired here, but simply replaced. The cost of such a replacement is about half the cost of the device (more or less depends on the type of device). It's hardly cheaper. When assembling the electrical panel with your own hands, or just planning it for now, remember this.
One example of a panel layout for a small circuit - for 6 machines
The stabilizer is installed on one or several groups and is turned on after the RCD and before the group circuit breakers. Since this is a rather large device, it won’t be possible to install it in a panel, but you can install it next to it.
Also, two buses are installed in the panel: grounding and grounding. All grounding wires from instruments and devices are connected to the grounding bus. The wire comes to the “zero” bus from the RCD and is fed to the corresponding inputs of the machines. Zero is usually designated by the letter N; when wiring, it is customary to use a blue wire. For grounding - white or yellow-green, the phase is carried out with a red or brown wire.
One of the options for an assembled small shield
When assembling an electrical panel yourself, you will need to purchase the cabinet itself, as well as rails (called DIN rails or DIN rails) on which circuit breakers, RCDs and switches are attached. When installing the slats, check with a level that they are horizontal: there will be no problems with fastening the machines.
One of the options for DIN rails in the panel housing
All machines must be connected to each other. This can be done using conductors - connecting their inputs in series, or using a ready-made connecting comb. A comb is more reliable, although it costs more, but if you take into account the time that you will spend connecting all the machines, it is unlikely that a few tens of rubles are of such fundamental importance.
Connecting comb for circuit breakers in an electrical panel: will speed up the self-assembly process
Scheme for several groups
Power supply schemes are not always simple: groups of consumers are divided into floors, outbuildings, lighting for the garage, basement, yard and local area are installed separately. If there are a large number of consumers, in addition to the general RCD after the meter, they install the same devices, only of lower power, for each group. Separately, with the obligatory installation of a personal protective device, the power supply to the bathroom is removed: this is one of the most dangerous rooms in a house or apartment.
It is very advisable to install protective devices on each of the inputs that go to powerful household appliances (more than 2.5 kW, and even a hair dryer can have such power). Together with a stabilizer, they will create normal conditions for the operation of electronics.
Also not the most complex circuit, but with a higher degree of protection - more RCDs
In general, when designing the exact design, you will have to find a compromise: make the system safe without spending too much money. It is better to buy equipment from trusted companies, but it costs a lot. But power grids are not an area where you can save money.
Read how to connect an electric hob here, and about connecting an electric water heater (storage or instantaneous) read this article.
Distribution board complete set
There are several types of shield configurations. In private homes, the electricity meter is often placed separately from the machine, so that an employee of the electricity supply company can take readings without entering the house if the owners are not there. If the meter is located in the house, it is advisable to place it in the panel along with the machine.
In the entrances of modern buildings, meters are often moved outside the apartment for ease of monitoring readings. In the apartment, an RCD and a machine gun are placed in the panel. An RCD is necessary to ensure safety in the same way as a machine gun.
An RCD is installed at the output of the meter and is triggered if the leakage current exceeds the maximum permissible value; it is triggered when there is a short circuit to ground. The phase from the RCD goes to the machines, which also trigger a short circuit in their section of the circuit.
In addition to the RCD, the installation of a power stabilizer is highly recommended. Domestic power grids often experience power outages, which delicate imported equipment with a bunch of microcircuits may not survive. A power stabilizer is not a cheap thing, but it can save you much more than it costs.
When voltage surges occur, control boards of devices fail, often beyond repair and requiring complete replacement. The price of the control board is approximately half the cost of the electrical appliance. Therefore, you should not skimp on the stabilizer.
They install a power stabilizer immediately after the RCD, in one or several groups, before supplying power to the machines. It will not be possible to mount it into the shield due to its size, but it can be placed nearby.
Two buses are connected to the panel - zero and ground. The ground from all electrical appliances is supplied to the grounding bus, and the wire from the RCD is fed to the “zero” to the machines. The “ground” is most often marked with a white or yellow-green wire, the “zero” with blue, and the phase with red or brown.
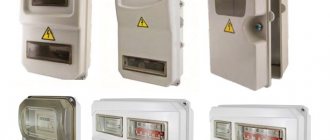
Types and sizes of electrical panels
We will talk about cabinets/drawers for installing automatic machines and other electrical equipment, and their varieties. Depending on the type of installation, electrical panels are available for outdoor and indoor installations. The box for outdoor installation is attached to the wall with dowels. If the walls are flammable, an insulating material that does not conduct current is placed underneath. When mounted, the external electrical panel protrudes above the wall surface by about 12-18 cm. This must be taken into account when choosing its installation location: for ease of maintenance, the panel is mounted so that all its parts are approximately at eye level. This is convenient when working, but can pose a risk of injury (sharp corners) if the location for the cabinet is poorly chosen. The best option is behind the door or closer to the corner: so that there is no possibility of hitting your head.
Electrical panel housing for outdoor installation
A panel for hidden installation requires the presence of a niche: it is installed and walled up. The door is flush with the wall surface; it may protrude a few millimeters, depending on the installation and design of the particular cabinet.
The cases are metal, powder-coated, and plastic. Doors are solid or with transparent plastic inserts. Various sizes - elongated, wide, square. In principle, you can find a suitable option for any niche or conditions. One piece of advice: if possible, choose a larger cabinet: it is easier to work in it, this is especially important if you are assembling an electrical panel with your own hands for the first time.
Complete set and installation of a mounted distribution panel
When choosing a building, they often operate on such a concept as the number of seats. This refers to how many single-pole circuit breakers (12 mm thick) can be installed in a given housing. You have a diagram with all the devices listed on it. You count them taking into account the fact that bipolar ones have double width, add about 20% for the development of the network (suddenly you buy another device and there is nowhere to connect, or during installation you decide to make two from one group, etc.). And for such a number of “seating” places, look for a shield with a suitable geometry.
Types and sizes of distribution boards
According to the type of installation, the classification is as follows:
Wall-mounted distribution boards require mounting on the wall surface using dowels and self-tapping screws. As a rule, their dimensions from the wall surface are 12-20 cm.
If the wall consists of flammable material, a layer of insulator is placed between the panel and the wall. When installing, it is better to place it approximately at eye level and in such a way as to exclude the possibility of accidentally hitting your head on the shield.
Built-in distribution boards - the design implies the presence of a niche prepared for them in the wall. The shield inserted inside is placed on the mortar; as a rule, it is mounted flush with the wall.
Installing a built-in distribution board is preferable to a wall-mounted one in terms of space saving.
- How to install electrical wiring in a wooden house
Urgent entry into a construction SRO
Gasoline power plants
Depending on the material used, there are metal and plastic shield housings. Based on their shape, the cases are divided into square and rectangular, elongated both vertically and horizontally.
In terms of size, if space allows, it is better to take the case with a reserve, so that if you need to add any element, the question of replacing the case with a more voluminous one does not arise.
Installation and connection of elements
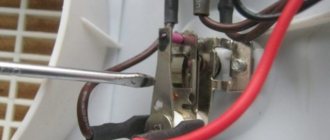
All modern automatic devices and RCDs have a unified mounting for a standard mounting rail (DIN rail). On the back they have a plastic stop that snaps onto the bar. Place the device on the rail, hooking it with the recess on the back wall, and press the lower part with your finger. Once clicked, the item is installed. All that remains is to connect it. They do it according to the scheme. The corresponding wires are inserted into the terminals and the contact is pressed with a screwdriver, tightening the screw. There is no need to tighten it too much - you can squeeze the wire.
They operate with the power off, all switches are turned to the “off” position. Try not to grasp the wires with both hands . Having connected several elements, turn on the power (input switch), then turn on the installed elements one by one, checking them for the absence of a short circuit (short circuit).
Connecting the input machine and RCD
The phase from the input is supplied to the input circuit breaker, from its output it goes to the corresponding input of the RCD (place a jumper with a copper wire of the selected cross-section). In some circuits, the neutral wire from the water is supplied directly to the corresponding input of the RCD, and from its output it goes to the bus. The phase wire from the output of the protective device is connected to the connecting comb of the machines.
In modern circuits, the input circuit breaker is installed two-pole : it must simultaneously disconnect both wires (phase and zero) in order to completely de-energize the network in the event of a malfunction: this is safer and these are the latest electrical safety requirements. Then the circuit diagram for switching on the RCD looks like in the photo below.
When using a two-pole input circuit breaker
To learn how to install an RCD on a DIN rail, watch the video.
In any circuit, the protective grounding wire is connected to its own bus, where similar conductors from electrical appliances are connected. Grounding is a sign of a secure network and doing so is vital. Literally.
To learn how to properly connect an RCD, watch the video tutorial.
When assembling the panel yourself, please note that the input machine and the meter will be sealed by the energy supply organization. If the meter has a special screw onto which a seal is attached, then the input machine does not have such devices. If it is not possible to seal it, you will either be denied entry or the entire panel will be sealed. Therefore, inside the common panel, a box is placed in one or two places (depending on the size and type of machine), and the input machine is mounted in it. This box is sealed upon acceptance.
Individual automatic machines are installed on the rails exactly like an RCD: they are pressed against the rail until it clicks. Depending on the type of machine (one or two poles - wires), the corresponding wires are connected to them. What types of circuit breakers are there, and how devices differ for single- and three-phase networks, see the video; the choice of circuit breaker rating is described here.
After the required number of devices are installed on the mounting rail, their inputs are connected. As they said earlier, this can be done with wire jumpers or a special connecting comb. See the photo for what the wire connections look like.
The machines in one group are connected by jumpers: the common phase arrives
There are two ways to make jumpers:
- Cut the conductors into the required sections, expose their edges and bend them in an arc. Insert two conductors into one terminal, then tighten.
- Take a long enough conductor and strip off 1-1.5 cm of insulation every 4-5 cm. Take pliers and bend the exposed conductors so that you get interconnected arcs. Insert these exposed areas into the appropriate sockets and tighten.
They do this, but electricians say the quality of the connection is poor. It is safer to use special tires. Under them on the case there are special connectors (narrow slots, closer to the front edge), into which bus contacts are inserted. These tires are sold by the meter and cut into pieces of the required length using ordinary wire cutters. Having inserted it and installed the supply conductor in the first of the machines, tighten the contacts on all connected devices. Watch the video on how to connect machines in a panel using a bus.
A phase wire is connected to the output of the machines, which goes to the load: to household appliances, to sockets, switches, etc. Actually, the assembly of the shield is completed.
Selection of machines for a house or apartment panel
There are three types of devices used in an electrical panel:
- Machine. Turns the power off and on manually, and also triggers (breaks the circuit) in the event of a short circuit in the circuit.
- RCD (residual current device). It controls the leakage current that occurs when the insulation breaks down or if someone touches the wires. If one of these situations occurs, the circuit is broken.
- Diff. automatic (differential automatic). This is a device that combines two in one housing: it monitors both the presence of short circuit and leakage current.
Differential automatic devices are usually installed instead of a combination - RCD + automatic. This saves space in the panel - it requires one less module. Sometimes this is important: for example, you need to turn on another power line, but there is no space for installation, just like there is no free machine.
A differential automatic machine is installed instead of a combination of an automatic machine and an RCD
In general, two devices are often installed. Firstly, it is cheaper (differential circuit breakers are more expensive), secondly, when one of the protective devices trips, you know exactly what happened and what to look for: a short circuit (if the circuit breaker was turned off) or a leak and possible overcurrent (triggered RCD). You will not find this out when the automatic machine is triggered. Unless you install a special model that has a flag indicating what malfunction the device was triggered by.
Automatic circuit breakers
Circuit breakers are selected according to the current required for consumers of this group. It is calculated simply. Add up the maximum power of all simultaneously connected devices in the group, divide by the network voltage - 220 V, and get the required current power. Take the device rating a little higher, otherwise when all loads are turned on, it will turn off due to overload.
For example, adding up the power of all devices in a group, we got a total value of 6.5 kW (6500 W). Divide by 220 V, we get 6500 W / 220 V = 29.54 A.
What numbers on the body mean what?
The current ratings of the circuit breakers can be as follows: (in A) 6, 10, 16, 20, 25, 32, 40, 50, 63. The closest larger one to the given value is 32 A. This is what we are looking for.
Types and types of RCD
There are two types of RCDs: electronic and electronic-mechanical . The difference in price for a device with the same parameters is large - electronic-mechanical ones are more expensive. But you need to purchase them for a shield in your house or apartment. There is only one reason: they are more reliable, since they operate regardless of the presence of power, while electronic ones require power to operate.
For example, the situation is this: you are repairing wiring, for example, a socket, and for this purpose you have de-energized the network - turned off the input circuit breaker. In the process, the insulation was damaged somewhere. If an electro-mechanical RCD is installed, it will operate even in the absence of power. You will realize that you did something wrong and will look for the reason. Electronic equipment is inoperative without power, and if you turn on a network with damaged insulation, you may have problems.
To understand which device is in front of you, it is enough to have a small battery and a couple of wires on hand. Battery power is supplied to any pair of RCD contacts. The electro-mechanical one will work, but the electronic one will not. More details about this in the video.
Next, RCDs are distinguished by the type of current to changes in which they respond:
- type AC - alternating sinusoidal current;
- type A - alternating current + pulsating direct current;
- type B - alternating + pulsating direct + rectified current.
It turns out that type B provides the most complete protection , but these devices are very expensive. For a house or apartment panel, type A is quite sufficient , but not AC, which are mostly sold because they are cheaper.
In addition to the type of RCD, it is selected by current. Moreover, according to two parameters: nominal and leakage . A nominal one is one that can pass through the contacts without destroying (melting) them. The rated current of the RCD is taken one step higher than the rated current of the machine installed in pair with it. If a machine is needed for 25 A, then take an RCD for 40 A.
In terms of leakage current, everything is even simpler: only two ratings are installed in electrical distribution boards for apartments and houses - 10 mA and 30 mA. 10 mA is placed on a line with one device, for example, a gas boiler, washing machine, etc. as well as in rooms where a high degree of protection is necessary: in a children's room or bathroom. Accordingly, a 30 milliamp RCD is installed in lines that include several consumers (devices) - on sockets in the kitchen and rooms. Such protection is rarely installed on lighting lines: there is no need, except for street lighting or in a garage.
What numbers on the body mean what?
RCDs also have different response delay times. They are of two types:
- S - selective - triggers after a certain time after the appearance of the leakage current (quite a long period of time). They are usually placed at the entrance. Then, if an emergency occurs, the device on the damaged line is first turned off. If the leakage current remains, then the “senior” selective RCD will operate - usually this is the one located at the input.
- J - also triggers with a delay (protection against random currents), but with a much shorter delay. This type of RCD is placed in groups.
Differential circuit breakers come in the same types as RCDs and are selected in the same way. Only when determining power by current do you immediately consider the load and determine the rating.
For a few explanations on installing a built-in cabinet for a panel and the connection procedure, see the video from a practitioner and generalist.
One important detail that is important for safety. There is a “test” button on the RCD or differential circuit breaker. When it is pressed, a leakage current is artificially created and the device must operate - the switch goes to the “off” position and the line is de-energized. This is how functionality is checked. This must be done at least once a month to be sure of the reliability of the protection. Check all the RCDs in the circuit one by one. It is important.
This is probably all the information you need to assemble an electrical panel with your own hands. You may also need to learn more about how to divide the workload into groups; read about that here.