Installation
How to install corrugation on a kitchen hood yourself and why? To ensure that the air is renewed regardless of whether the hood is on or not, it is worth attaching the corrugation through the grille to the ventilation hole. Because the hole has a compartment for the air duct and for air removal. When installing, it is also necessary to take into account the technical characteristics - the size and length of the pipe, otherwise all the work done will be impractical. Remember the quality and reliability of the material you choose. Besides, it’s better when everything is done in the same style, to match the interior. Please understand that cost does not guarantee a proper installation, so do your research on collation. It also says how to install an air duct for an exhaust hood in the kitchen.
How to choose the size
It is necessary to measure the entire length with a tape measure. And take into account the route along which the air duct will pass. For example, its possible path lies through a closet, along the walls or along the ceiling. After calculations, it is worth adding about another 10 to 15 percent to the total length. This is an important point before connecting the corrugation to the hood.
IMPORTANT! Check the stretched corrugation size. It is worth taking the length with a margin. Ideally, it is 3 meters, but even if there is a completely extra length, it will not hurt.
In the opposite situation, if there is a shortage of material, you can attach the missing piece using tape, but this option will reduce the permeability of the air duct. This should be resorted to only in extreme cases. With the fewest angles, but with a larger degree, the hood can work much more smoothly.
How to attach a corrugation to a hood
In order to somehow connect the corrugation to the hood, you will need:
- corrugated pipe
- self-tapping screws
- clamps for fixing the sleeve or soft wire
- ventilation grille or adapter
- silicone sealant
- adapters, there was no corrugation of a suitable size
How to attach the corrugation to the hood after all the tools are ready:
- Before work, you should clean the ventilation in the apartment
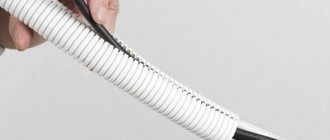
- To begin, stretch the corrugation along its length and check the component elements. Avoid kinks, then the air draft will remain good.
- Use sealant to lubricate the hood neck
- Put on the corrugation and secure it with a clamp; if there is none, then wrap it with wire.
- It is necessary to lay it this way until the end of the ventilation hole.
- Fix the ventilation grille with self-tapping screws
- Then put on the corrugation with sealant
- Secure the work with a clamp
- Check the exhaust system by connecting the hood to the mains. This is done as follows: turn on the hood at maximum power, now take a sheet of paper and bring it from below to the grille. A sign of correct mounting is that the leaf is held, which means that air is being sucked in. That's it, the problem of how to put the corrugation on the hood is solved.
REFERENCE! Do not wipe the outer surface, this will relieve you of unwanted odors.
You need to know that a ventilation hole is required. The shaft cannot be closed completely.
If you do not want the corrugation to be on public display, then there is an opportunity to hide it. How to insert the corrugation inside the hood so that it is not noticeable? This can be easily done using wall cabinet doors, decorative boxes or other elements. To disguise it, you need to choose a color to match the furniture. To add harmony, try to decorate everything based on the style of the kitchen. Another option is to install an overlay. It can be formed along the contour of the cabinet, thereby ensuring the secrecy of ventilation. It will not be difficult to install it inside kitchen units. However, this will waste a lot of necessary space, and will also add holes that will need to be cut.
If you don’t want to figure out how the corrugation is attached to the hood, then you can simply order professional installation. Especially if the kitchen was made together with a custom-made hood. Then, installation of the corrugation for the hood may not proceed according to the standard scheme.
Why do you need to install corrugated hoods?
The good thing about using corrugated pipes is that they have many advantages. For example, most can afford to install them, and installation, as it turns out, is quite simple. In addition, they have a wide range of types and sizes and low compressed weights. They are resistant to high temperatures and therefore do not burn. It is possible to install both indoors and outdoors, which indicates functionality. They are placed in different planes and used in different areas of systems. You just need to take care once and the freshness in the room is guaranteed for a long time.
Subscribe to our Social networks
Places where it is advantageous to lay wiring under the floor
This method of wiring electrical cables is relevant in “bare” residential or administrative buildings without ready-made repairs. We are talking about various new buildings that are handed over in draft form. This approach eliminates wall slitting; the wire can be placed freely on any area of the floor with convenient wiring to sockets and switches.
The floor layout fits perfectly into wooden structures. This option completely eliminates the disadvantage associated with difficult cable accessibility. The method is more relevant than ever, since when installing electrical wiring on the walls, you have to either attach cable ducts to them, which spoils the interior of the room, or decorate everything in a retro style, which leads to significant financial costs. By hiding the cable in a wooden floor, you can take it out from under the boards at any time and perform the necessary manipulations.
Varieties
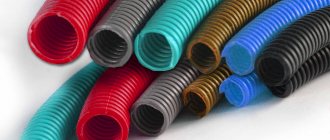
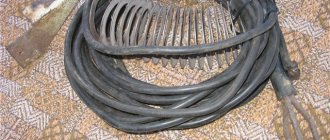
Corrugations have several varieties:
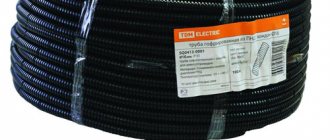
- Plastic. A budget option. There are many models of this type. But the general characteristic is the least air resistance that is created inside the pipe. It is easy to clean and works quite quietly. ATTENTION! It is worth remembering about the fragility and possible harm to human health, since a large amount of smoke is released during fire. In addition, the cheapest devices can emit an unpleasant odor. Installation is difficult. Afraid of high temperatures.
- Aluminum. Not particularly heavy, high chance of long-term performance, high temperature tolerance. However, during operation it can produce specific sounds and increased vibration. There are inconveniences during cleaning.
- Insulated. Its peculiarity is the presence of a layer of foil with mineral wool. This type can be installed on any hood.
- Other. All of the listed disadvantages of previous models are absent (smell, noise, flammability, service life) + is durable. But this type is not cheap. Not everyone can afford them.
What are the diameters of corrugations for hoods?
There are the most popular corrugations, the values are 100 mm, 125 mm and 150 mm (for a kitchen hood). In industrial applications it can reach 200 mm, 250 mm, 300 mm. The choice depends directly on the power of the device. The diameter of the hood itself should be taken into account accordingly; they must match. If you want a large diameter, then you should also find an adapter to connect it to the neck. The dimensions of the corrugation for the hood have several classic parameters. You can always find the minimum value in the kitchen hood instructions. The most commonly used are 100 mm and 120 mm. If you still cannot find the size, then use a larger one; this is especially good for the kitchen: the noise will decrease due to the low flow rate. With a reduced diameter, air will be pushed through, experiencing difficulties.
Need to know
Thanks to the corrugation, it is possible to compensate for a very significant displacement, up to 20 centimeters. The pipe can also be rotated to any angle. For this purpose, a series connection of two pipes is used. But you need to understand that with a large pinch, high-quality drainage will not be ensured. In addition, the pipe may crack at the point where it is pinched. It may not be noticeable right away, but the smell will not be pleasant. This must be taken into account when replacing the corrugation on the toilet. Also, before use, the toilet is always filled to the top with water to check for leaks.
Features of dismantling old corrugation
The dismantling process will be easier if the corrugated pipe (old) is stretched as much as possible. In this case, it is enough to pull the pipe from the toilet pipe, and then remove the other end from the sewer. Remaining water can be easily removed - it is easily drained into the sewer.
If the toilet is located in a corner, you need to apply the arc rule. In this case, the structure can be easily removed from the two pipes, but first the corrugation is removed from the toilet pipe.
Sometimes it happens that the corrugated pipe is not stretched at all. This happens if the toilet is located too close to the drain. To dismantle here you will have to remove the toilet itself. The corrugation is removed in the same sequence as described earlier: first, the end that is connected to the toilet, and then the one that goes to the sewer.
Location in screed
The electrical cable can be hidden in the floor screed. Immerse it to a depth of at least 30 mm. If it is necessary to intersect two routes, they should be placed one above the other, which will lead to an increase in the thickness of the concrete screed. Therefore, experts recommend avoiding such situations.
Before pouring the screed, check the integrity of the cable line and make sure there is no short circuit. If there are no breaks, proceed with the installation of the covering, and then proceed to installing electrical points: switches, lighting fixtures and sockets.
Laying cables in a corrugated floor screed
If you follow the rules and recommendations, you can easily create a safe electrical network, which will be equally easy to repair if necessary. The order in which the work is performed is not so important: you can place the corrugation, and then stretch the wire through it, or install everything at once.
Installation step by step
Let's look at the procedure for connecting a toilet using corrugation. This work is quite simple, but there is no need to disrupt the procedure. It is advisable to install the corrugation when the toilet is not yet connected in place. It is more comfortable. But if you install corrugation on an old toilet, you will have to prepare it:
- remove old cement;
- remove sealant (if present);
- clean the sewer pipe socket.
Otherwise, the tightness of the connection will be in question. Some people use sealant when installing corrugations. However, experts do not recommend using a cheap one, as it may break down over time.
So we bought a toilet. What's next? Further work is carried out step by step.
- The end of the pipe that will be connected to the sewer is treated with silicone. The end of the outlet is evenly blocked by a branch of 5-6 centimeters.
- The tension is carried out without distortions, as evenly as possible.
- To make tightening easier, lubricate the rubber seal on the socket with soap.
- The corrugated pipe is installed in the inlet with one end, and the other is mounted to the toilet.
- Pouring water into the toilet.
- Check joints for leaks.
- The toilet mounting points are marked on the floor. The corrugation is first disconnected.
- The holes are drilled and coated with sealant.
- The toilet is fixed to the floor. The fastening bolts are tightened until the structure stops wobbling and is perpendicular to the floor.
- Then the adapter is reconnected.
- The joints are treated with plumbing sealant.
- The screed is poured.
- The floor surface is being finished.
How to choose corrugation
Before you start buying a corrugated pipe for a toilet, you should clearly understand which product is best suited for our bathroom. It is imperative to check the diameters of the toilet outlet and sewer pipe. Most often these sizes are standard, but there are exceptions.
Another important point is the length of the corrugation. If the toilet is installed in close proximity to the sewer hole, the corrugation can be replaced with a special rubber cuff. And, on the contrary, for large combined bathrooms, you can consider the option of corrugation with an additional outlet, which will allow you to simultaneously connect not only the toilet, but also another element (bathtub, sink, etc.) to the drain.
It is not recommended to save on purchasing corrugated pipes. Even the most expensive products from leading imported manufacturers will not create a serious gap in the construction budget, but they can last much longer. In addition, the risk of receiving a low-quality fake in this case will be much lower.
How can I replace corrugation?
Despite the numerous advantages of corrugation, not all owners choose such an element. Some are confused by the fragility of the ribbed plastic, others are not satisfied with the appearance of the finished structure.
We recommend that you read: Purpose and use of plastic profile pipes
Fortunately, there are alternative options that will serve just as well. This could be a bright chrome pipe, which will definitely win in appearance.
A toilet with an oblique outlet type is conveniently connected to the sewer system using a piece of PVC or polyethylene pipe. To seal the joints, rubber cuffs of the appropriate diameter will be required. Also, the pipe can be preheated, which will make the material more pliable and facilitate the installation procedure.